DIY Felt Chicken Ornament Tutorial (Pattern + Video)
DIY Felt Chicken Ornament Tutorial with Pattern PDF + Step-by-Step Videos
I’ve added to my growing menagerie of DIY felt animal ornament patterns and am so excited to introduce you to my current favorite: this highly customizable DIY felt chicken ornament pattern so you can make three French hens for Christmas or some pastel felt hen Easter ornaments come spring.
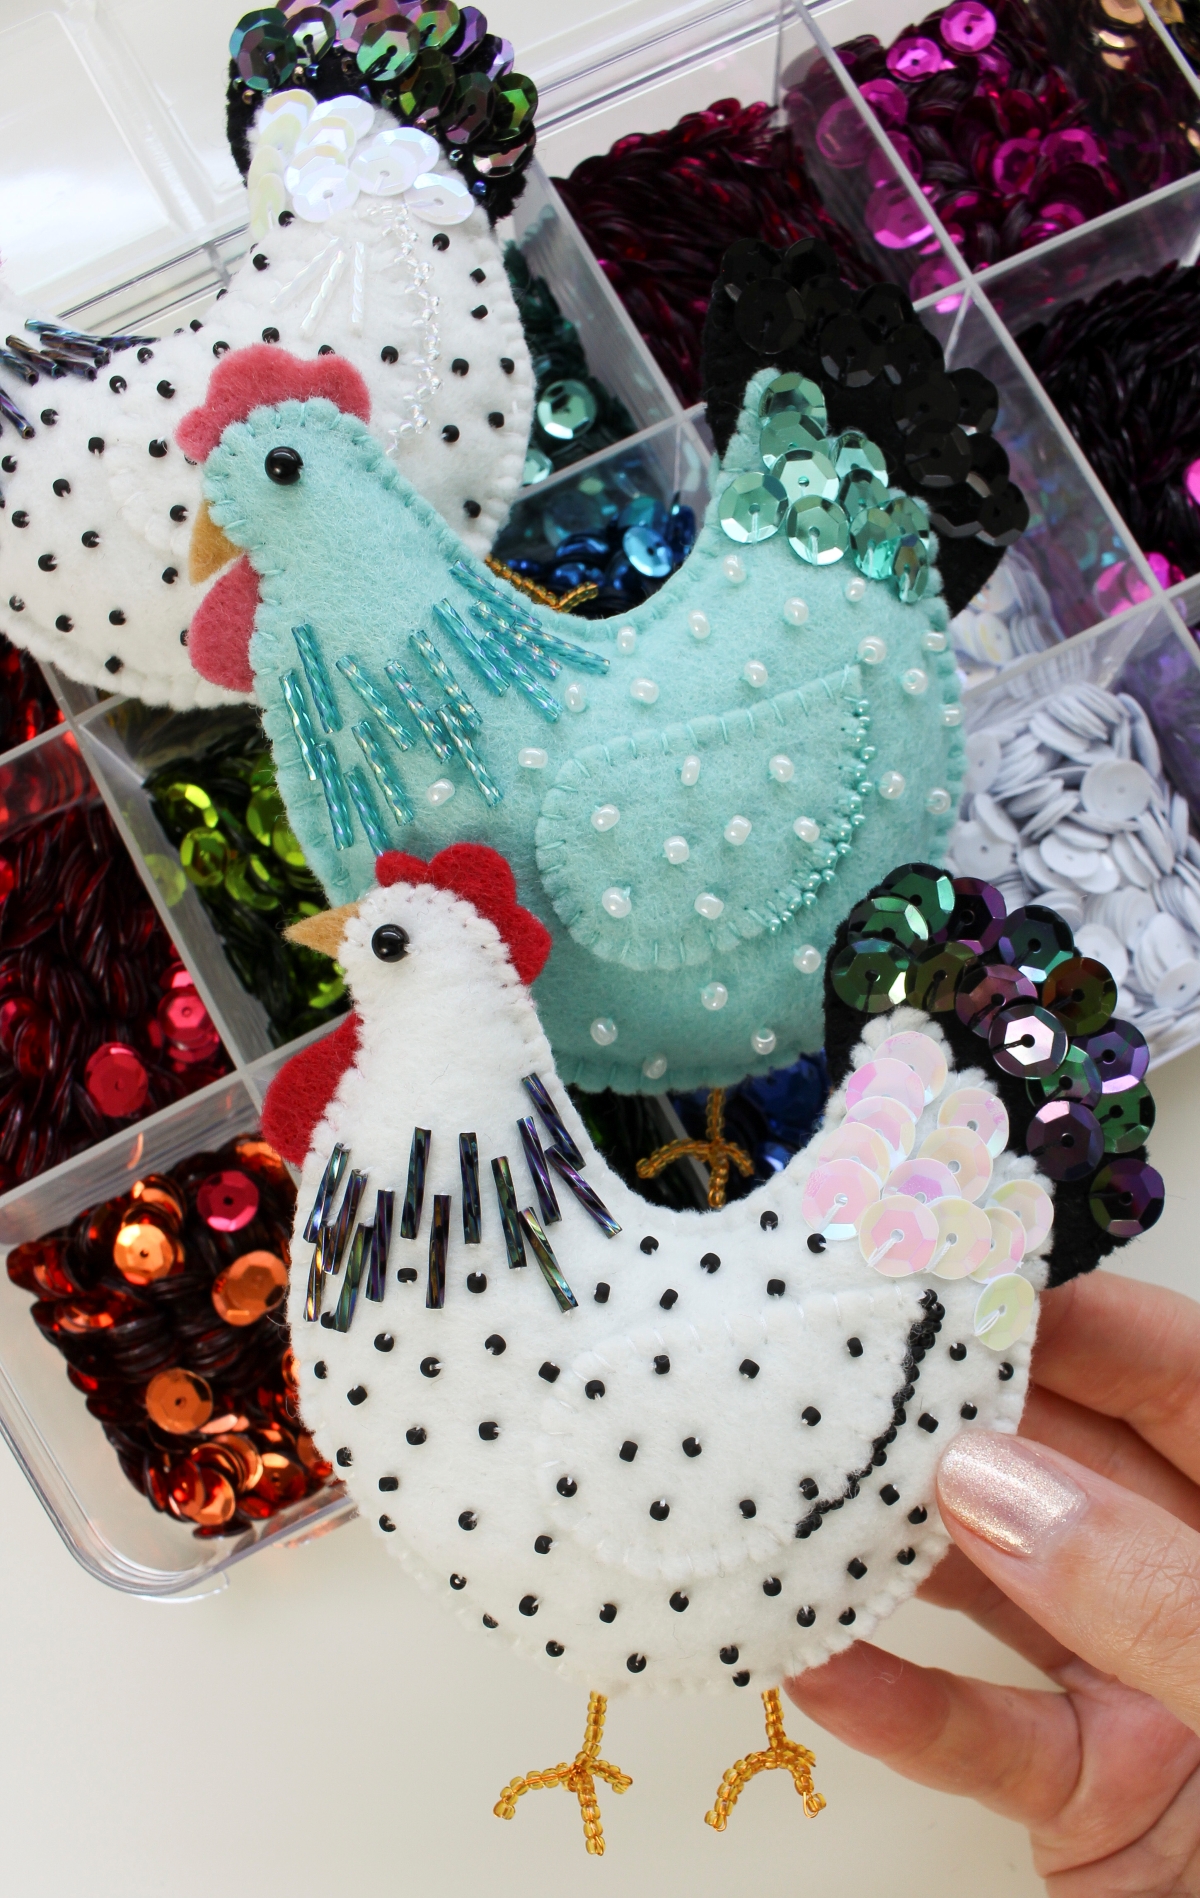
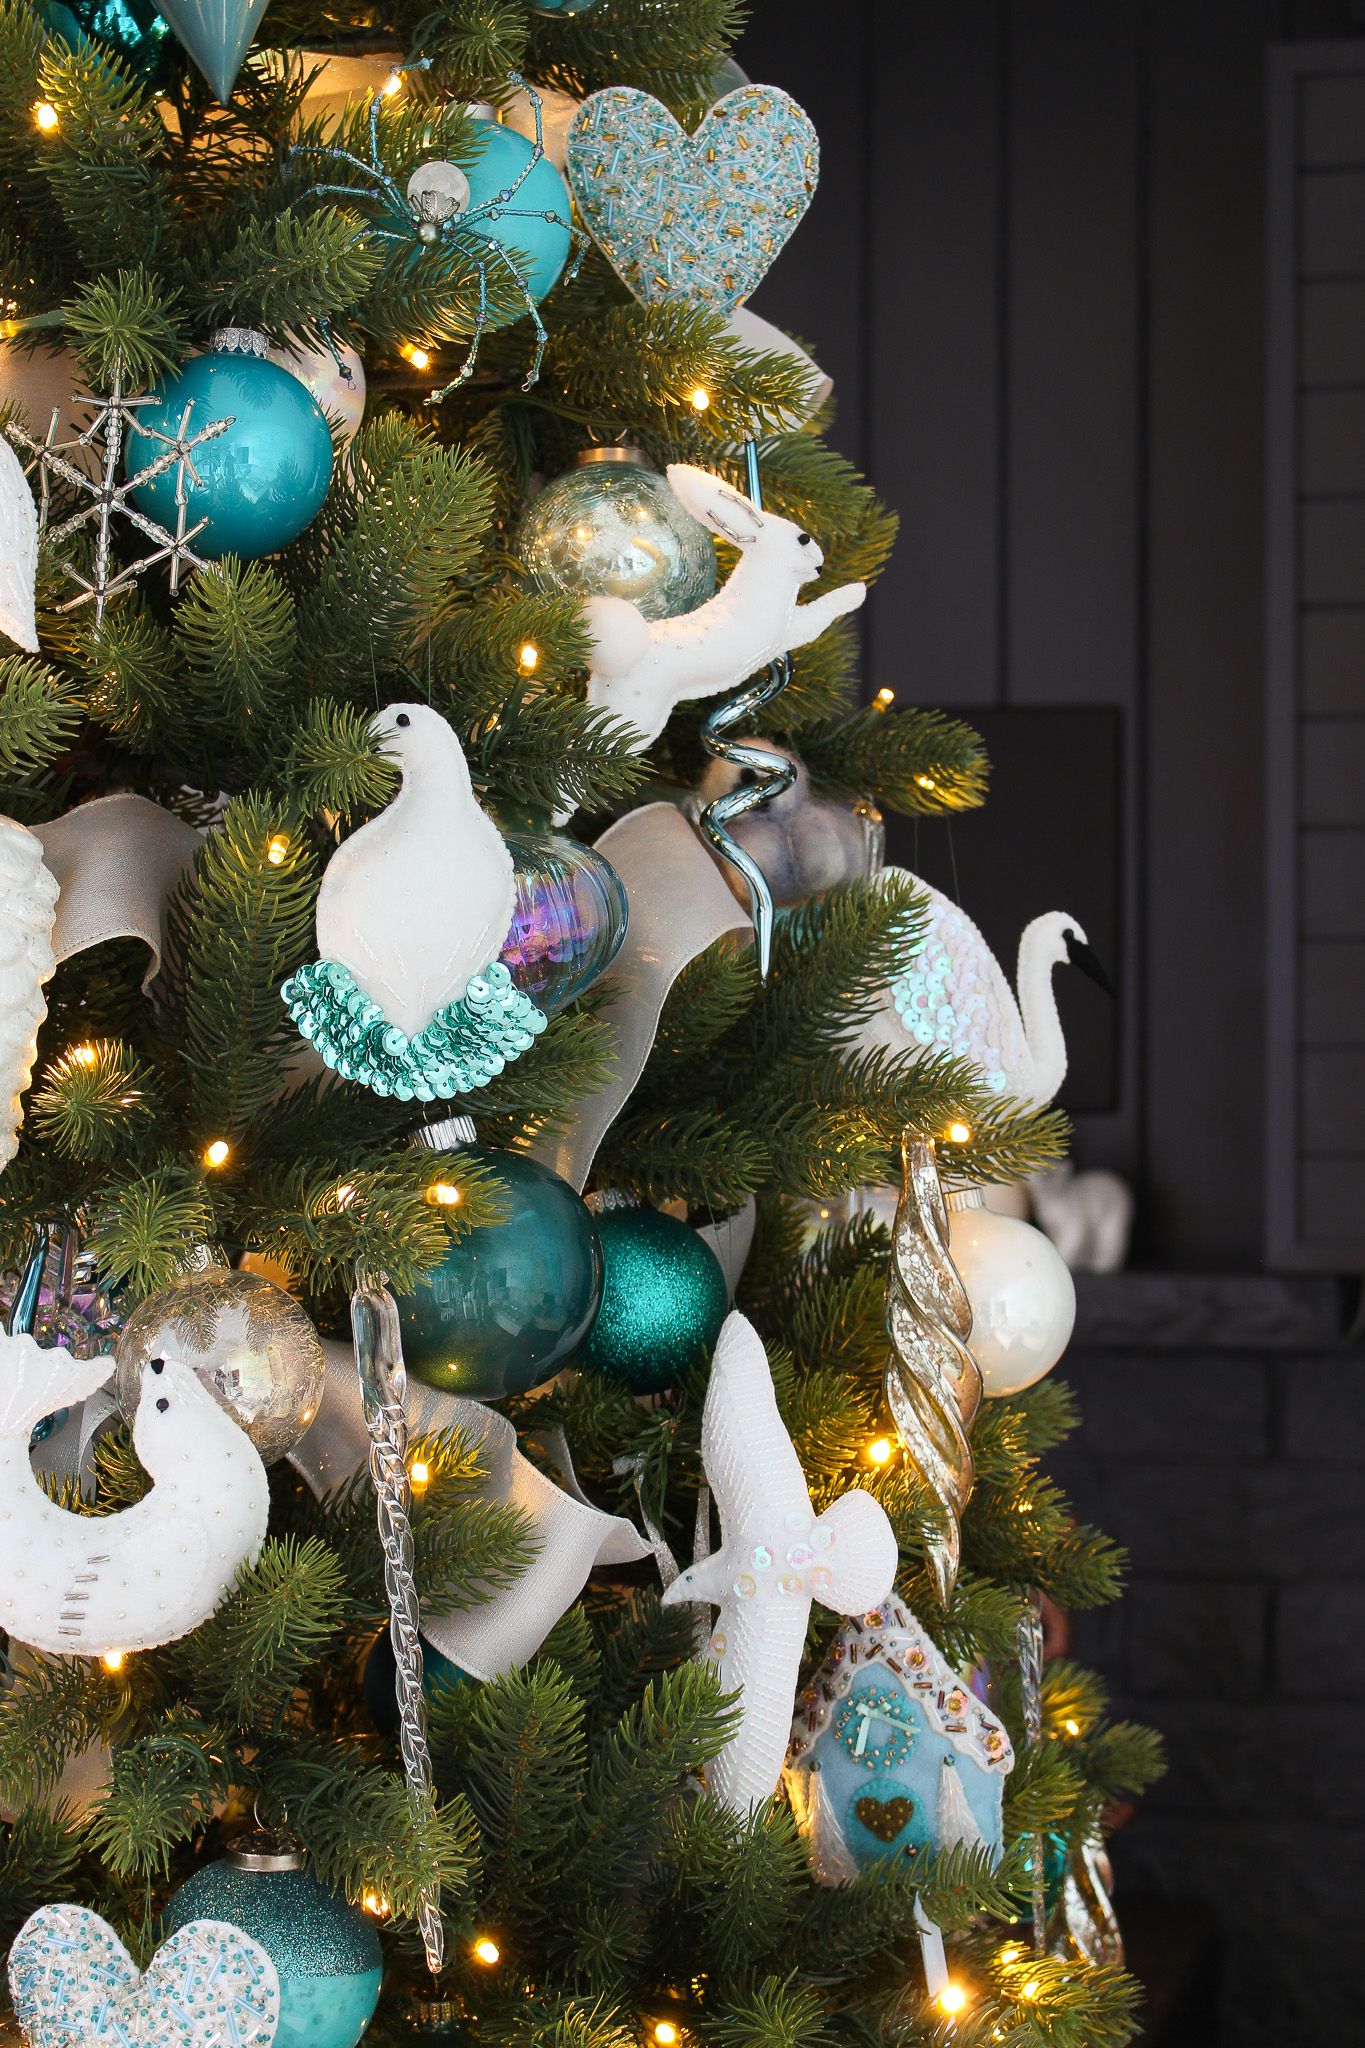
This hand-sewn beaded project joins the DIY felt fox ornaments, DIY felt seal ornament, DIY felt polar bear ornament, DIY felt swan ornament, DIY felt bunny felt ornament, and DIY felt ptarmigan bird felt ornament. They’re all white and similarly scaled so, if you’ve made any of the other shapes, this little felt hen will fit right into your handmade holiday collection!
(Find all of my ornament patterns here).
While she looks beautiful in crisp white with black “speckles,” this beaded chicken ornament tutorial is also a fun opportunity to experiment with different colors. You can get creative with beads and sequins to make DIY hen tree ornaments that “match” the real-life members of your flock. As a backyard chicken keeper, I plan to make one for each of my girls (and boy)!
In this step-by-step guide, I’ll teach you how to sew felt ornaments with detailed photos (and some video tutorials) to help you with every stitch.
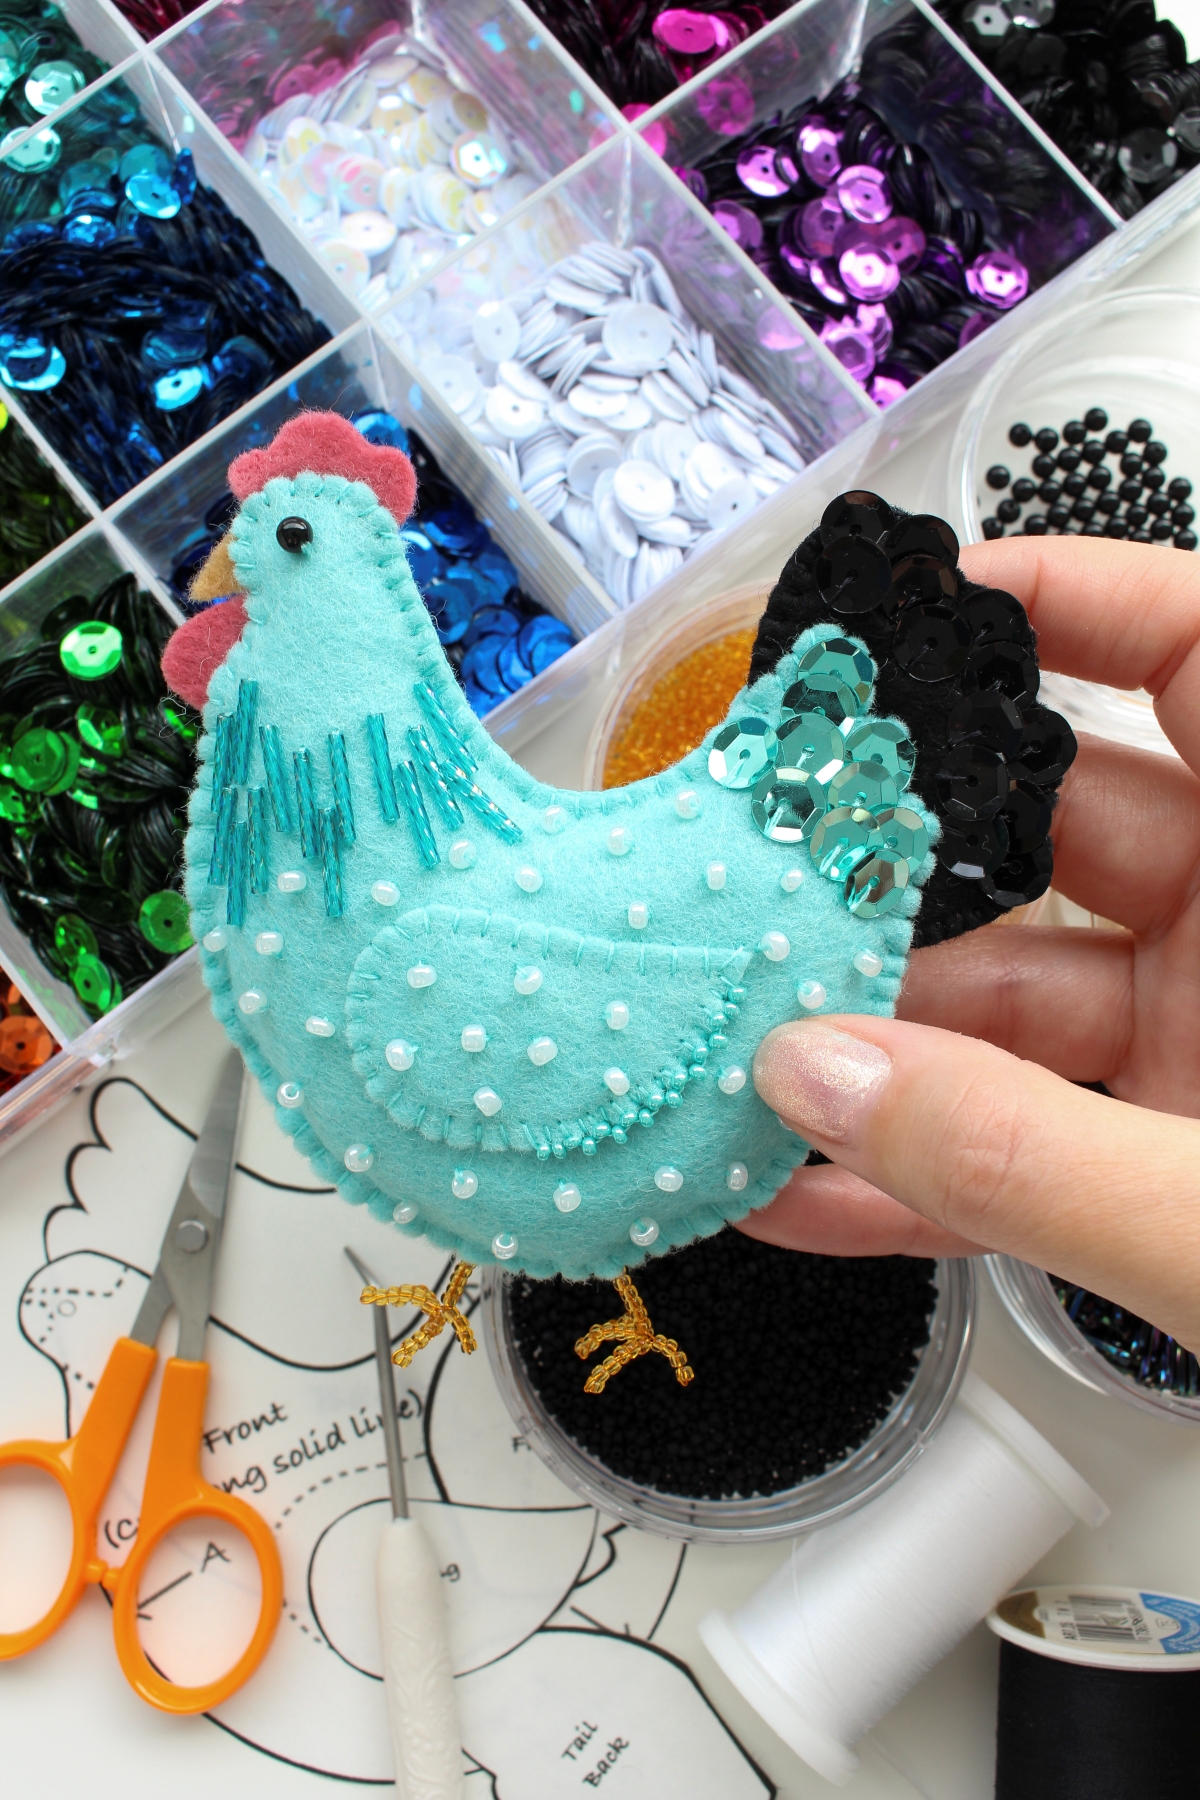
Felt Ornament Supplies:
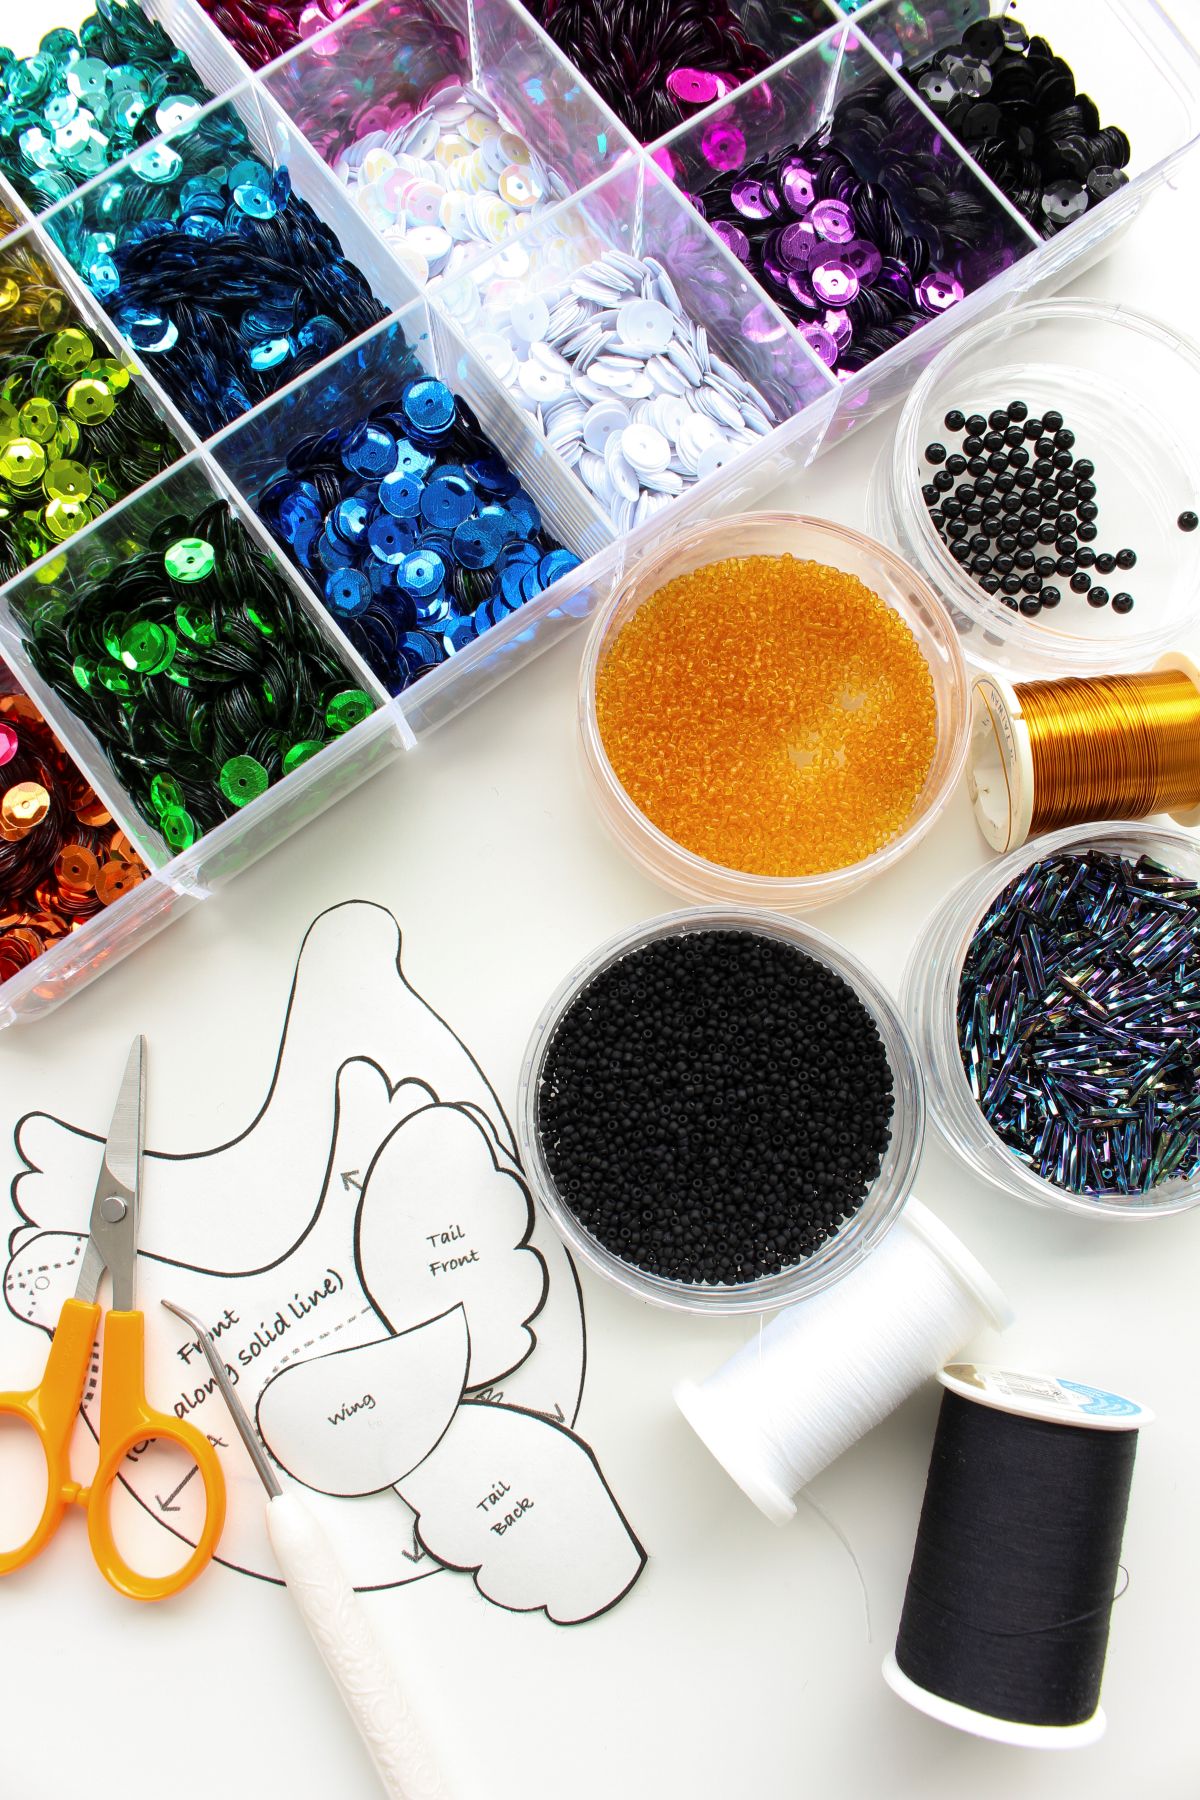
What Do You Need to Make a Felt Ornament:
You do not need to purchase everything on this list to make a beautiful felt ornament! I’ve listed what I used above (including the sizes of beads, sequins, and wire I used), but please don’t feel pressured to buy every felt ornament supply all at once.
Here are a few easy ways to use what you already have at home:
- Simplify the Details: If you don’t want to buy beads or sequins, you can completely skip the beadwork or use embroidery floss to add simple, stitched details instead.
- Eco-Friendly Stuffing: Instead of buying new polyester fiberfill, you can repurpose stuffing from clean, old pillows or use your leftover felt and fabric scraps to stuff the ornaments.
- Household Tool Hacks: Skip the fancy tracing supplies and stuffing tools. You can use a Sharpie to trace the paper pattern onto your felt, and then use the blunt end of that same marker (cap on!) to push the stuffing into the tight corners of the ornament.
*A Note on Thread Preference: I highly recommend using hand quilting thread. It is incredibly durable, rarely tangles, and is strong enough to hold glass beads securely in place. However, if you already have standard sewing thread or embroidery floss on hand, feel free to use what you have.
Find more of my felt ornament supply suggestions here!
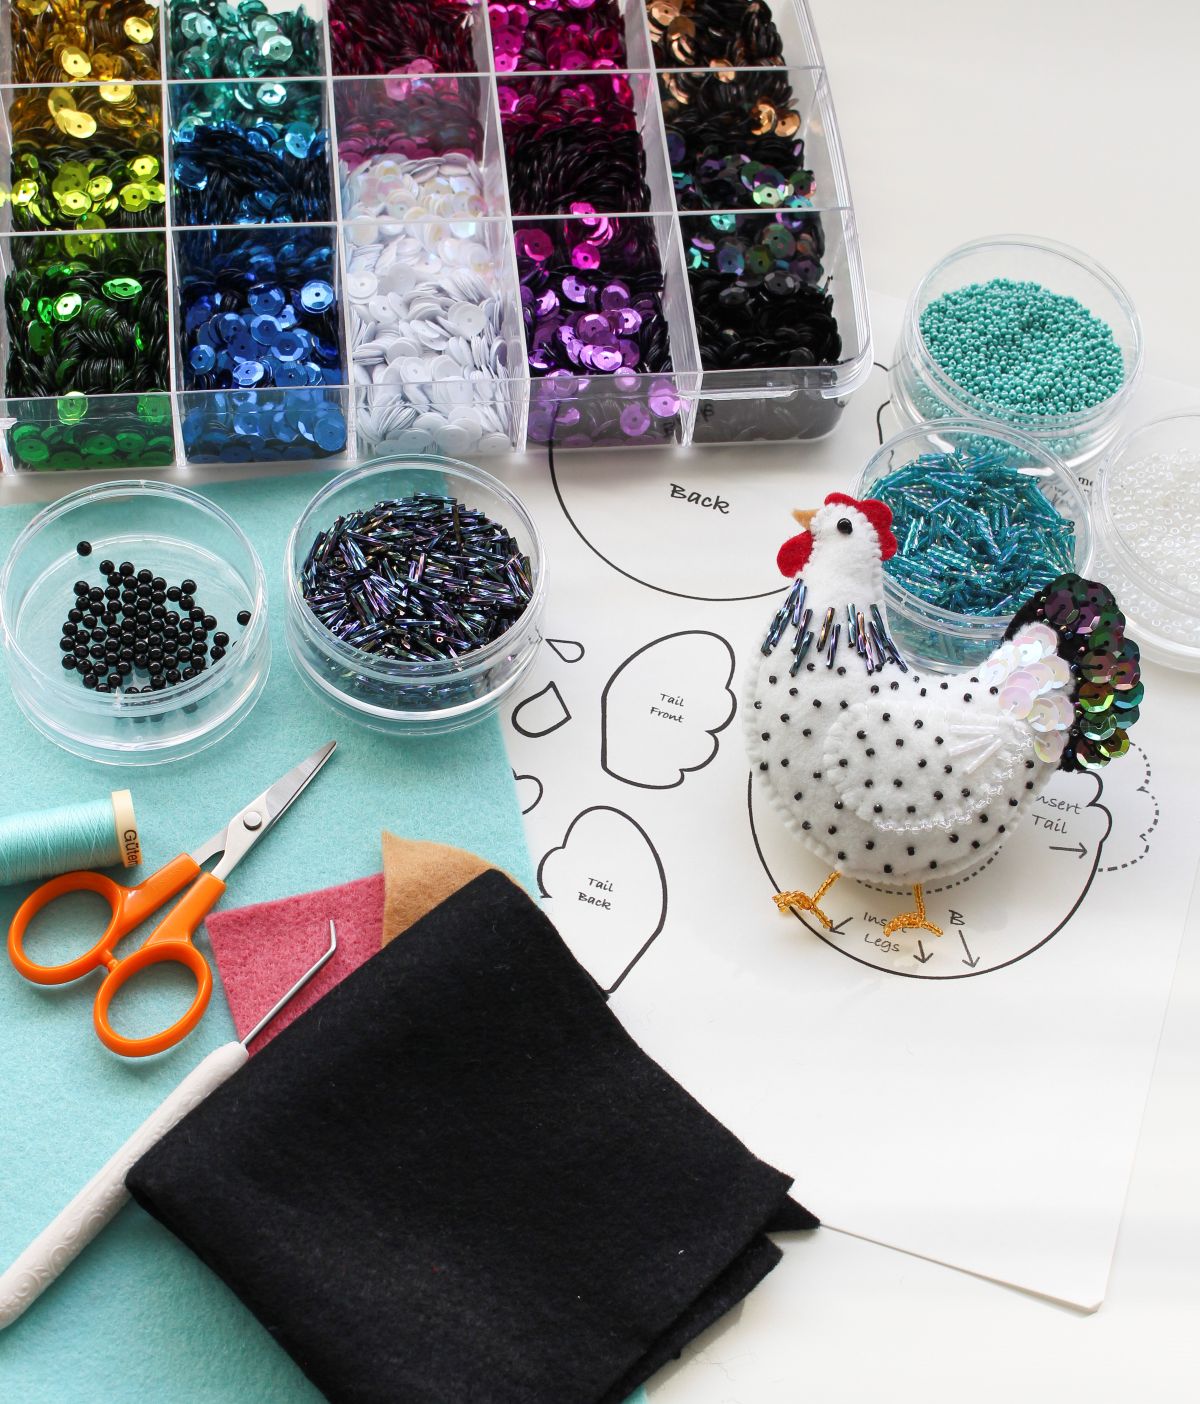
How to Use My Felt Ornament Patterns:
This pattern is a digital download that is available to use immediately. It’s scaled to 8.5 x 11″ paper and can be printed with any printer. You can purchase it here or in the shop.
Pattern Usage Rights:
Please note: this pattern is copyright protected and is for your PERSONAL USE ONLY. By downloading this template, you agree that this design, pattern, and tutorial are not licensed to be shared or redistributed online, used for commercial purposes, or sold in any format.
Once printed, you can simply cut out the paper templates outside the SOLID LINES and trace them onto your felt (you’ll see dotted lines to help you position smaller pieces, do not cut along those). Alternatively, you can use specialized materials like freezer paper or wash-away stabilizer to transfer the design.
I have a detailed tutorial with information on how to transfer felt ornament patterns to felt, but here’s a rundown of each method:
- Printer Paper: Print the pattern onto any printer paper, cut out the shapes, and then trace them onto your felt with a thin sharpie. Cut out the felt shapes inside the line. Benefit: it’s an inexpensive way to transfer patterns.
- Freezer Paper: Print the pattern onto freezer paper, cut out the shapes, iron them onto the felt and then cut out around the template. Remove the freezer paper and re-use. Benefit: it’s a steadier process than simply tracing and you don’t need to draw on the felt.
- Wash Away Stabilizer: Print the pattern onto stabilizer, roughly cut out the shapes, then stick them onto the felt. Then dissolve the stabilizer with water and let the felt dry. Benefit: you can follow embroidery or beadwork guides on patterns.
My Recommendation for the Chicken Pattern:
Because I haven’t marked specific placement for the beadwork on this pattern (giving you creative freedom), freezer paper is an excellent choice for this project! While stabilizer is normally my personal preference for my more intricate designs, the freezer paper method actually works beautifully for cutting out these chicken shapes.
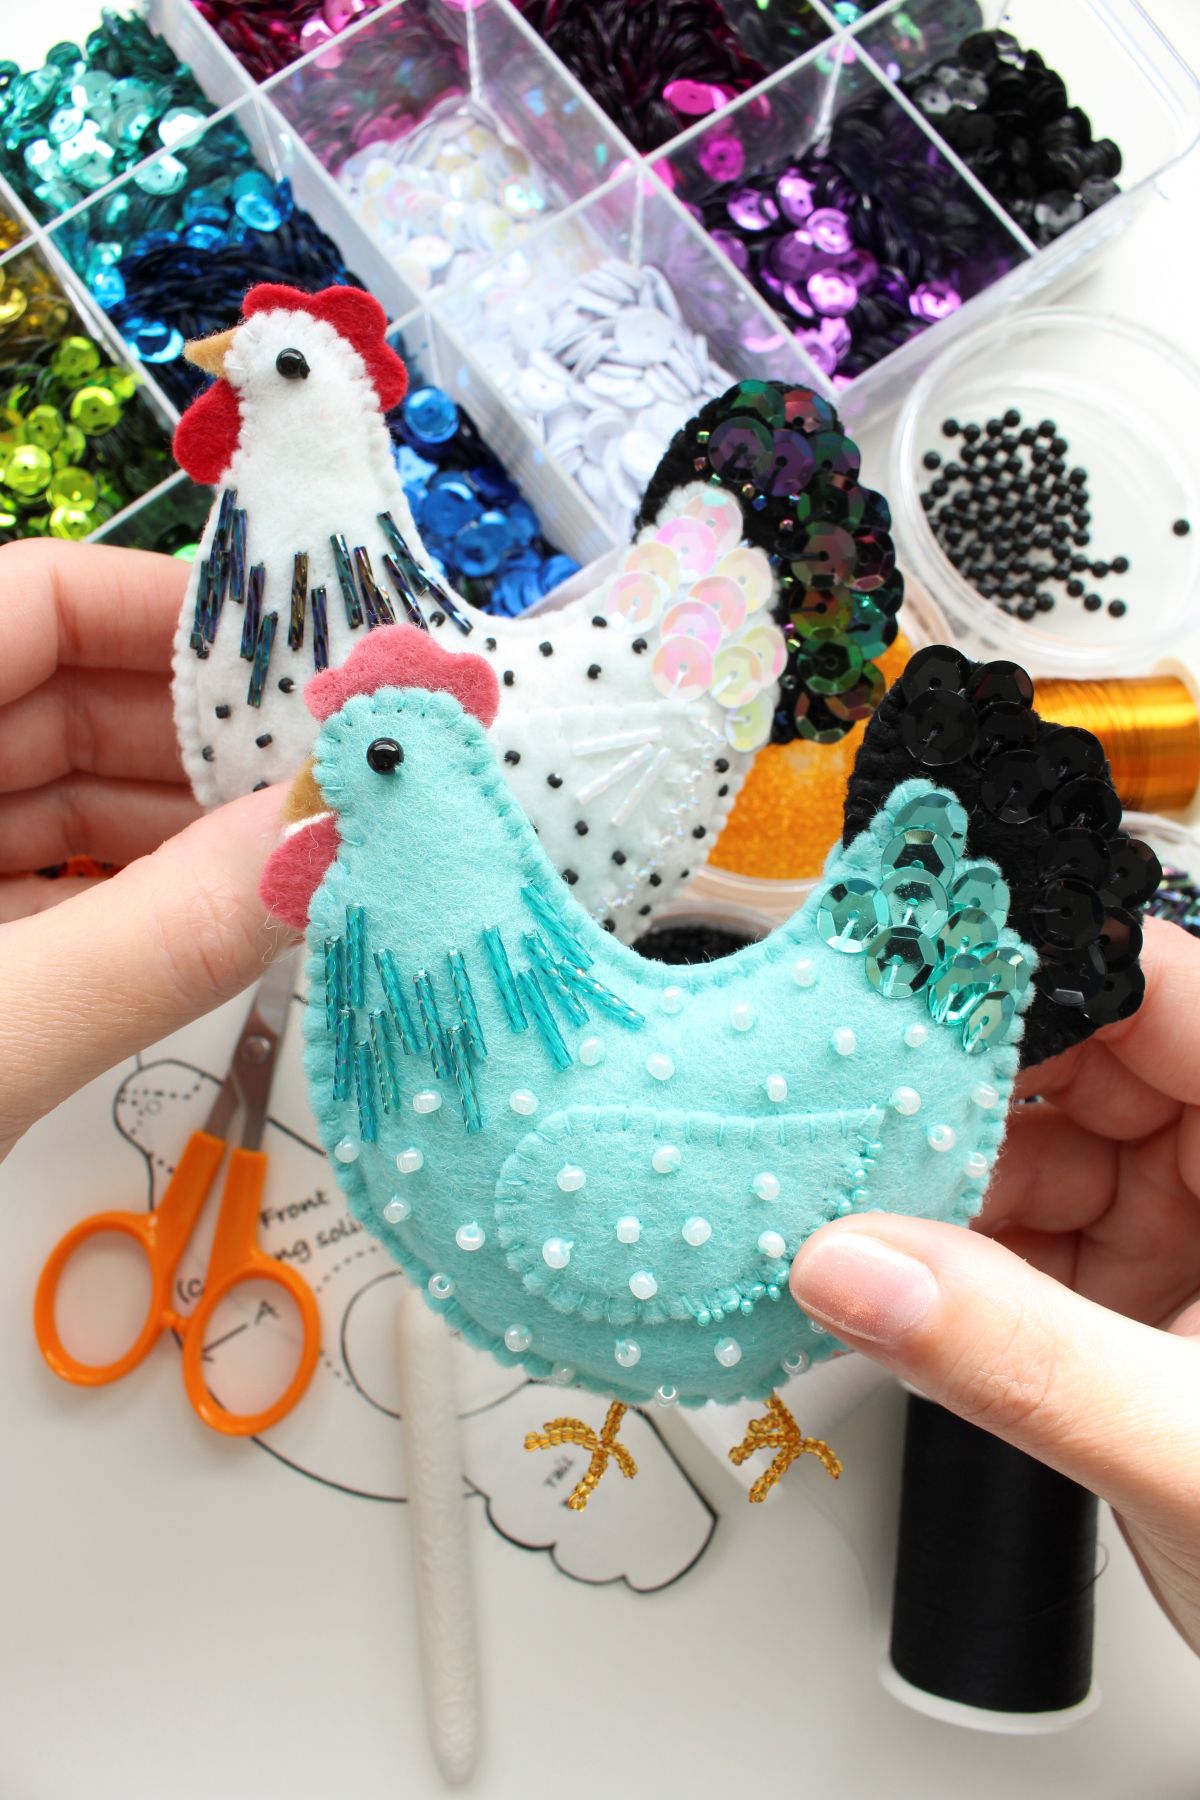
How to Make a DIY Felt Chicken Ornament:
- Print out my felt chicken ornament pattern.
- Transfer the ornament shapes to felt, using one of the methods outlined above.
- Cut out the shapes, following the pattern, with short fabric scissors.
- Stitch the wing onto the chicken front (adding edge beading if desired).
- Stitch sequins onto the tail of the chicken front.
- Stitch bugle beads onto the neck of the chicken front.
- Stitch on a 3mm bead (as an eye), onto the chicken front.
- Stitch random seed beads for “speckles” (optional) onto the chicken front.
- Stitch sequins onto the front of tail piece, checking for fitment against chicken body.
- Using a blanket stitch, sew together the tail front and back pieces.
- Make the beaded wire legs (optional).
- Using a blanket stitch, sew together the front and back of the chicken, starting under the wattles.
- Sew toward the top of the ornament, sewing in the wattles, beak, and comb.
- Keep sewing along the top and tail end of the chicken, sewing in the tail.
- Stop sewing after the chicken tail.
- Begin to stuff the chicken ornament, then insert the legs and continue sewing, stopping to add more stuffing as needed until the ornament is fully stuffed and sewn closed.
- Thread a needle with green thread and thread a loop through the back for hanging.
That’s a succinct summary of the steps, but keep reading for more detailed felt ornament sewing instructions with photos and videos.
How to Transfer and Cut Out Felt Pattern Pieces:
For this tutorial, I’m going to suggest using freezer paper and will outline those steps.
- After printing the pattern onto freezer paper, cut out the pieces by cutting outside of the lines. This is where the small detail scissors I link to really help!
- Once the pattern pieces are cut out, gently iron the pattern pieces onto the corresponding colors of felt using a “wool” or similar low heat setting.
- With the pattern pieces transferred onto felt, use the small scissors to cut each piece out of the felt.
- When finished, gently peel off the pattern pieces and set aside (they can be reused).
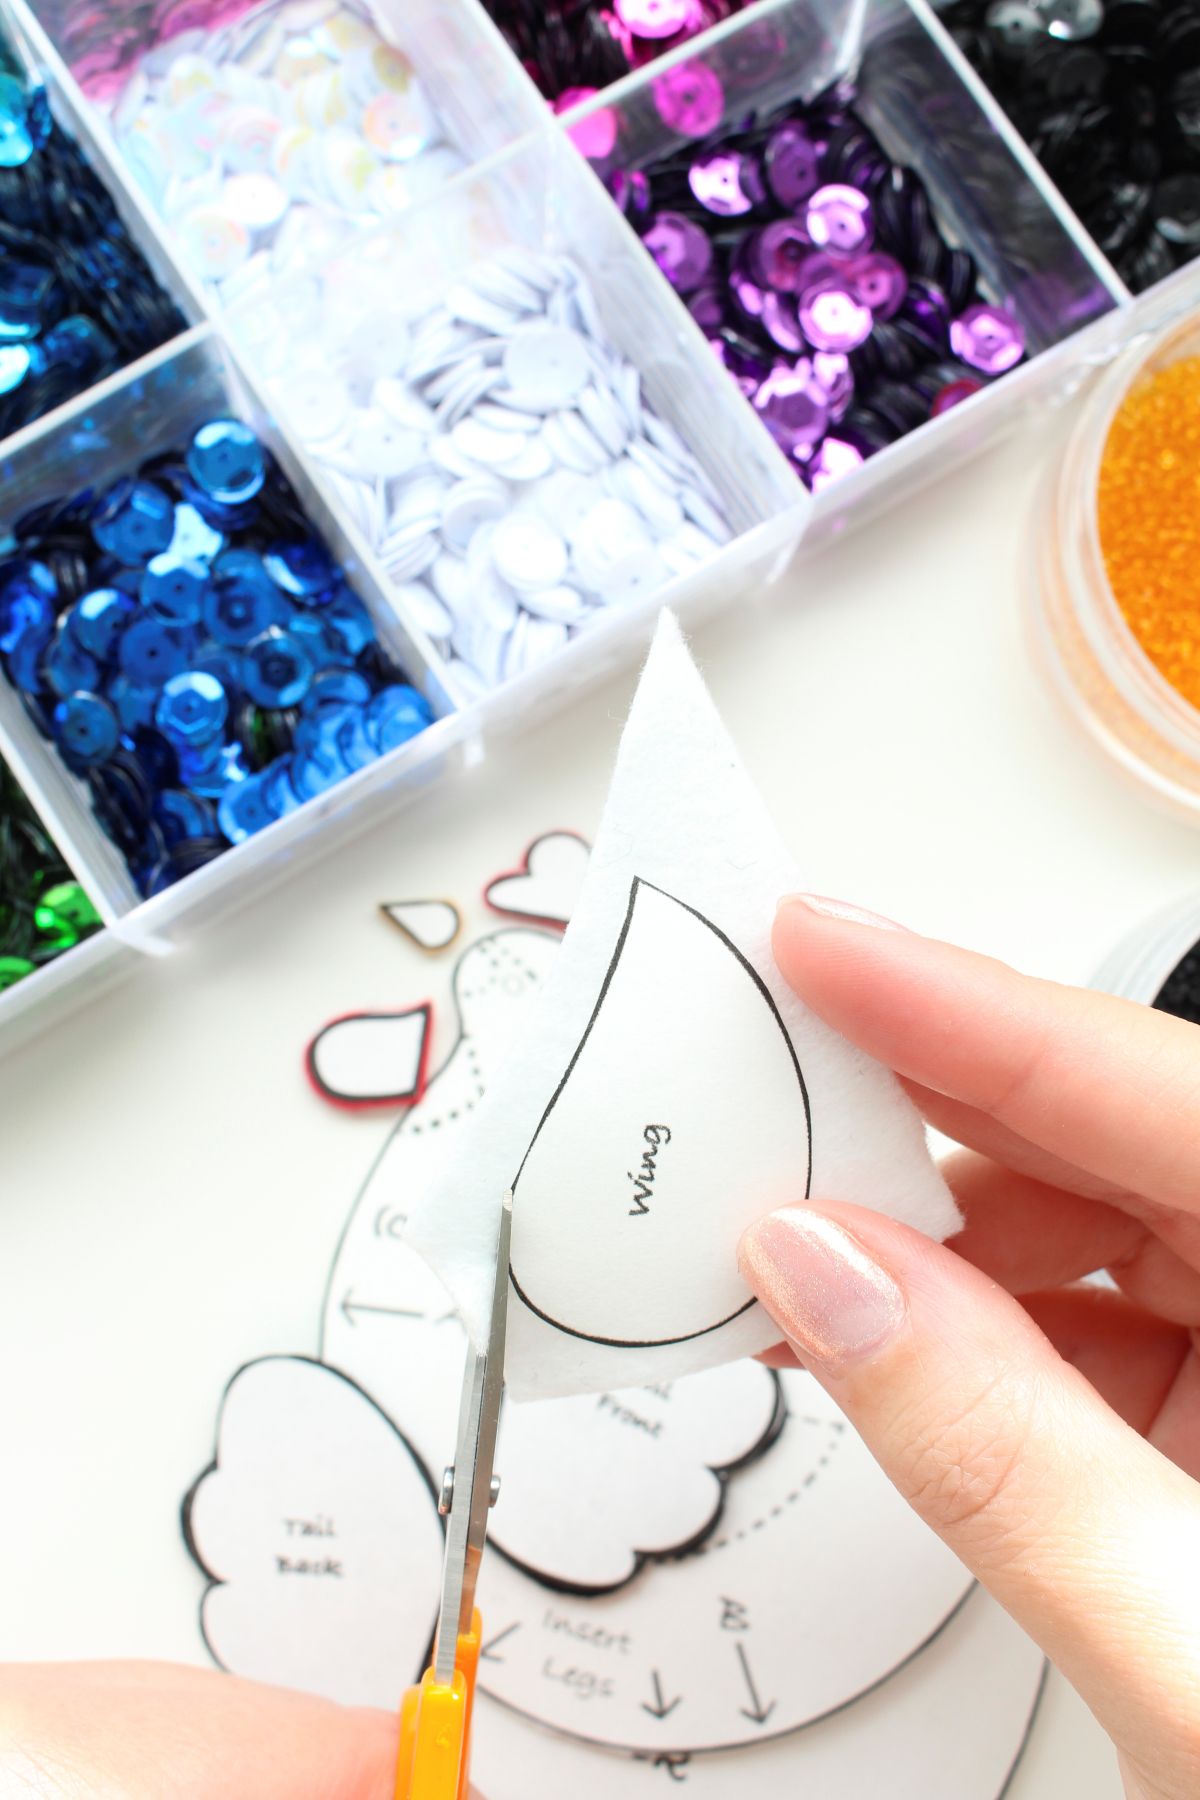
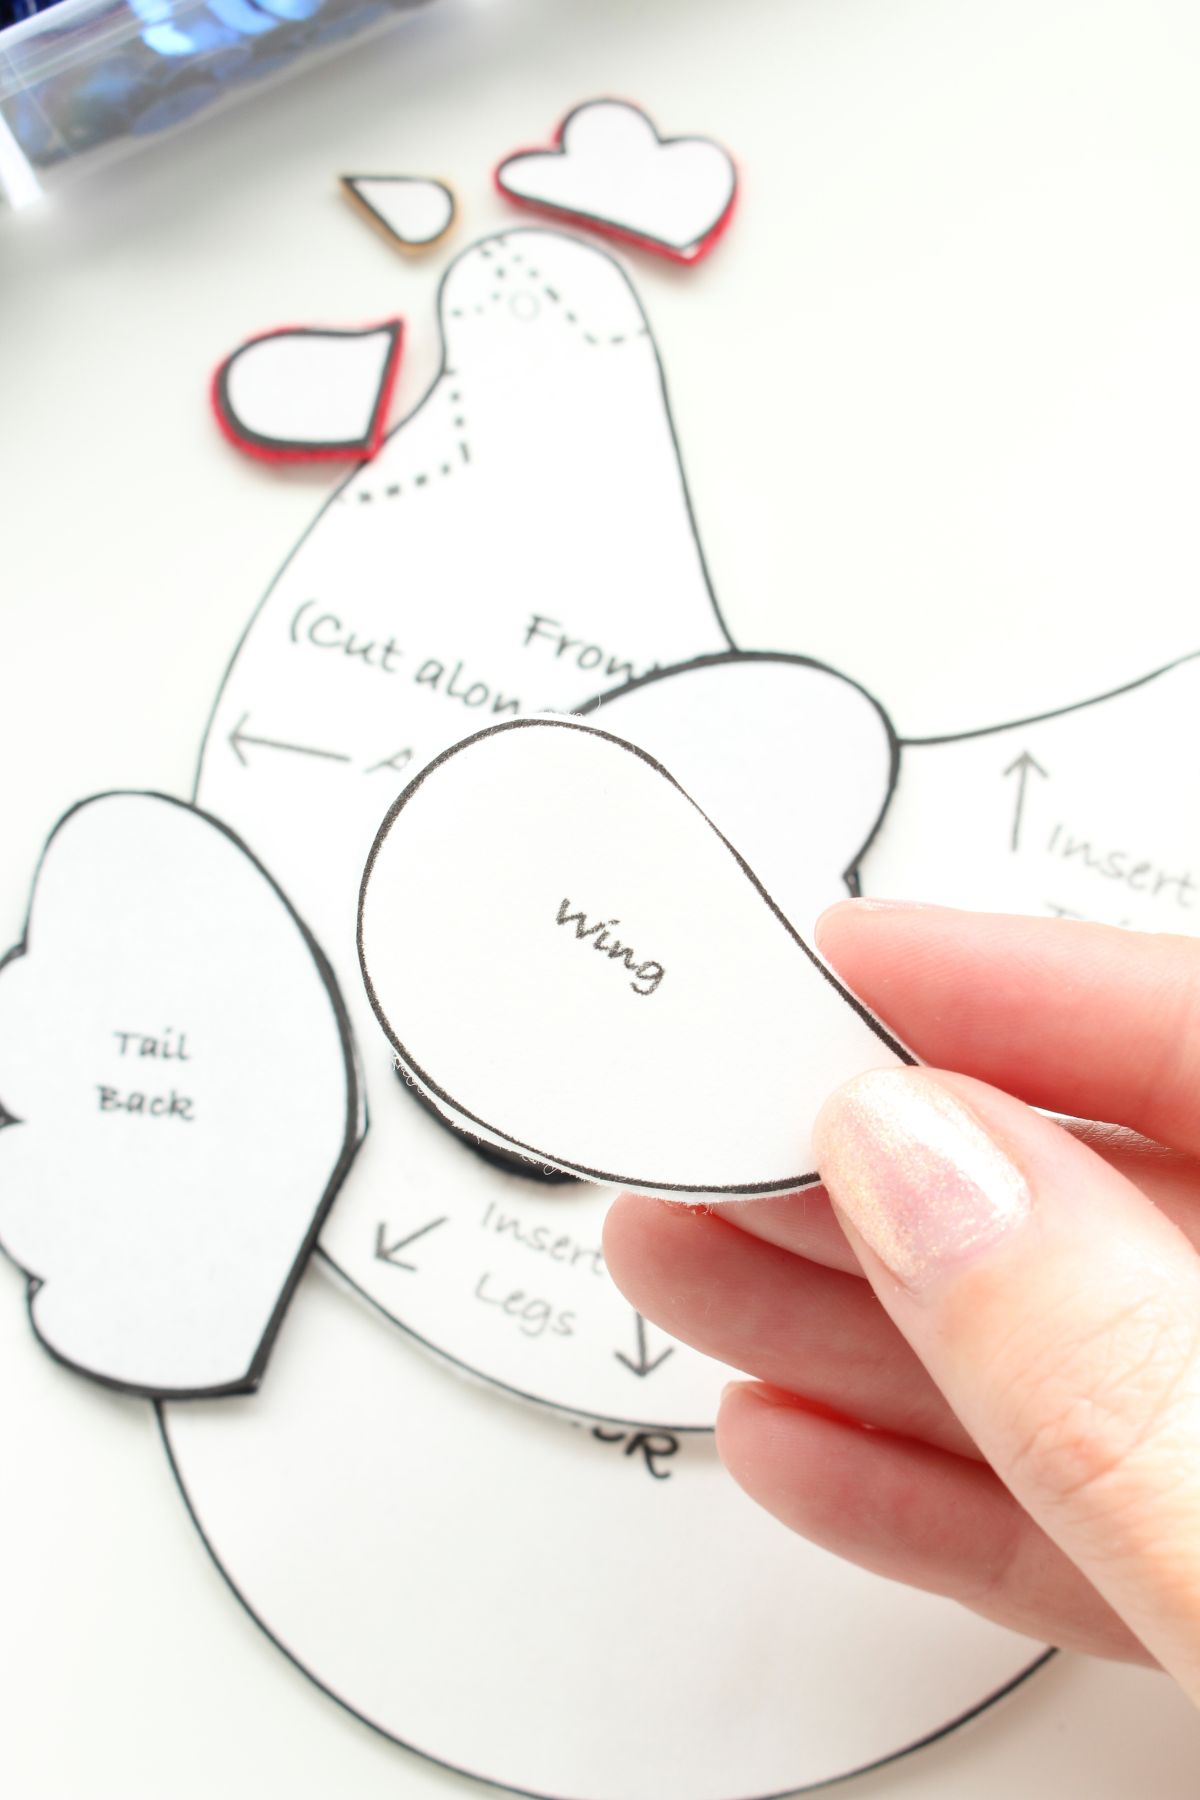
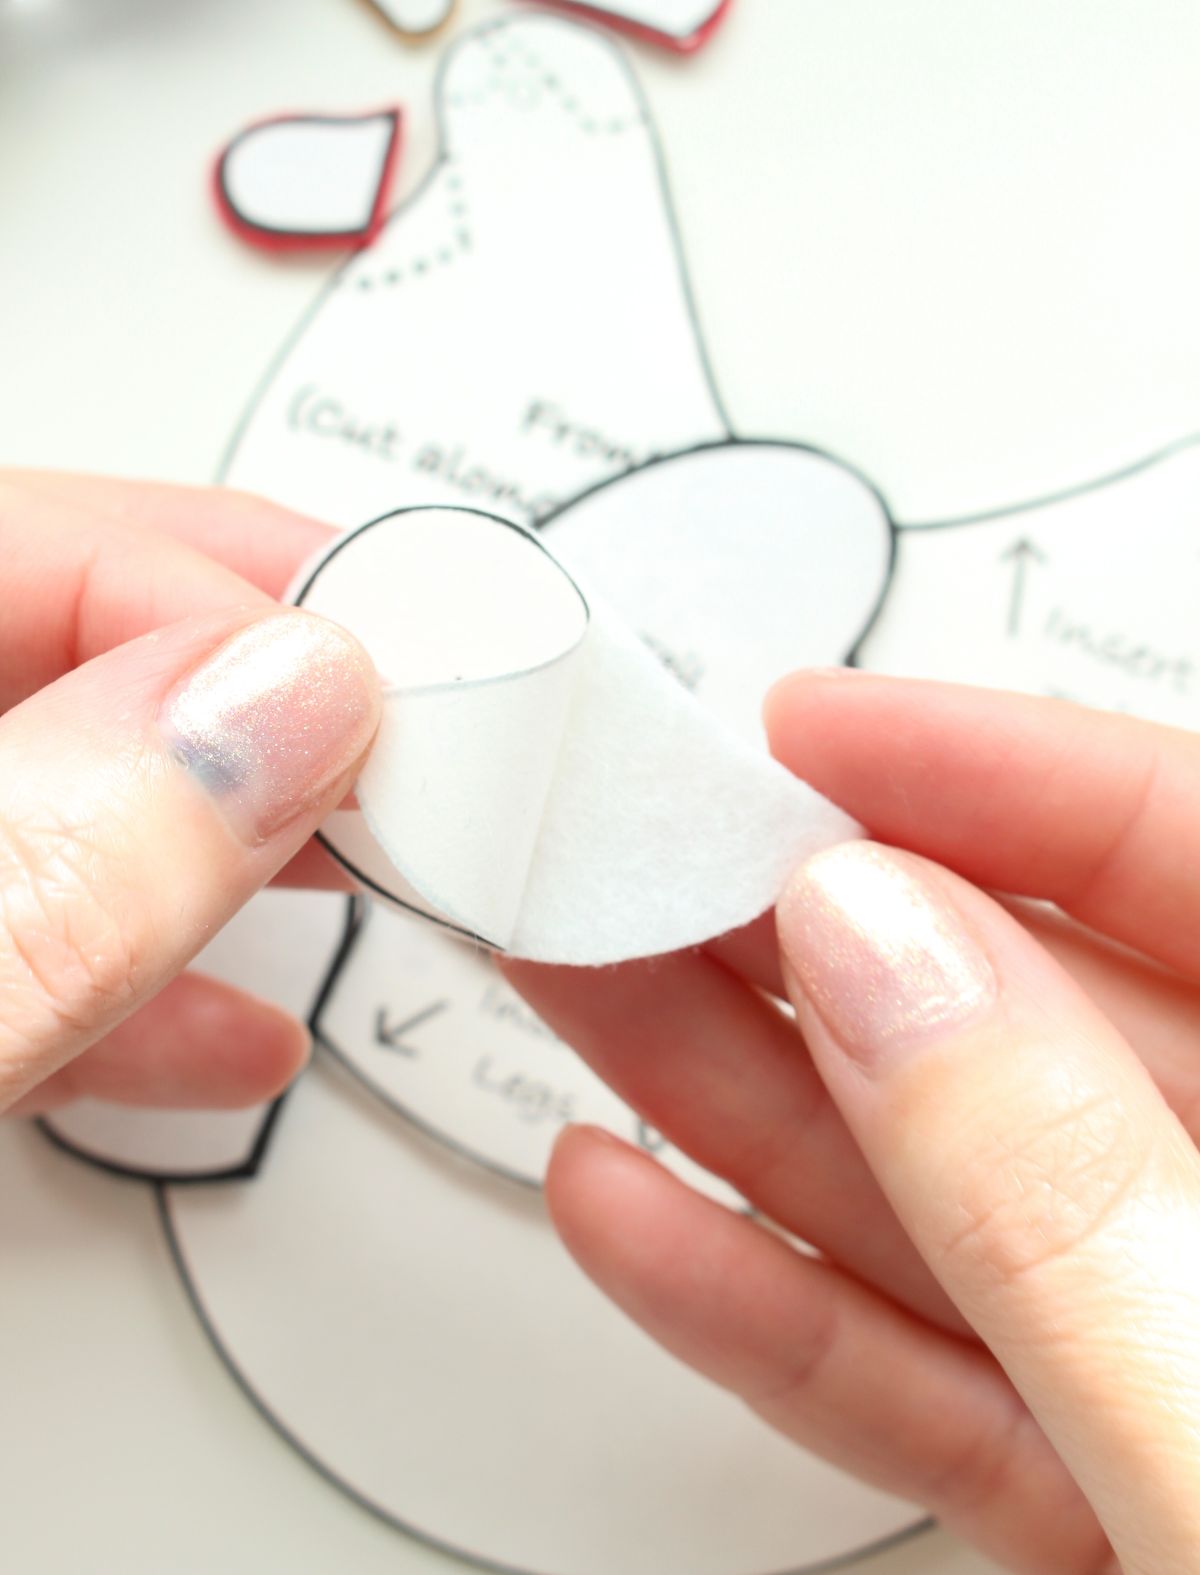
Once you have cut out and transferred all of the pattern pieces, you’ll have a chicken front and back as well as a tail front and back. You will also have a single wing, comb, beak, and wattle. The next step will be embellishing the front of the chicken body and tail.
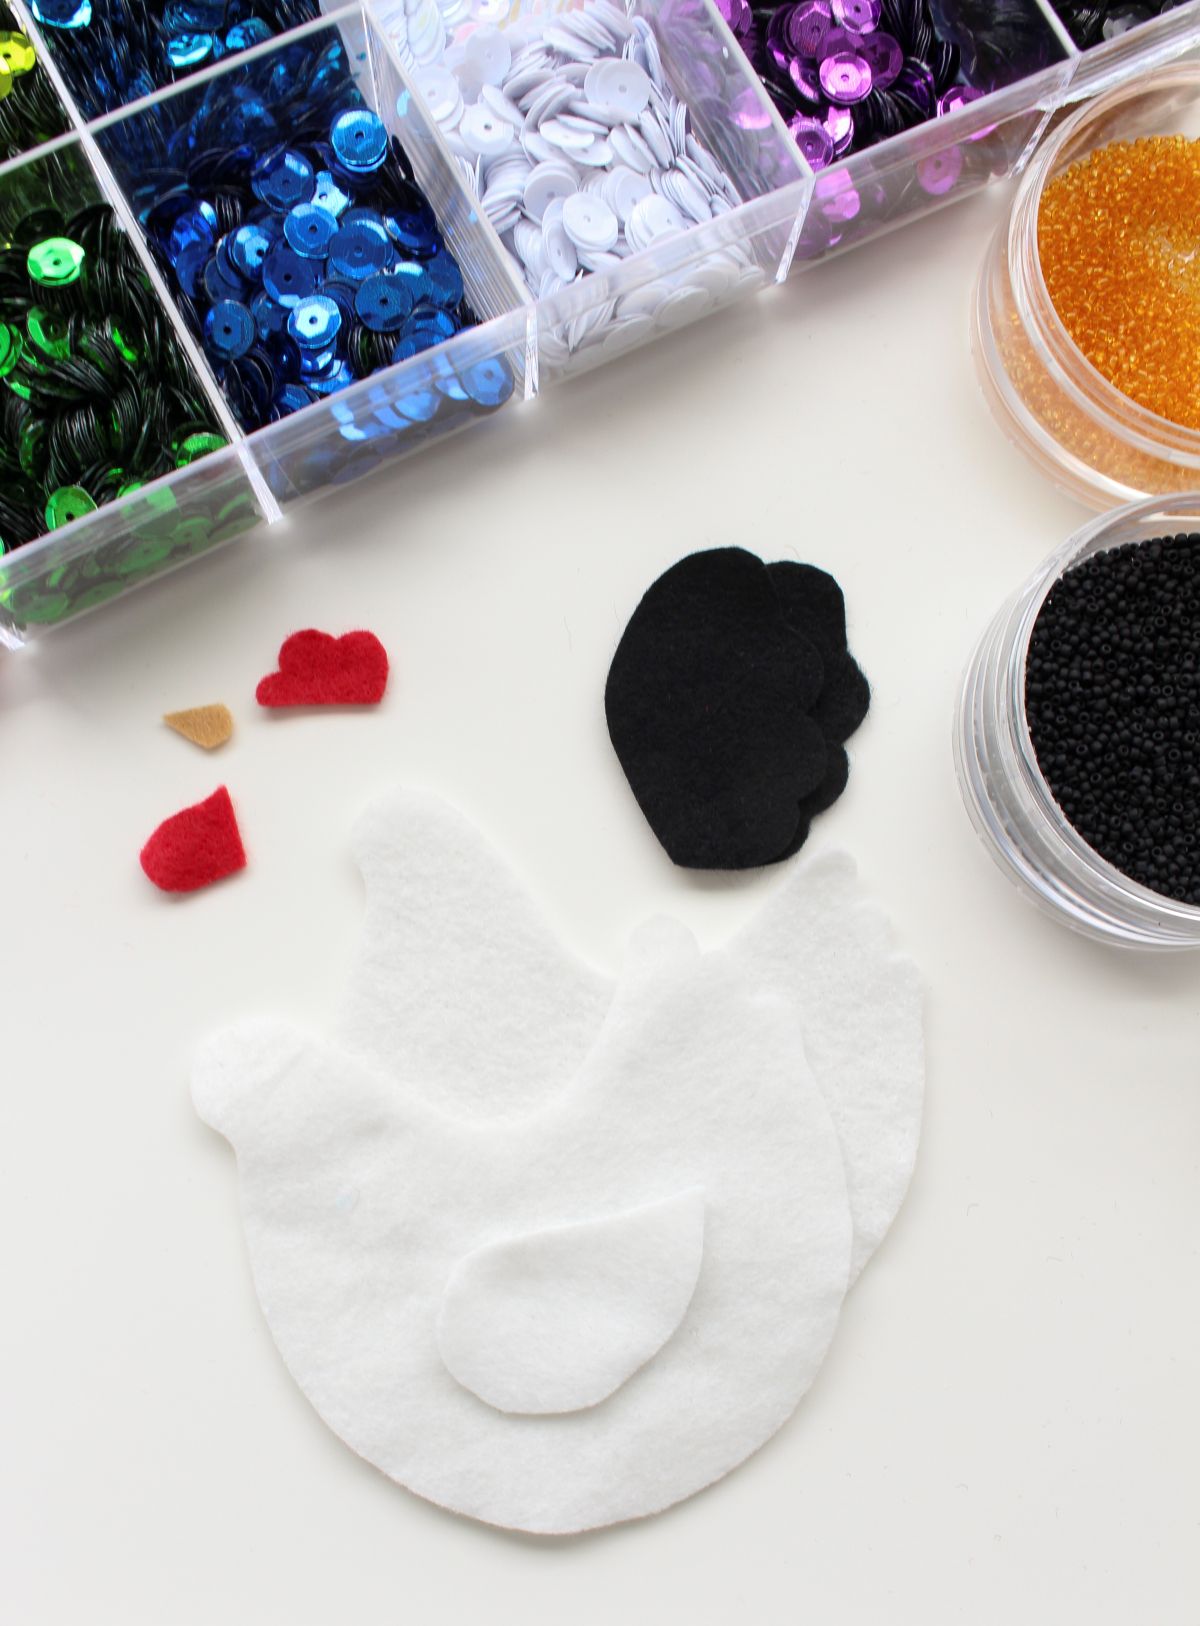
How to Stitch Applique Details onto Felt:
- Thread a beading needle with thread to match the body of the chicken and knot the two ends of the thread together (I use a beading needle here, so I can continue onto to beading without having to stop and switch needles).
- Position the wing onto the front of the felt chicken, hold it in place.
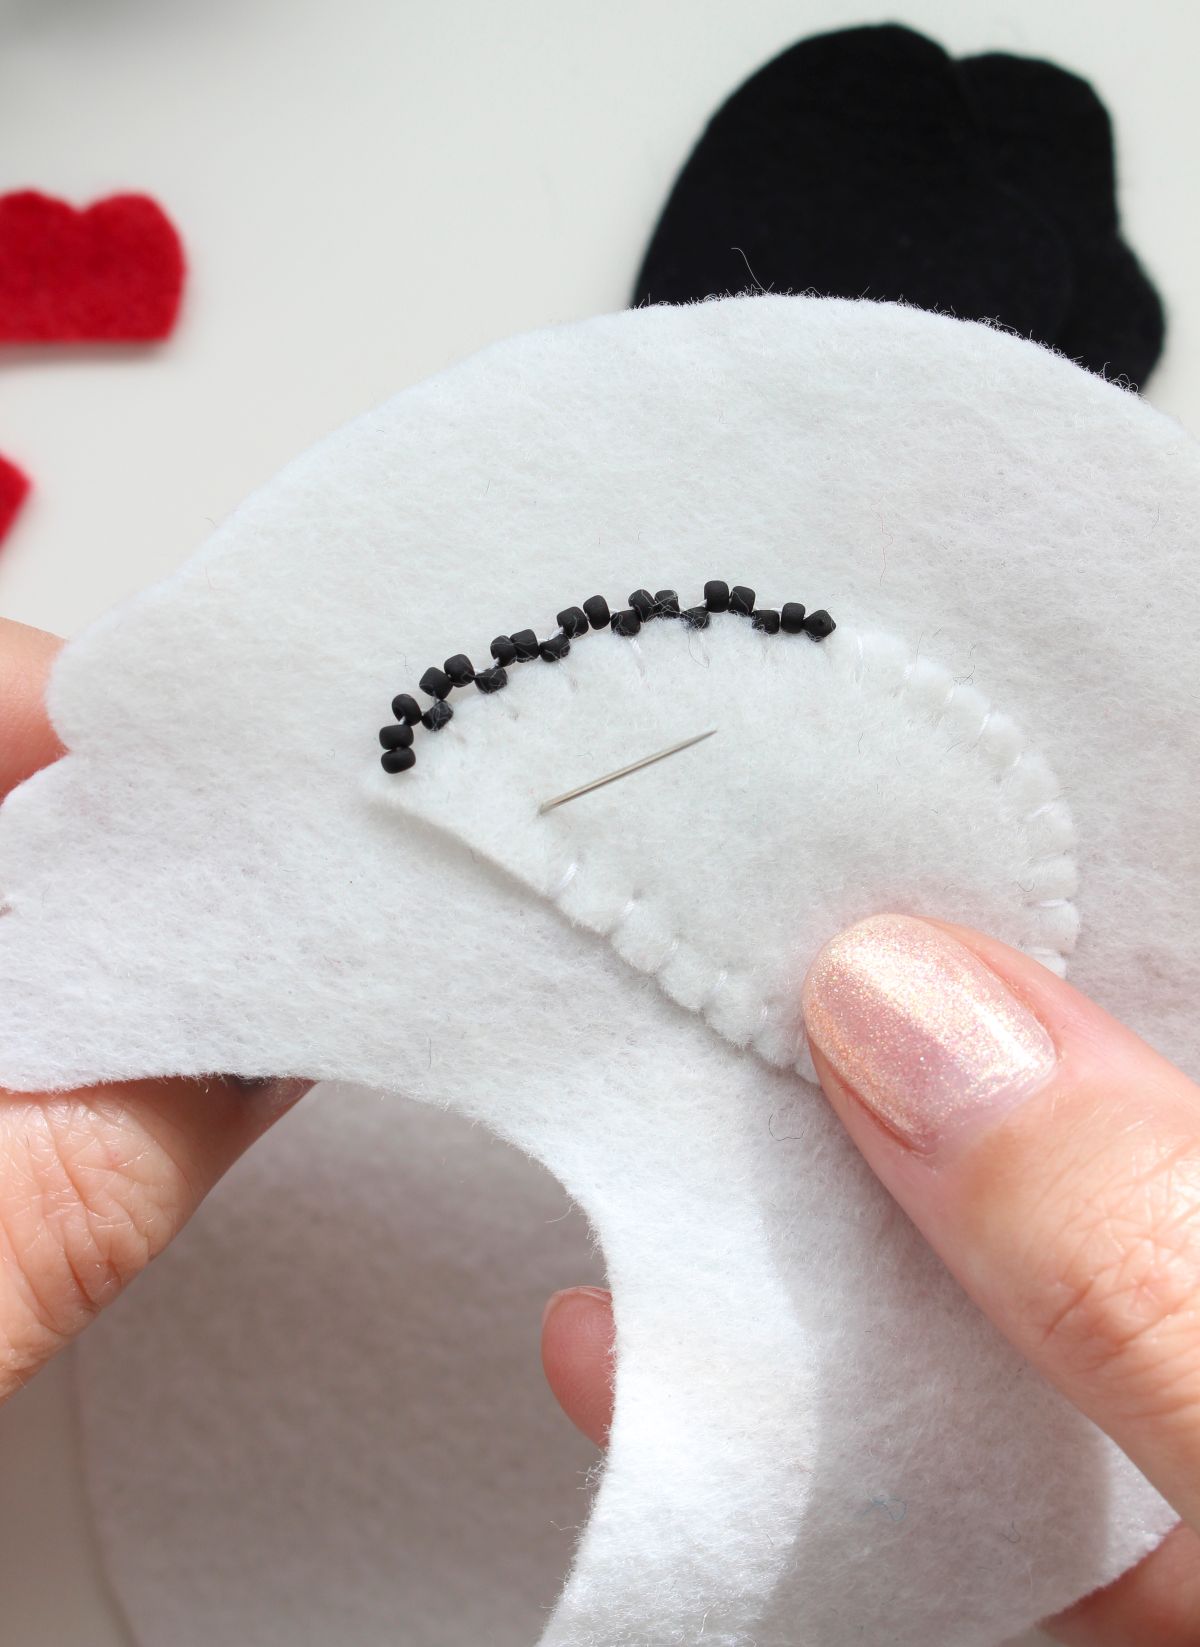
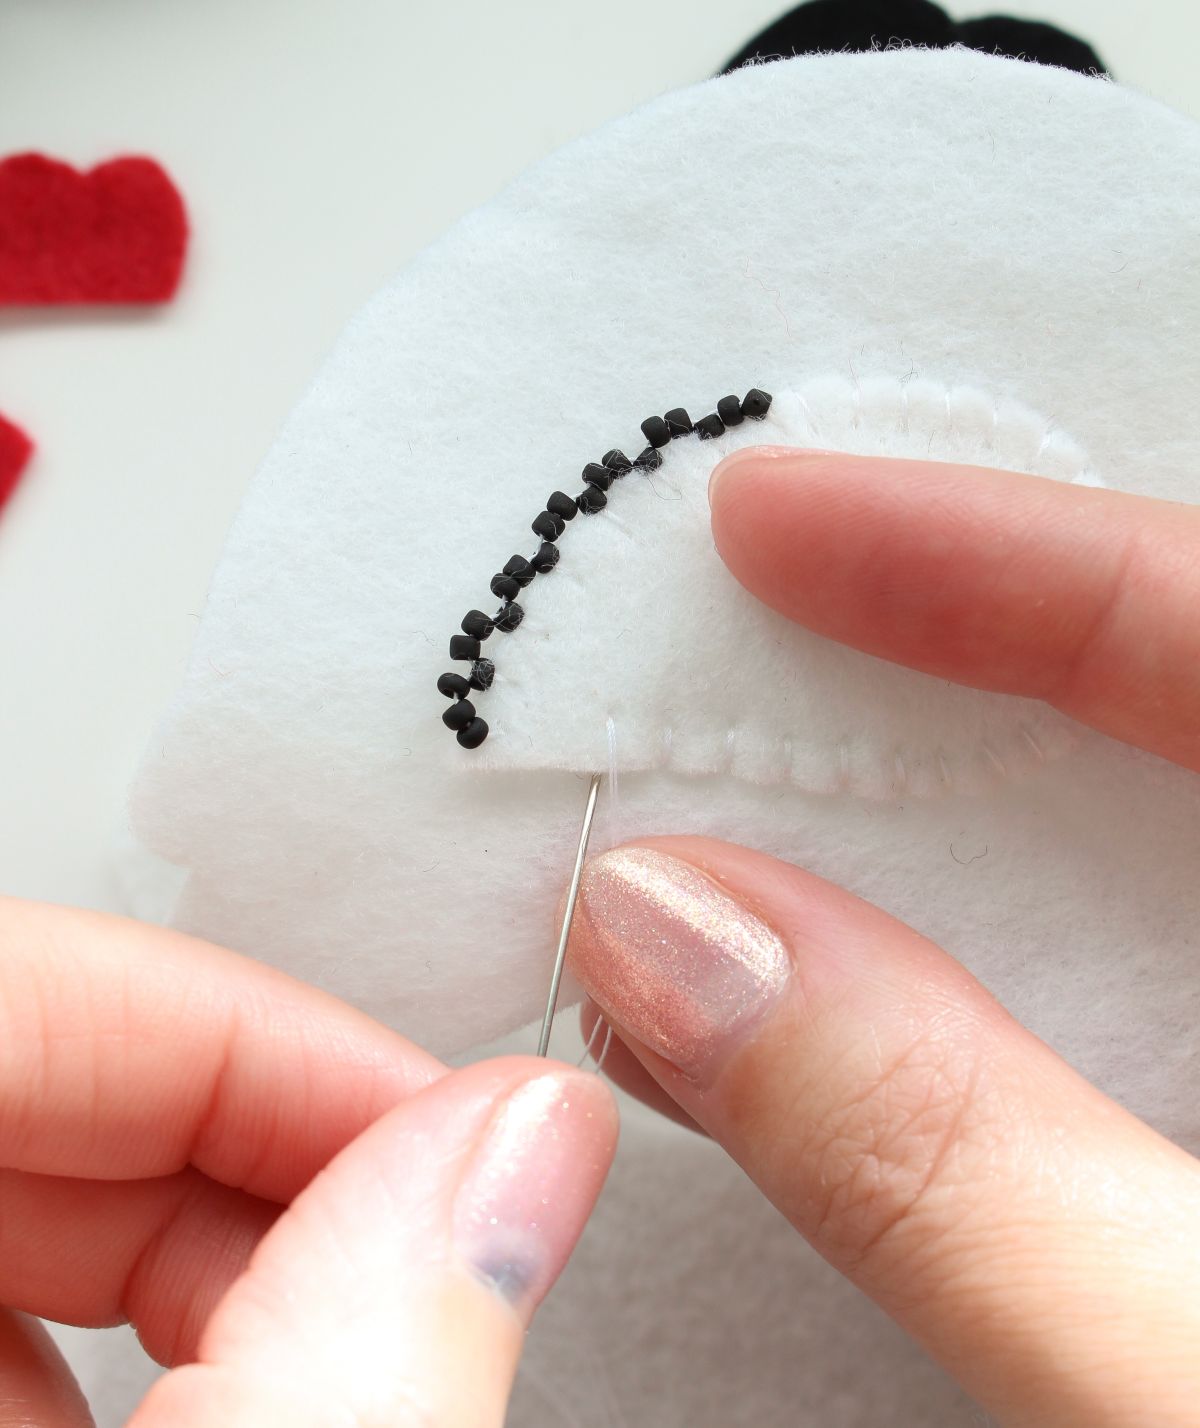
- Using a whipstitch, affix the wing to the front of the chicken (bring the needle up from the back, inside the felt applique by a few mm, then stitch toward the edge of the applique before pushing the needle back down).
How to Stitch Seed Beads onto Felt:
- Continuing from the felt applique, you can start stitching seed beads around the wing.
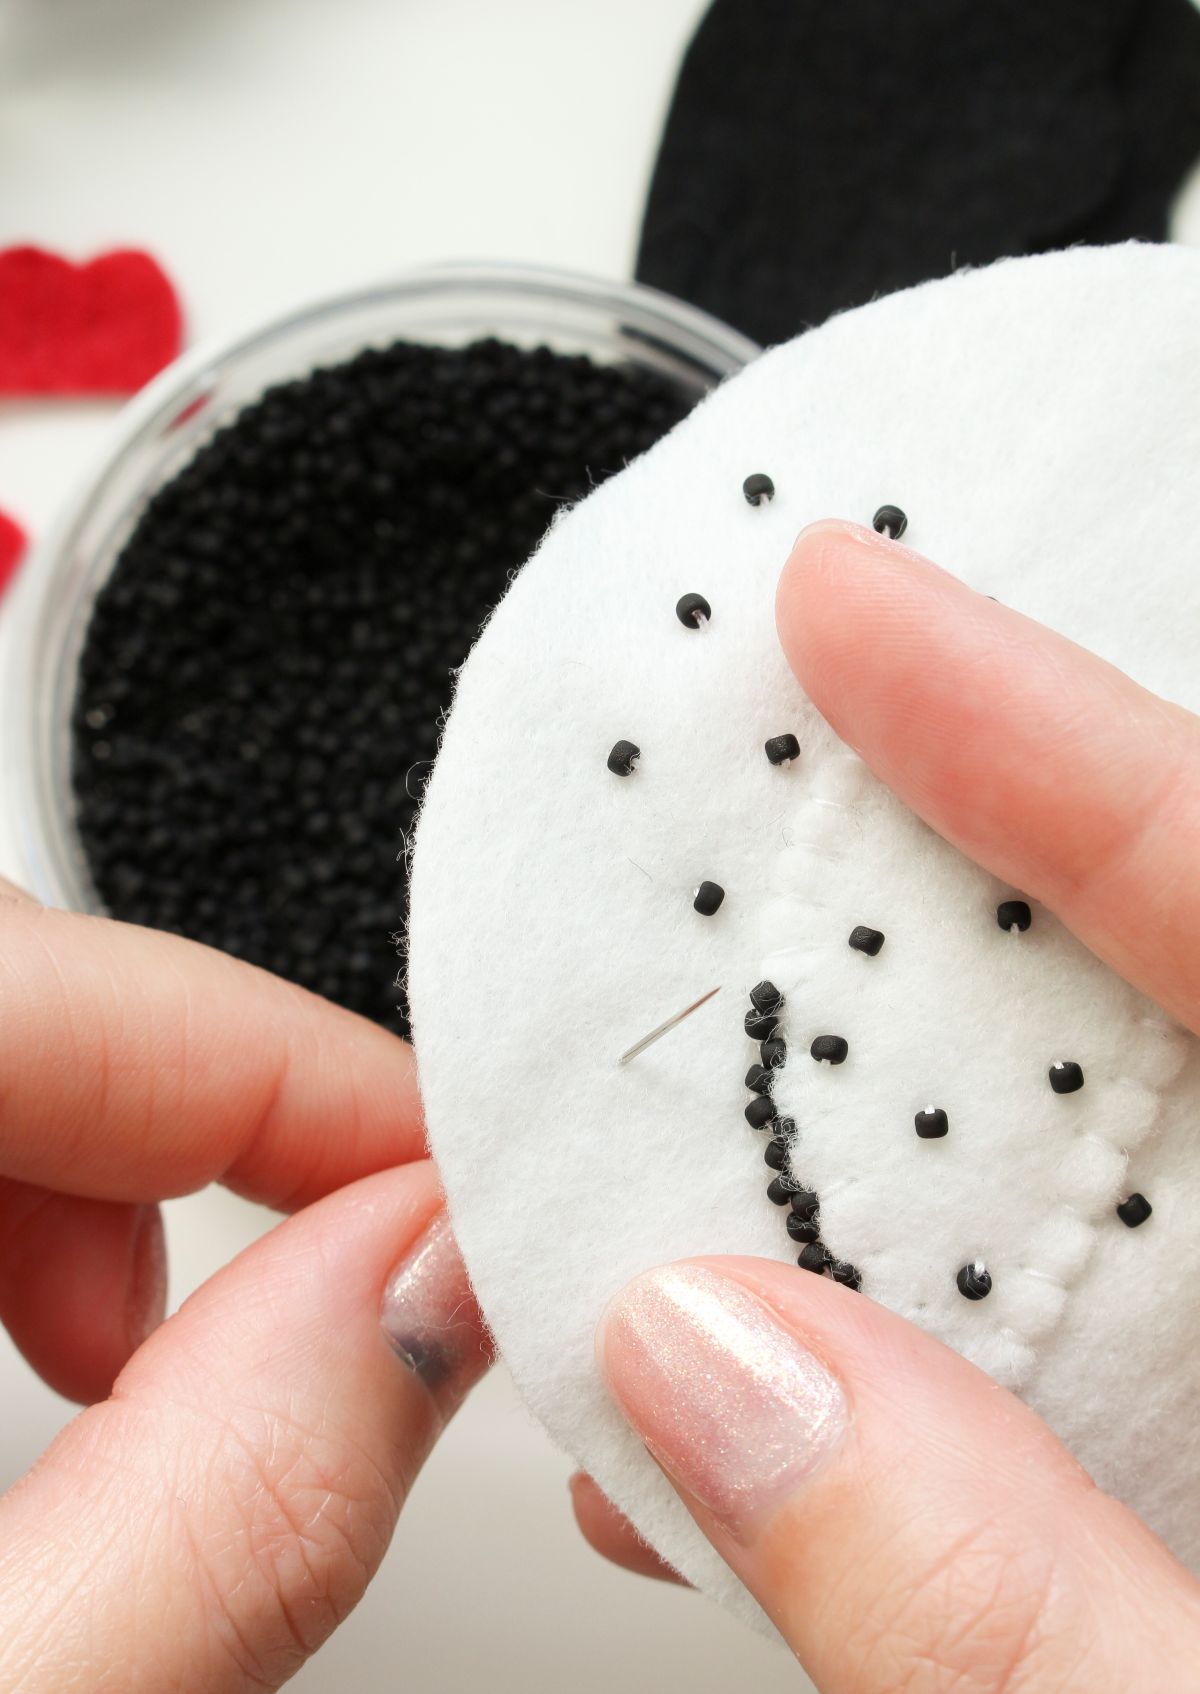
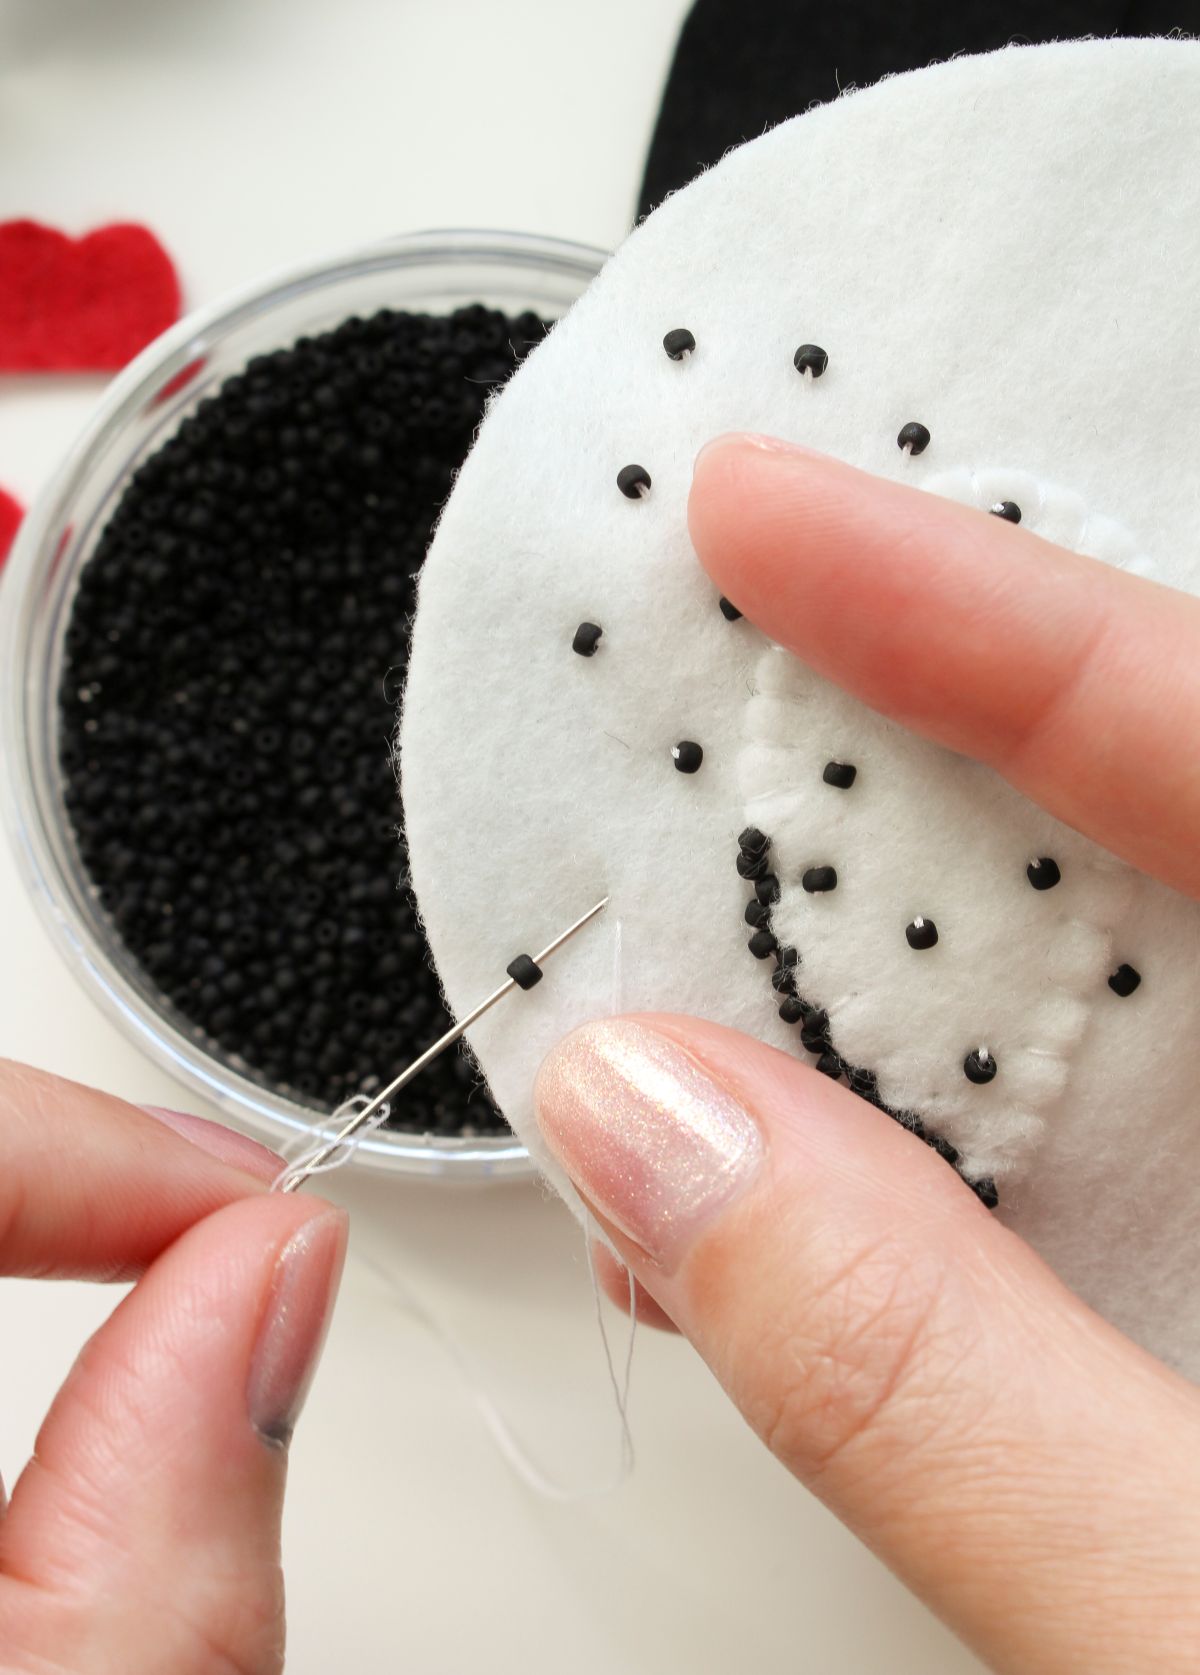
- Bring the needle up, slide on a seed bead, and then push the needle back down – repeat.
- Before stitching on all of the “speckles,” pause and move on to affixing the tail sequins and neck bugle beads to ensure there is room for those details (if you’re adding them).
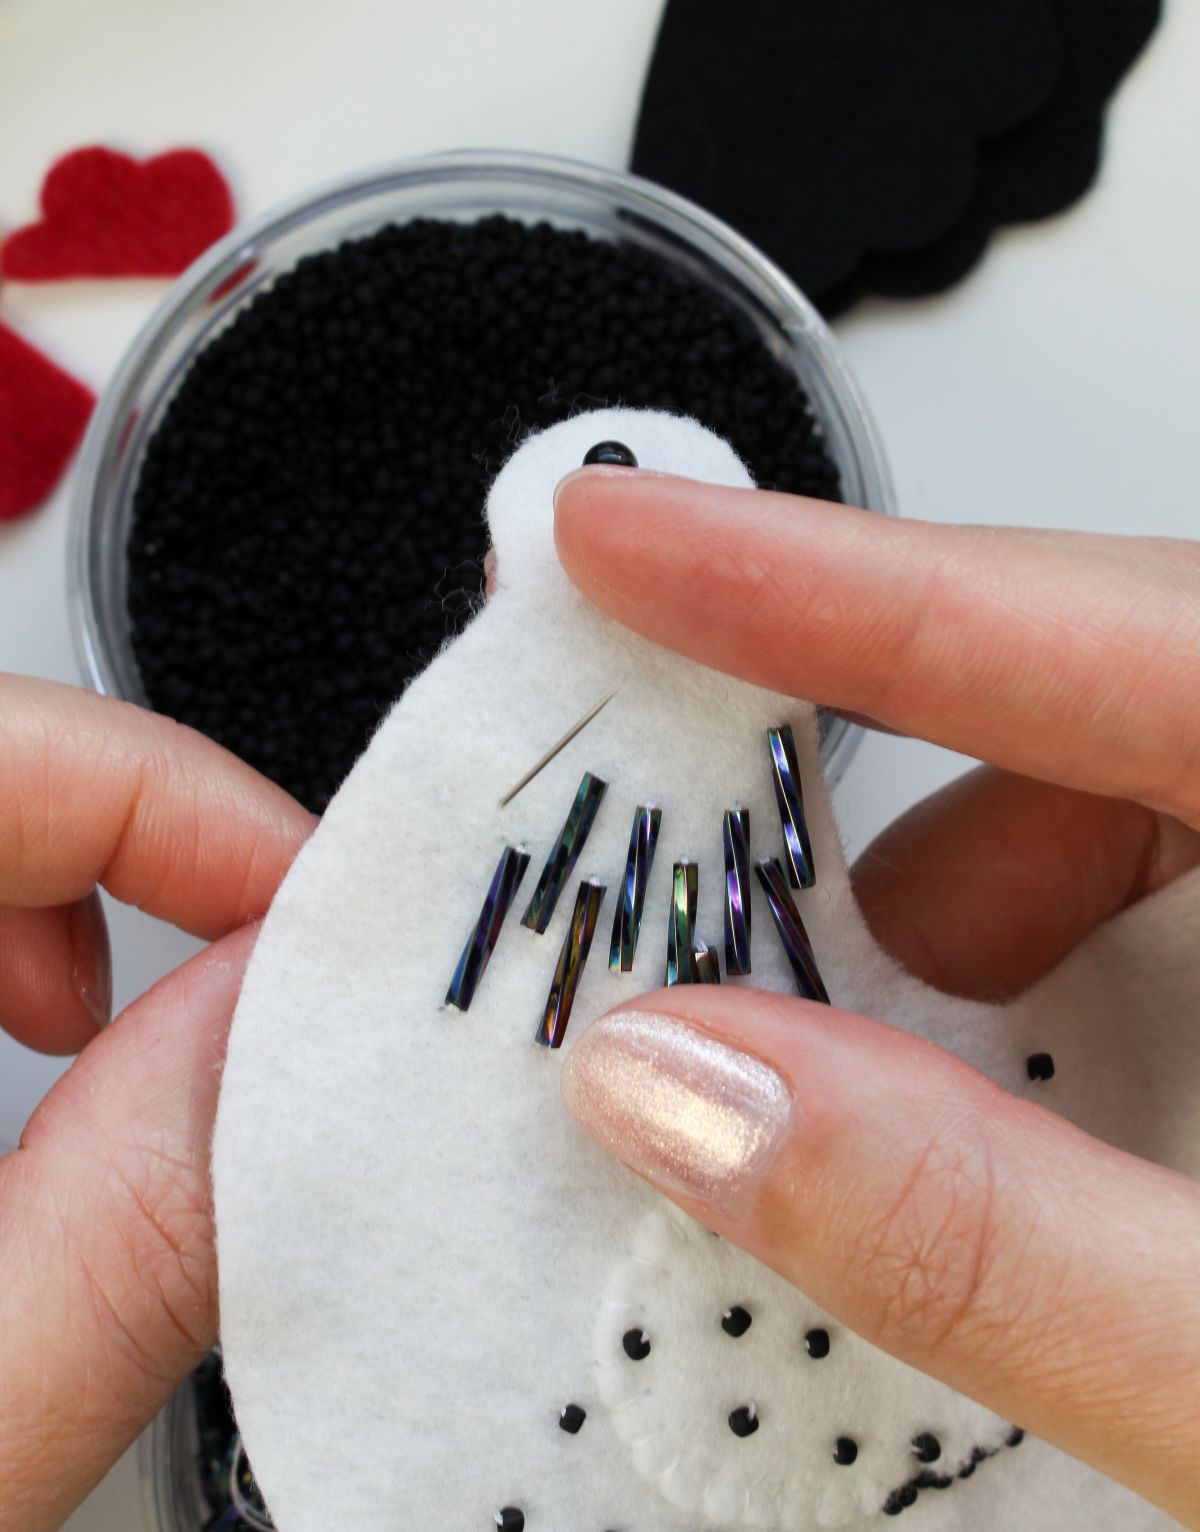
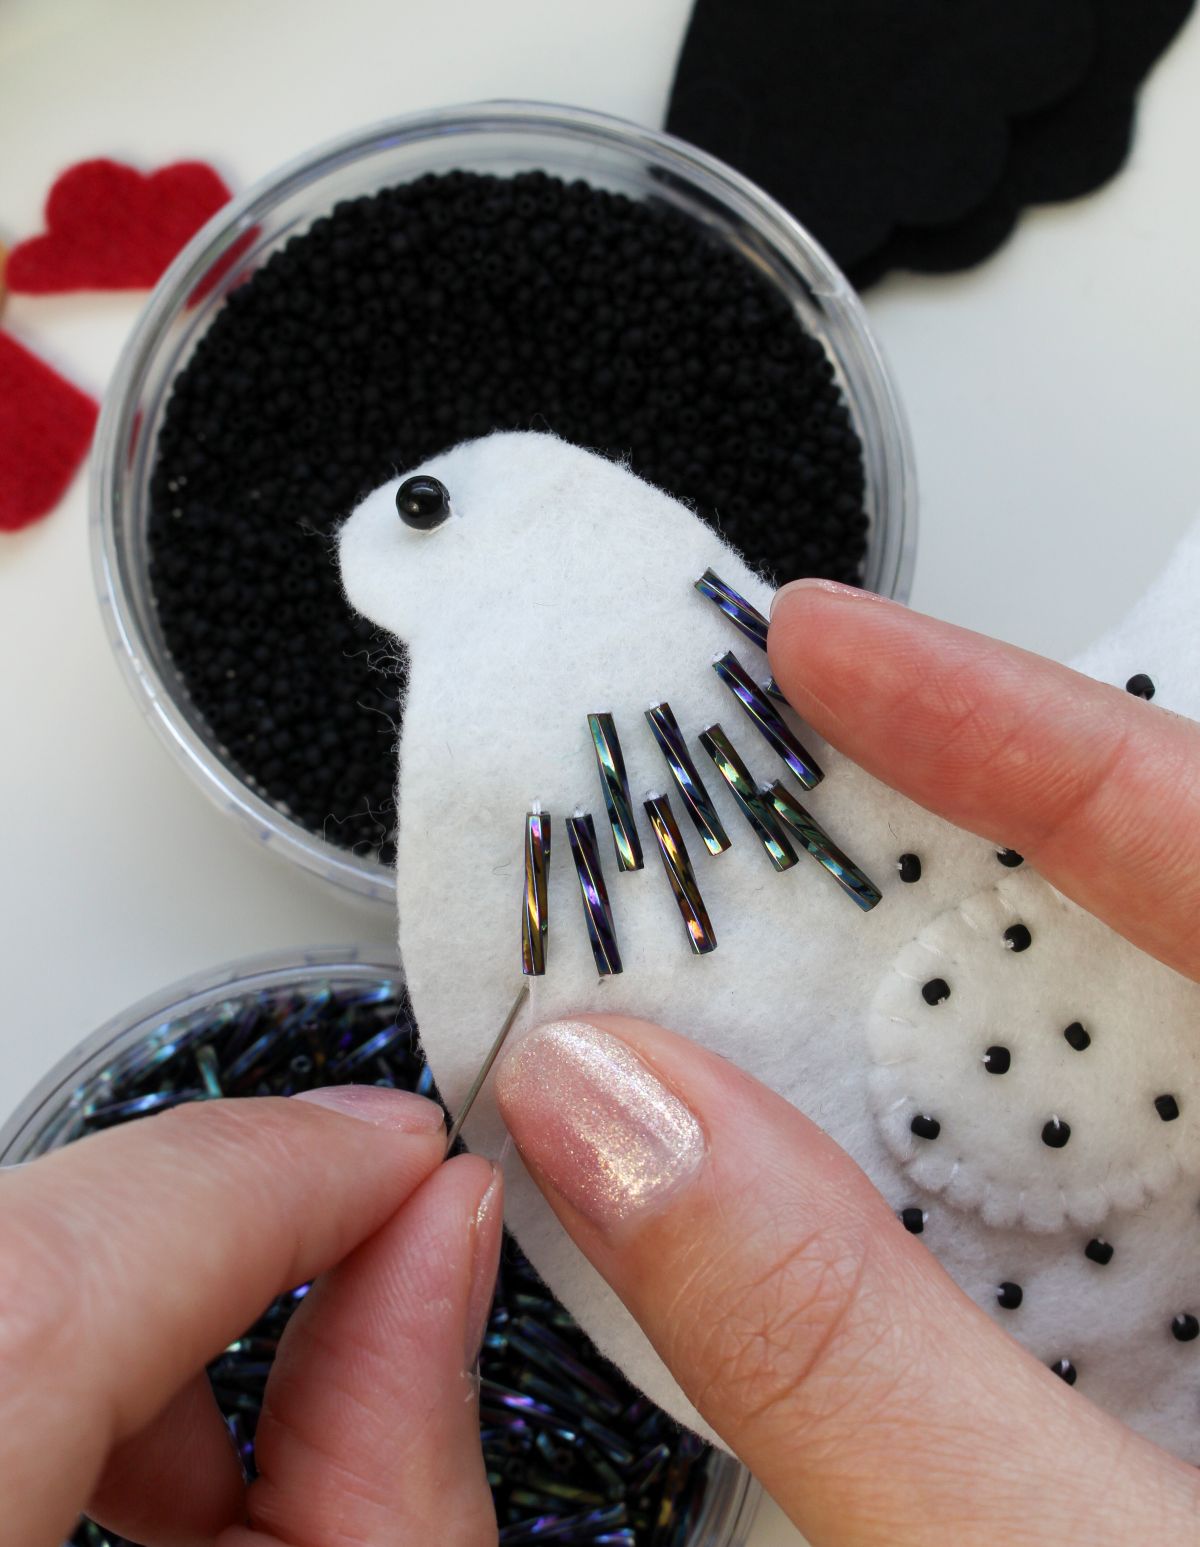
How to Stitch Bugle Beads onto Felt:
- Just like with the seed beads, bring the needle up from the backside of the felt.
- Slide on a bugle bead and position it in place.
- Then push the needle back down at the end of the bugle bead.
- Stitch through twice, because bugle beads can be sharp at the ends and so stitching through again will make it extra secure in case the glass frays the thread.
How to Stitch Sequins onto Felt:
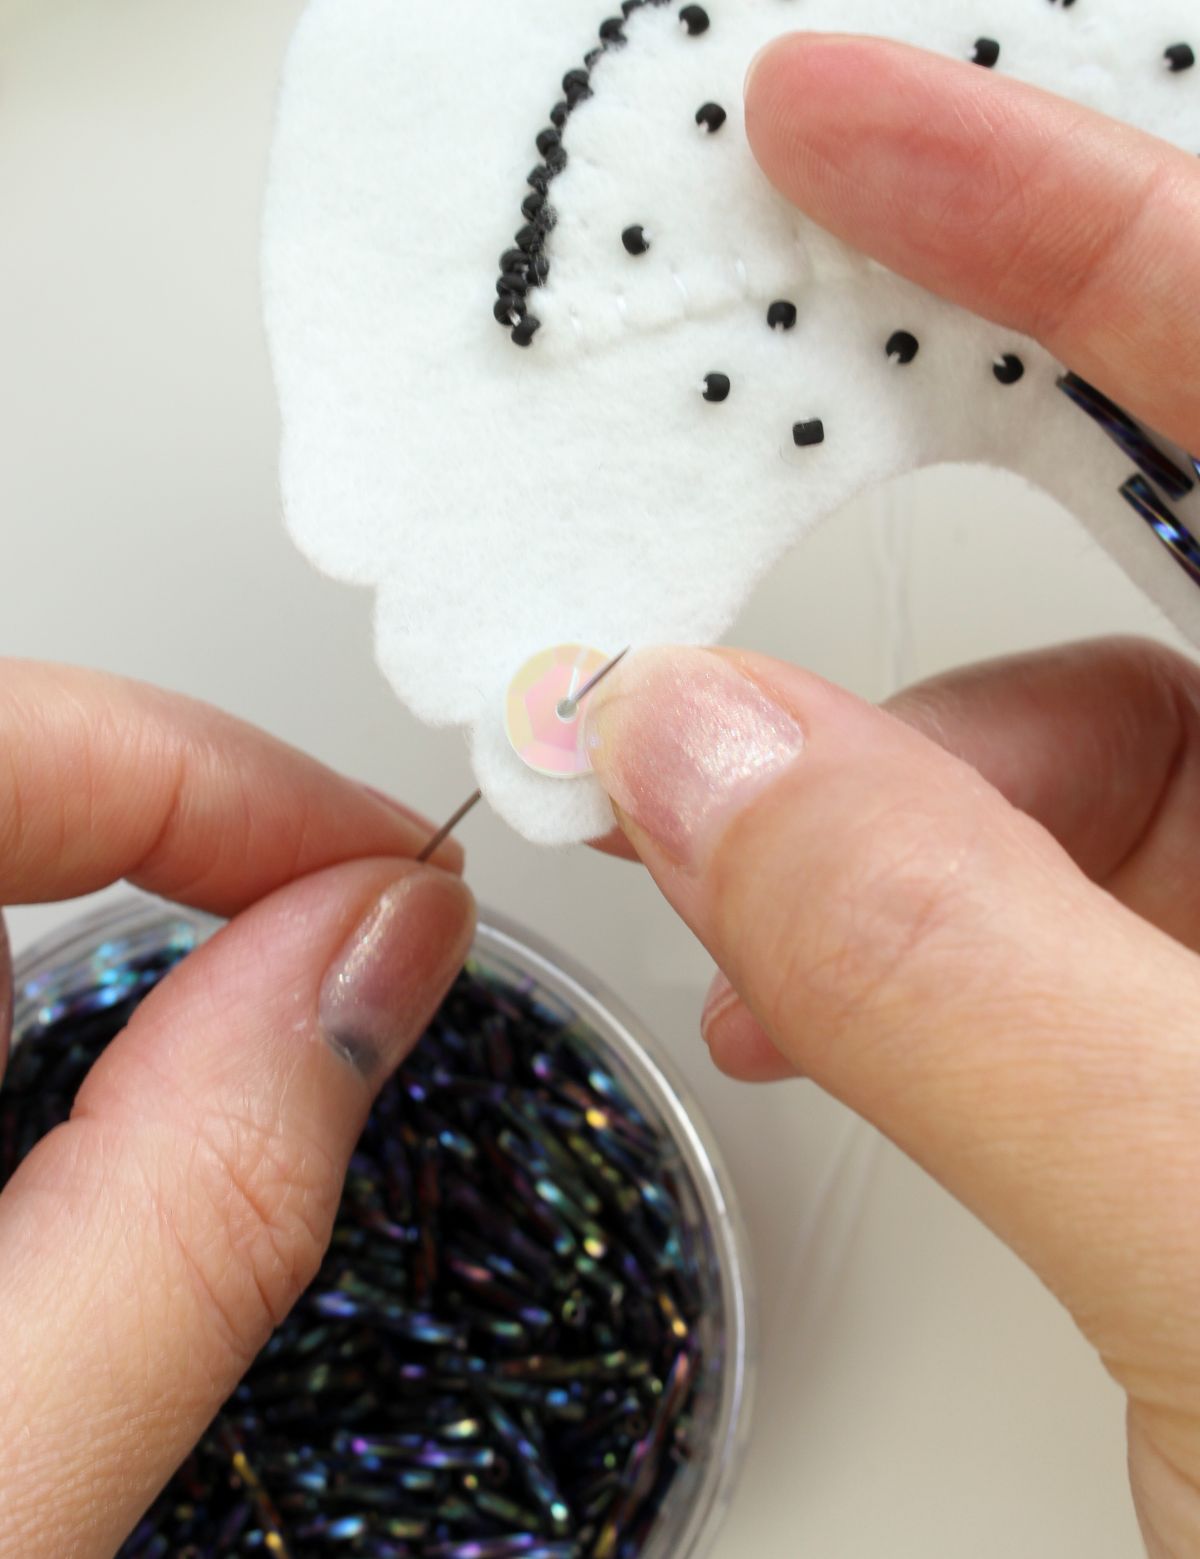
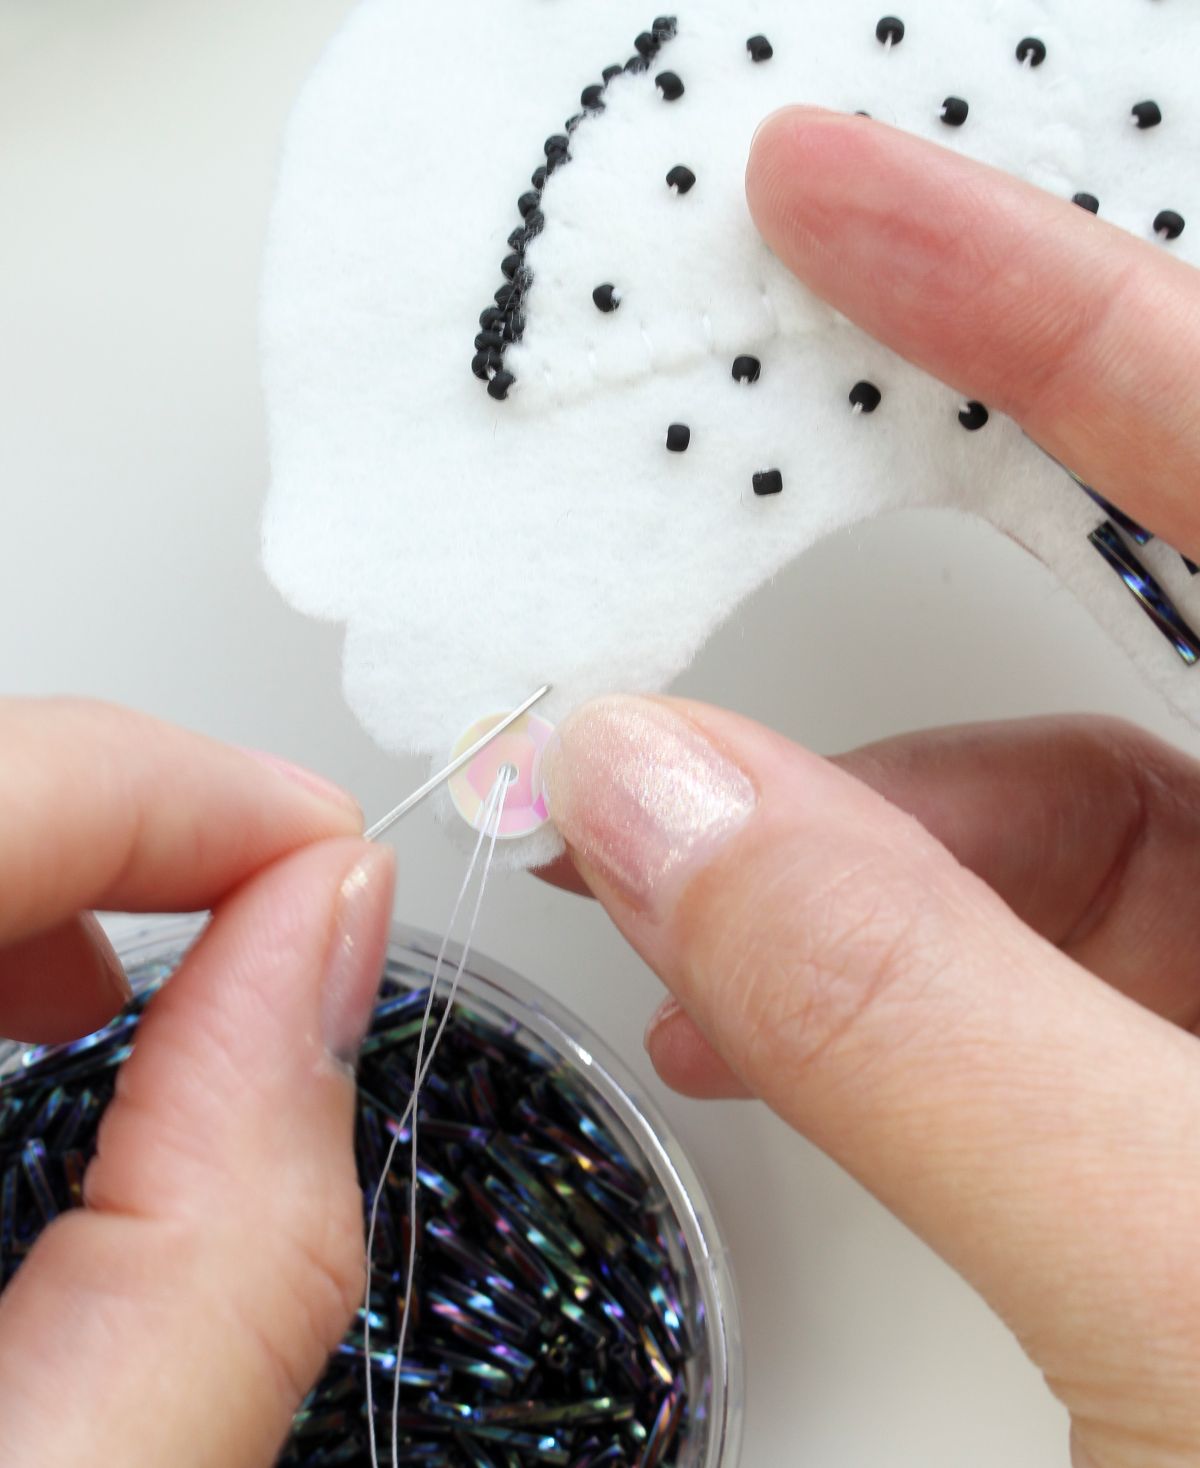
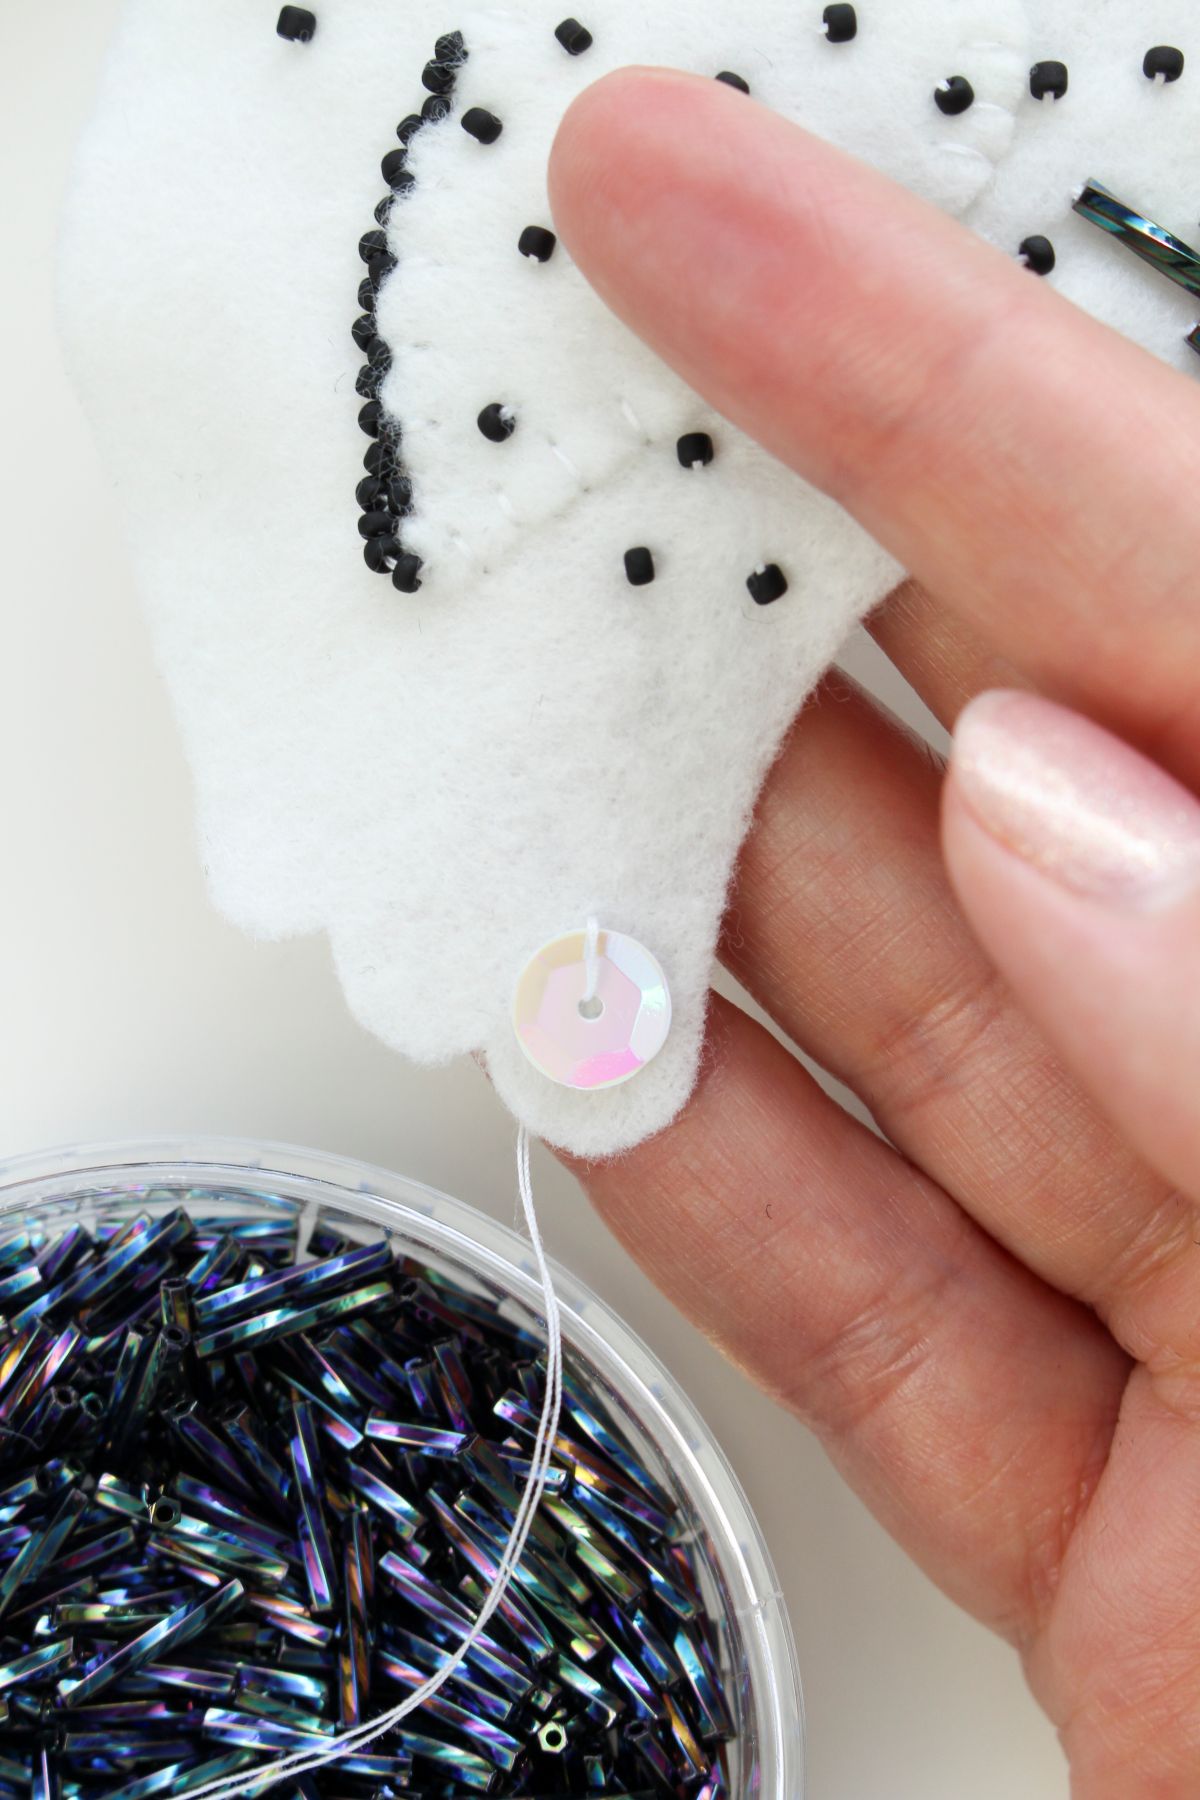
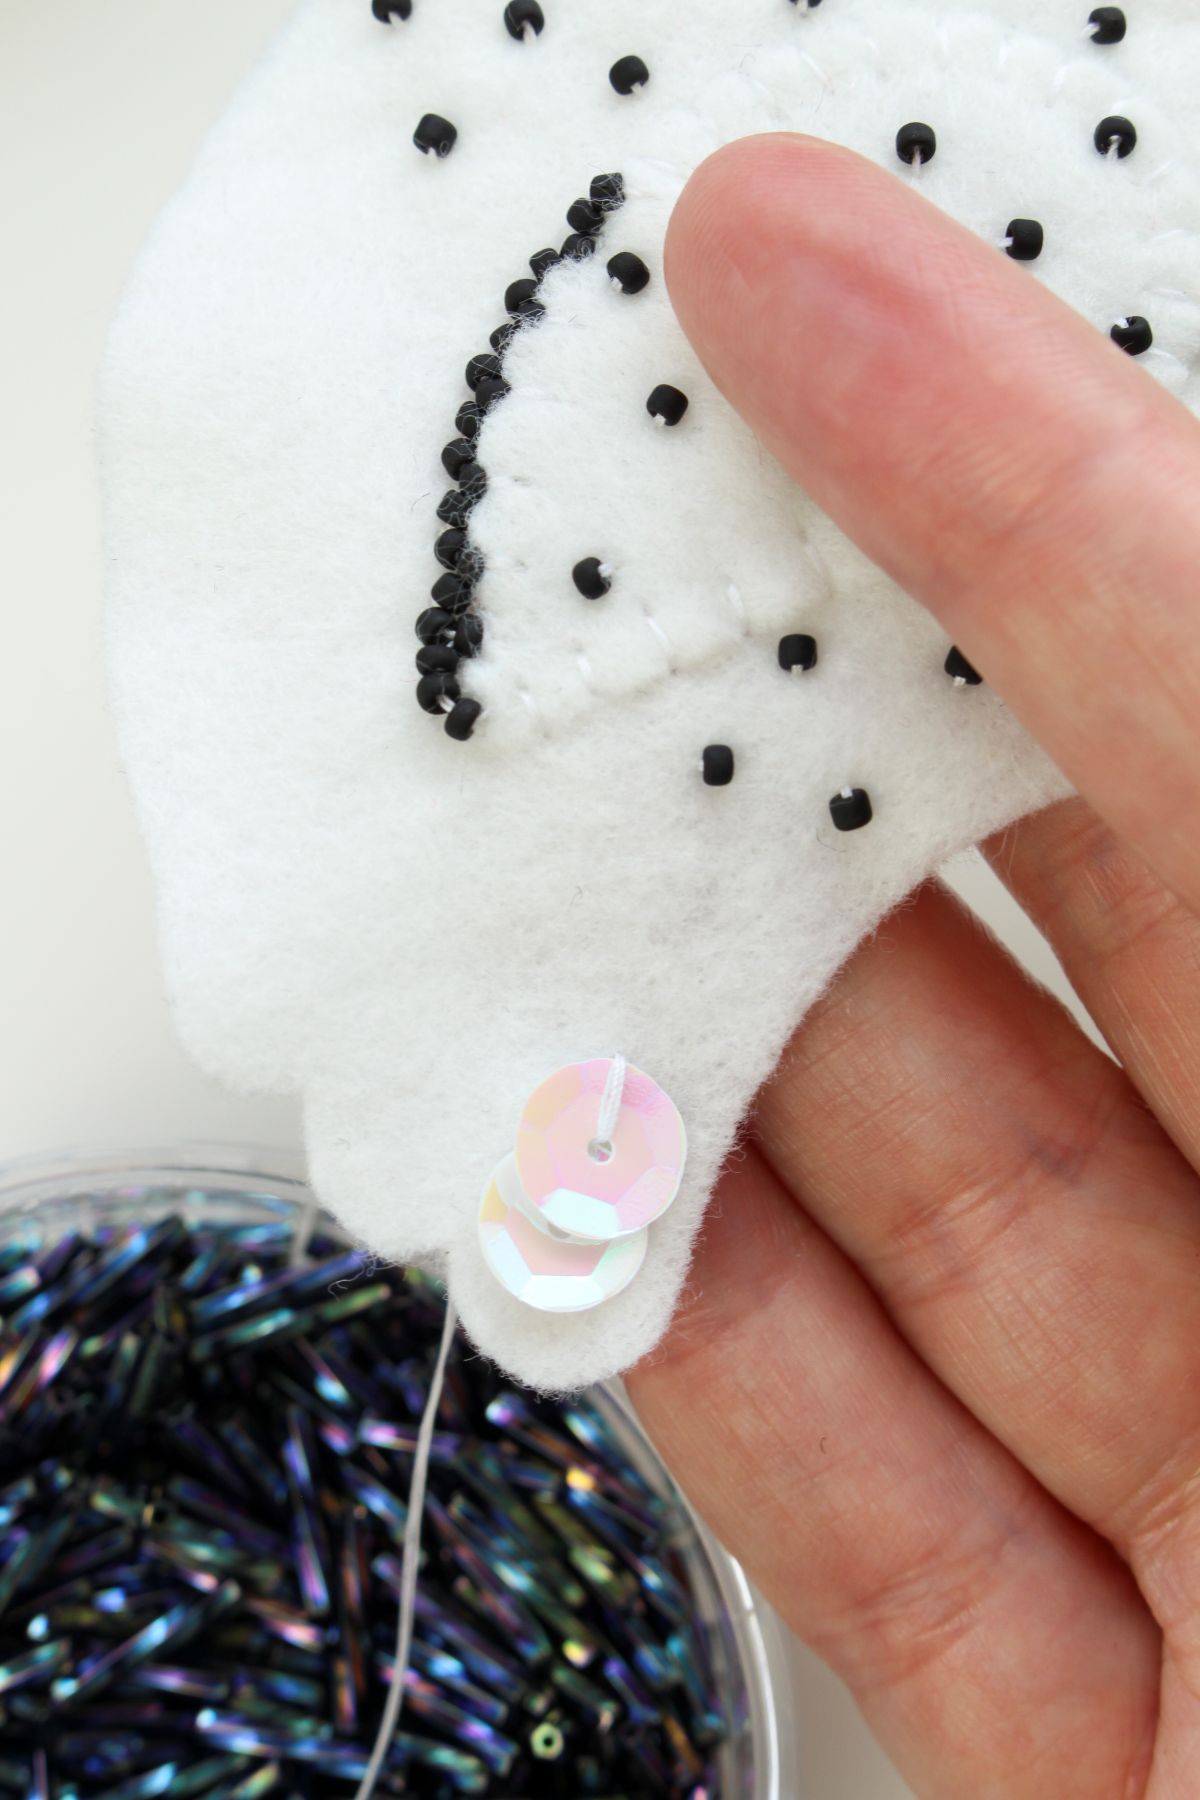
- There are different ways to stitch sequins onto felt, but for this tutorial we will use a single stitch (and you can use a beading or hand sewing needle).
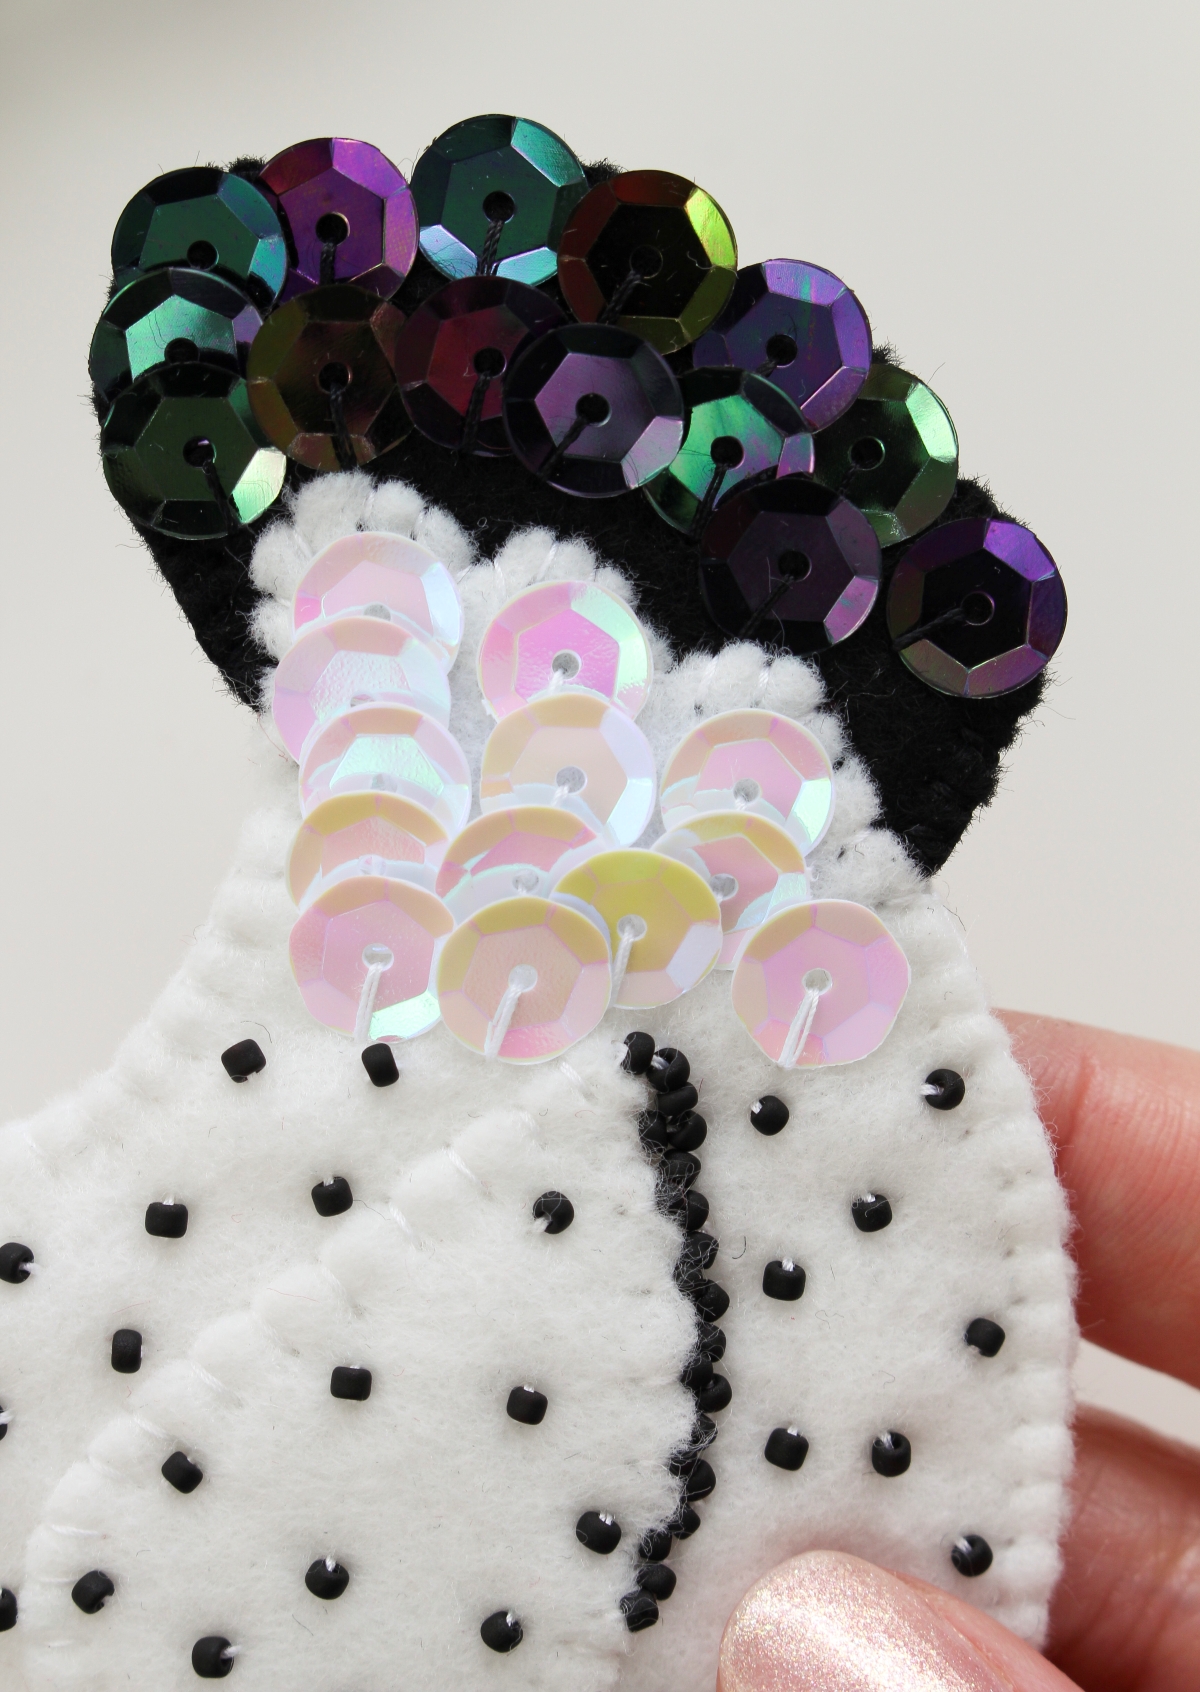
- Start at the edge of the ornament, working away from the edge so that each subsequent sequin hides the previous stitch.
- Position the sequin in place and bring the needle up through the center of the sequin.
- Stitch across the sequin away from the edge of the ornament and push the needle back down.
- Repeat, placing the next sequin as close as possible so it hides the thread.
- Repeat in a row, tying a knot at the back of the ornament after each row.
- Repeat for a few rows so the sequins look like “feathers”.
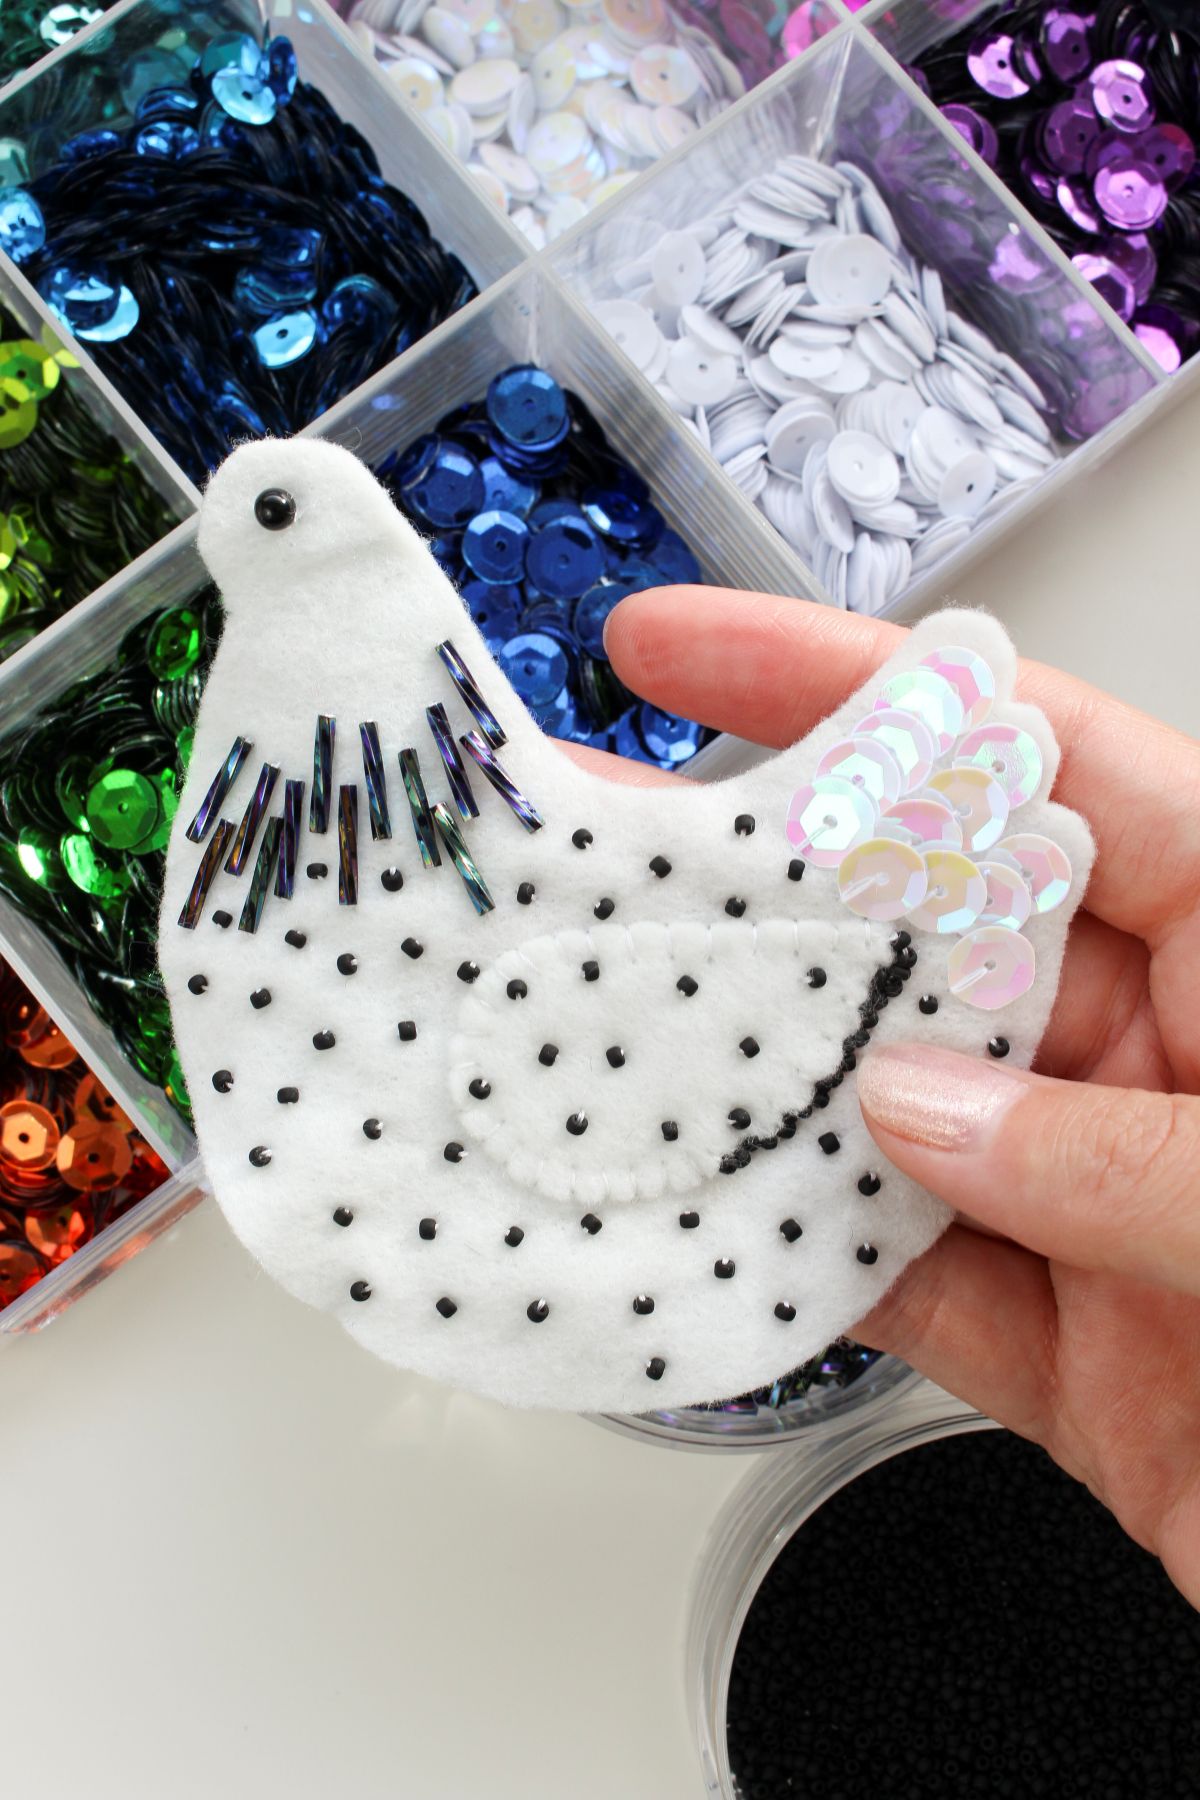
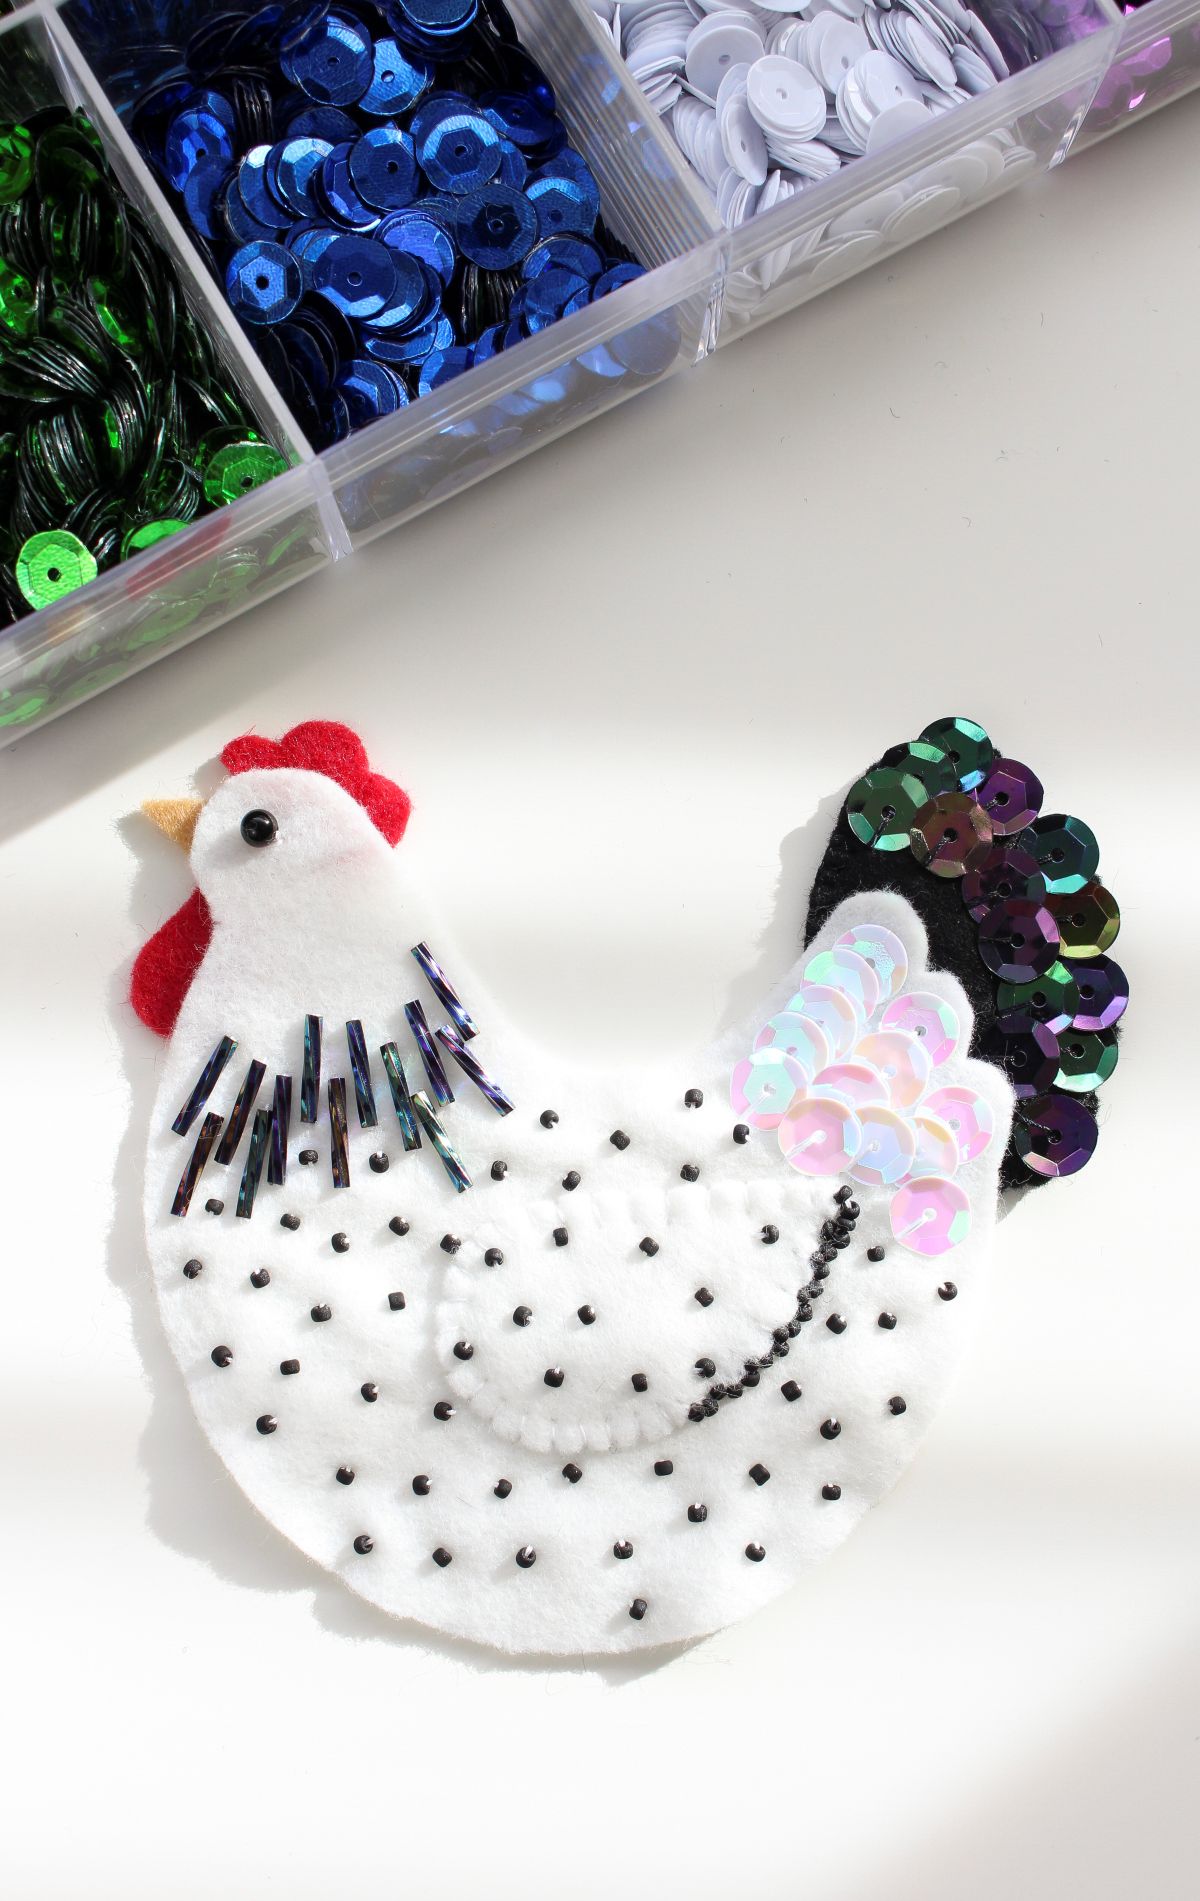
At this point, the front of the felt chicken ornament will look like this:
How to Stitch Beads + Sequins onto Felt Video:
If you’d like to see a quick video tutorial for how to stitch beads and sequins onto felt, watch this quick beading guide I made to help you better visualize this embellishment process.
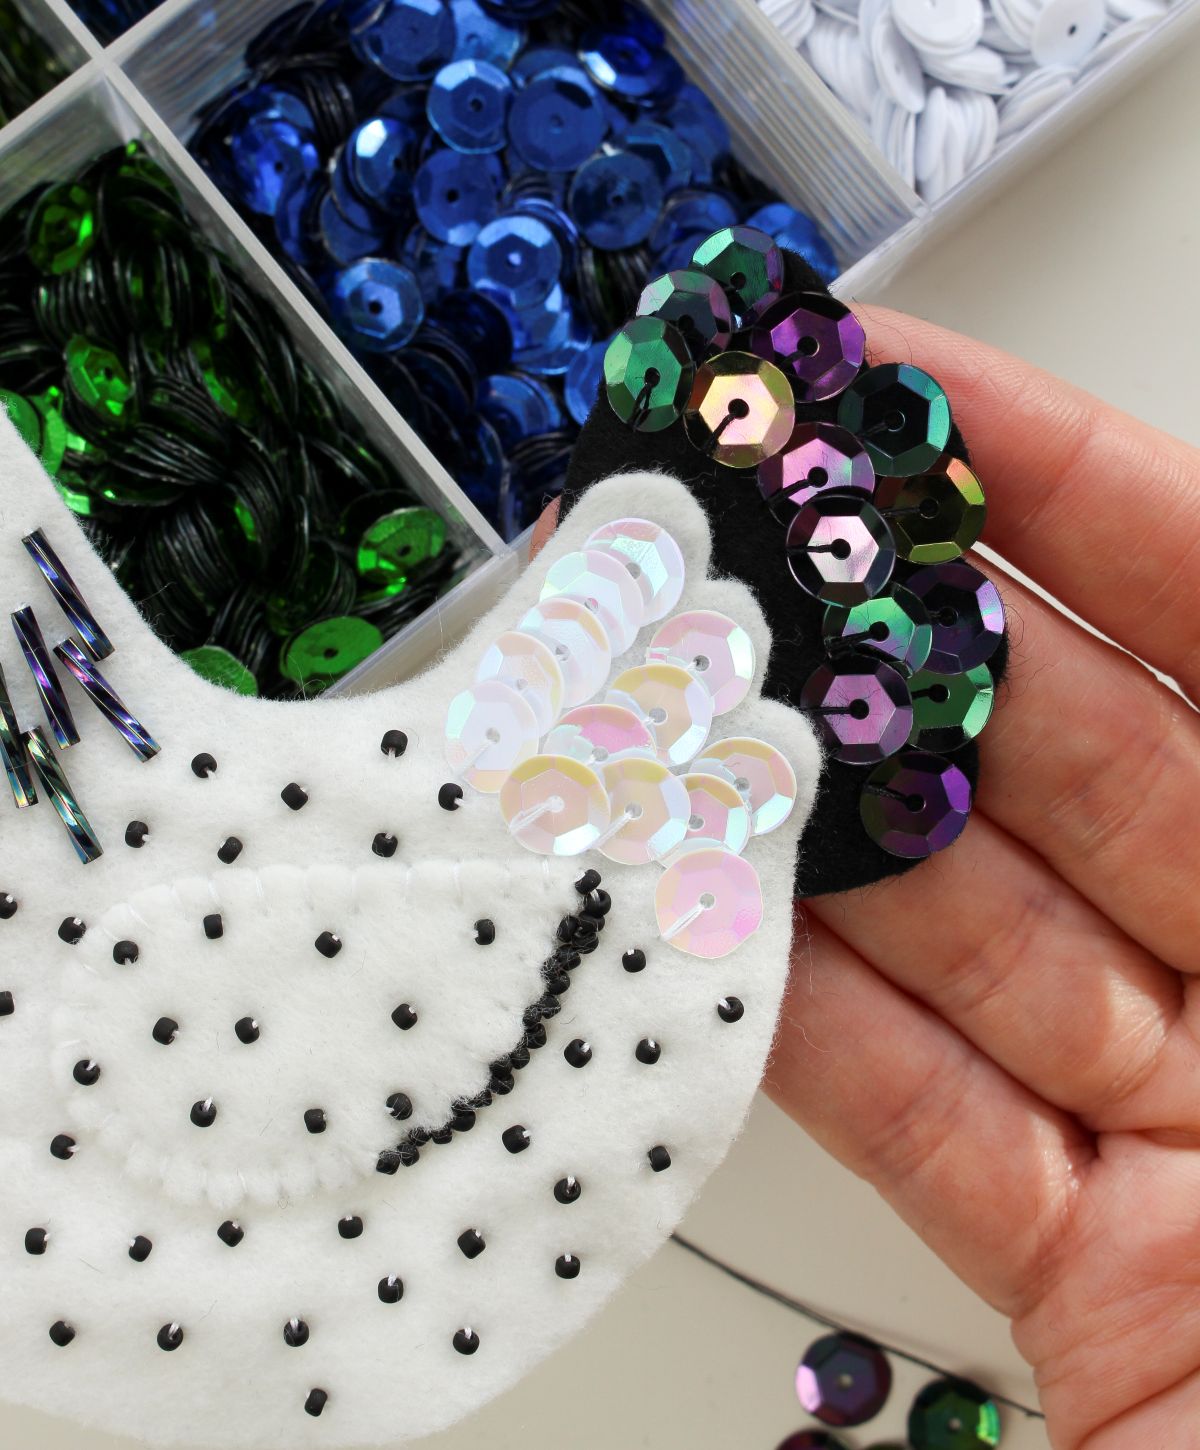
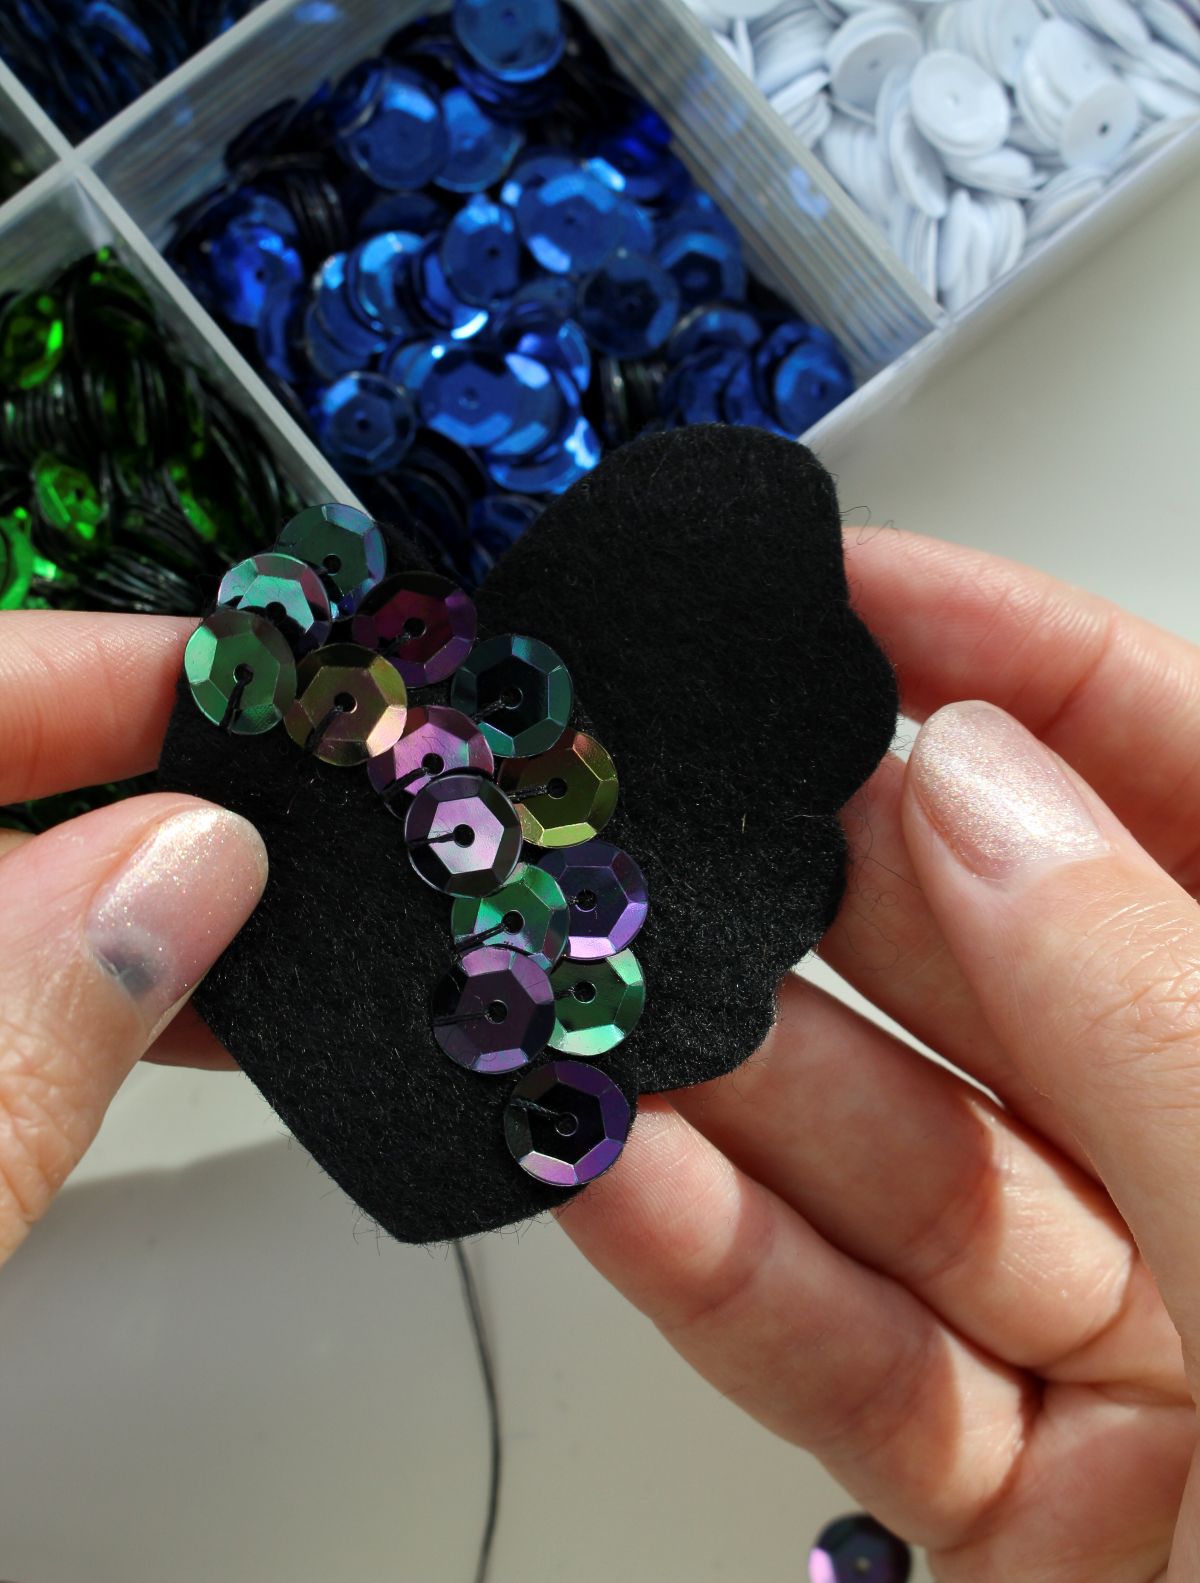
How to Make the Chicken Tail:
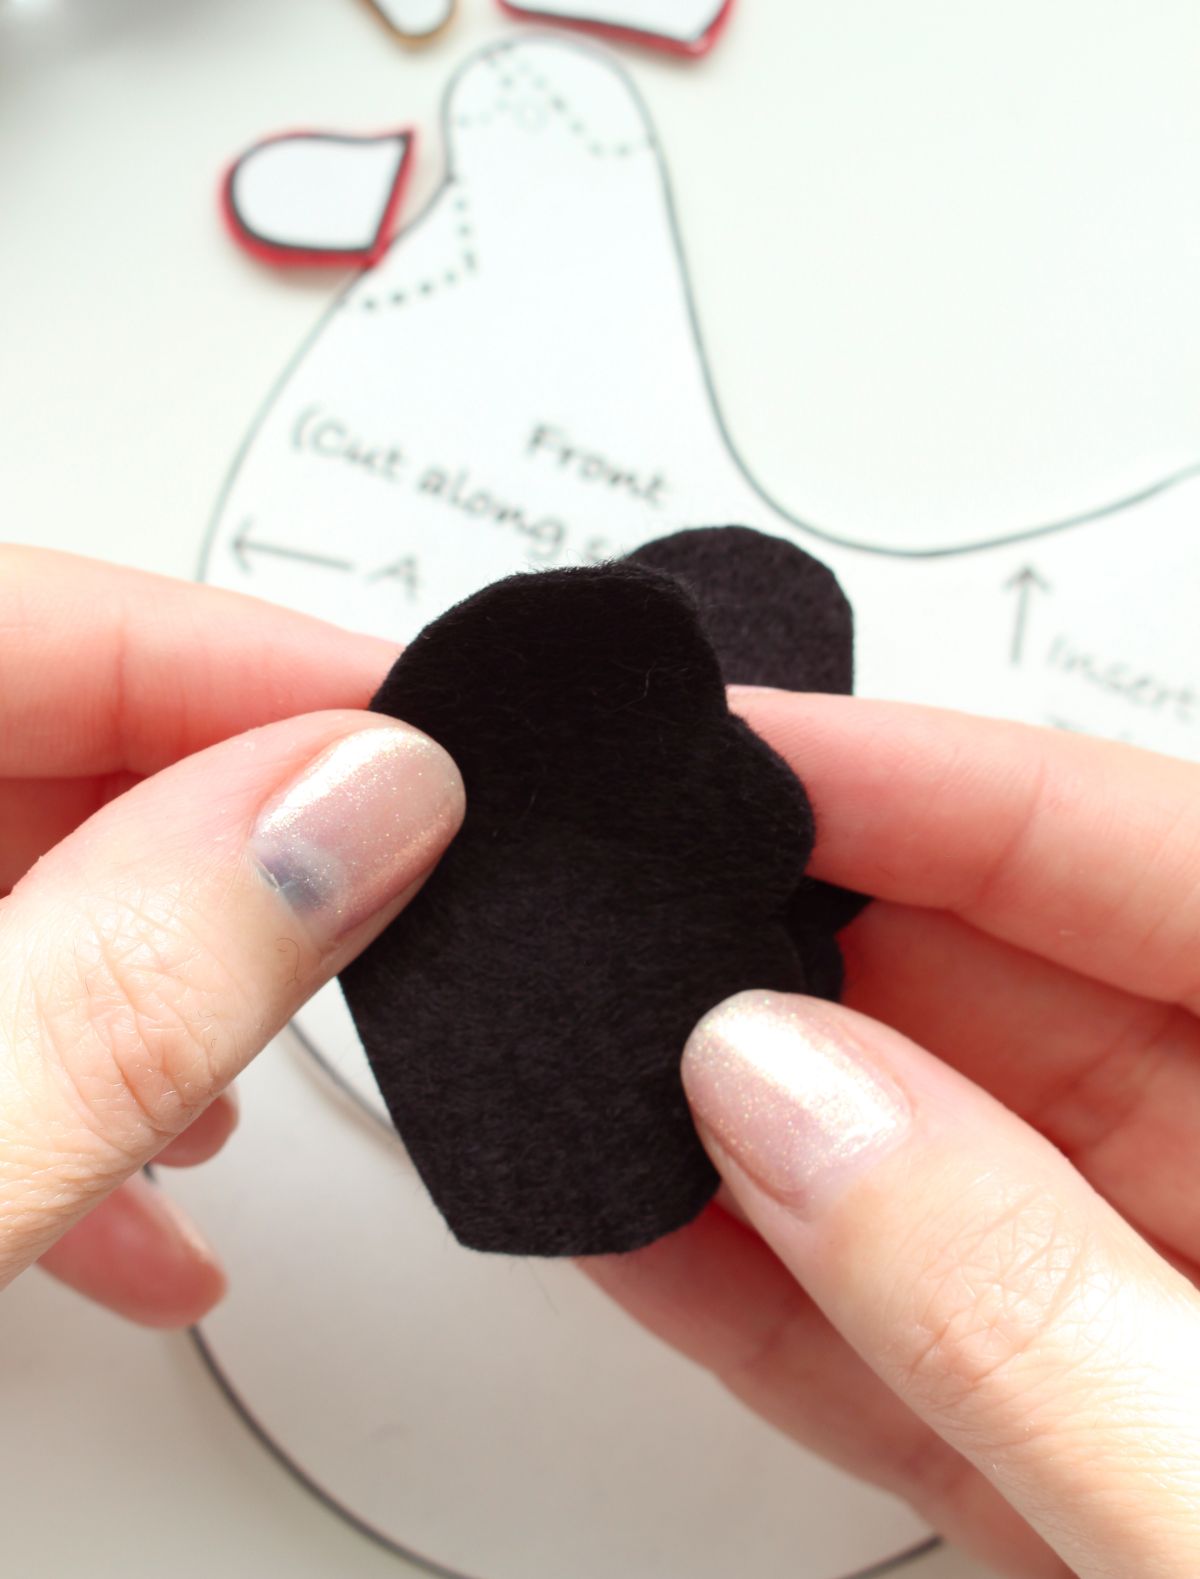
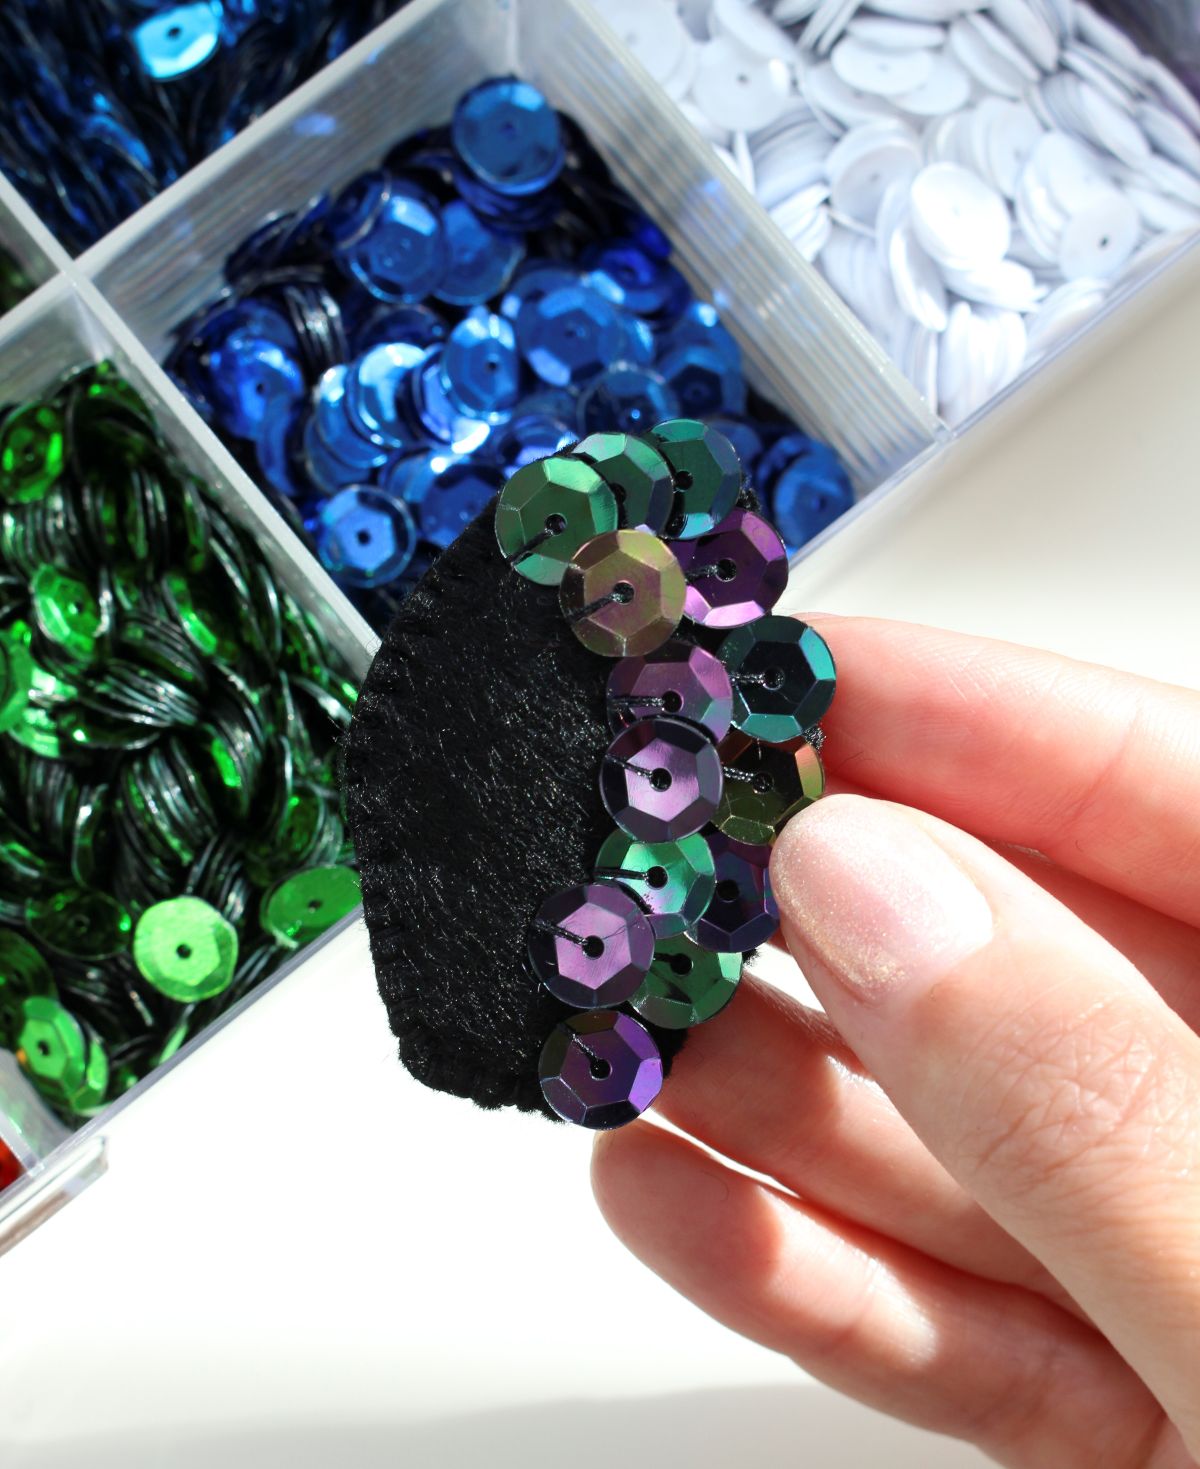
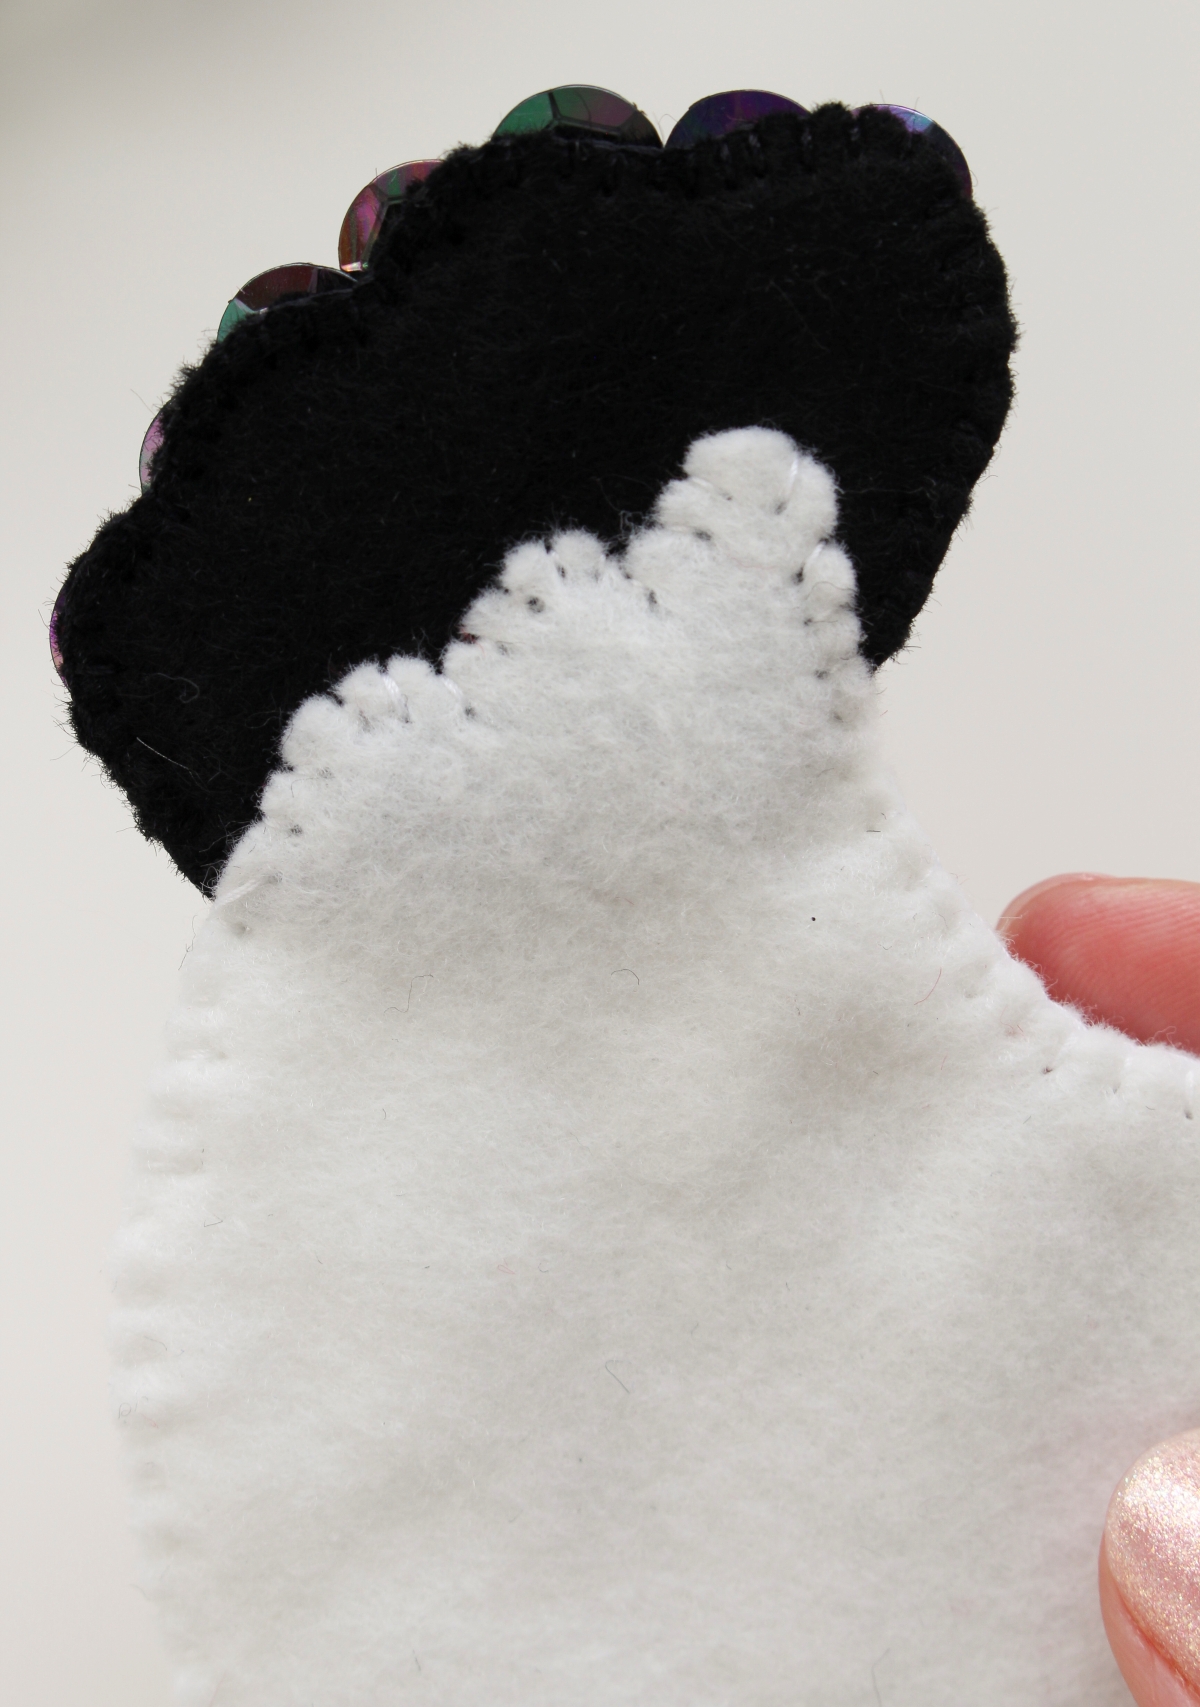
The chicken tail has a front and back, to hide the thread used to stitch on the sequins and also to give it some rigidity so it keeps its upright shape and doesn’t flop over.
- Thread a beading needle and tie off the two ends of thread.
- Stitch on short rows of sequins, with the same steps outlined above (it’s ok if the edge of the sequins extends past the edge of the felt a little).
- Check the fitment to make sure you are not adding sequins where the tail will be sewn into the chicken body.
- Using a blanket stitch (you can keep using the beading needle), sew together the front and back of the tail with small stitches in a matching thread.
How to Make the Beaded Wire Chicken Feet:
If you prefer, you can skip this step or you can make feet with pipe cleaner or just wire, if you’re feeling creative. If all of this sounds too complicated, the felt chicken ornament looks adorable even without beaded chicken feet:
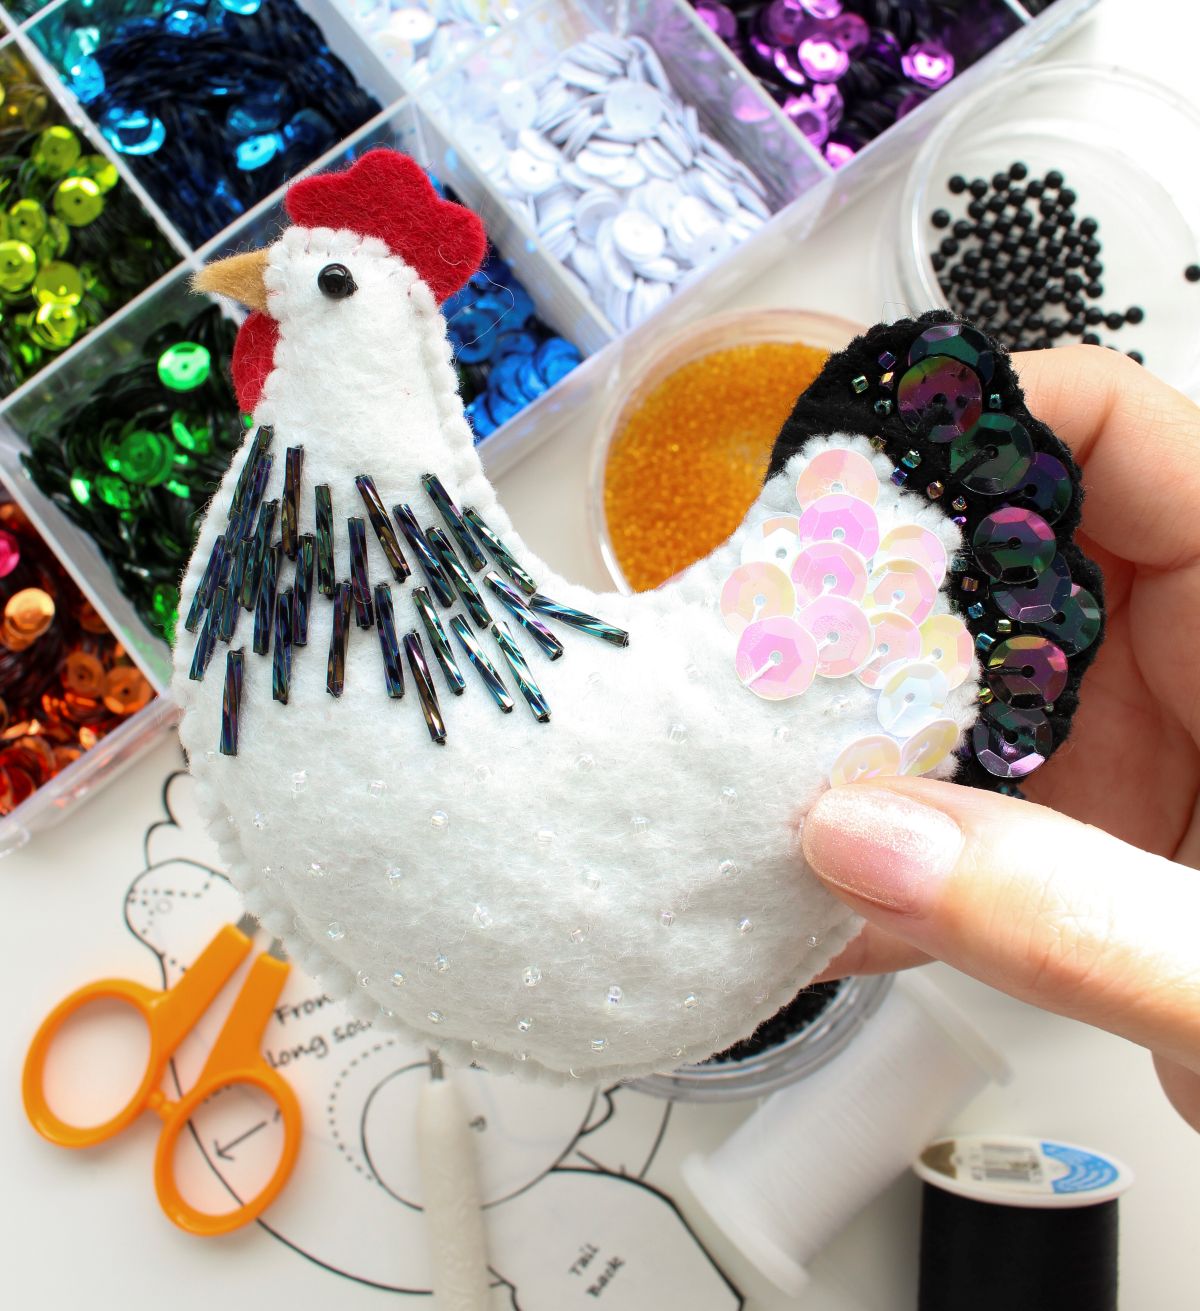
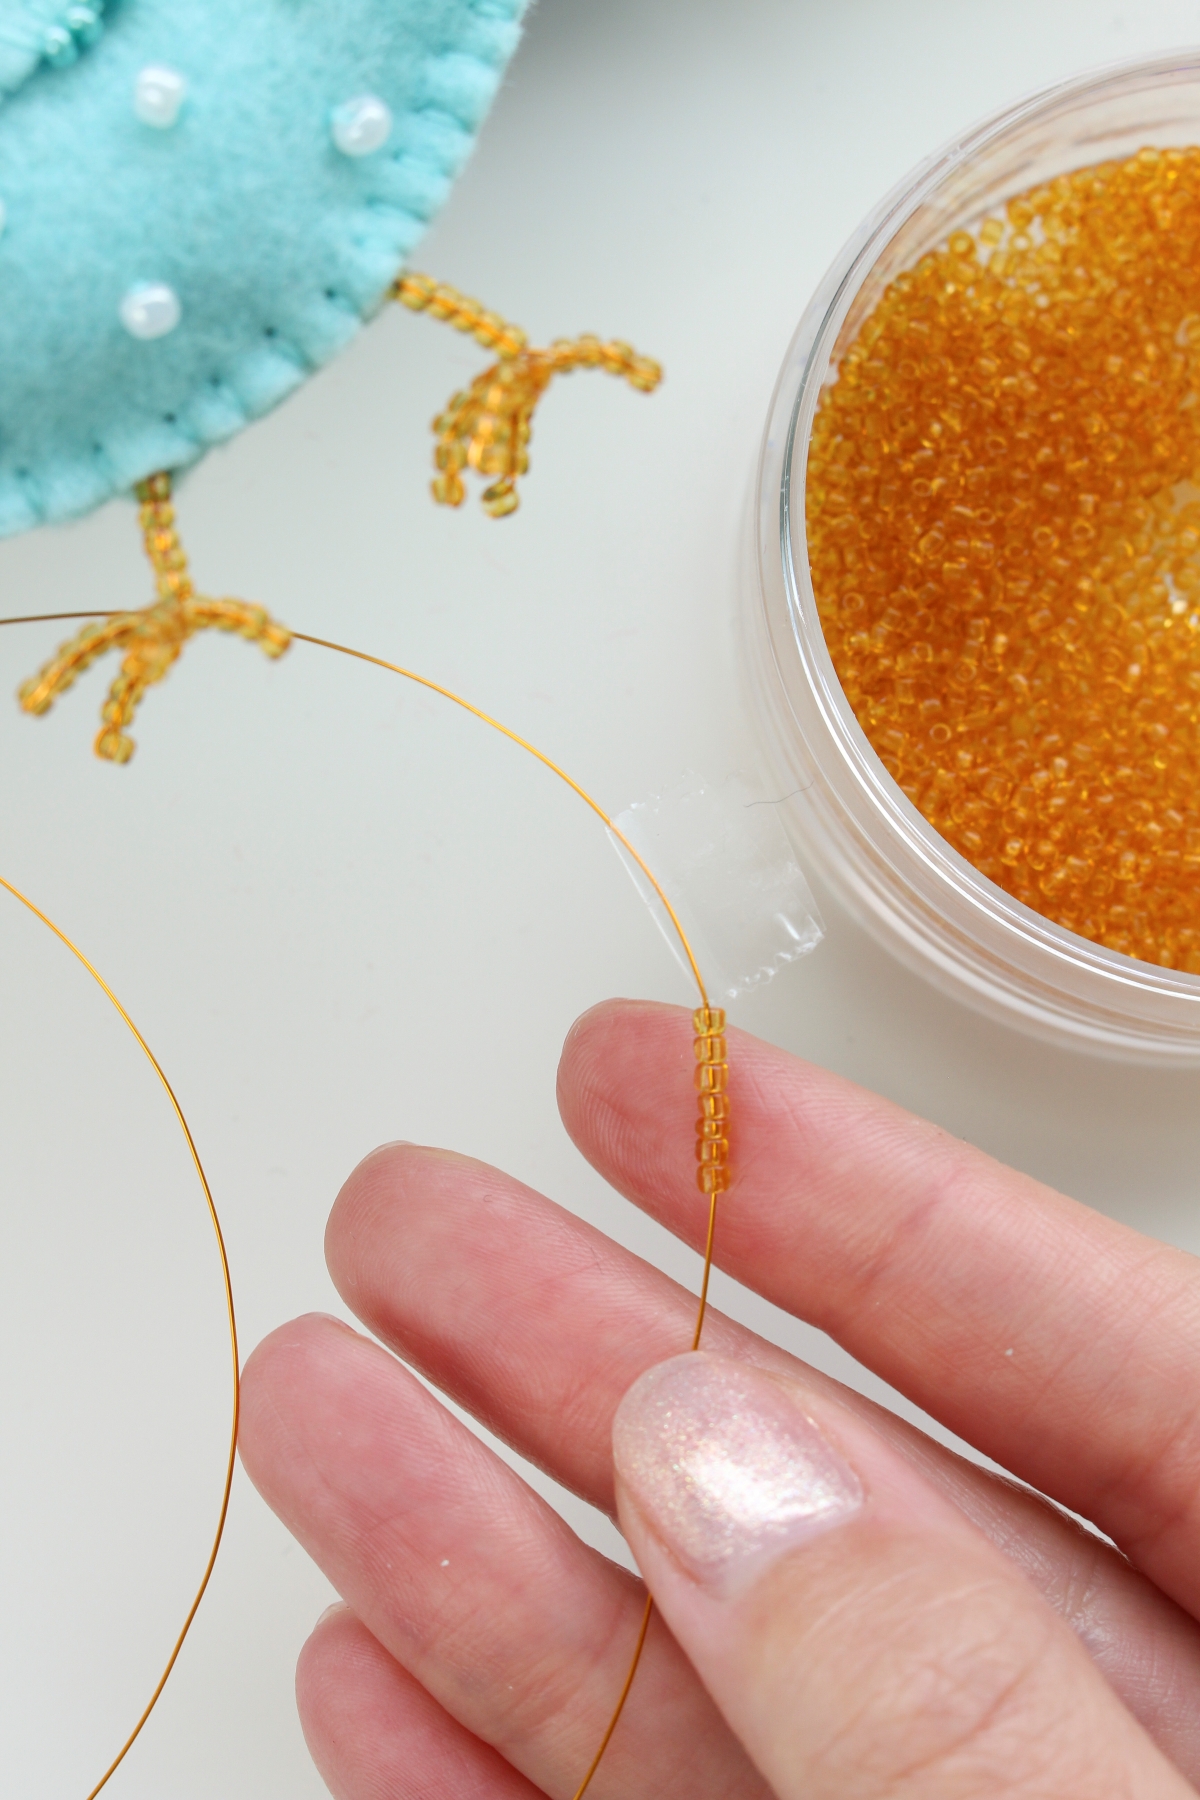
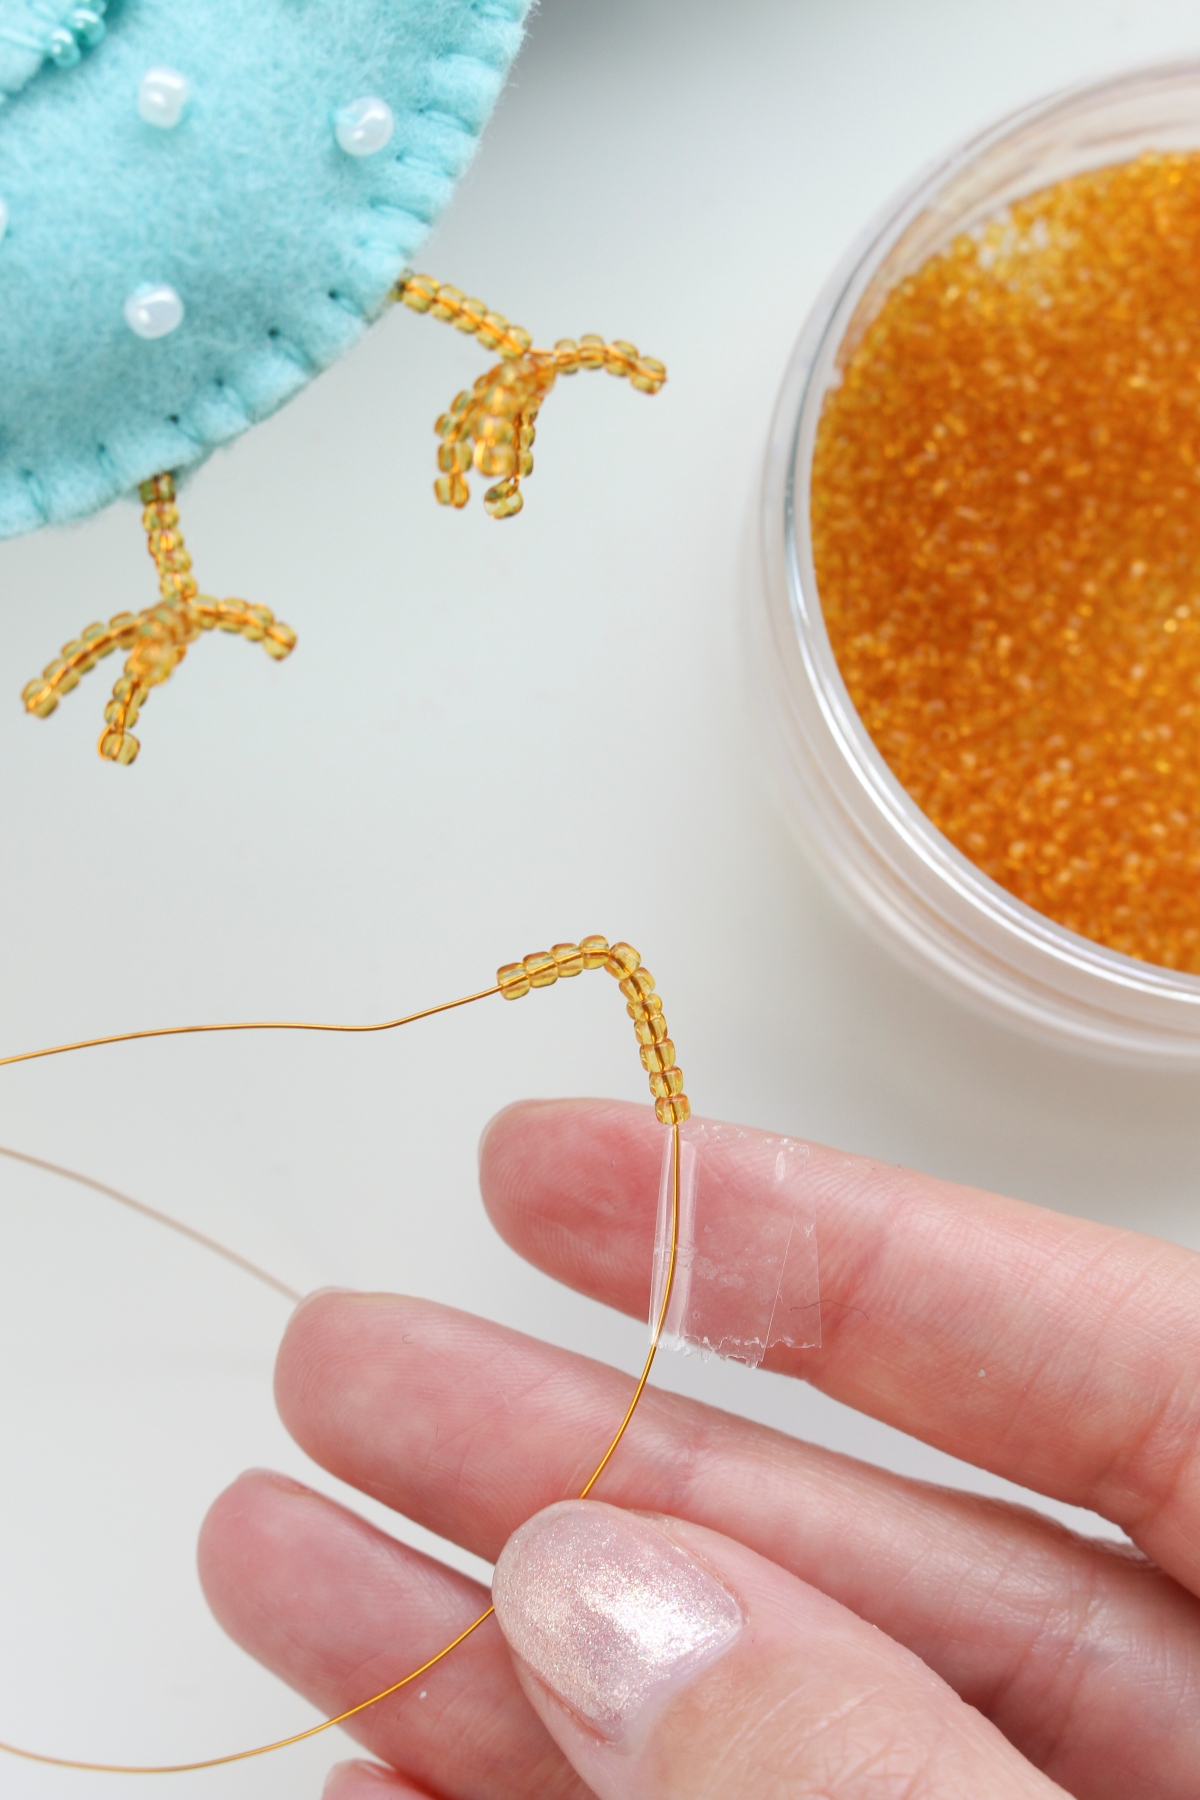
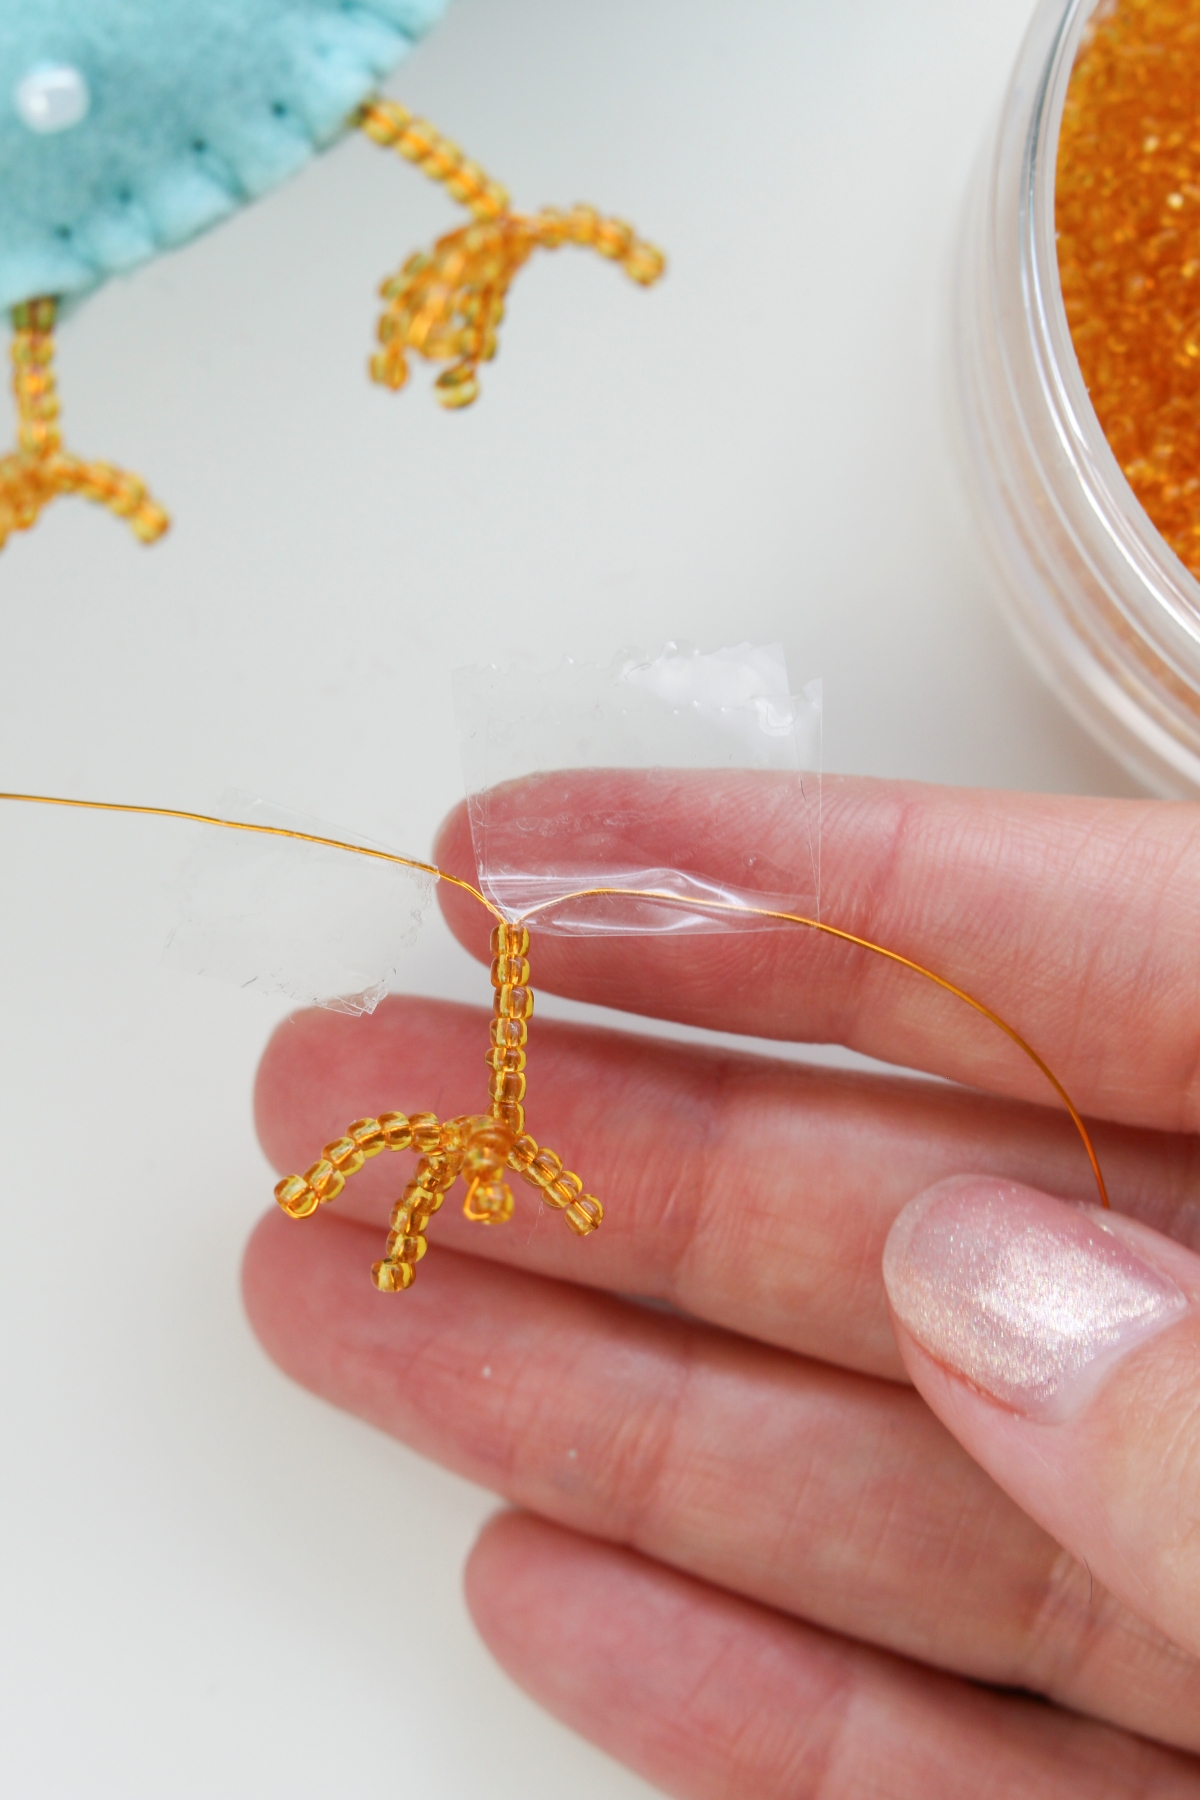
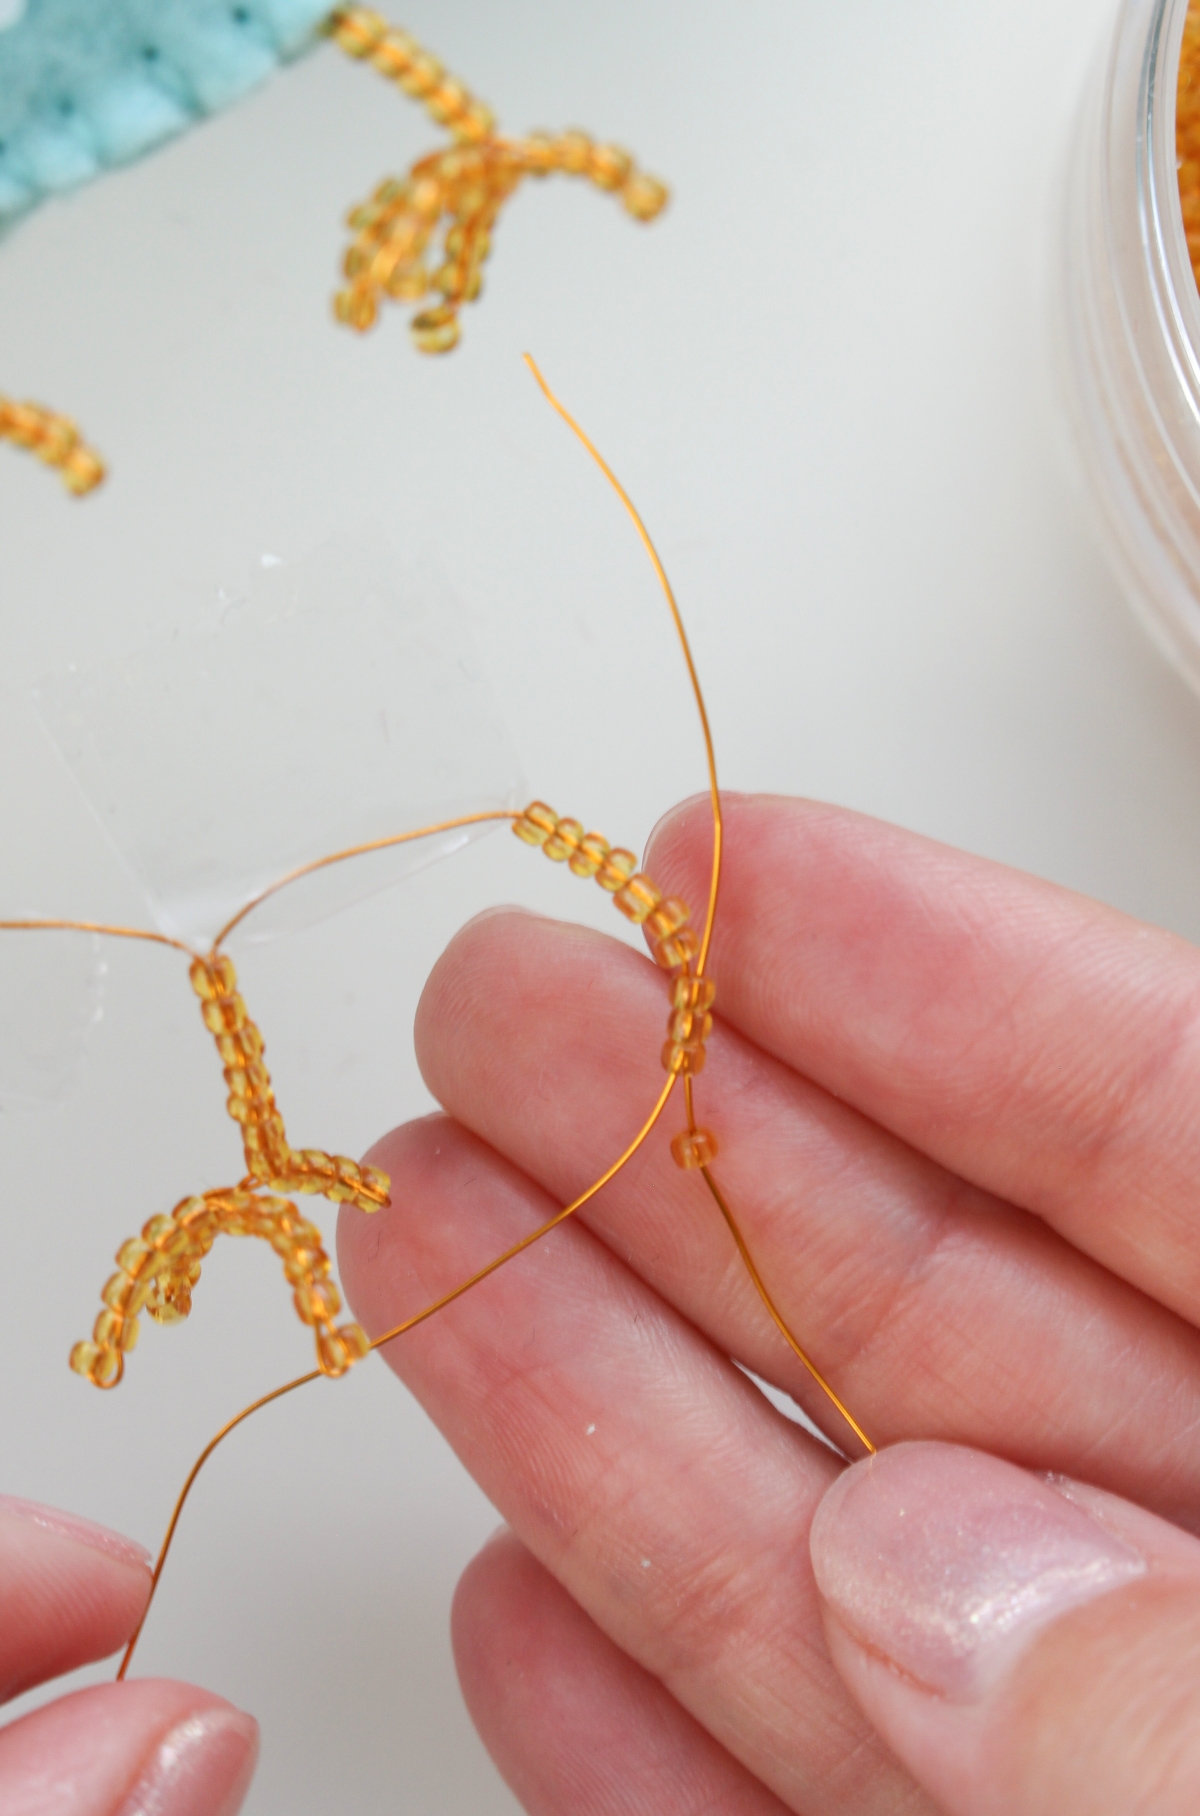
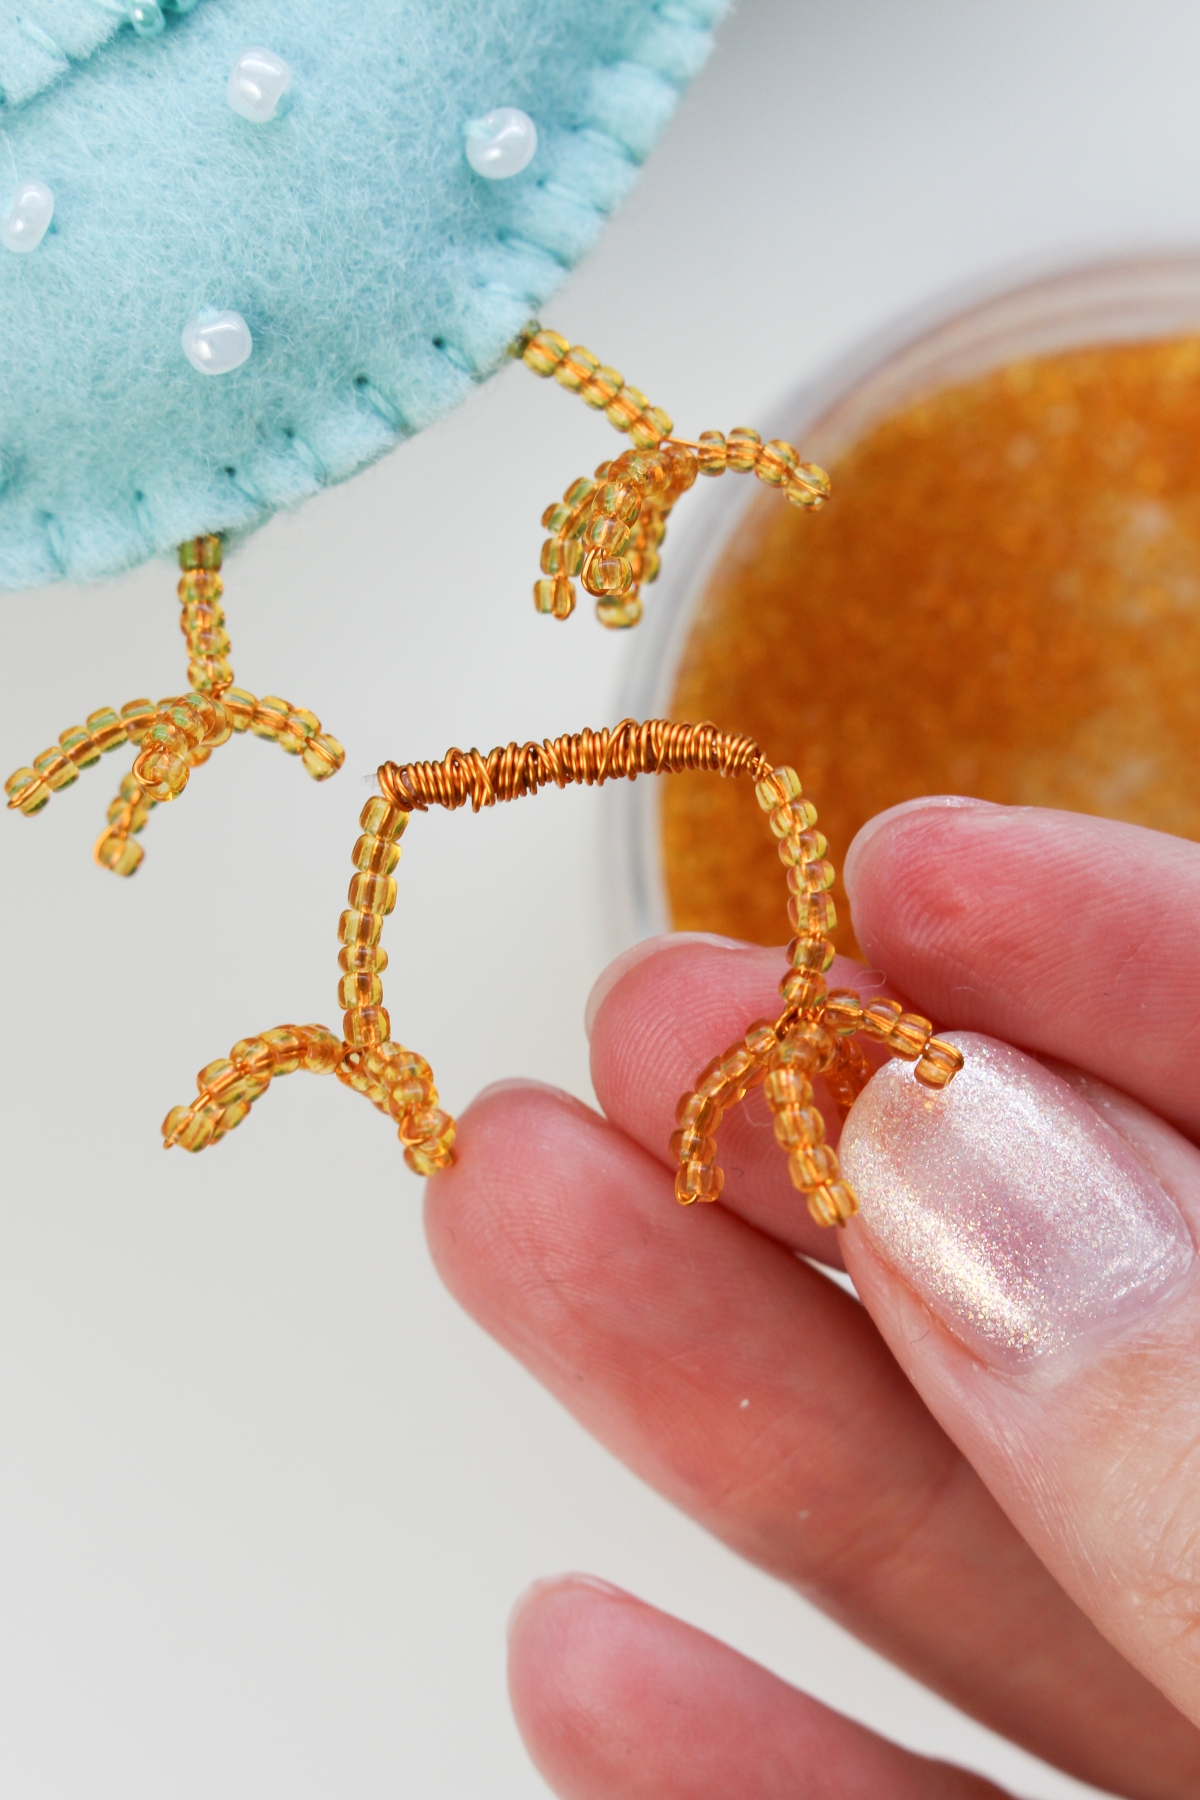
But if you’d like to try making the beaded wire feet, here’s the tutorial along with some detailed photos so you can better see this aspect of the felt hen ornament design:
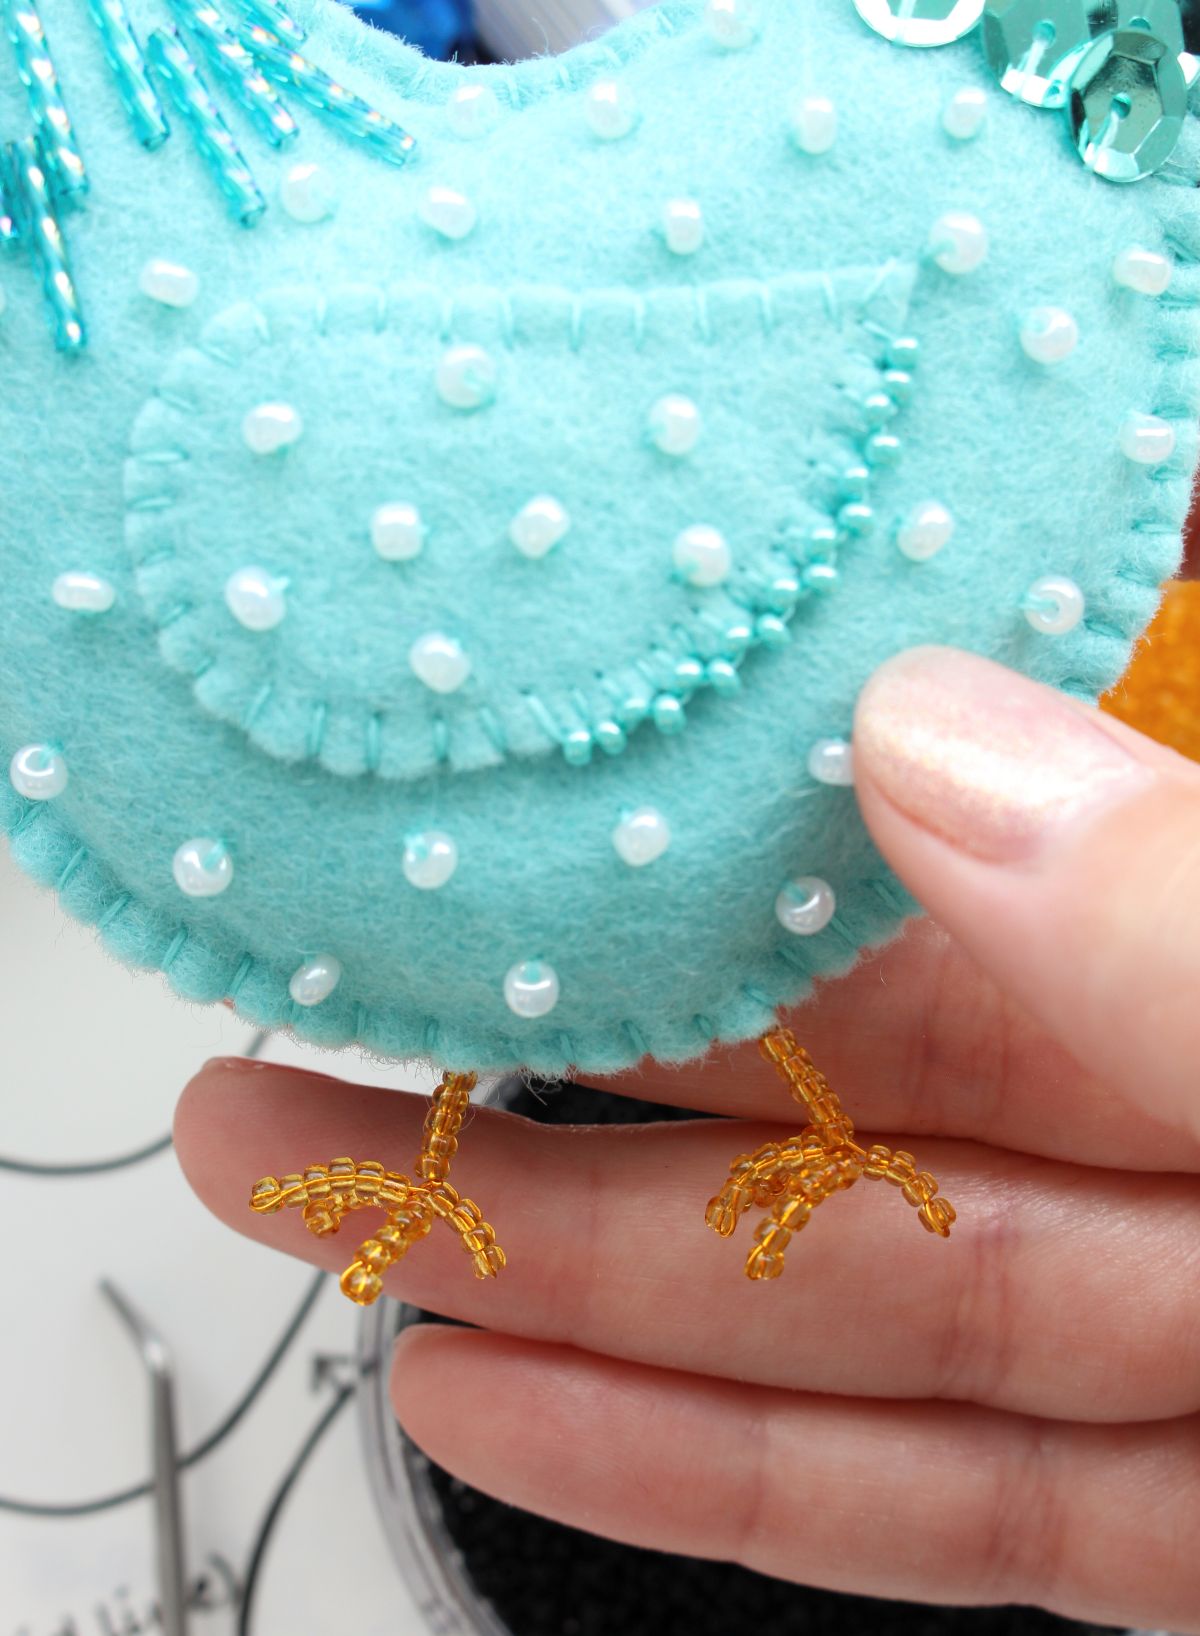
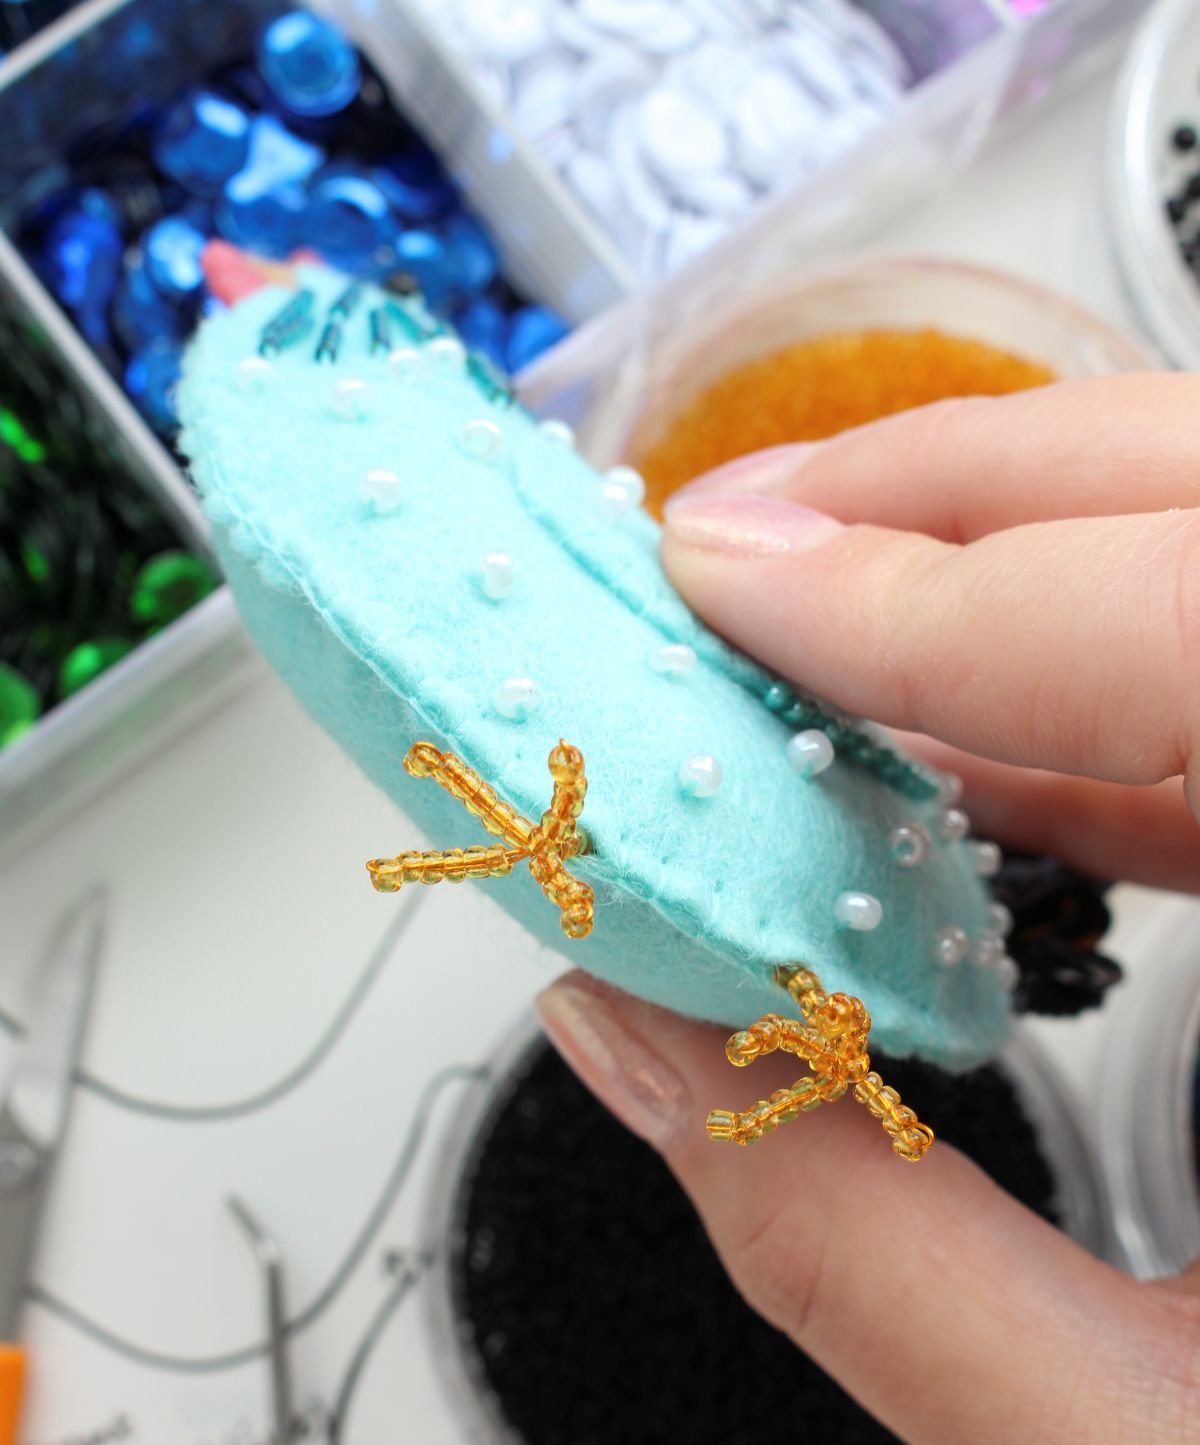
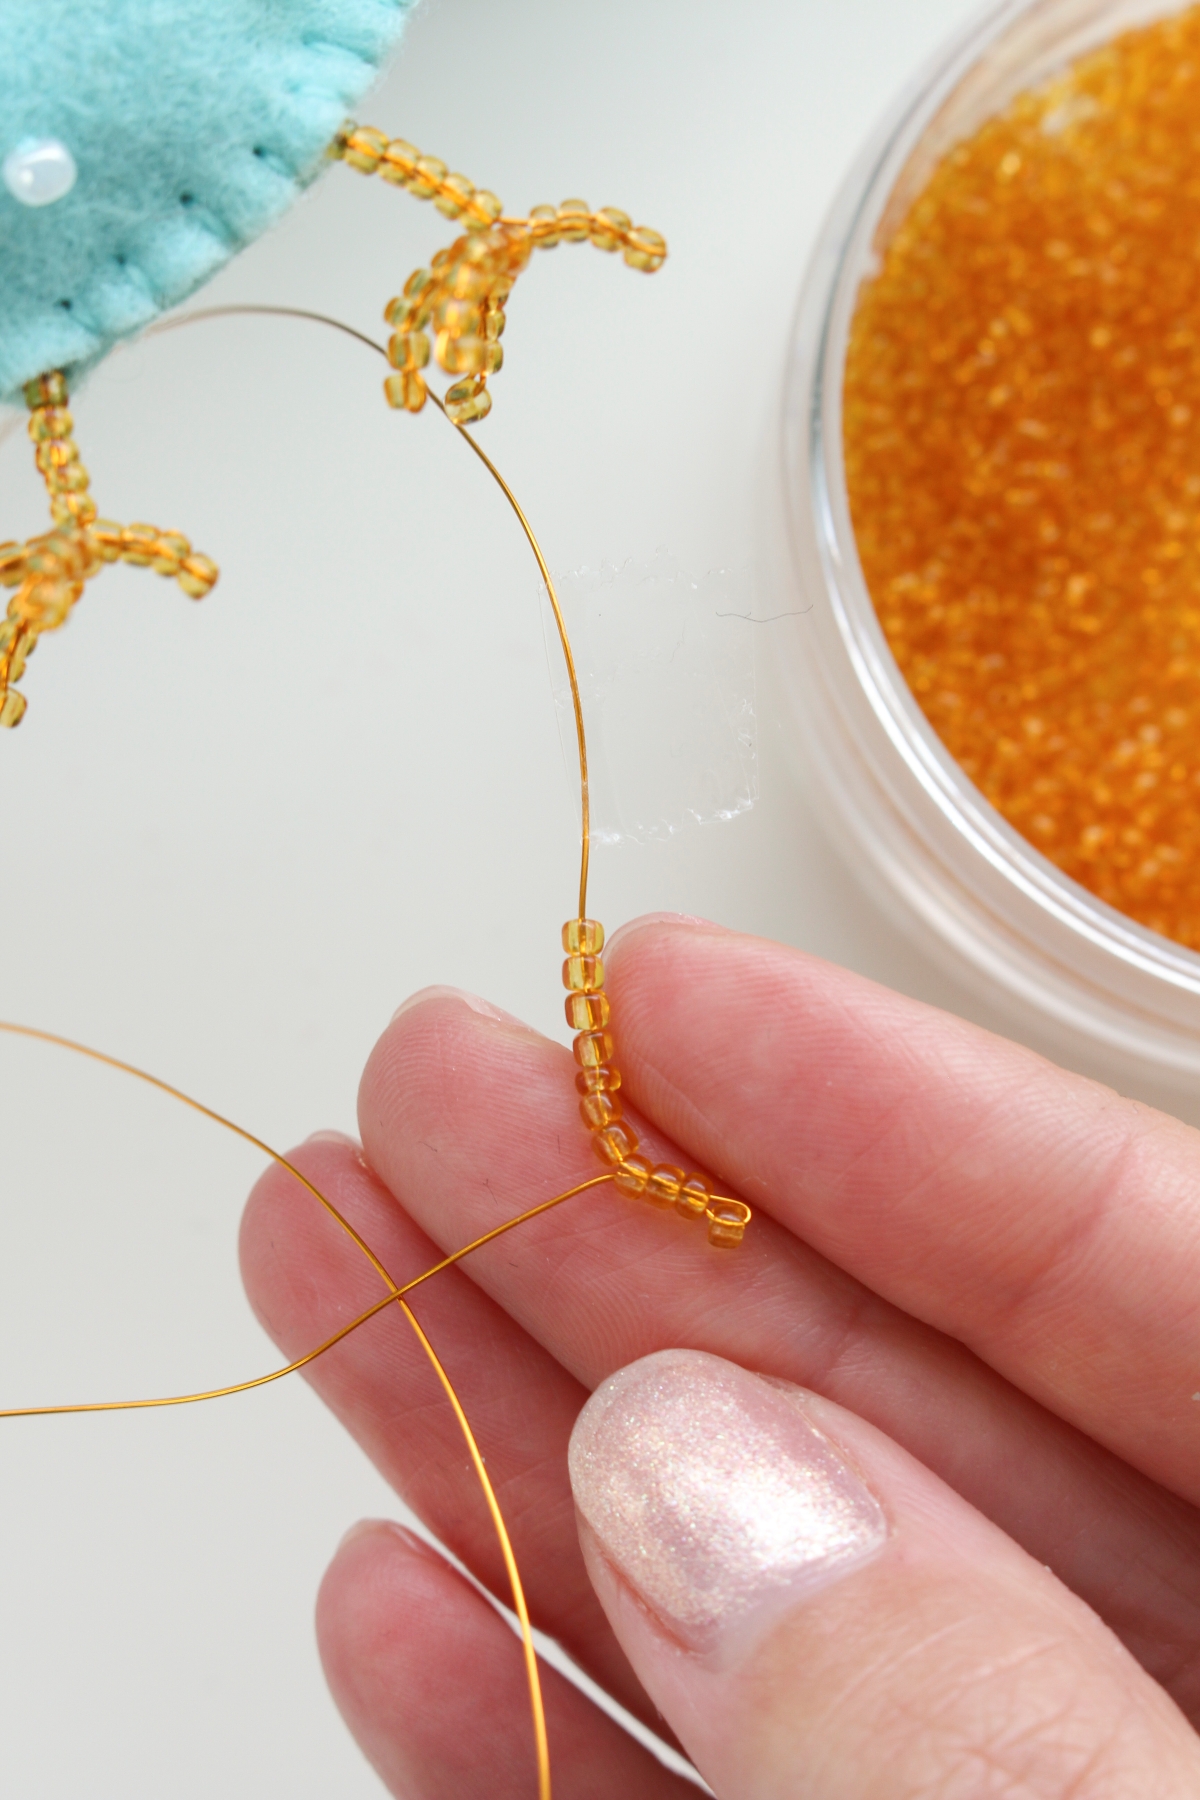
- Cut a length of 26-gauge OR 28-gauge wire to approximately 22 inches (make sure it’s thin enough to go through the beads you’re using for legs twice: 26-gauge for size 10/0 or larger seed beads and 28-gauge for size 11/0 should work).
- Apply a small piece of tape a few inches from one end, to keep the seed beads from sliding off the end.
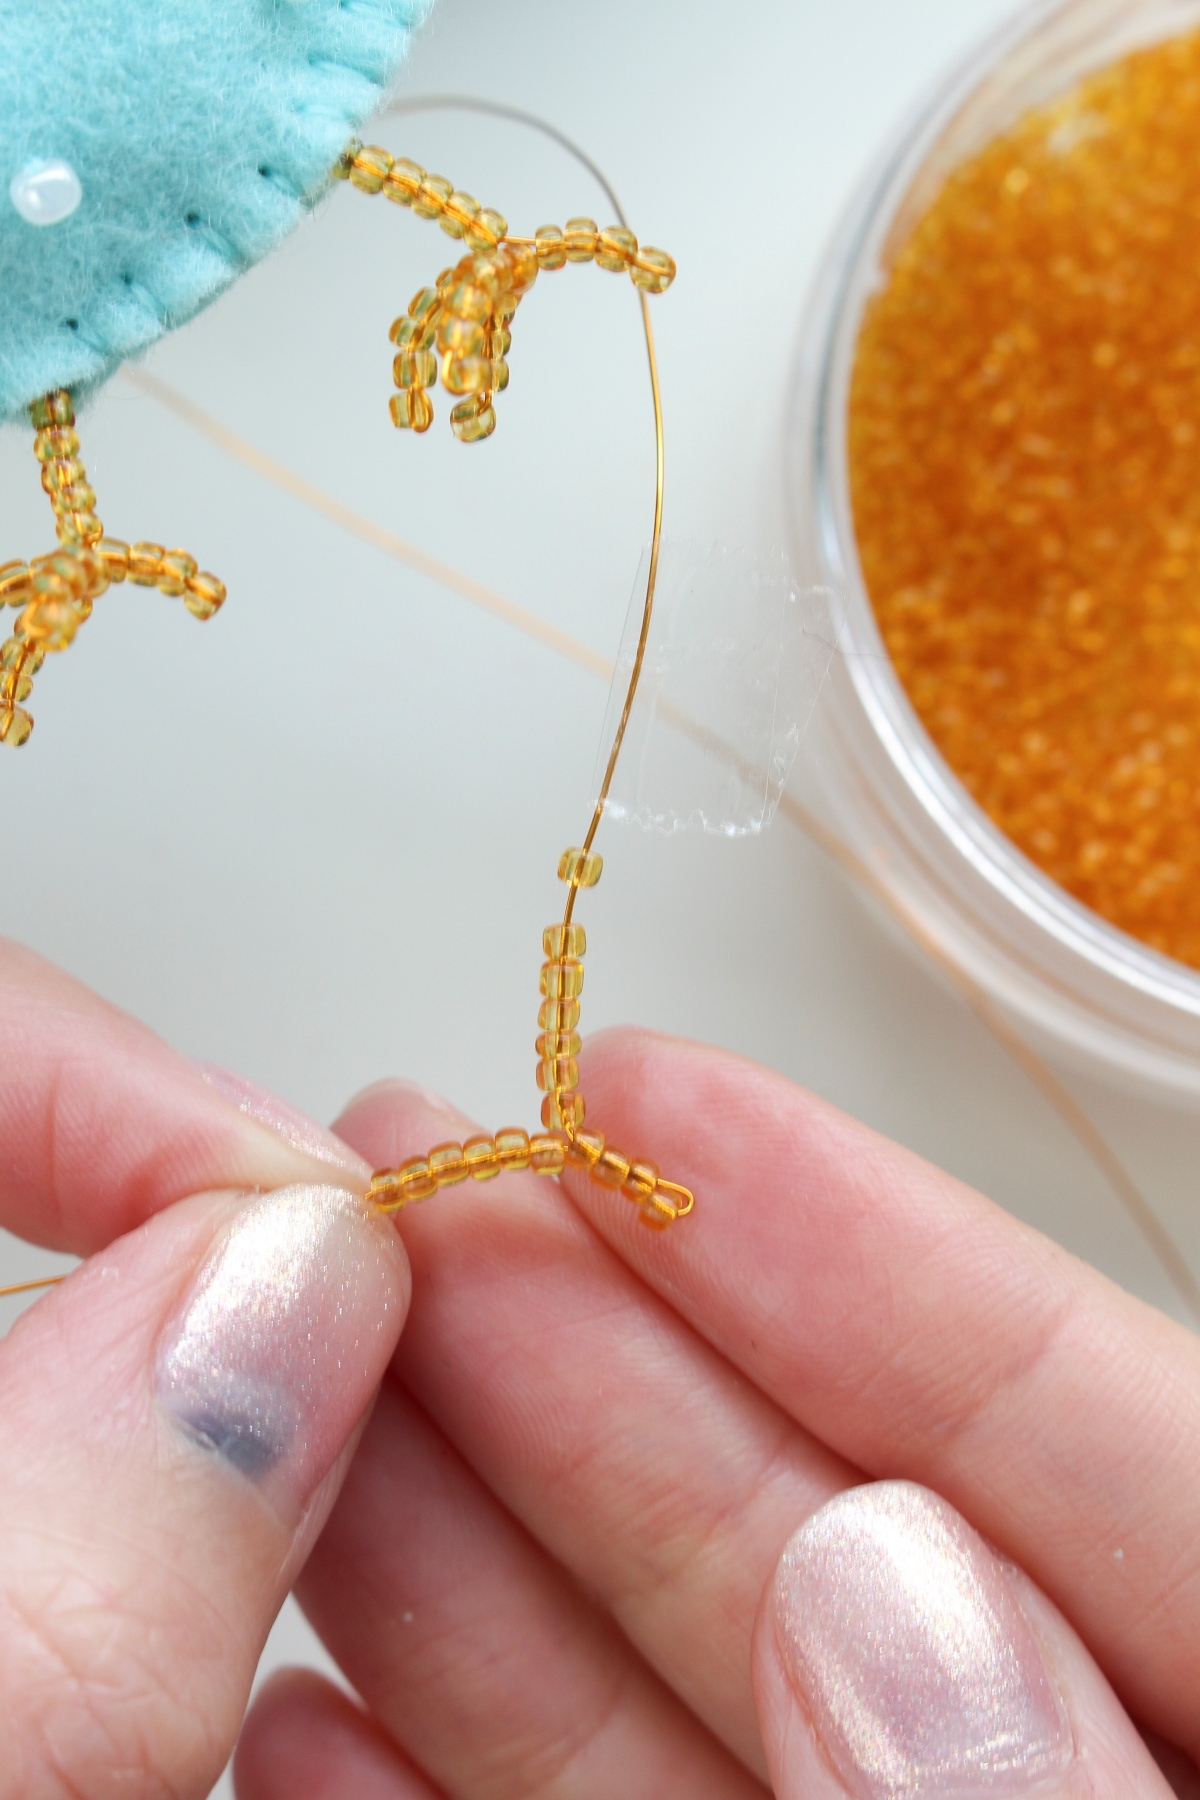
- String on 7 seed beads (this will be a leg).
- String on 4 more seed beads, then push the wire back through the second last bead and 2 additional beads only.
- Gently pull the wire tight so there are no gaps (this will be the smallest toe).
- String on 6 more beads, then push the wire through the second last bead and 4 additional beads, gently pulling tight so there is no space between beads (this is another toe).
- Repeat step 6 for two more toes.
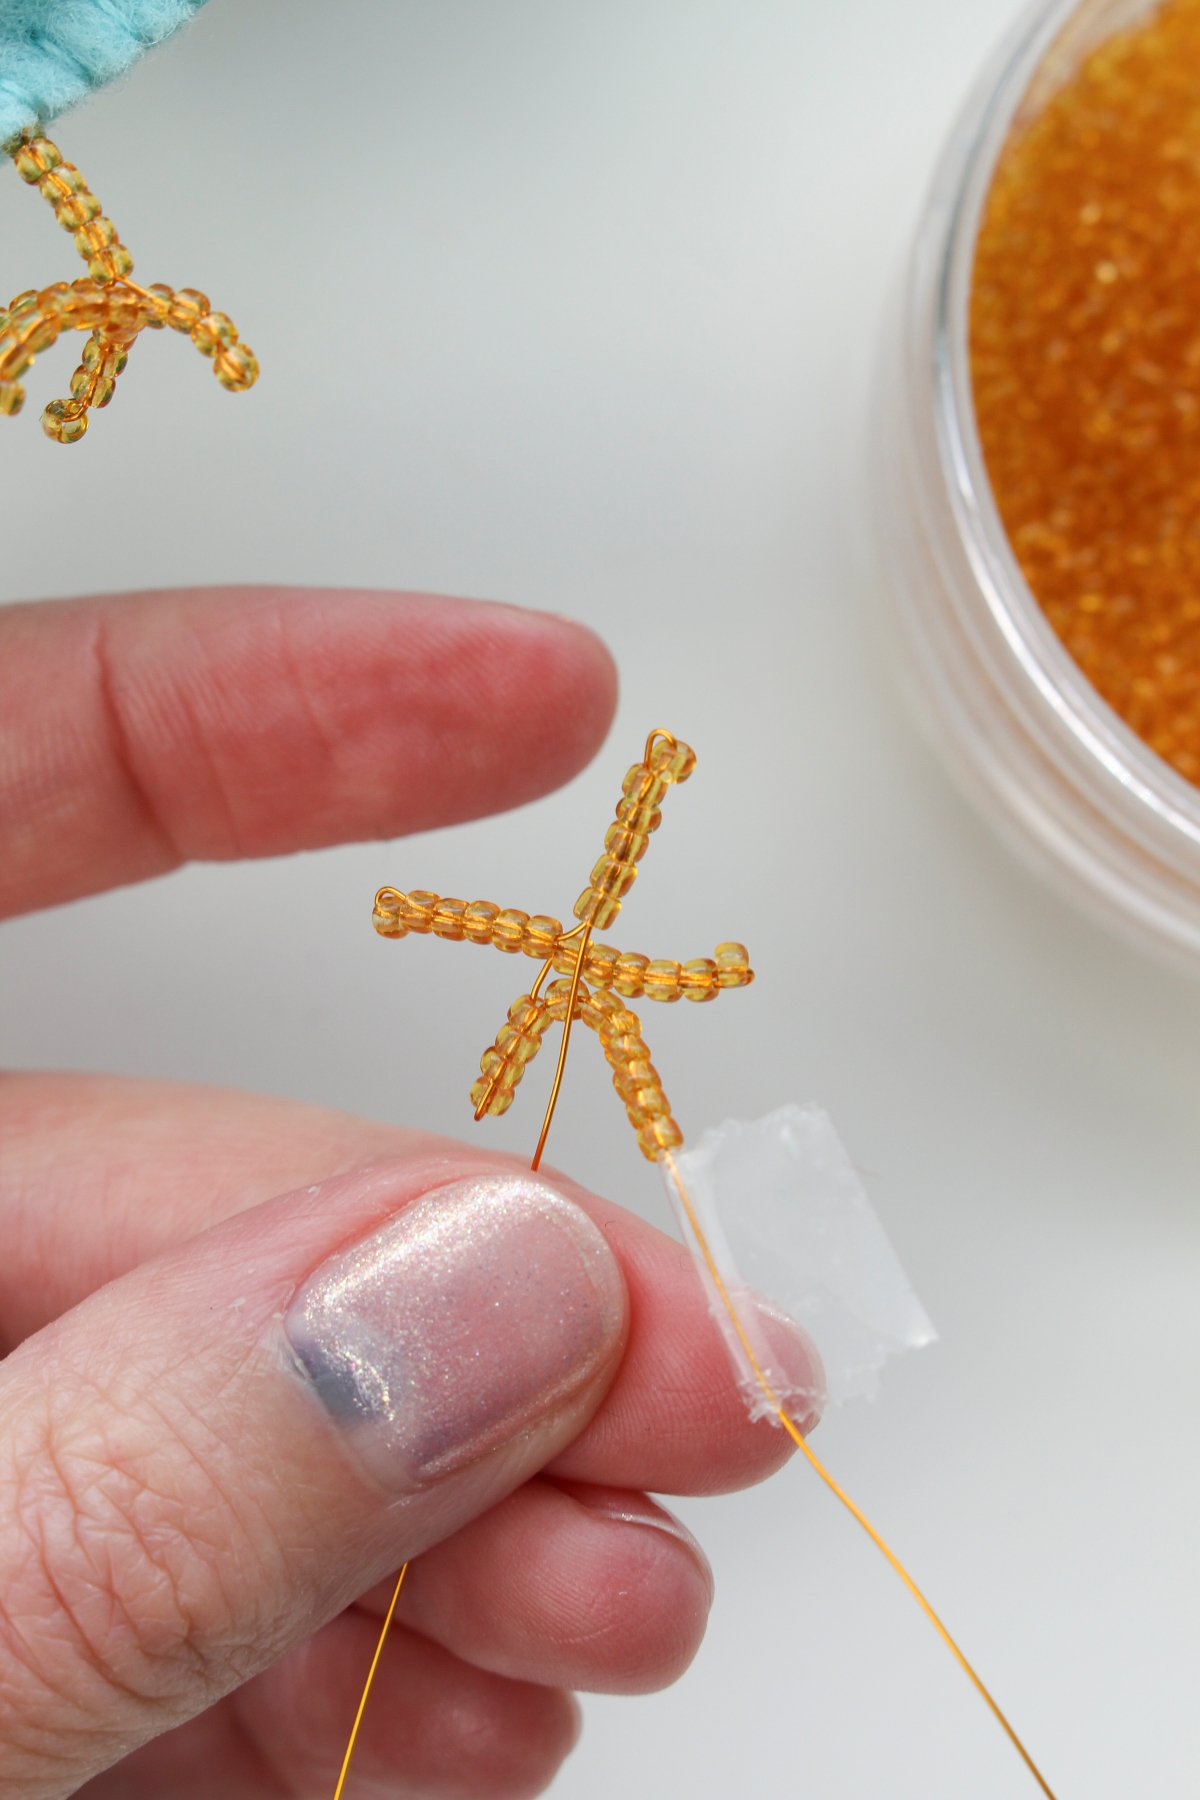
- Now push the wire back up through the original 7 “leg” beads.
- Place a piece of tape on the wire you’ve push up through the beaded leg.
- On the remaining length of wire, repeat this process again to form the second leg.
- The two legs are held separate by the piece of tape so trim any excess and then wrap the ends of the wire around the empty length of wire.
- Gentle shape the toes to look curved (if the wire hasn’t been pulled taught through the beads, you can gently twist the wire to shorten it but be careful as thin wire can snap).
How to Sew Together a Felt Ornament:
At this point, the tail and feet are complete, the front of the chicken body is bedazzled, and the comb, wattles, and beak have been cut out. All that is left is to sew together the felt ornament and add batting to stuff it.
How to Use a Blanket Stitch:
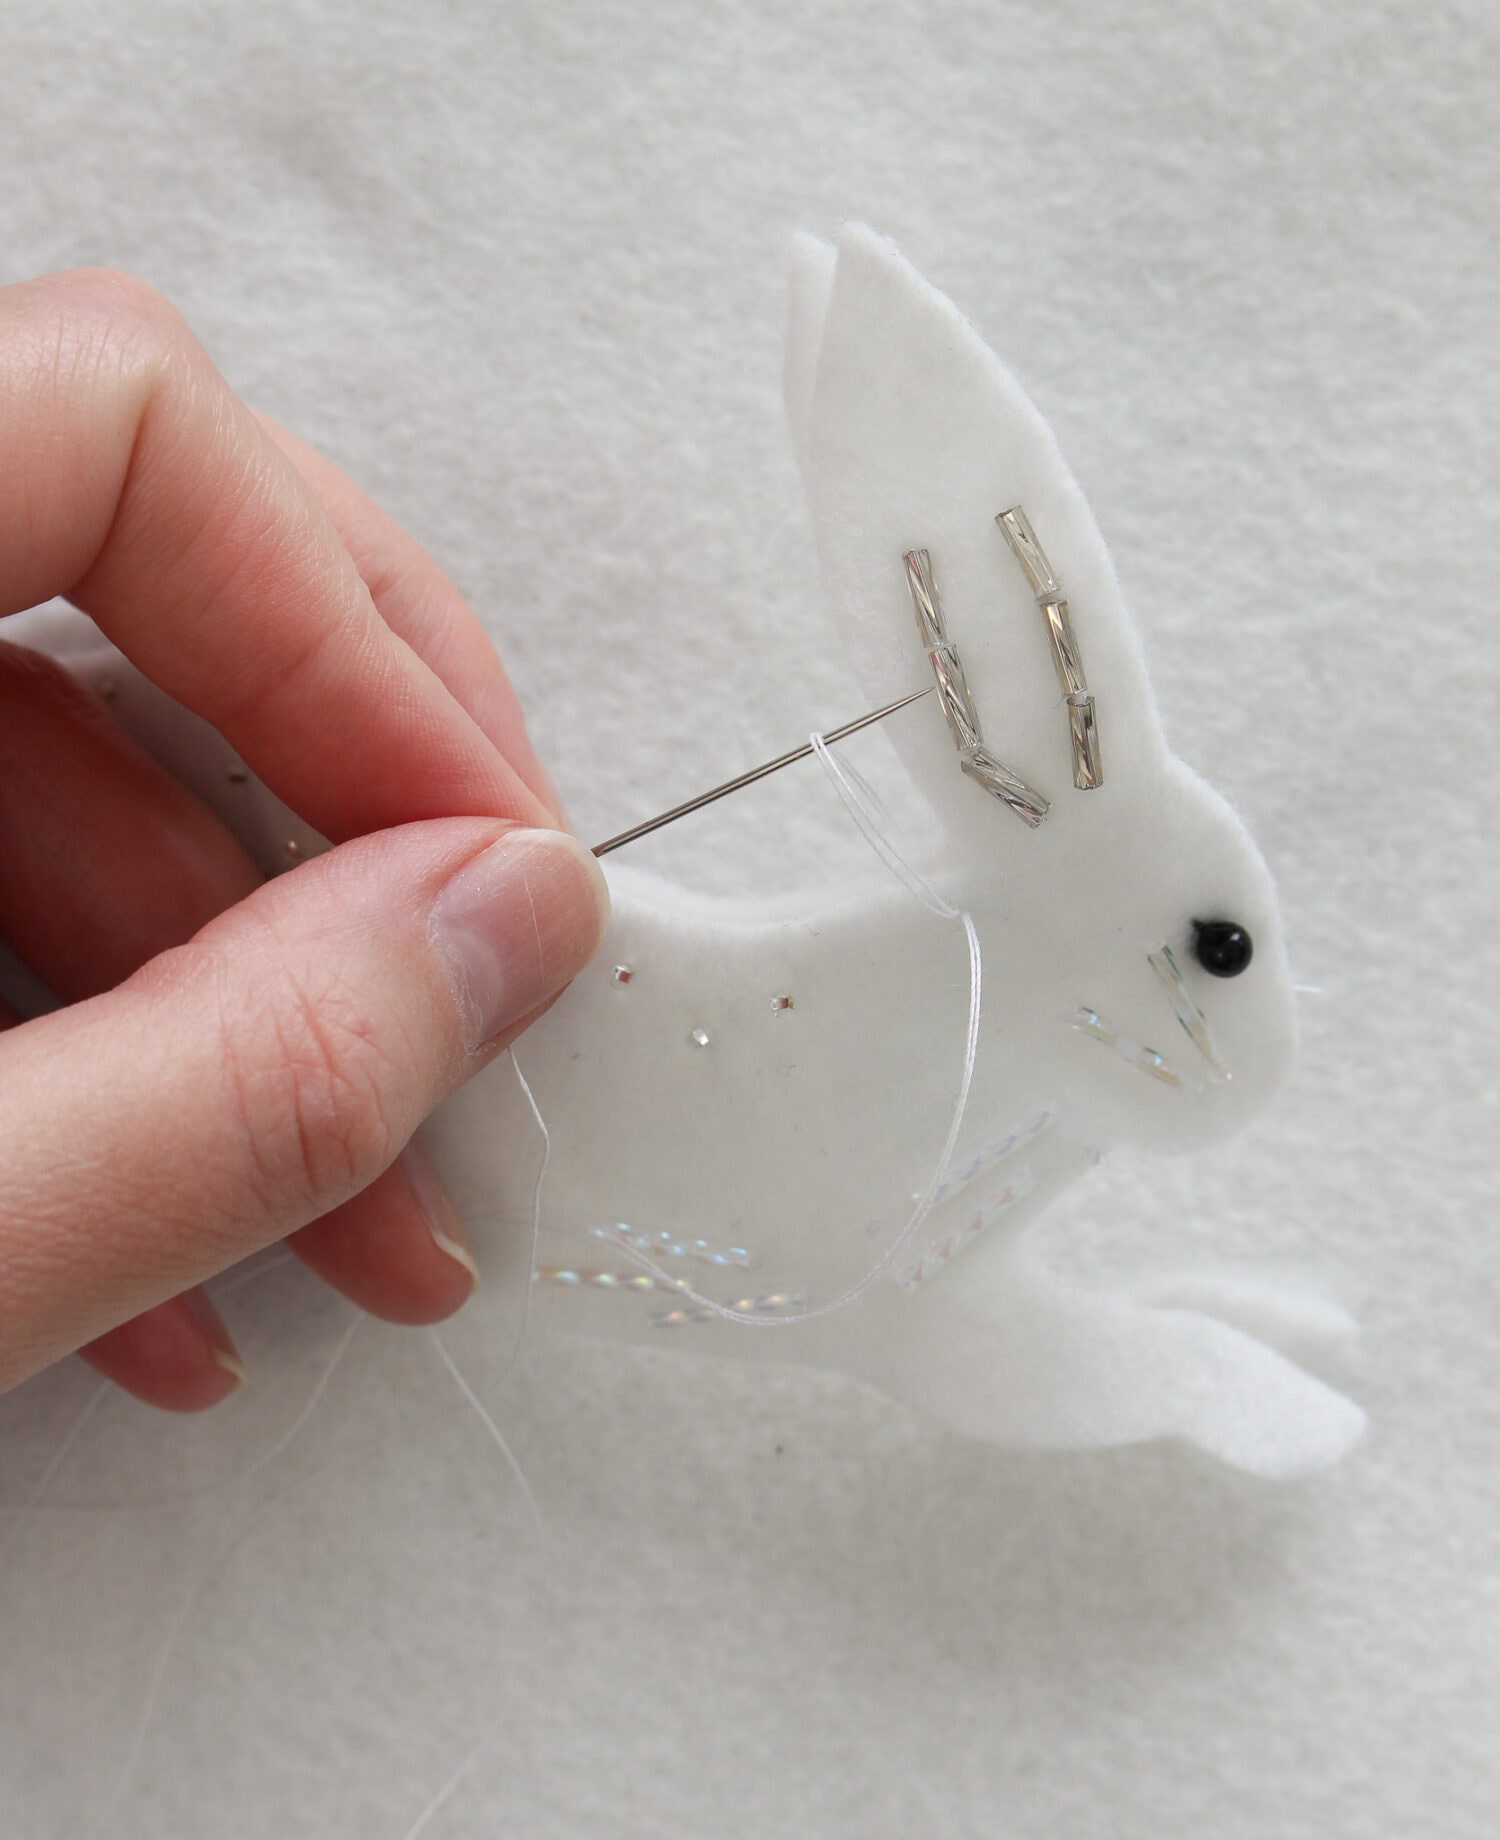
I didn’t take photos of how to use a blanket stitch to sew closed this felt ornament, so I’m re-using photos from my DIY felt bunny ornament tutorial. I will also embed a video tutorial. On this felt chicken ornament pattern, I show you roughly where to begin sewing with arrows “A” (start – under the wattles) and “B” (stop and insert the leg/start stuffing), but otherwise the steps are the same:
- Switch to a hand sewing needle and start the stitch by bringing the needle up through the beaded half of the ornament (I do this in order to bury the knot inside the ornament).
- Then hold the two sides together and loop the thread around, bringing it up again – this time through both layers of felt.
- As you bring the thread through, you’ll create a loop – push the needle through that loop. That secures the thread and becomes the first blanket stitch.
- To continue the blanket stitch, bring your needle up again, from the back of BOTH layers of felt, a few mm over.
- Then push the needle back through that loop, and repeat.




How to Do a Blanket Stitch Video:
If you’d prefer a blanket stitch video tutorial, you can watch my how to sew a blanket stitch video guide below. I am left-handed, so you right-handed folks have to flip this in your head.
How to Sew Felt Pieces into Felt Ornaments:
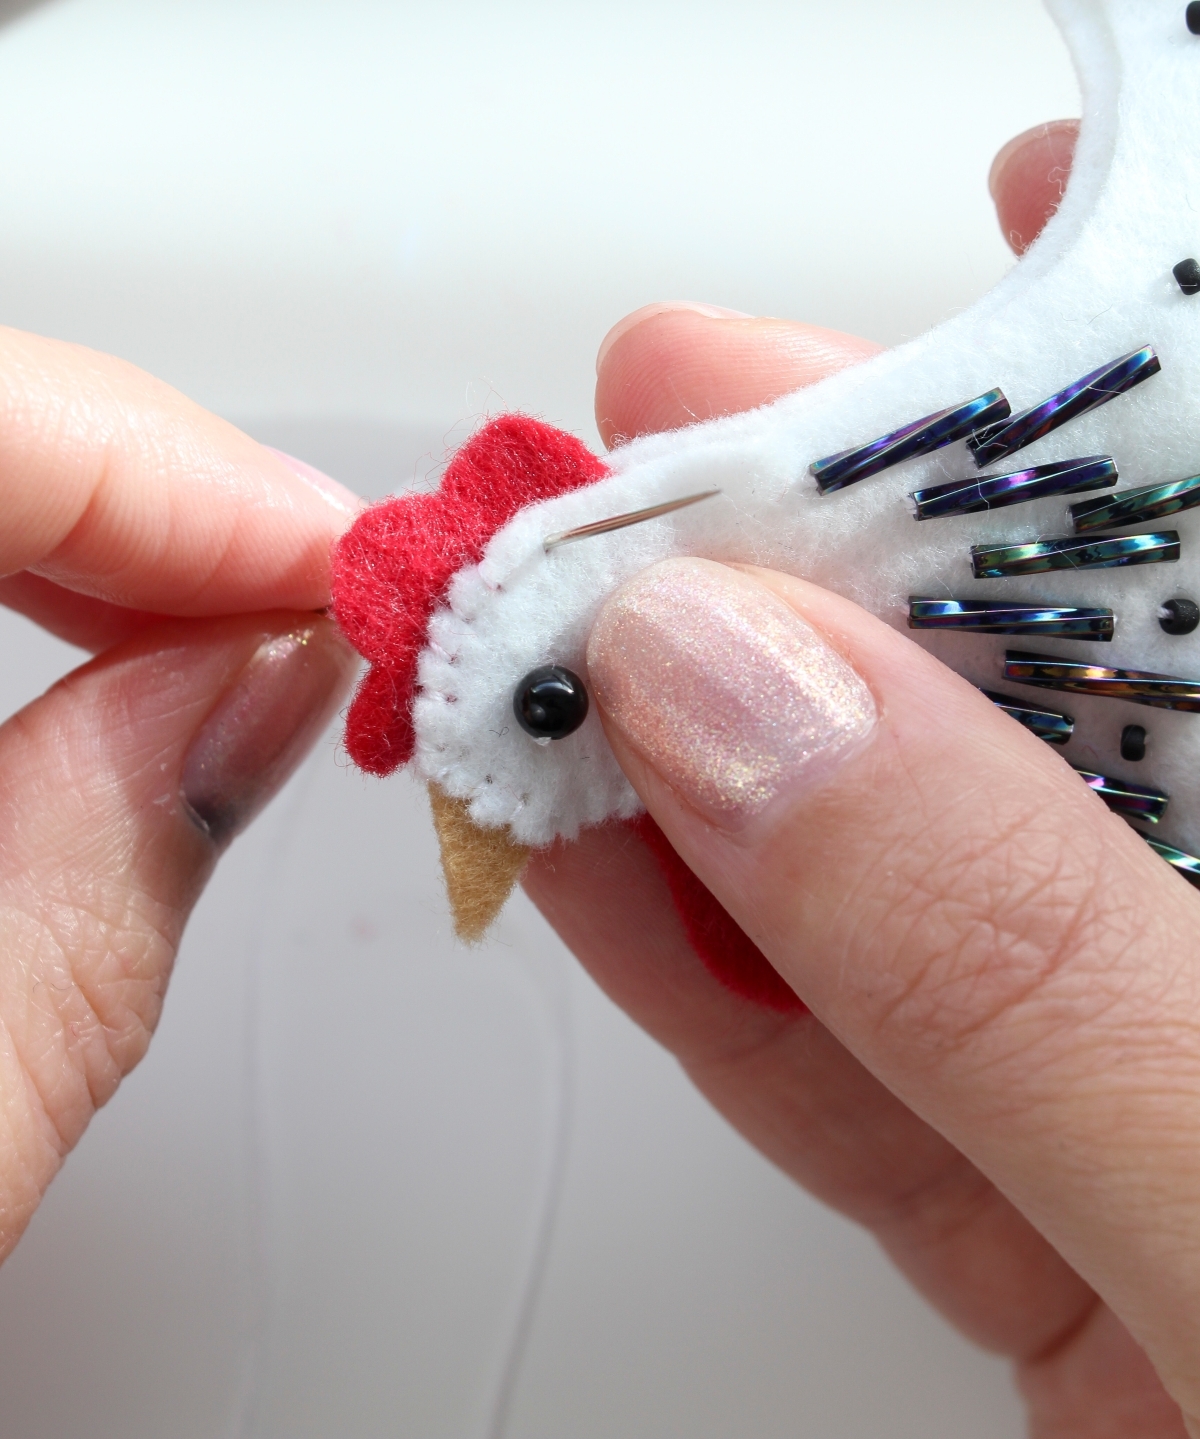
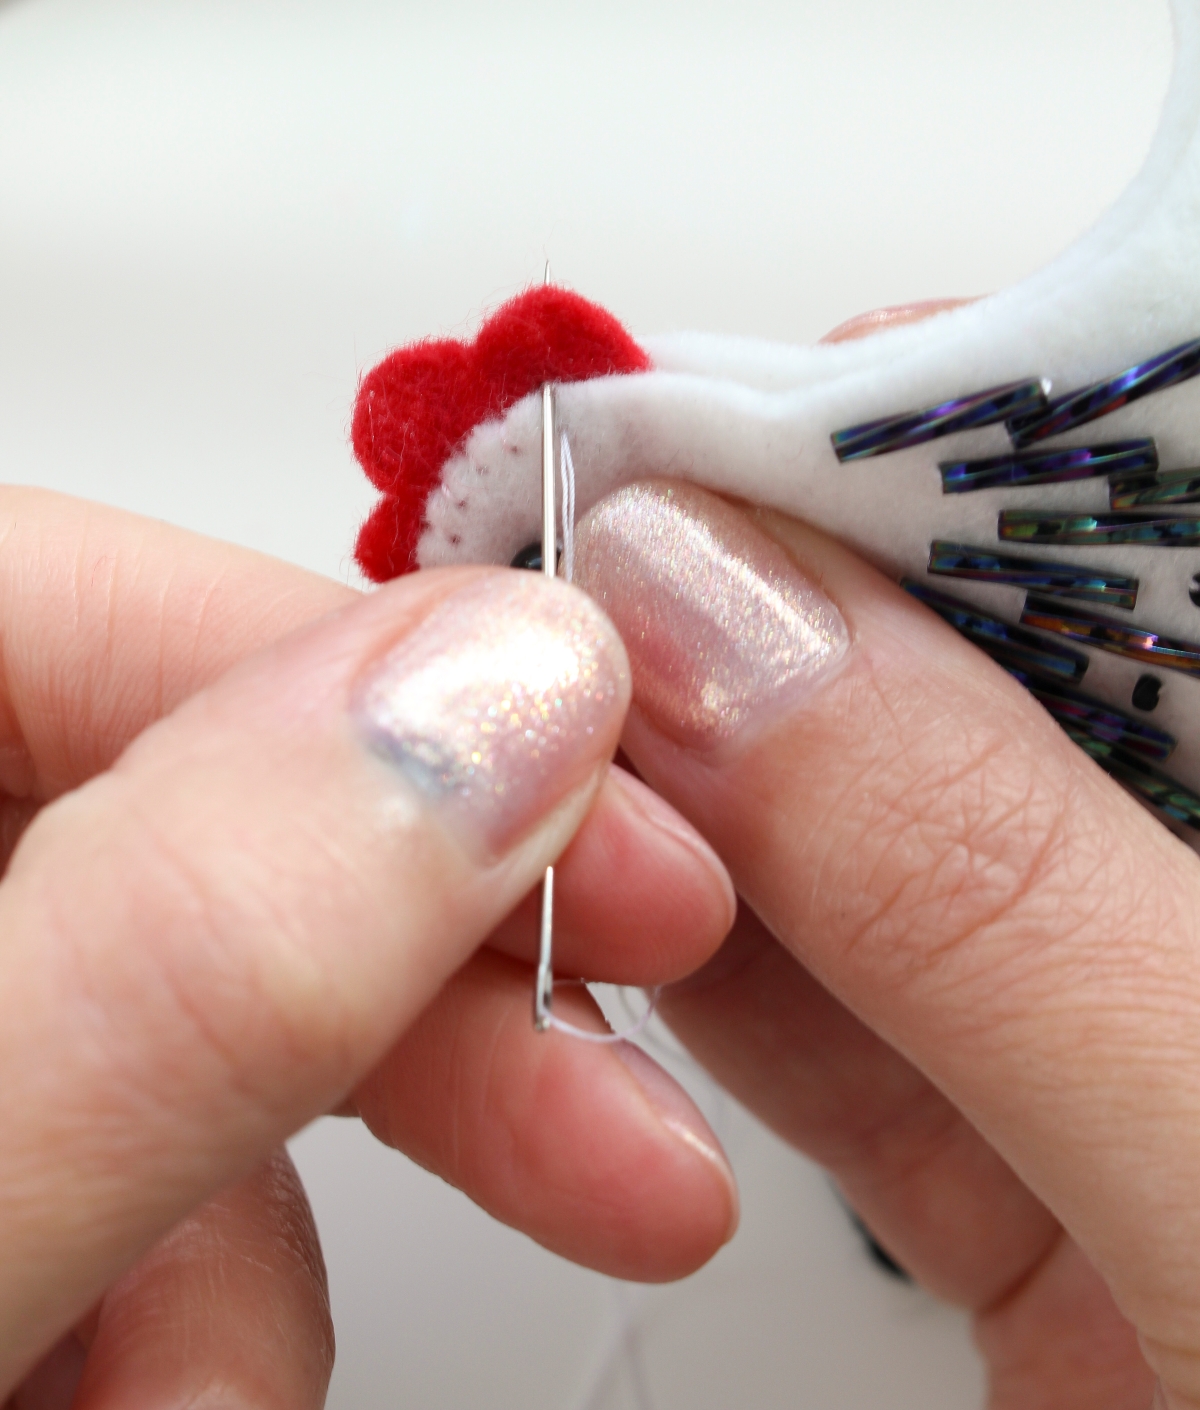
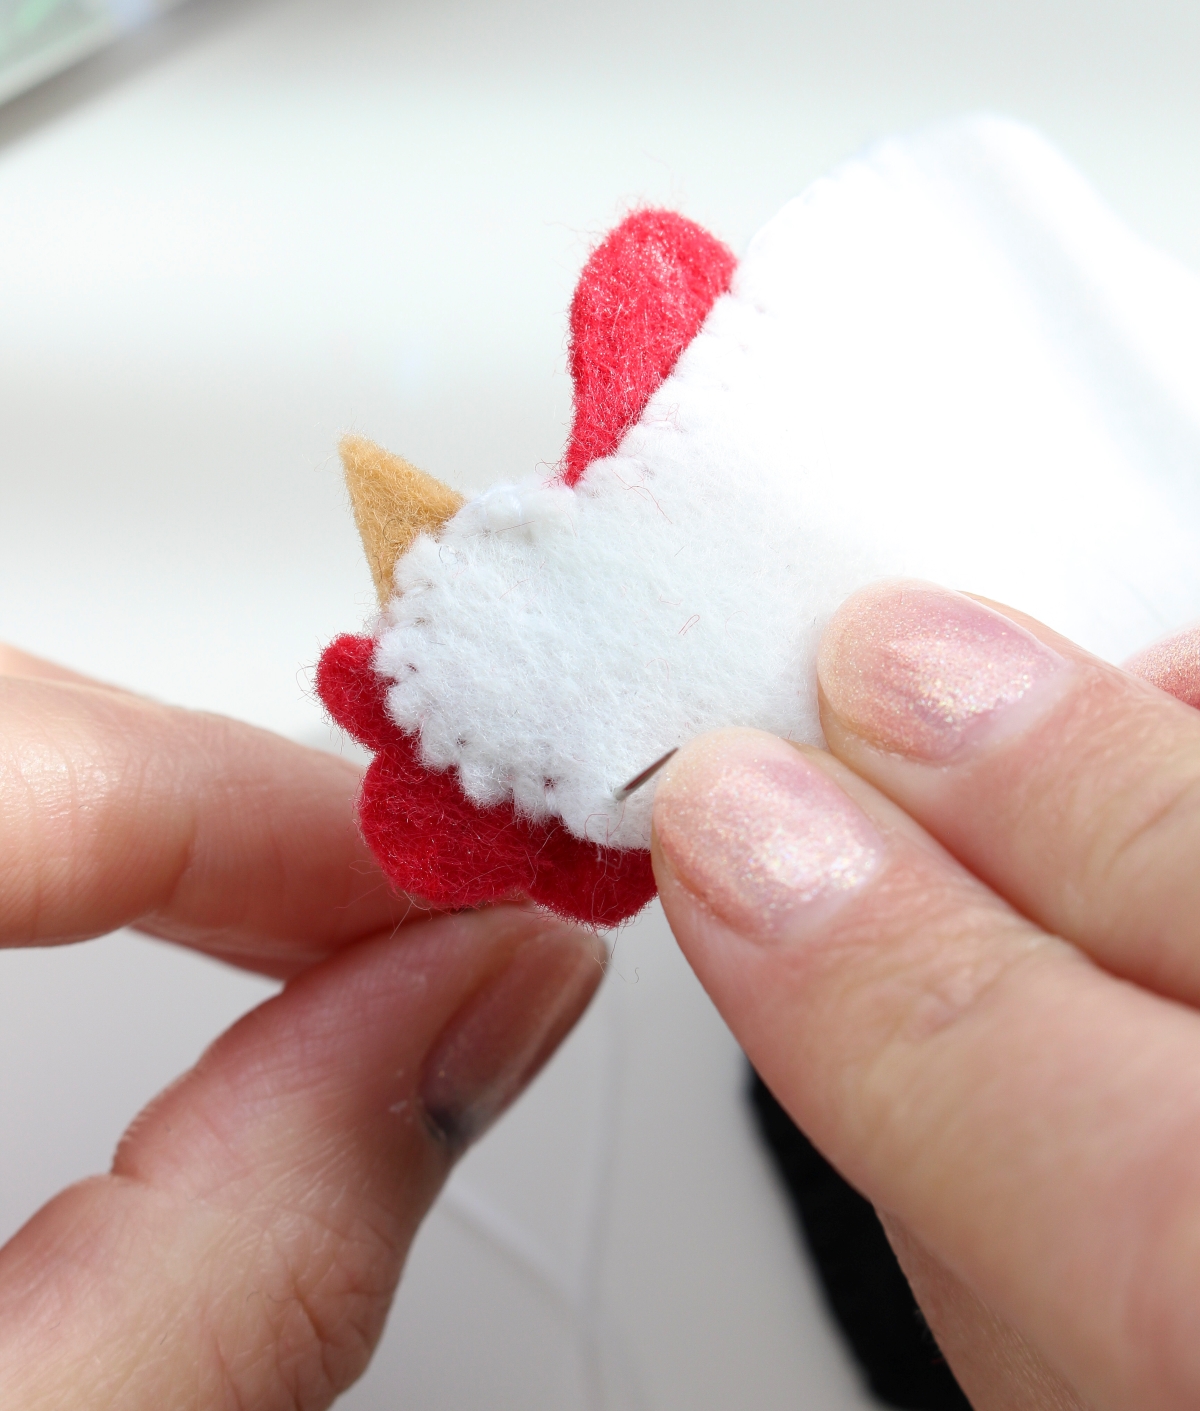
- Stop the blanket stitch and bring the needle through to the front of the felt, from the back, a few mm from the edge of the chicken “head”.
- Then push the needle back, at the edge of the “head” into the comb – but don’t push it straight back, angle the needle so it’s coming up a few mm from the edge at the back.
- Then repeat these steps, securing the pieces of felt with stitches that look close to a blanket stitch for a seamless look.
- Once the little bits are sewn in, continue with a blanket stitch.
How to Stuff Felt Ornaments:
- Stop sewing around the bottom of the ornament and begin to stuff the head, back, and tail area with Poly-fil batting.
- You can use a stuffing tool or chopstick/knitting needle/capped pen to help work the batting into small areas (stuff with small clumps at a time).
- Insert the legs and continue a blanket stitch around them.
- Sew a few stitches, stuff, sew a few stitches, stuff, until the ornament is plump and completely closed.
- Tie off and bury the thread.
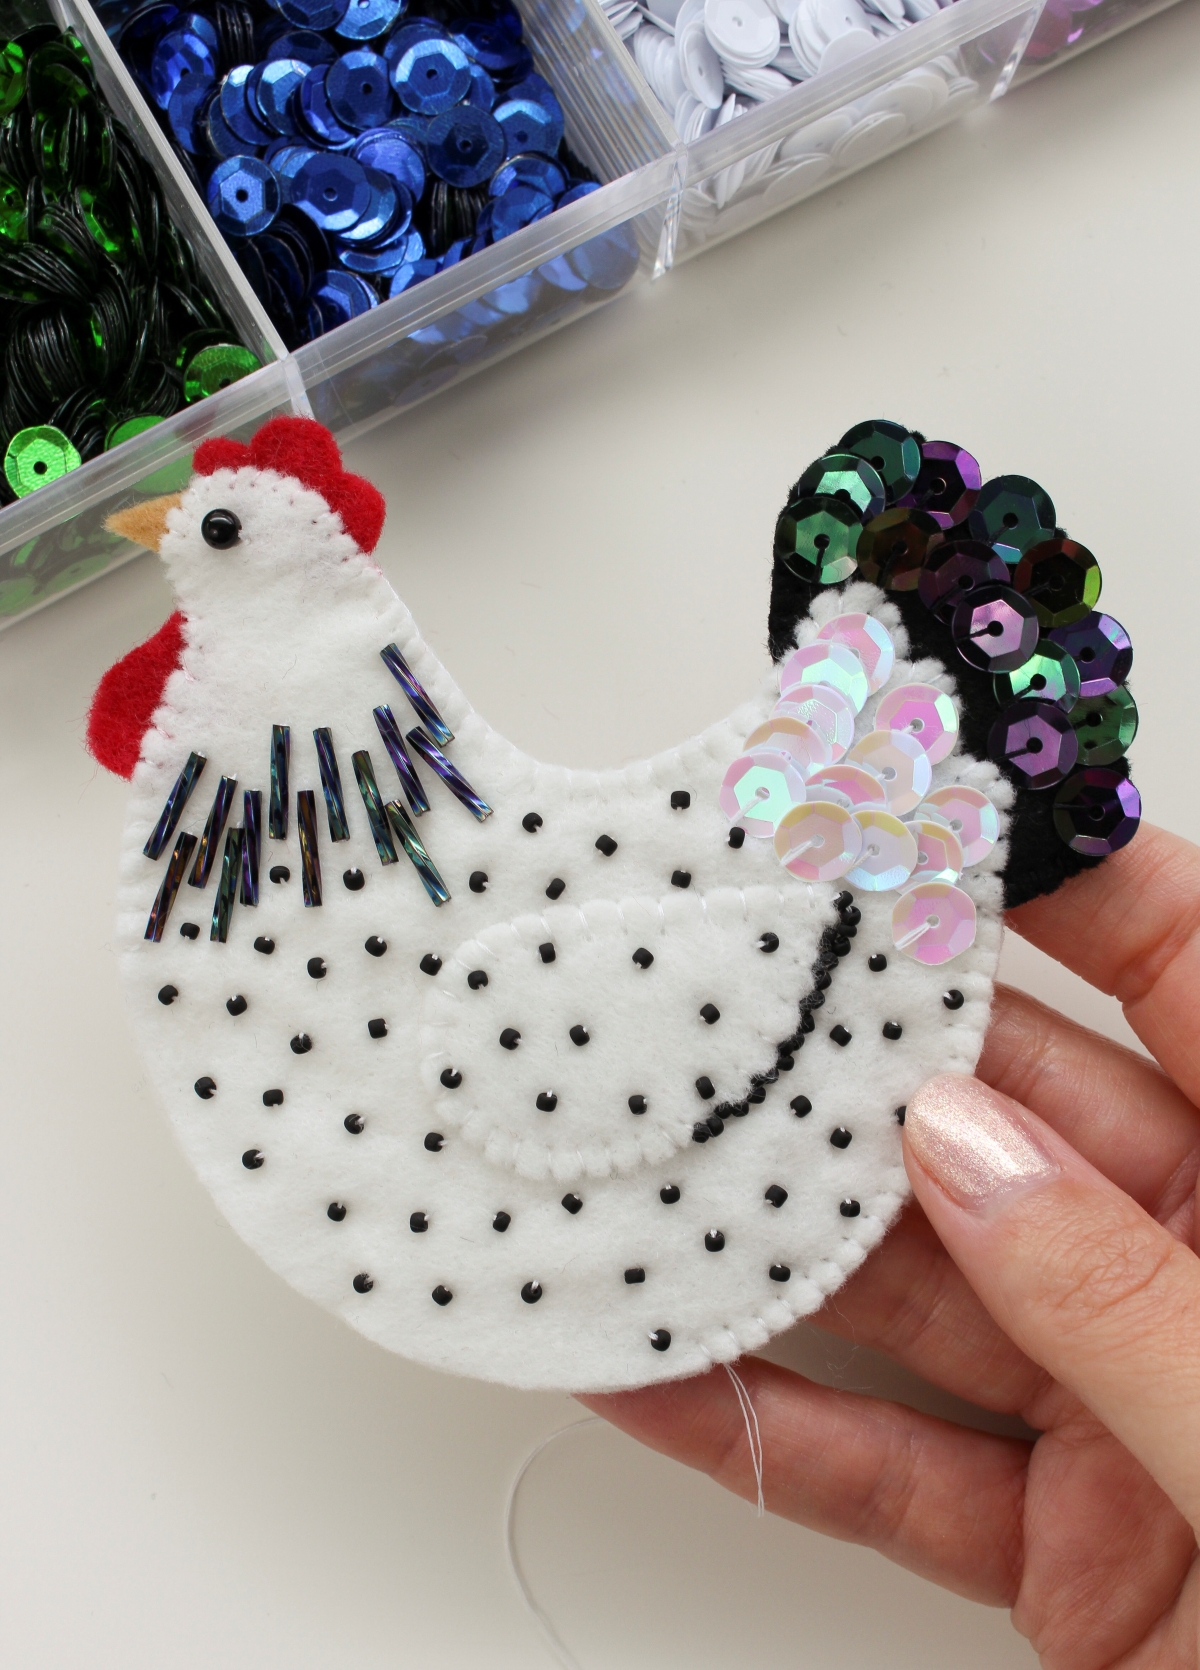
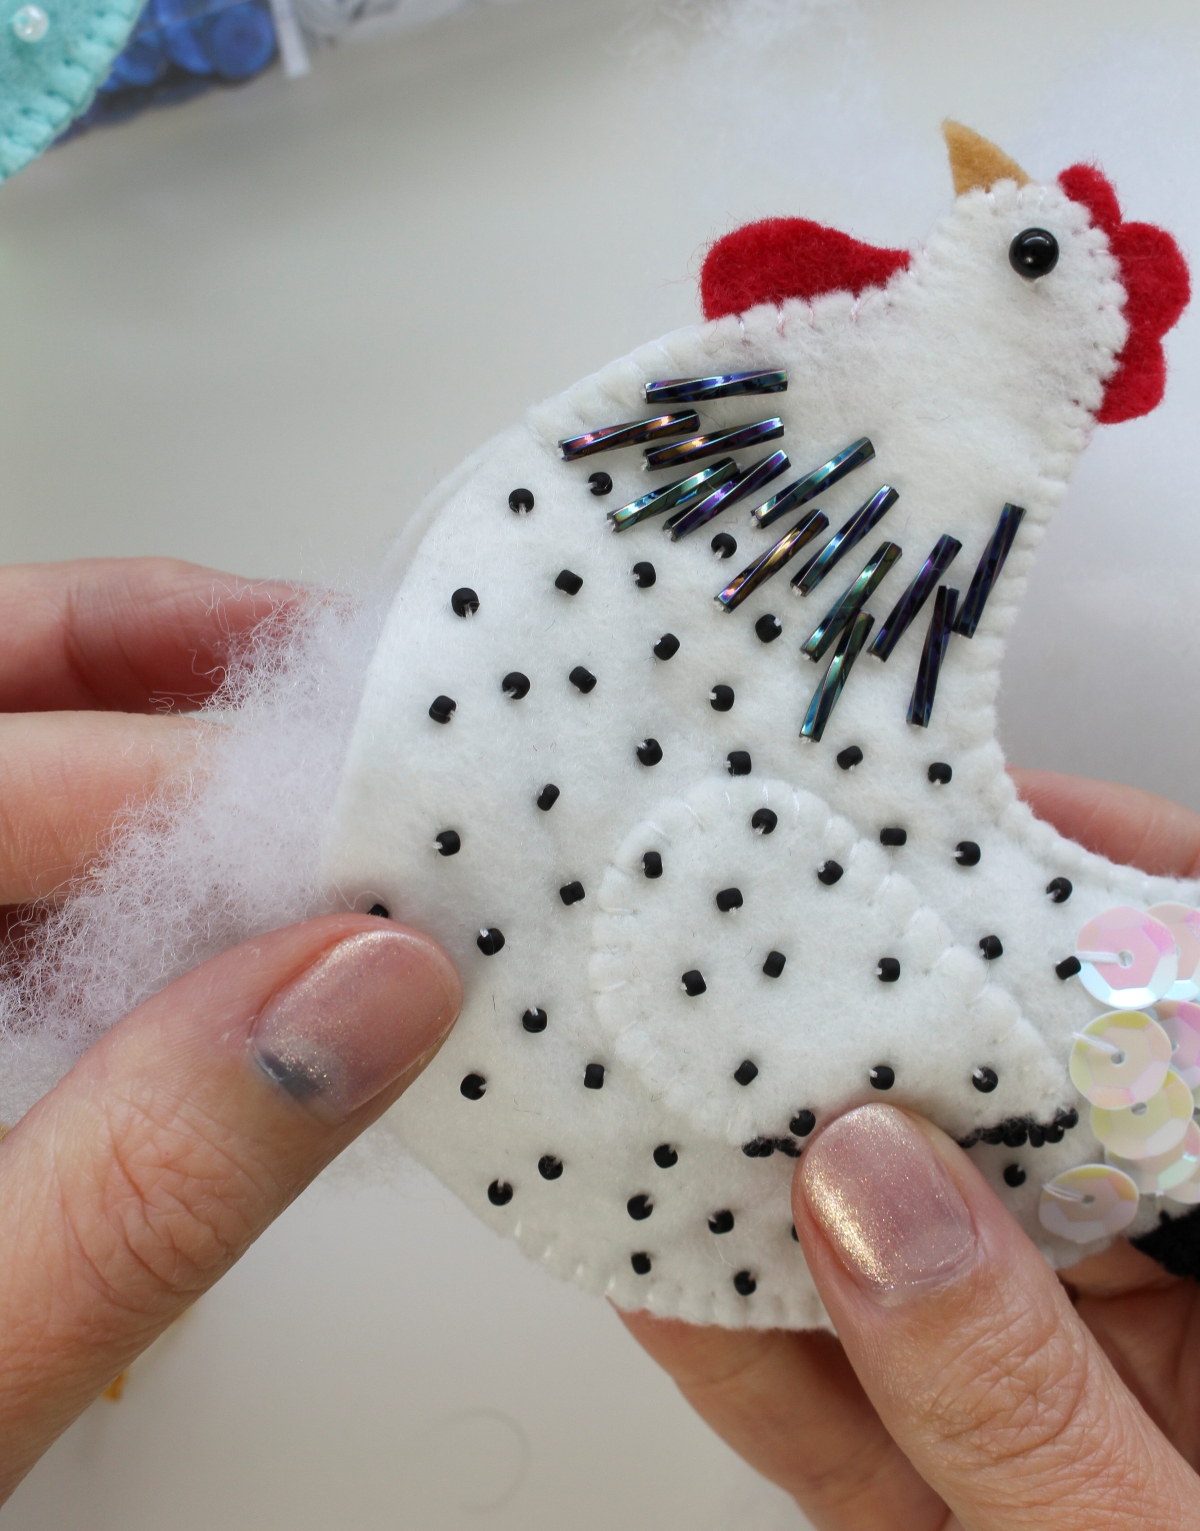
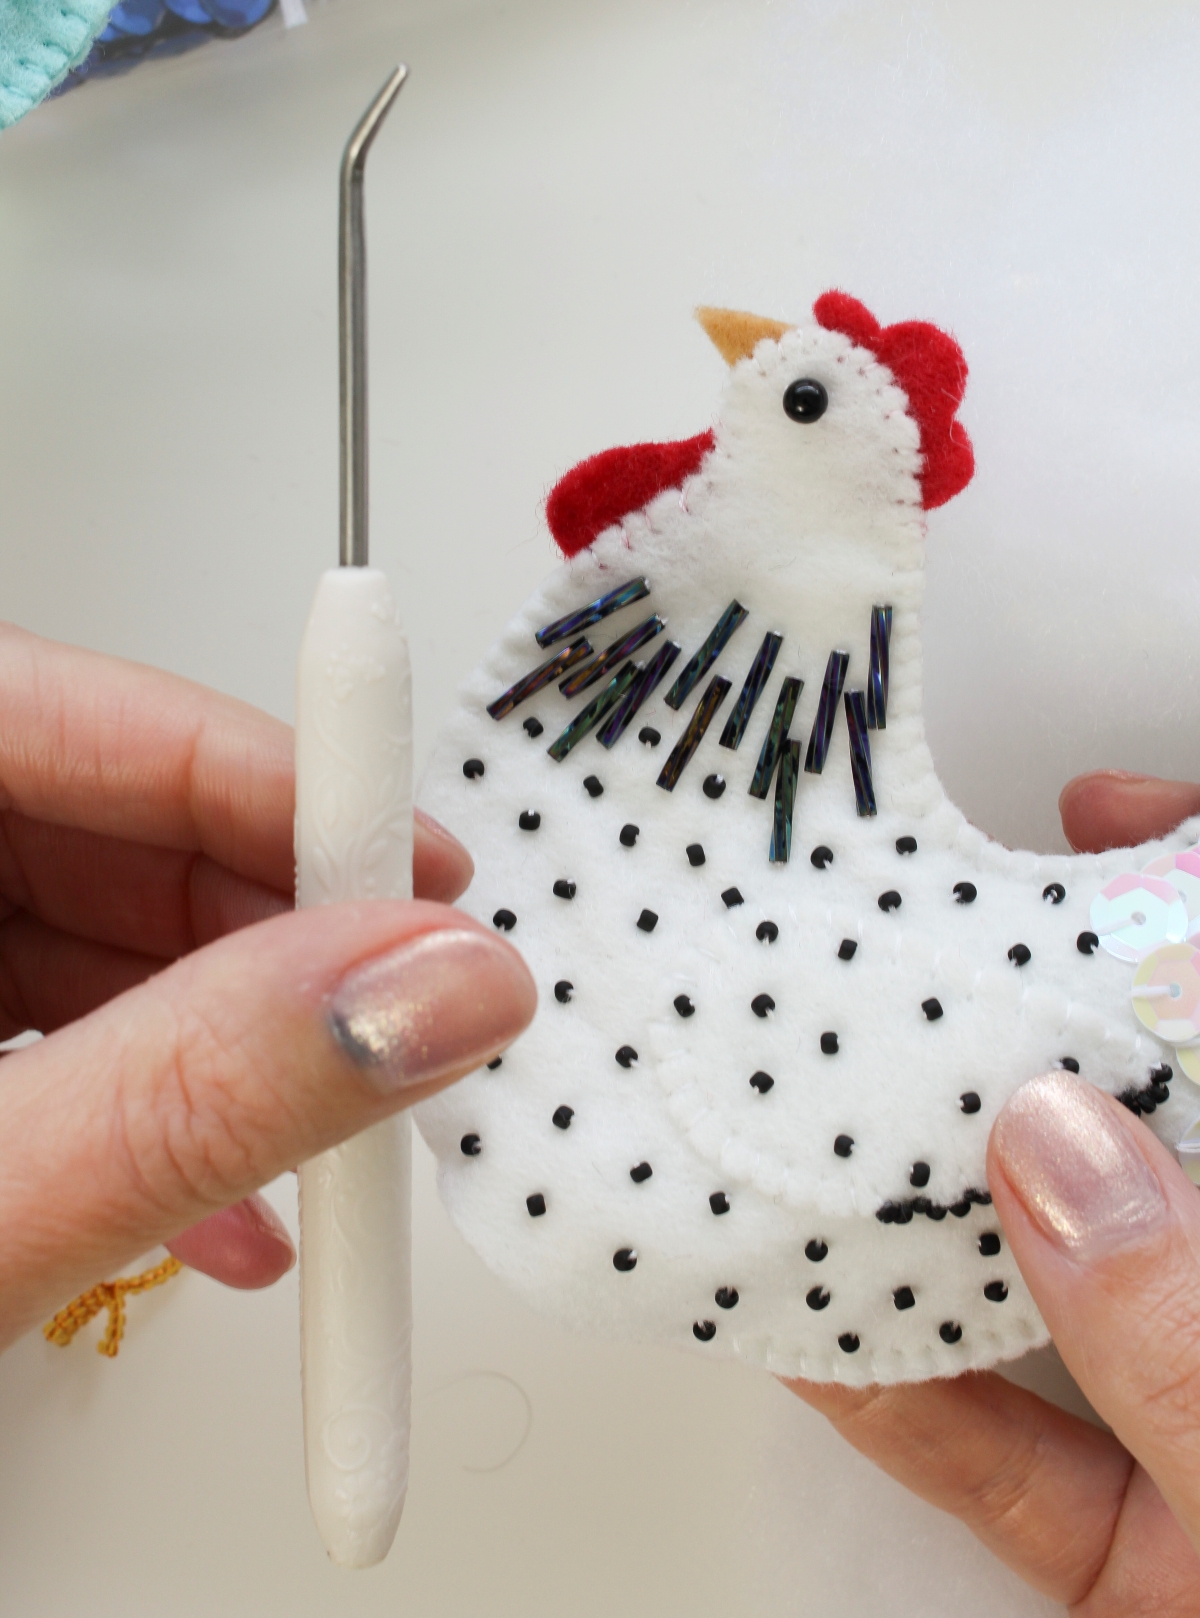
Finished DIY Beaded Felt Chicken Ornament:
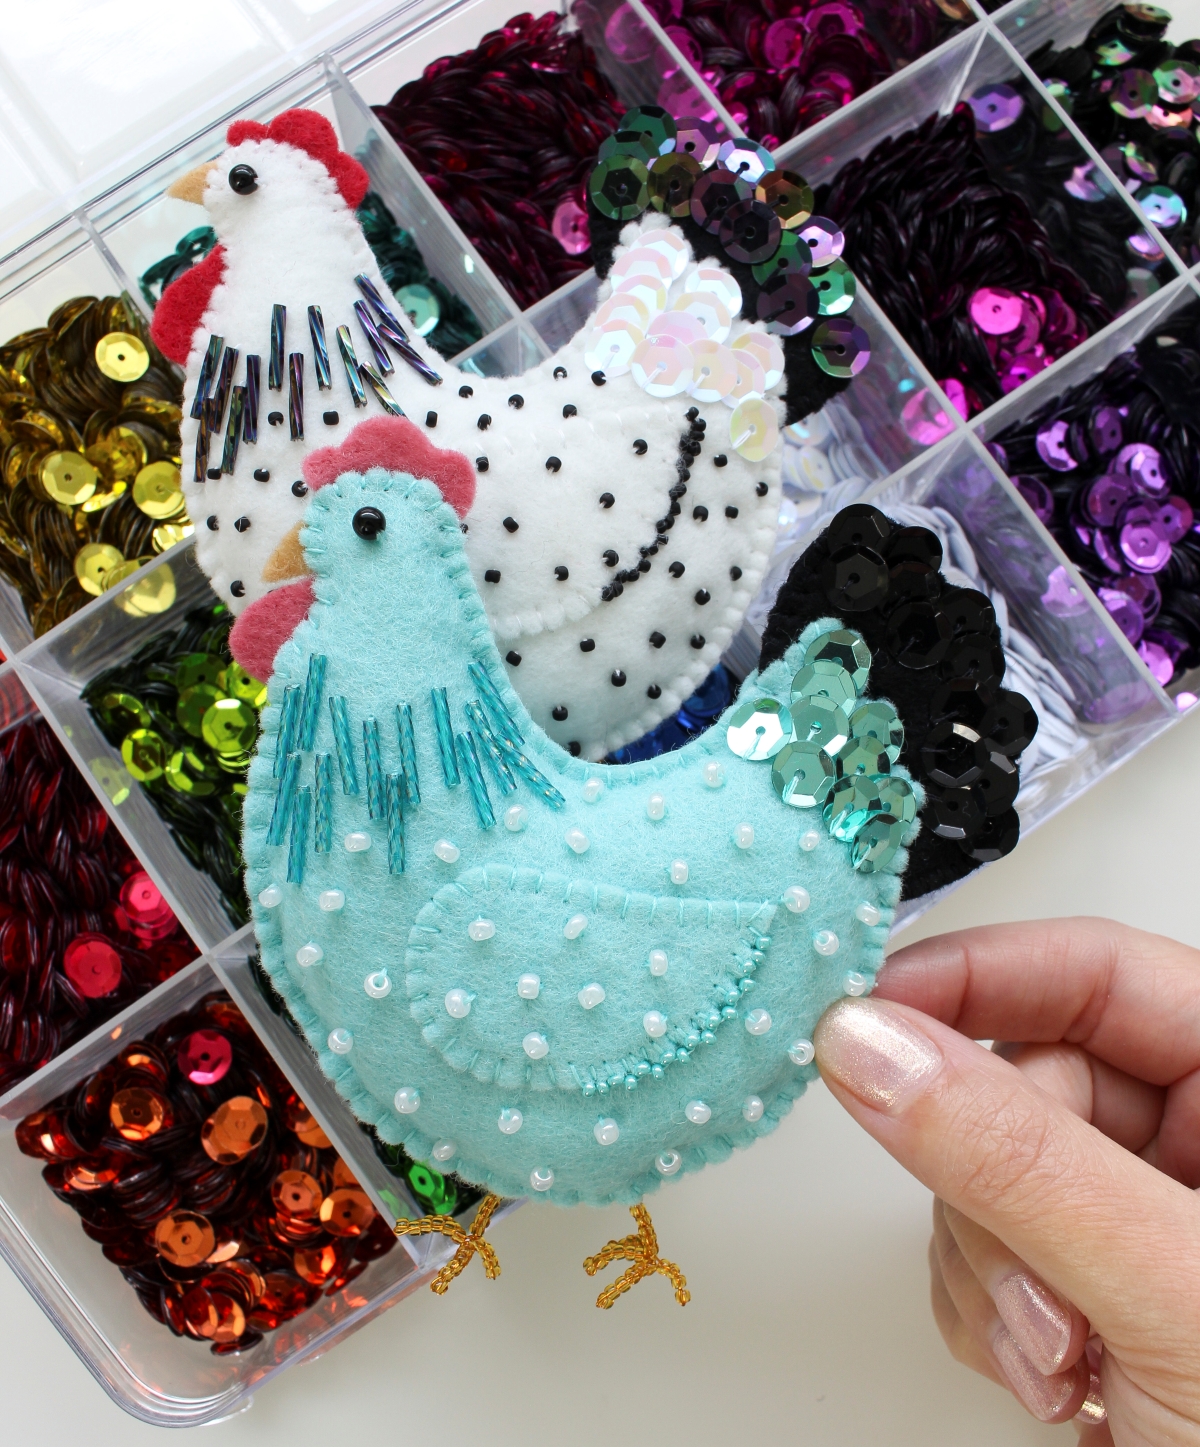
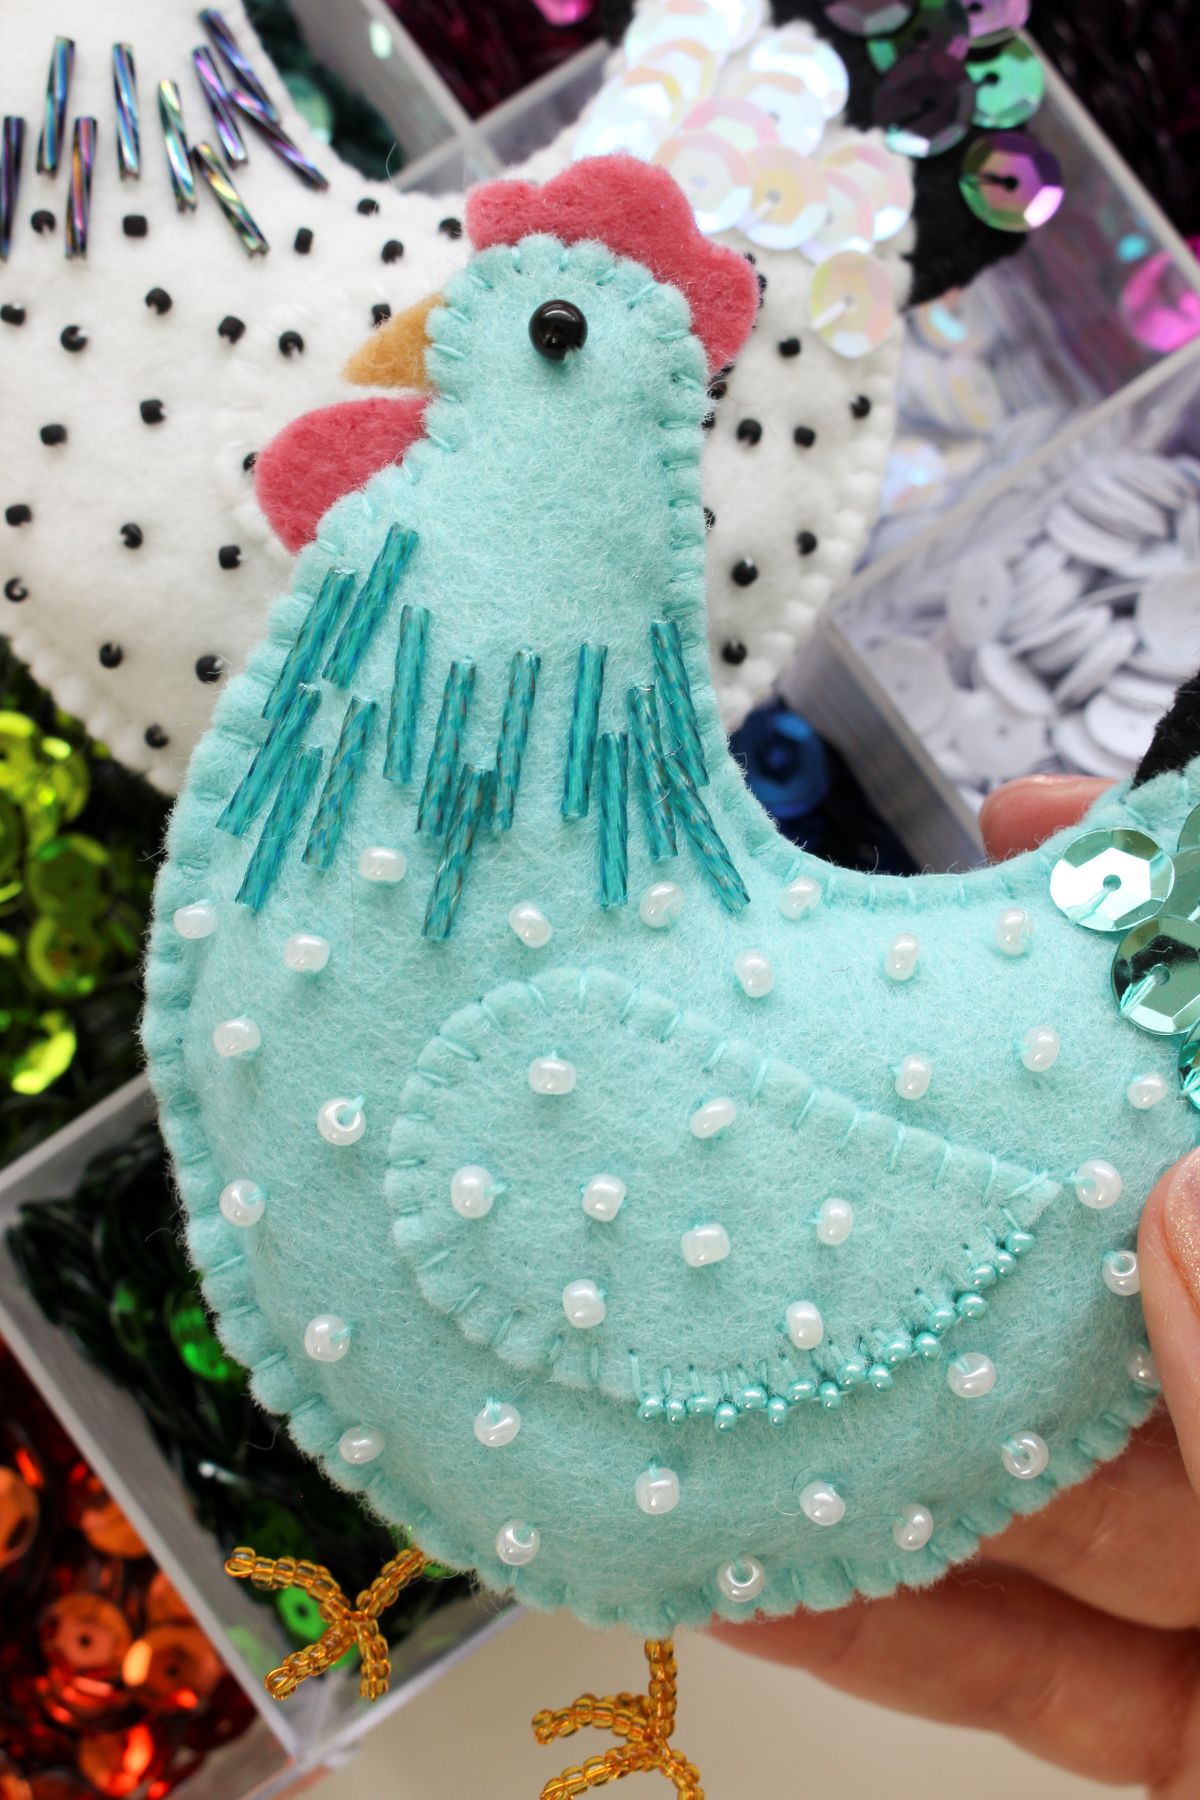
Now you have a completed, hand-sewn beaded felt chicken ornament, complete with its adorable little beaded legs!
To display your new creation, you have two easy options for hanging:
- Built-In Ribbon Loop: Sew a ribbon or twine hanger directly into the top seam of the head while you are stitching the comb and body pieces together.
- Quick + Invisible Thread Loop: If you’ve already sewn your chicken closed, simply use a needle to string a loop of sturdy thread or embroidery floss through the back of the ornament – use green to make it invisible on your tree and keep the focus on your beautifully beaded ornament.
Whichever way you choose to hang it, this whimsical little hen ornament will add the perfect handmade charm to your tree or holiday felt garland!
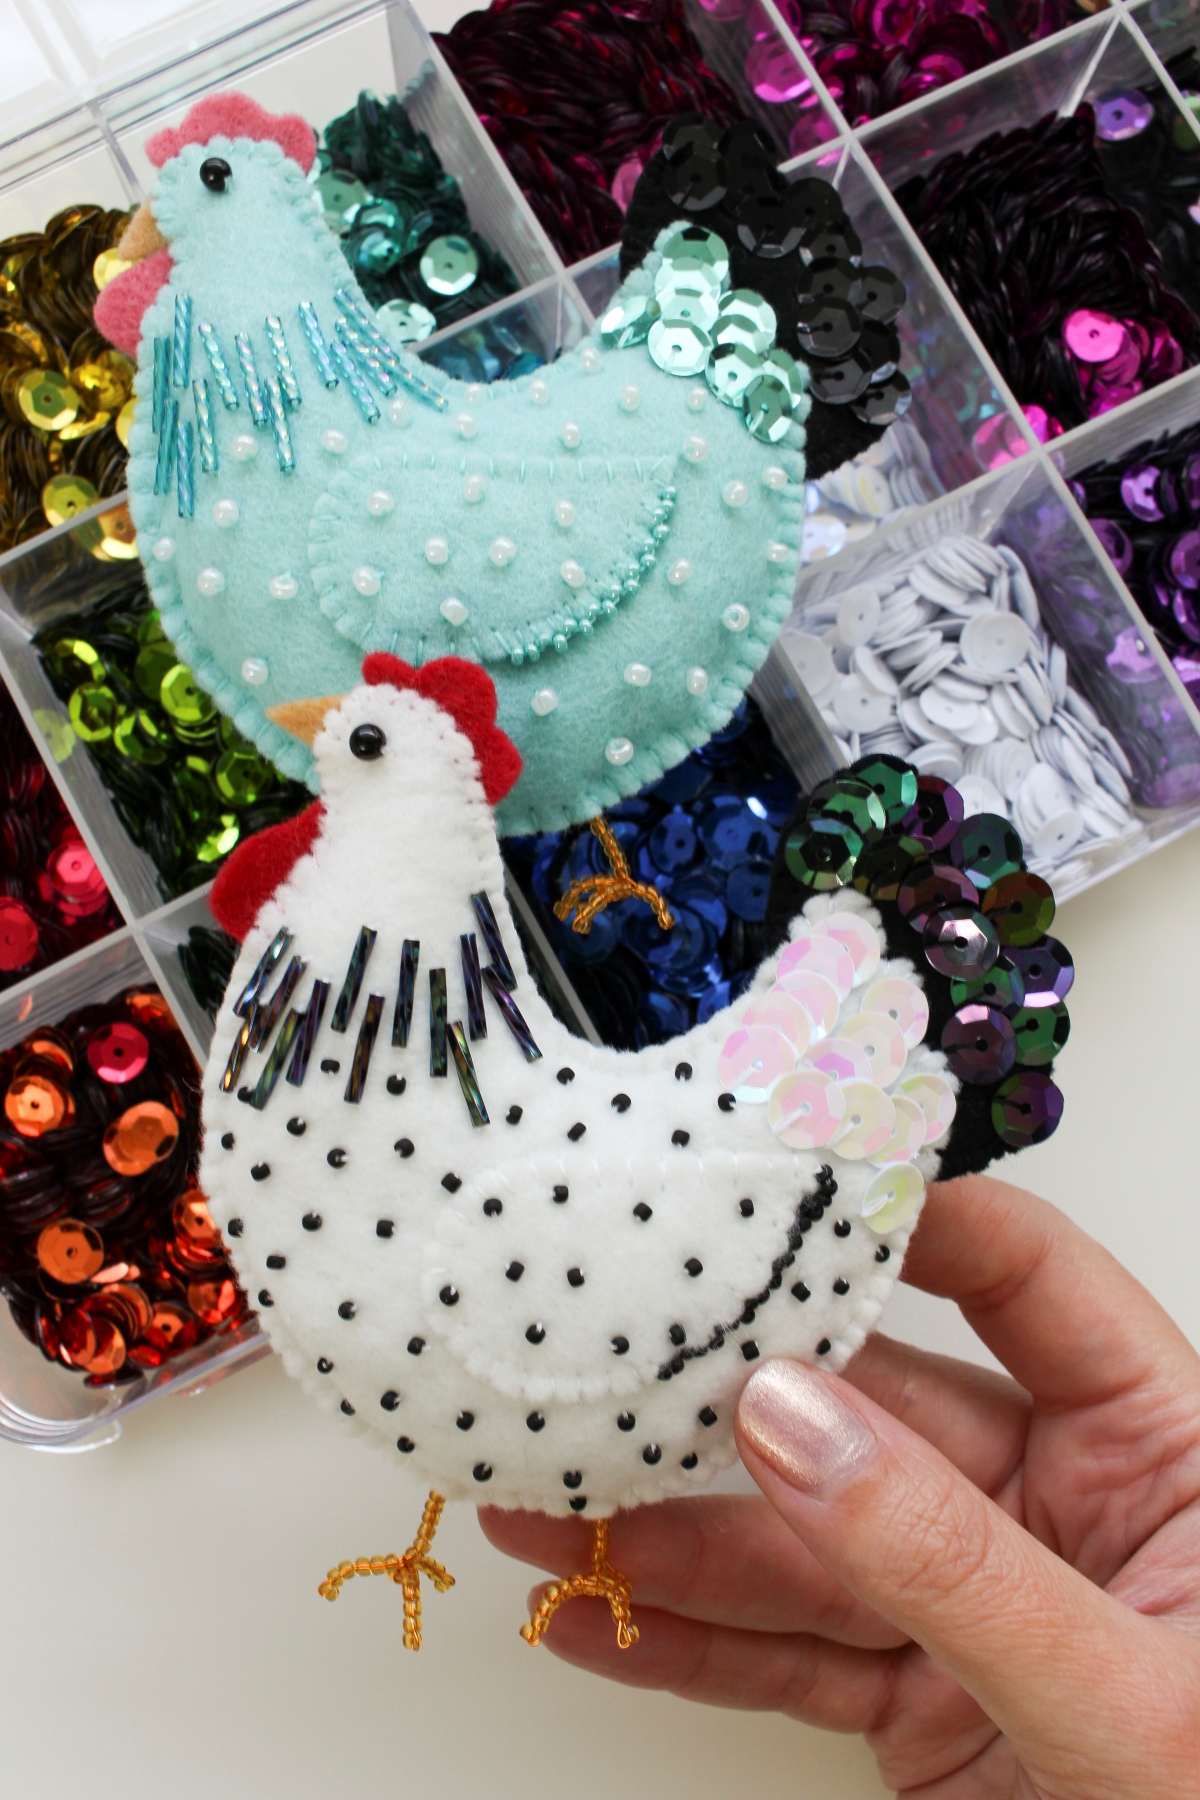
I would absolutely love to see how your felt chickens turn out! Are you sticking to a classic white chicken with “natural” beaded details, or are you experimenting with a colorful, vibrant flock?
Leave a comment below to let me know, or tag me on social media (I’m @danslelakehouse everywhere) so I can see and share your beautiful, handmade ornaments!
And make sure to PIN this DIY felt chicken ornament tutorial to Pinterest for spring, so you can also make a felt hen Easter ornament or a spring felt chicken garland with felt chickens, felt bunnies and more spring farm animal felt crafts.
Happy crafting!