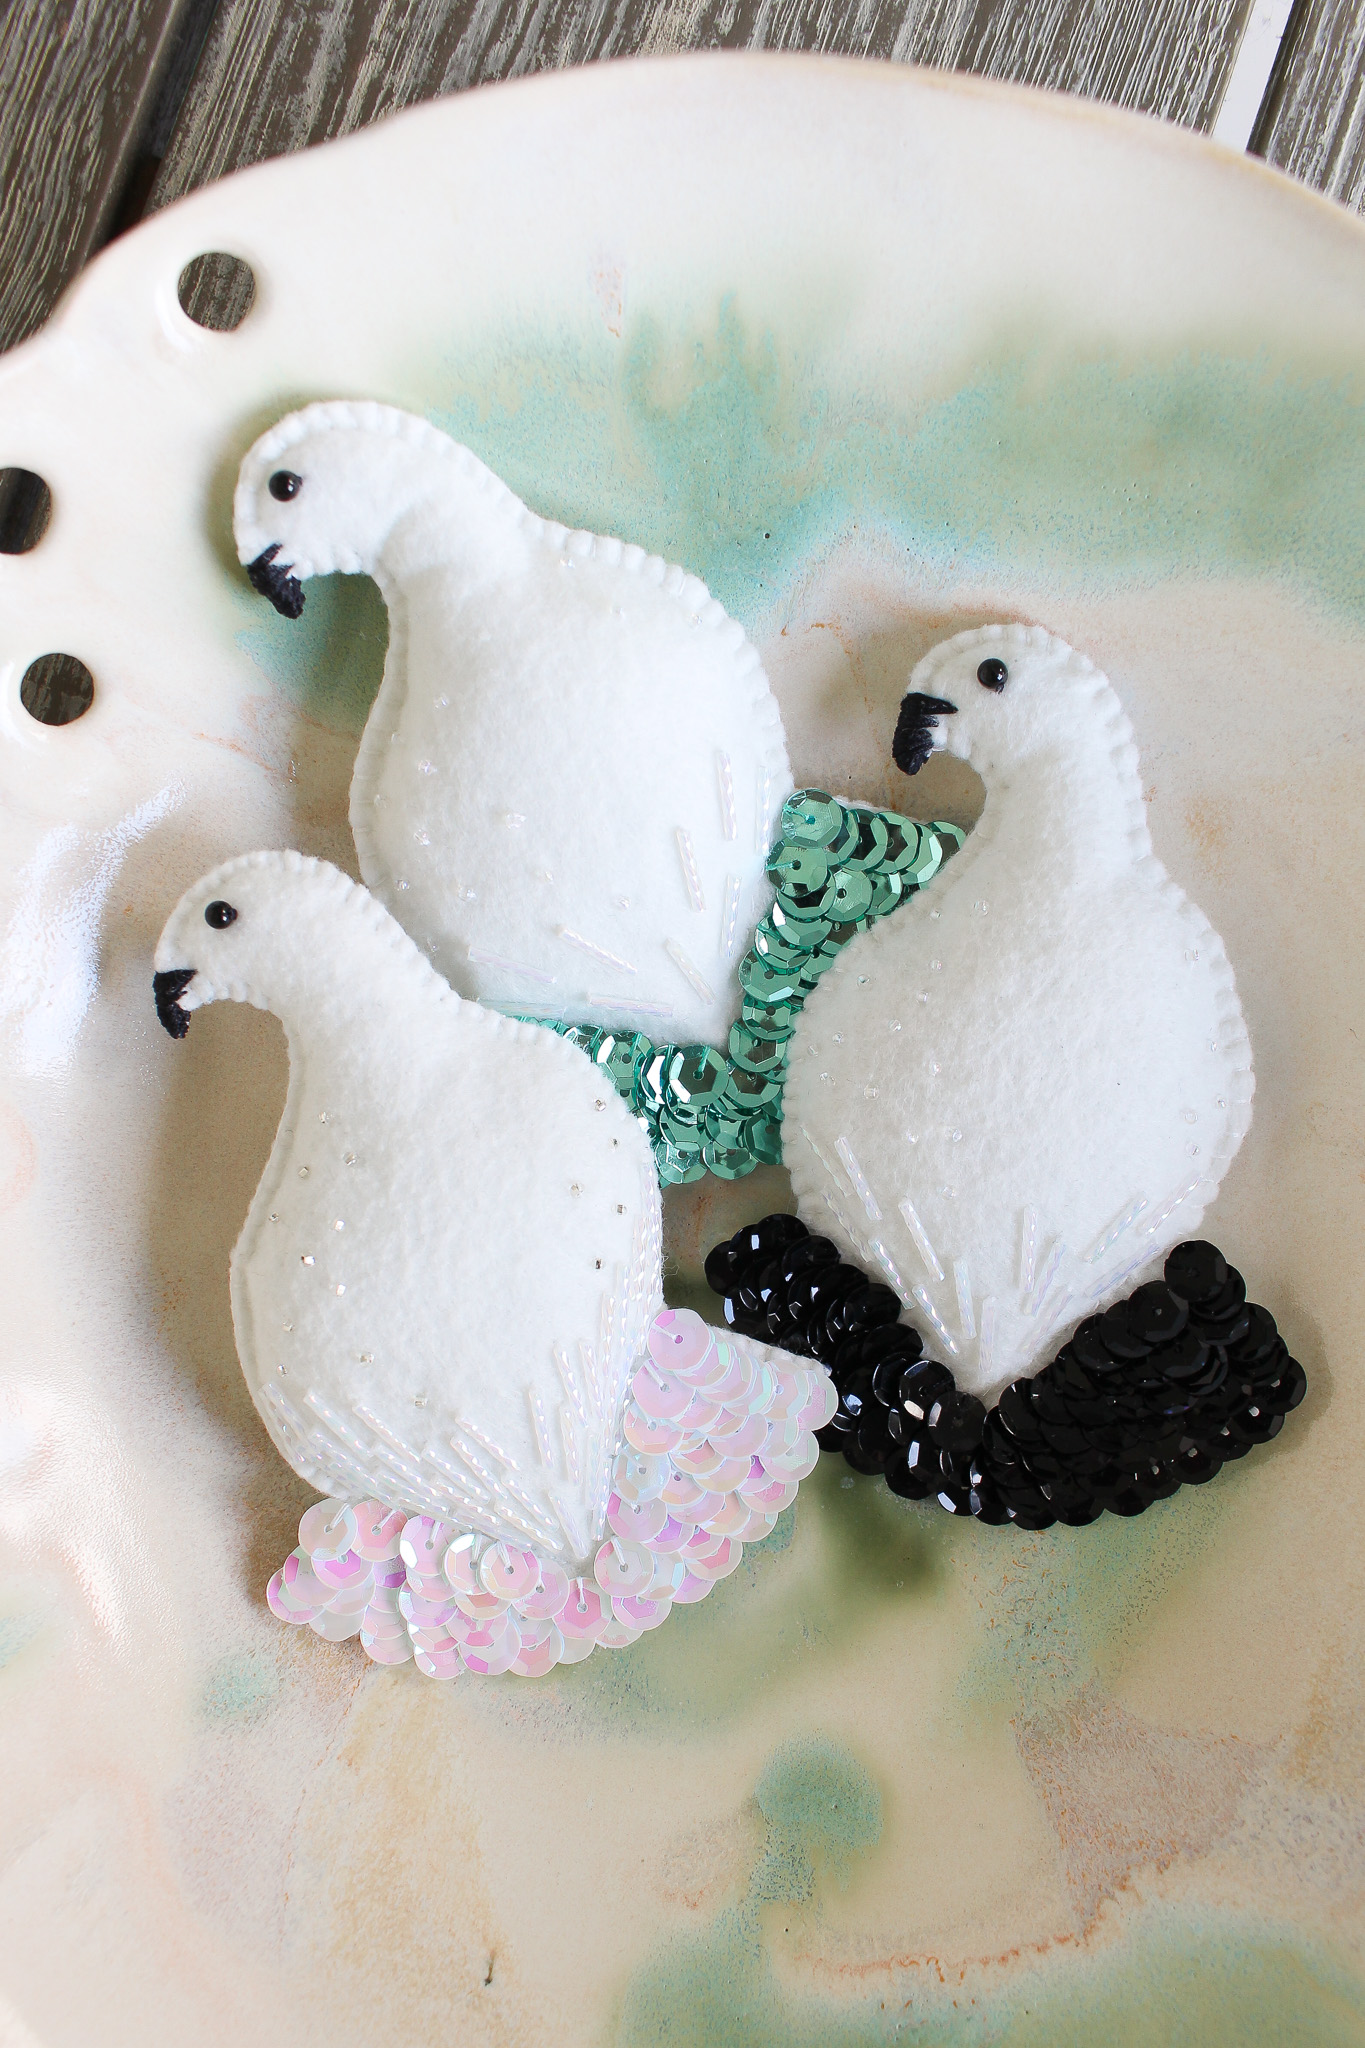
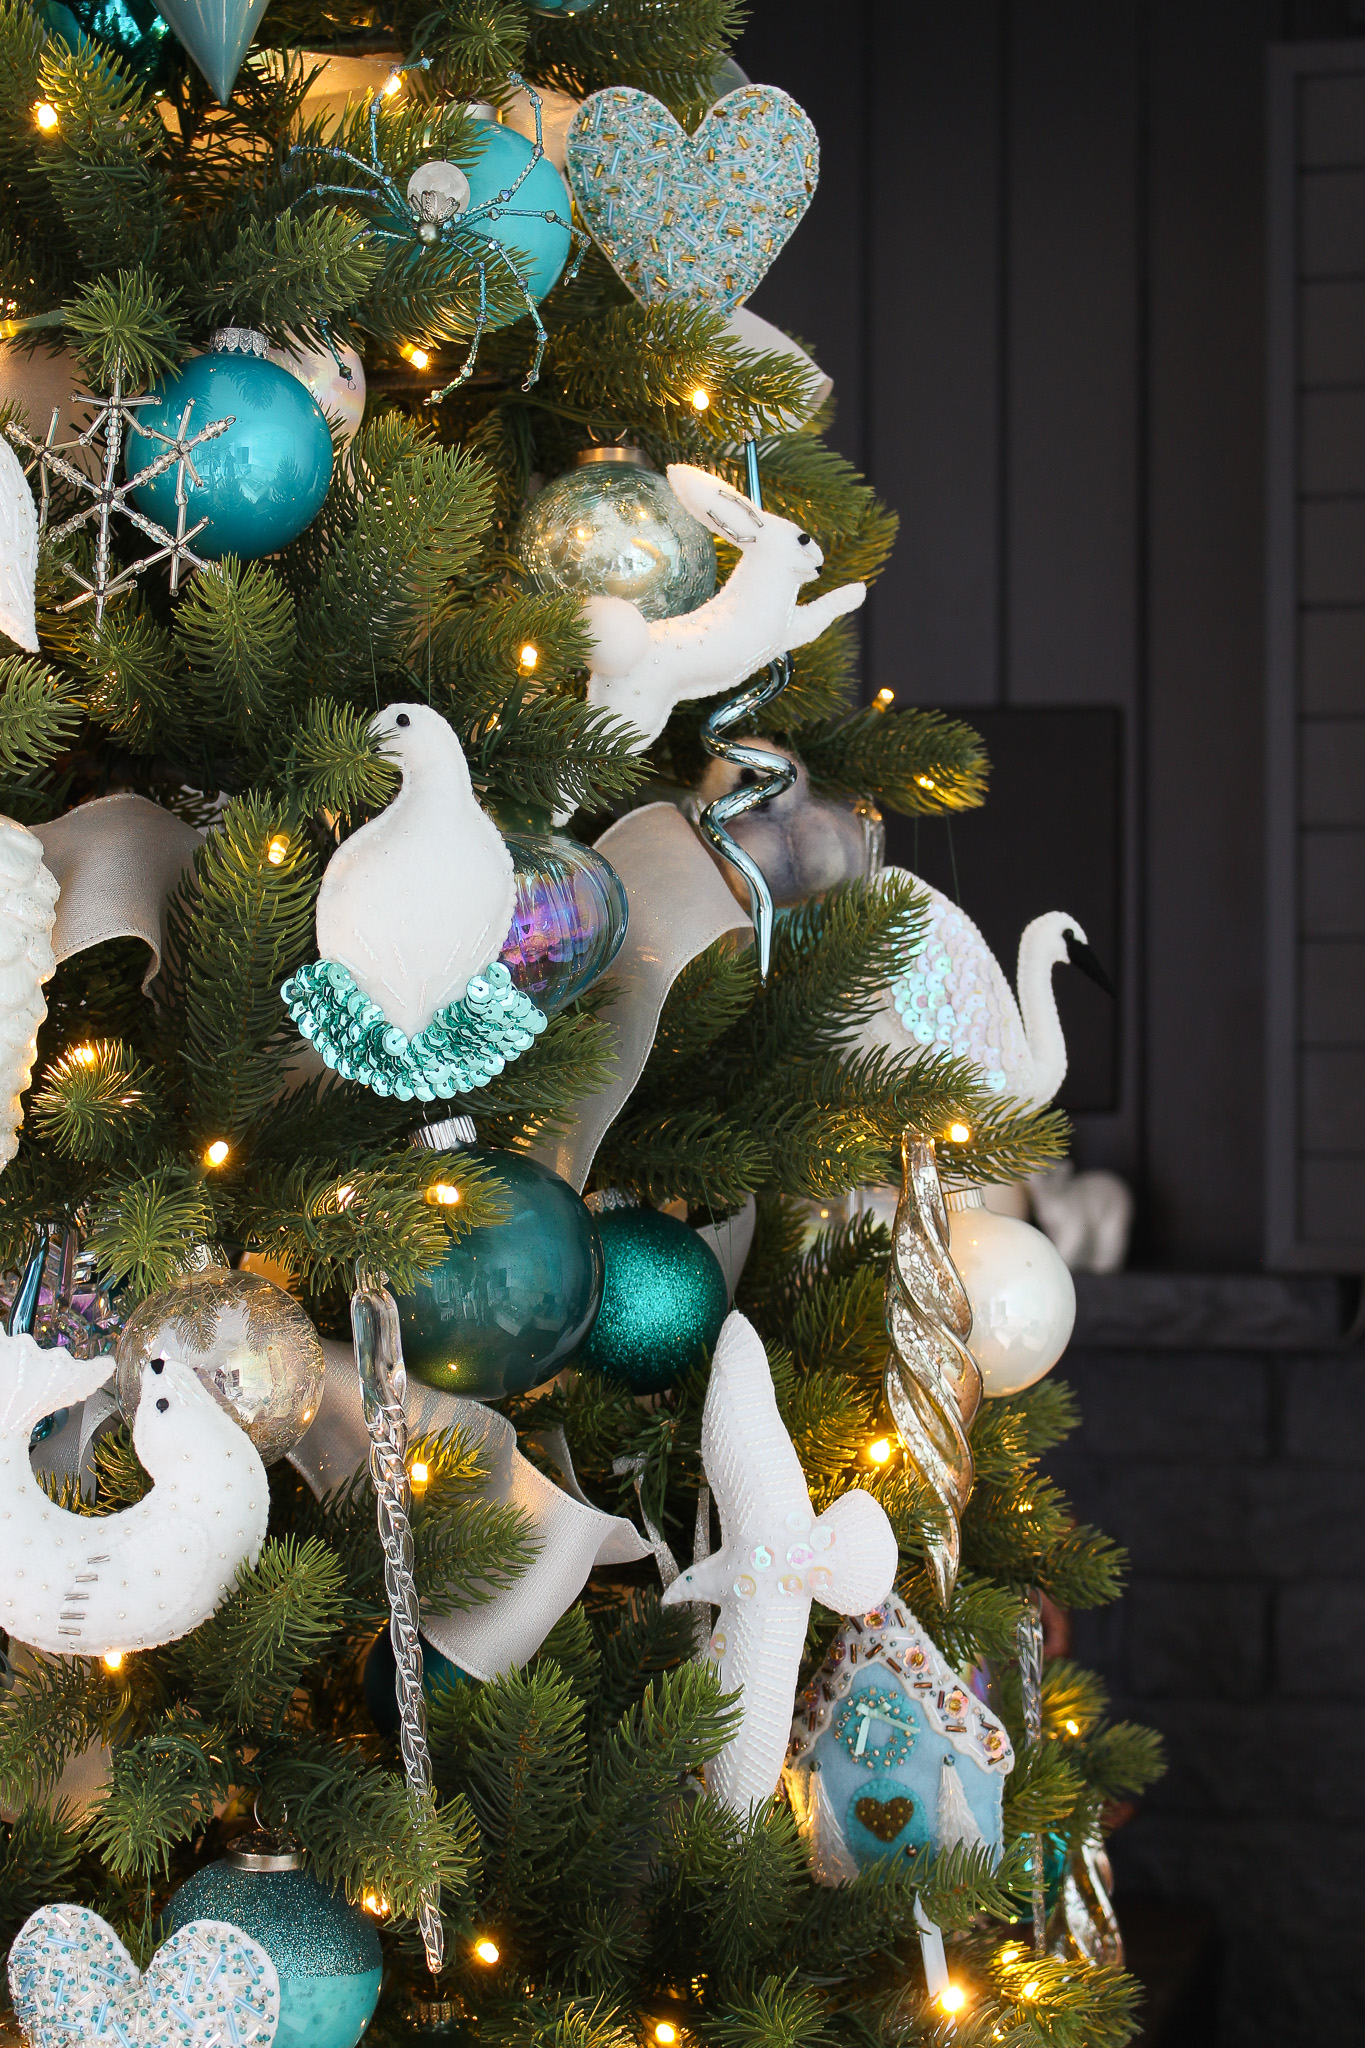
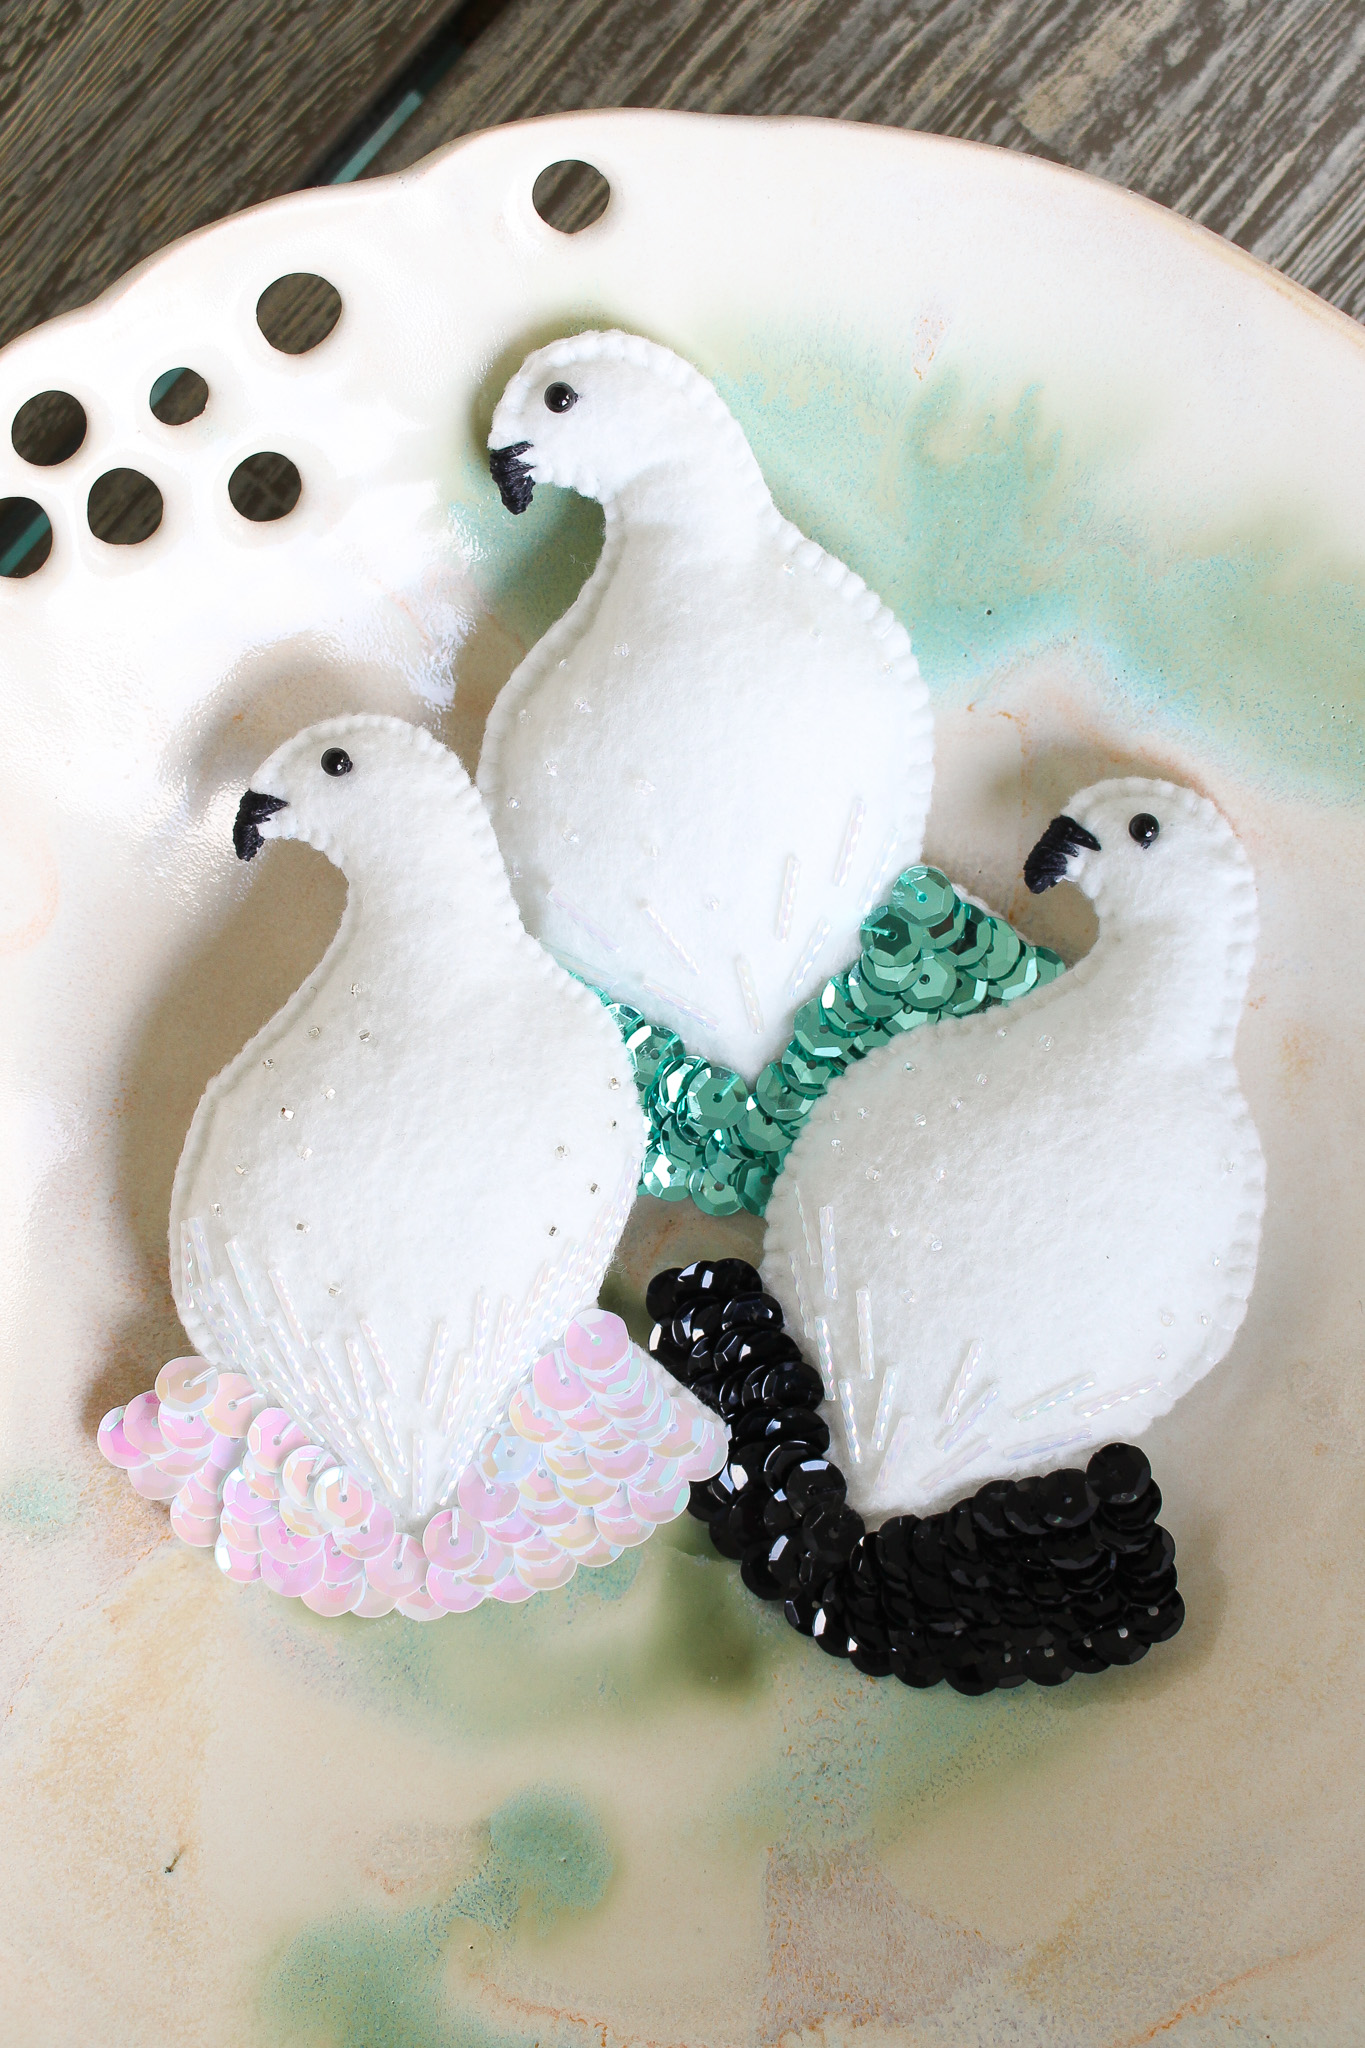
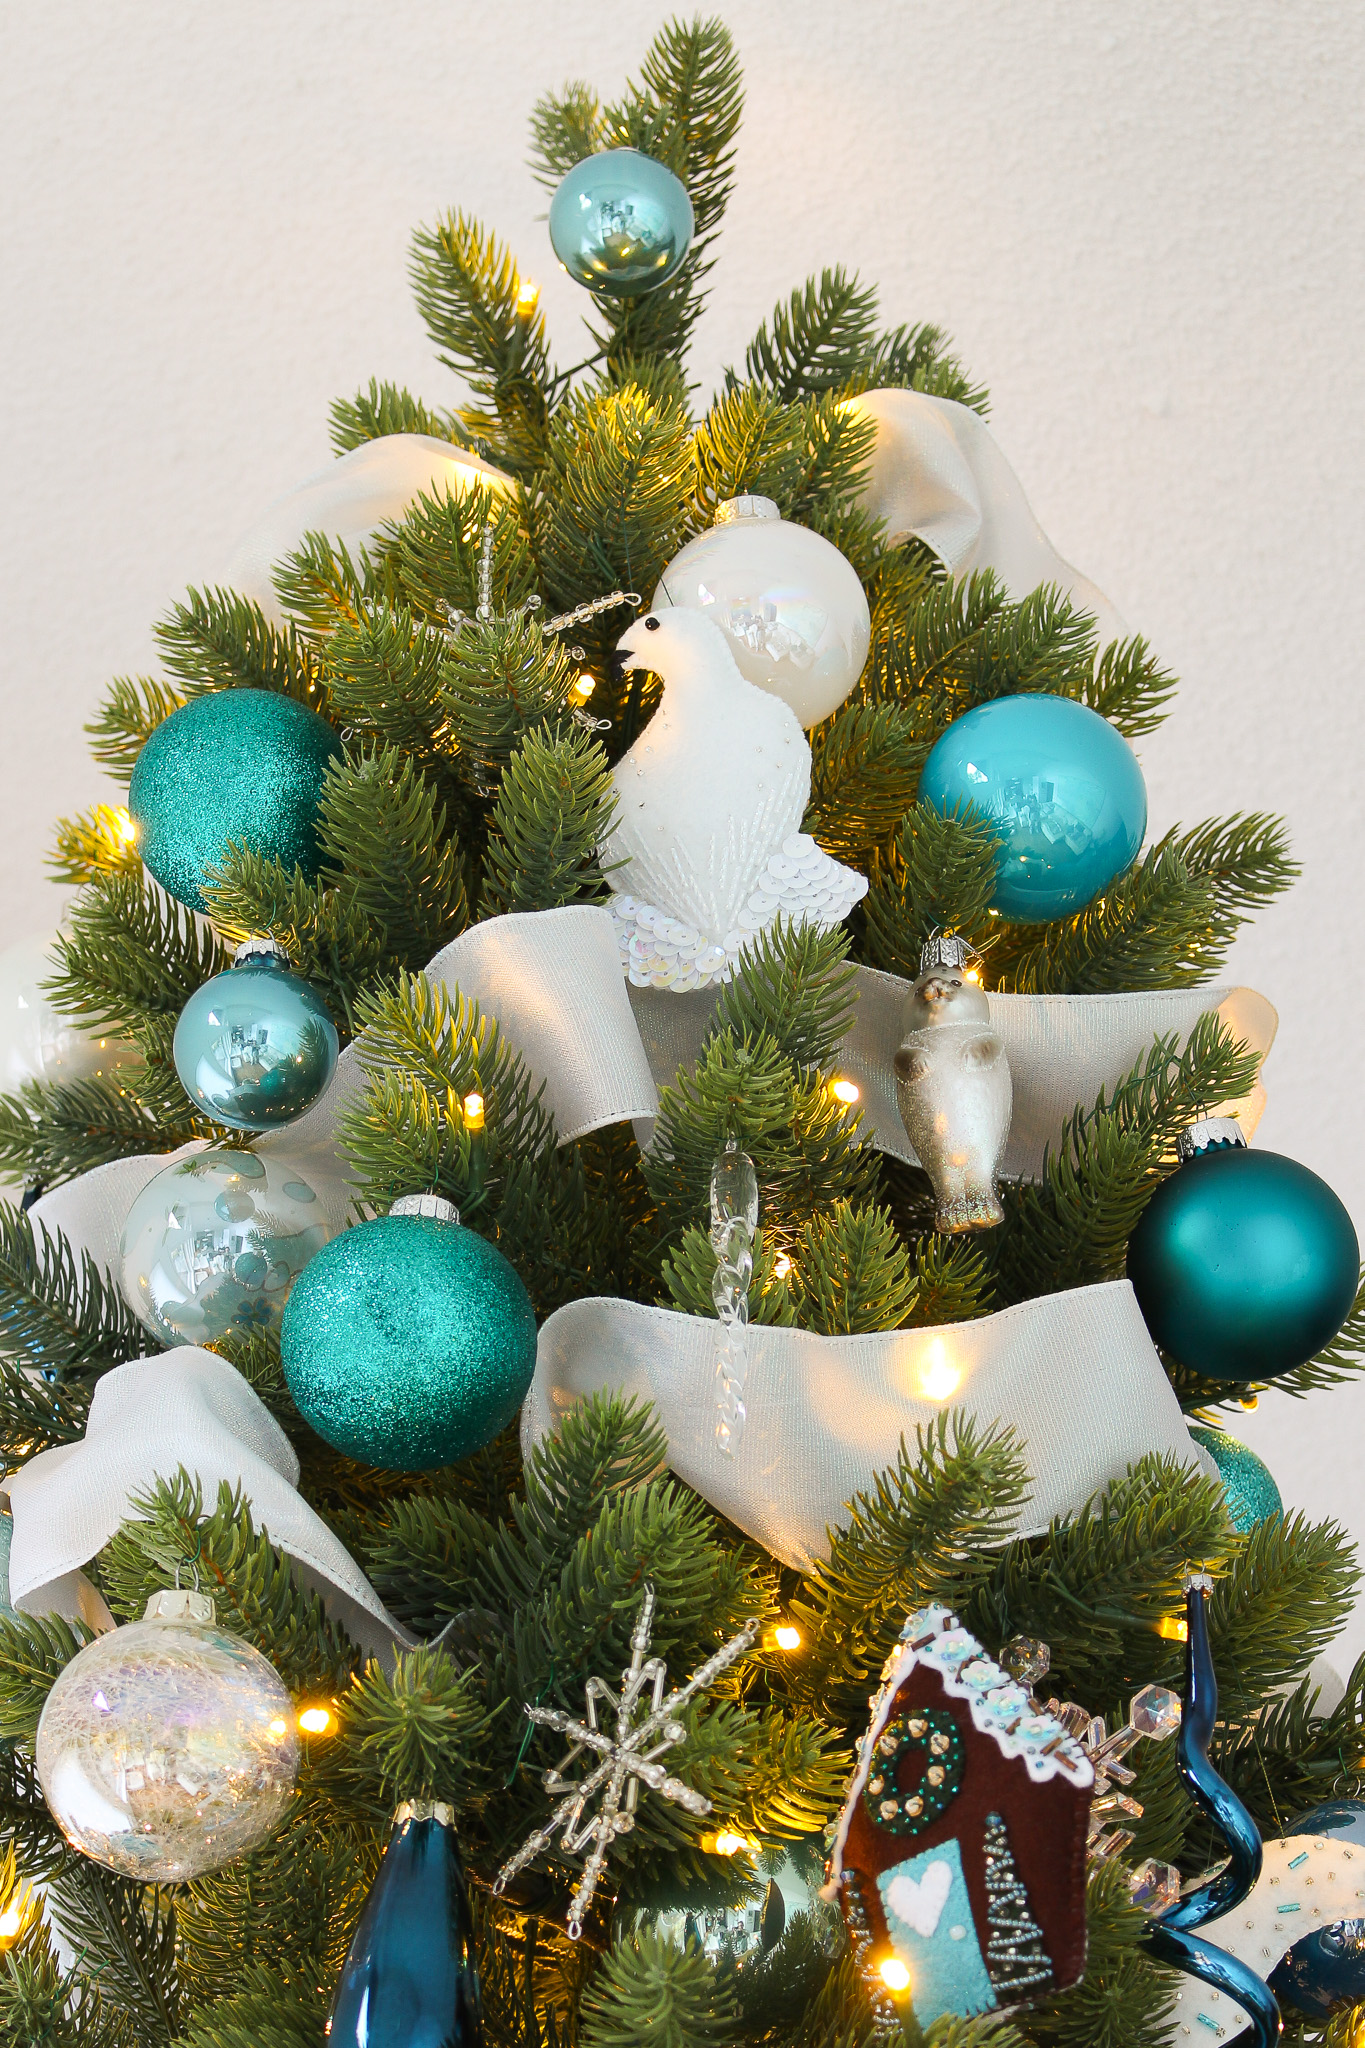
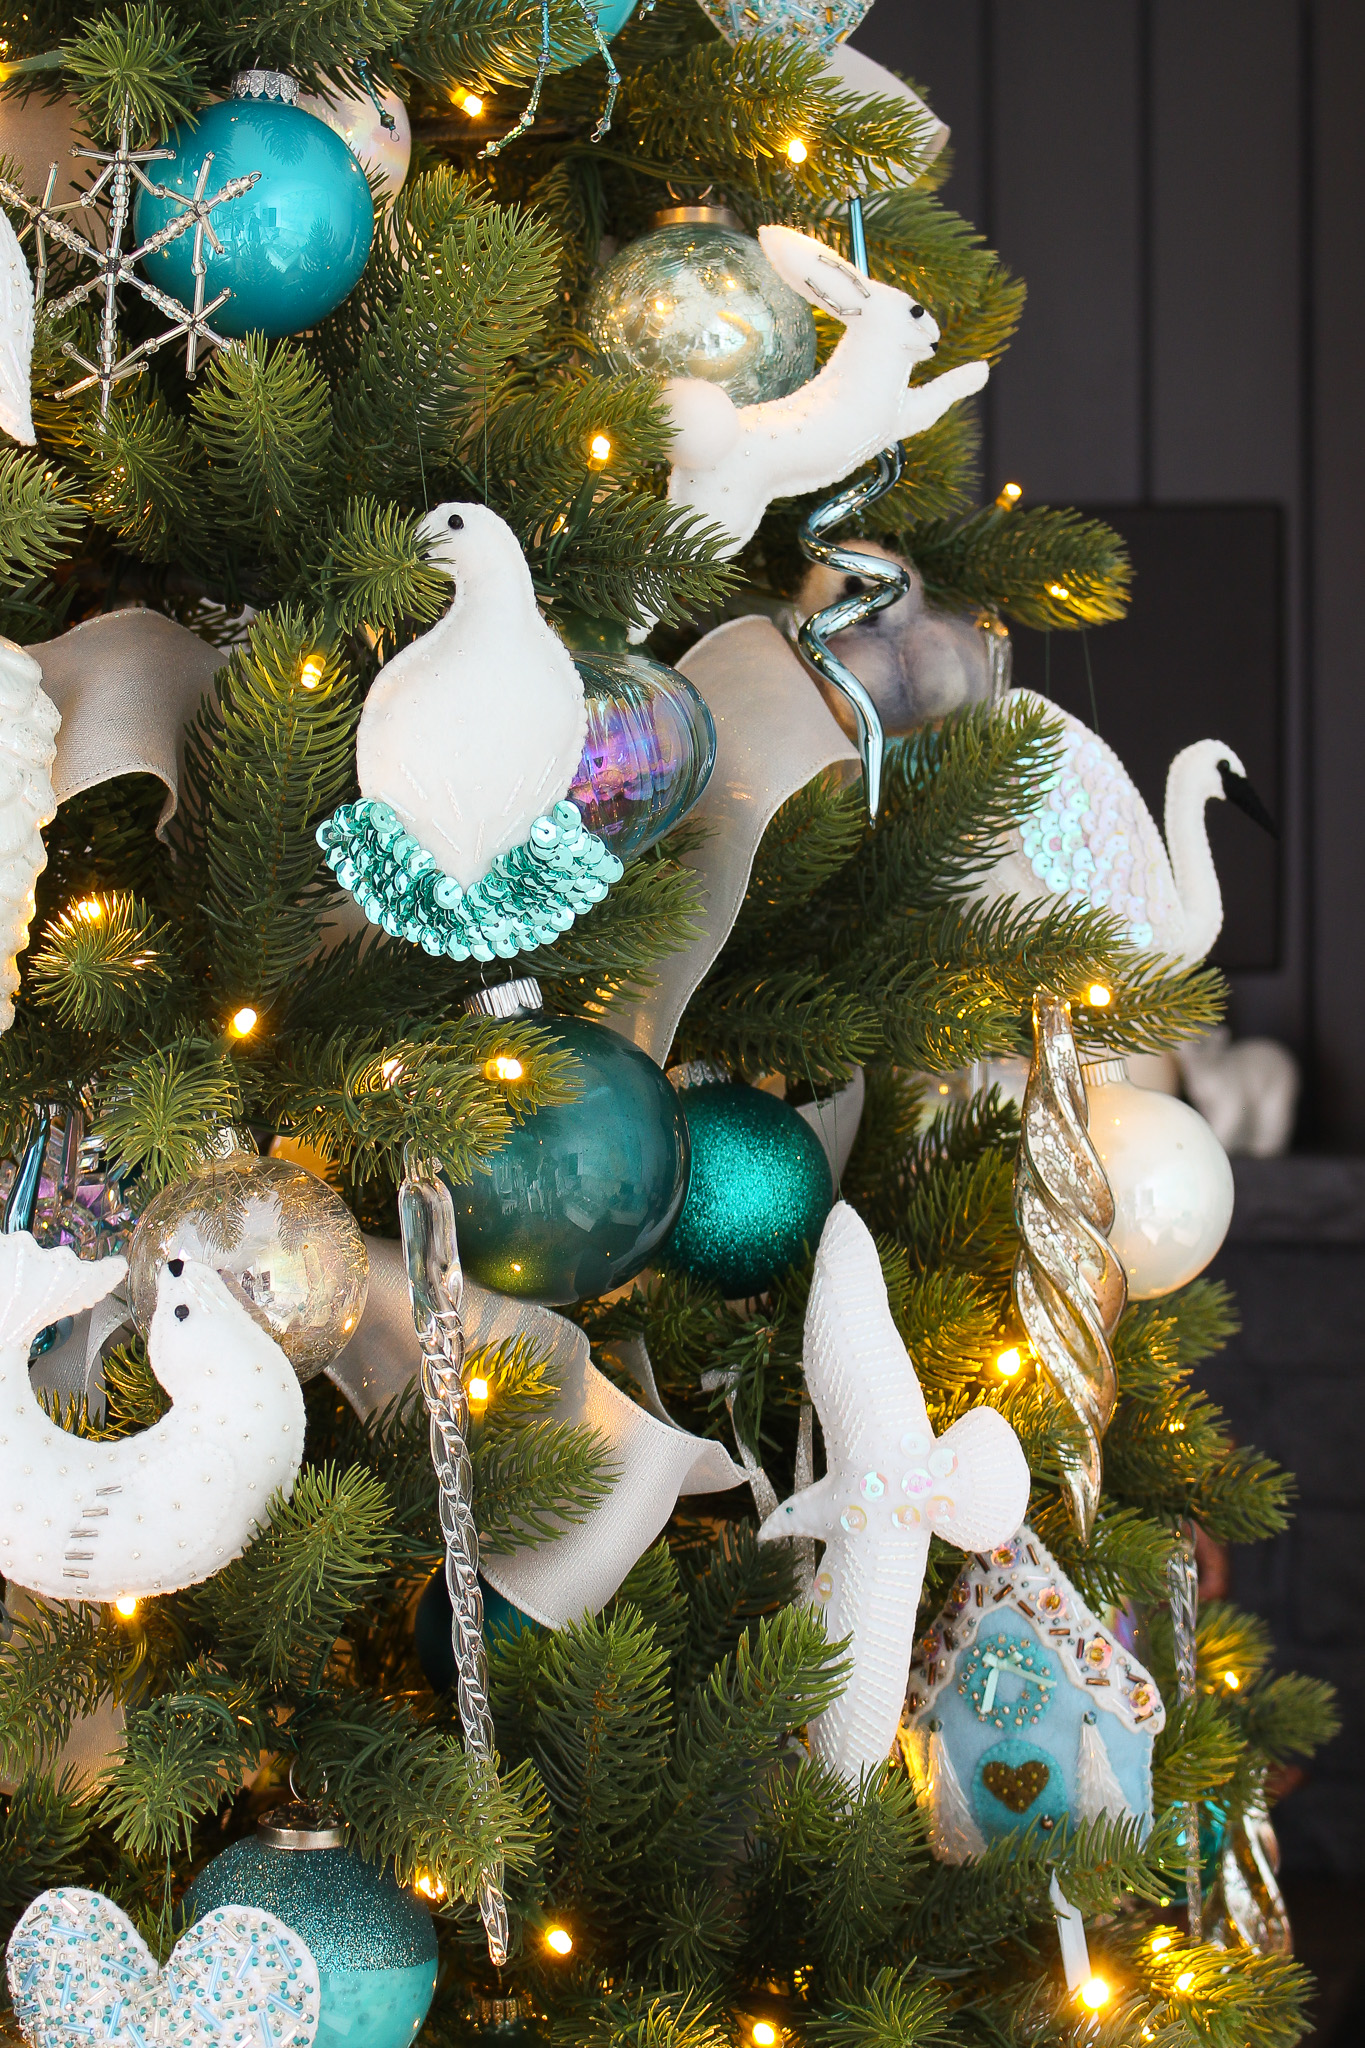
Technically this DIY felt bird ornament (with pattern!) is a Ptarmigan – designed at the request of my Hubby, to complement my other Tundra felt animal ornament patterns. He’s right, this white felt Ptarmigan is the perfect addition and pairs perfectly with the DIY felt jumping fox ornament, DIY felt sitting fox ornament, DIY felt leaping bunny ornament, DIY felt polar bear ornament, and DIY felt seal ornament. Click here for the new DIY felt ptarmigan ornament pattern. If you have tried those DIY felt animal ornaments already, you’ll love this one – especially because the beading/sewing is a touch more advanced than last year’s easier designs. If you’re not into Ptarmigans, specifically, I think this stylized bird can also pass for a dove or other bird – you’ll see how the different sequin colors change the look completely (and a different felt color/beading would as well).
Felt Bird Ornament Supplies:
- My Ptarmigan Felt Ornament Template
- Soft White Felt (not the stiff/rigid kind)
- White Thread (I like Coats & Clark Hand Quilting Thread – it’s thin enough for beading, but strong enough to sew the ornament together)
- Green Heavy Duty Thread (optional – for hanging)
- Black Thread (for the beak and stitching on the eye bead)
- Transparent Iridescent Glass Seed Beads (I typically use sizes 10/0 OR 11/0, but you can use what you have)
- 12mm Bugle Beads
- 3 mm Black Bead (for the eye)
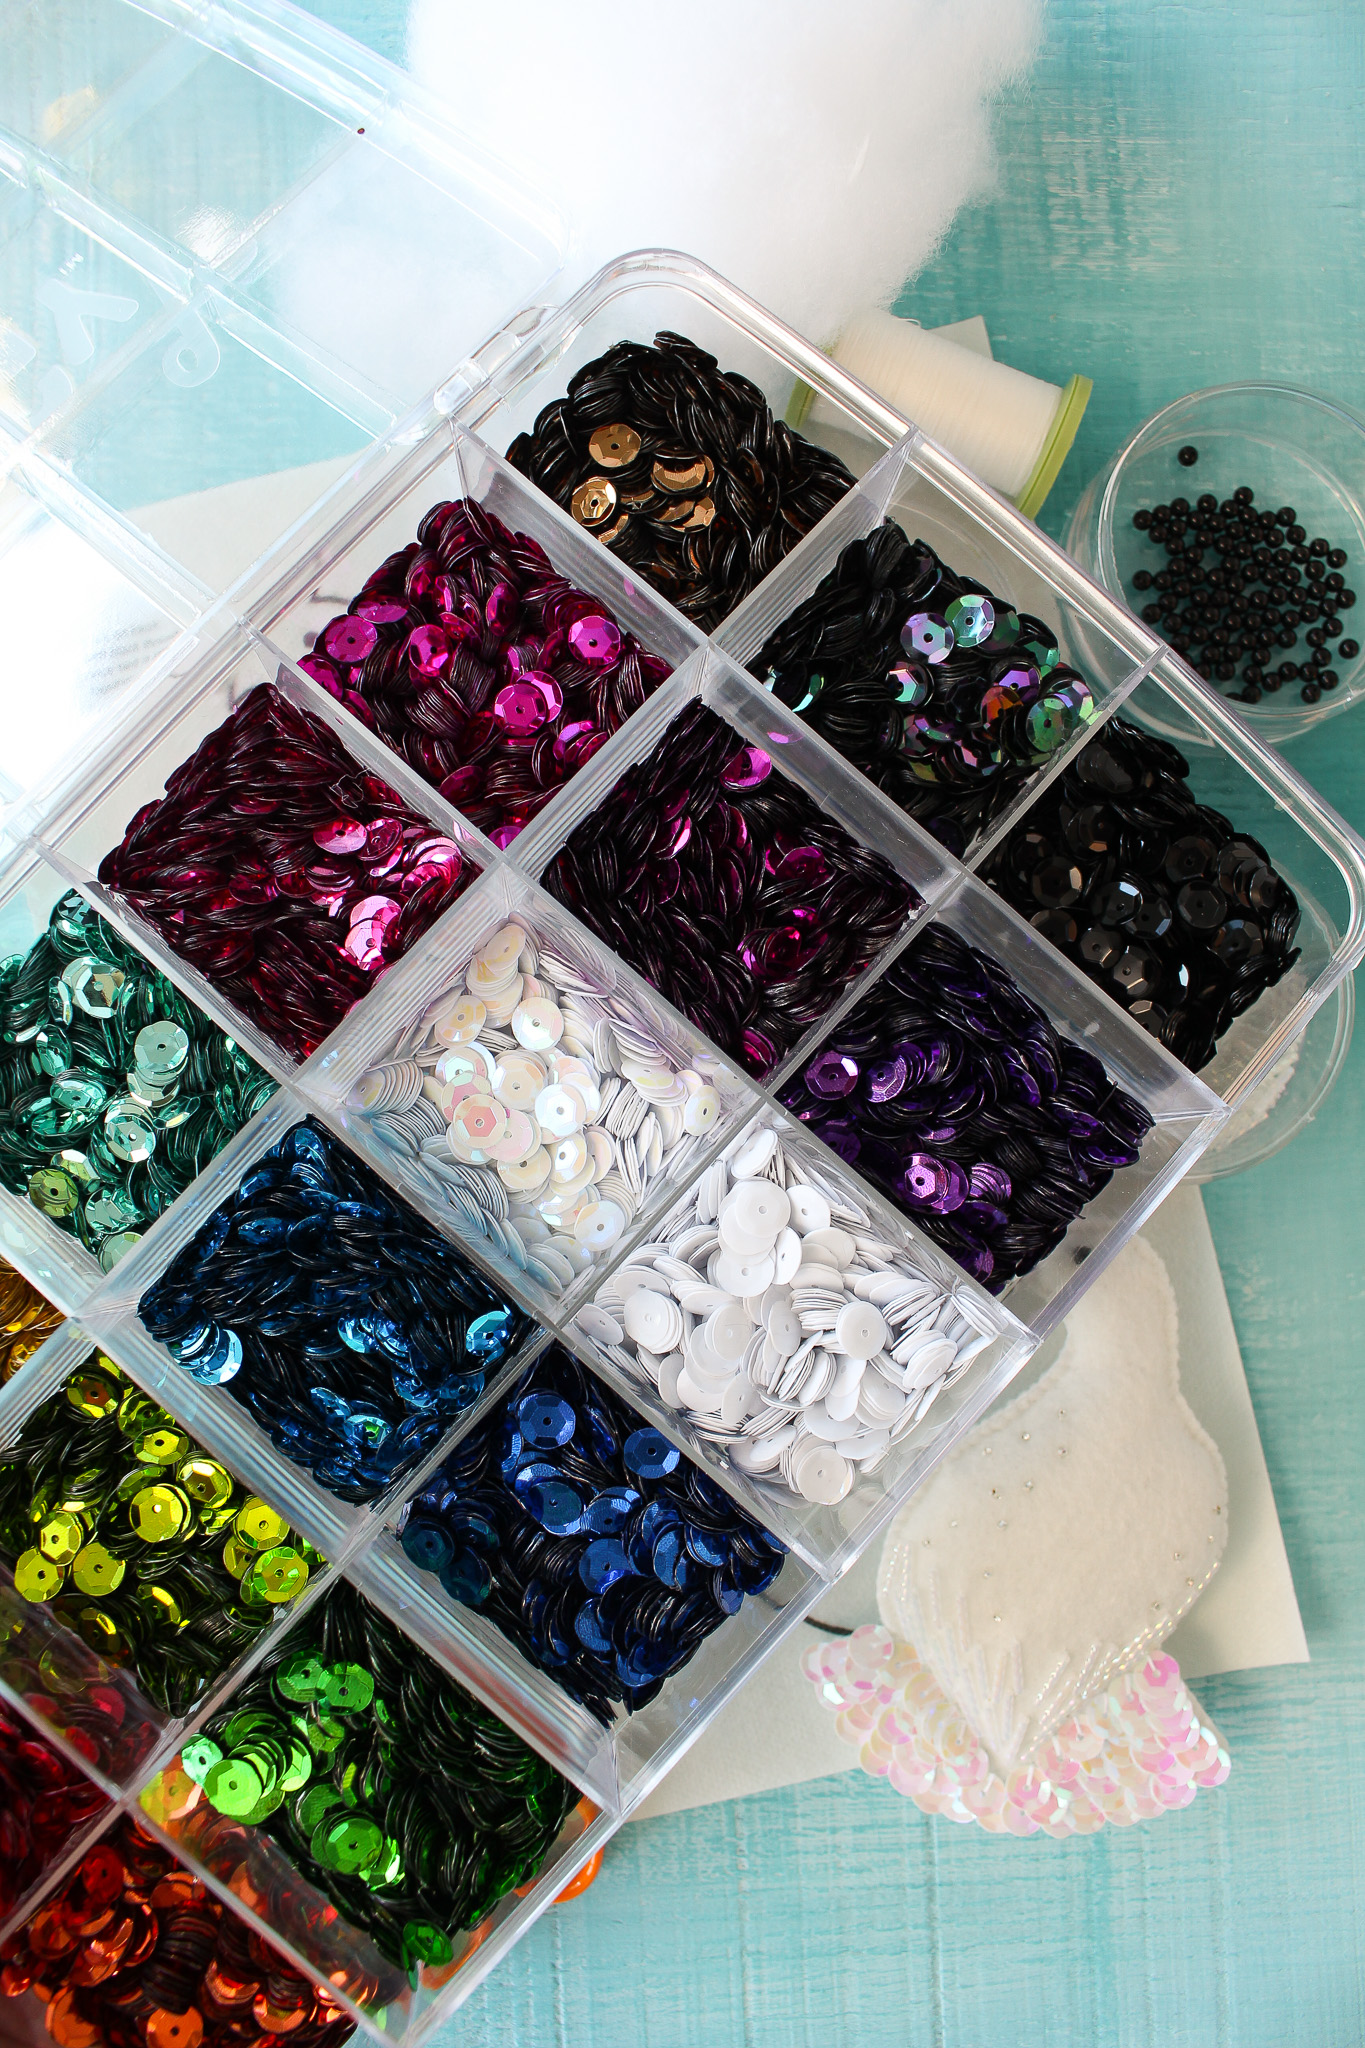
- Black or White Sequins
- Poly-fil or Wool Batting/Stuffing
- Beading Needle
- Hand Sewing Needle
- Short Fabric Scissors
- Printer
- Fine Tipped Sharpie + Printer Paper OR Gypsy Quilter Freezer Paper OR Stick N Stitch Self Adhesive Wash Away Stabilizer
- Stuffing Tool (optional)

Notes on Supplies:
Find more DIY felt ornament supply suggestions here. But please note that you do NOT need to purchase everything on this list. For example: you can skip beading or add embroidered details instead, if you have those supplies already. Repurpose stuffing from old pillows or use felt/fabric scraps to stuff the ornaments. Stick to a sharpie for tracing and use that same sharpie to stuff the ornaments, if you don’t want to purchase the stick on stabilizer or stuffing tool. You can make these felt ornaments with very minimal supplies. I’ve linked everything I’ve used, but don’t feel pressured to buy it all – or buy it all at once. Making DIY felt animal ornaments CAN be a very economical craft. If you are able to purchase some supplies, I bought a multi-pack of sequins, which is a lot of fun especially if you’re going to be sewing other DIY felt ornaments this season (like my DIY felt gingerbread ornaments).
How to Use My Felt Ornament Pattern:
This pattern is a digital download, available to use immediately. It’s scaled to 8.5 x 11″ and can be printed with any printer onto any paper, cut out, and traced. Alternatively, you can purchase Gypsy Quilter Freezer Paper OR Stick N Stitch Self Adhesive Wash Away Stabilizer. You can then print the pattern onto either material and follow the manufacturer’s instructions. Here’s a rundown of each method:
- Printer Paper: Print the pattern onto any printer paper, cut out the shapes, and then trace them onto your felt with a thin sharpie. Cut out the felt shapes.
- Freezer Paper: Print the pattern onto freezer paper, roughly cut out the shapes, iron them onto the felt and then cut out around the template. Remove the freezer paper. Benefit: it’s a steadier process than simply tracing and you don’t need to draw on the felt.
- Wash Away Stabilizer: Print the pattern onto stabilizer, roughly cut out the shapes, then stick them onto the felt. Cut out the shapes and stitch on the beads. Then dissolve the stabilizer with water. Benefit: this option allows you to take advantage of the additional details on my pattern, which indicate where to place the beads.
Pattern Usage Rights:
Please note: this pattern is copyright protected and is for your PERSONAL USE ONLY. It is not licensed to be shared online, used for commercial purposes, or sold.
How to Make a DIY Ptarmigan Felt Ornament:
- Print out my felt ptarmigan ornament pattern.
- If using plain paper: cut out both of the shapes and trace onto felt with a fine tipped permanent marker.
- Cut out both shapes, inside the marker lines, with short fabric shears.
- If using Freezer Paper or Wash Away Stabilizer: roughly cut out both shape first, then either iron/stick onto felt.
- Cut out both shapes, following the pattern, with short fabric shears.
- Remove the freezer paper, but if using wash away stabilizer you can leave it on for the beading steps below.
- Thread a beading needle with white thread, for the following 2 steps:
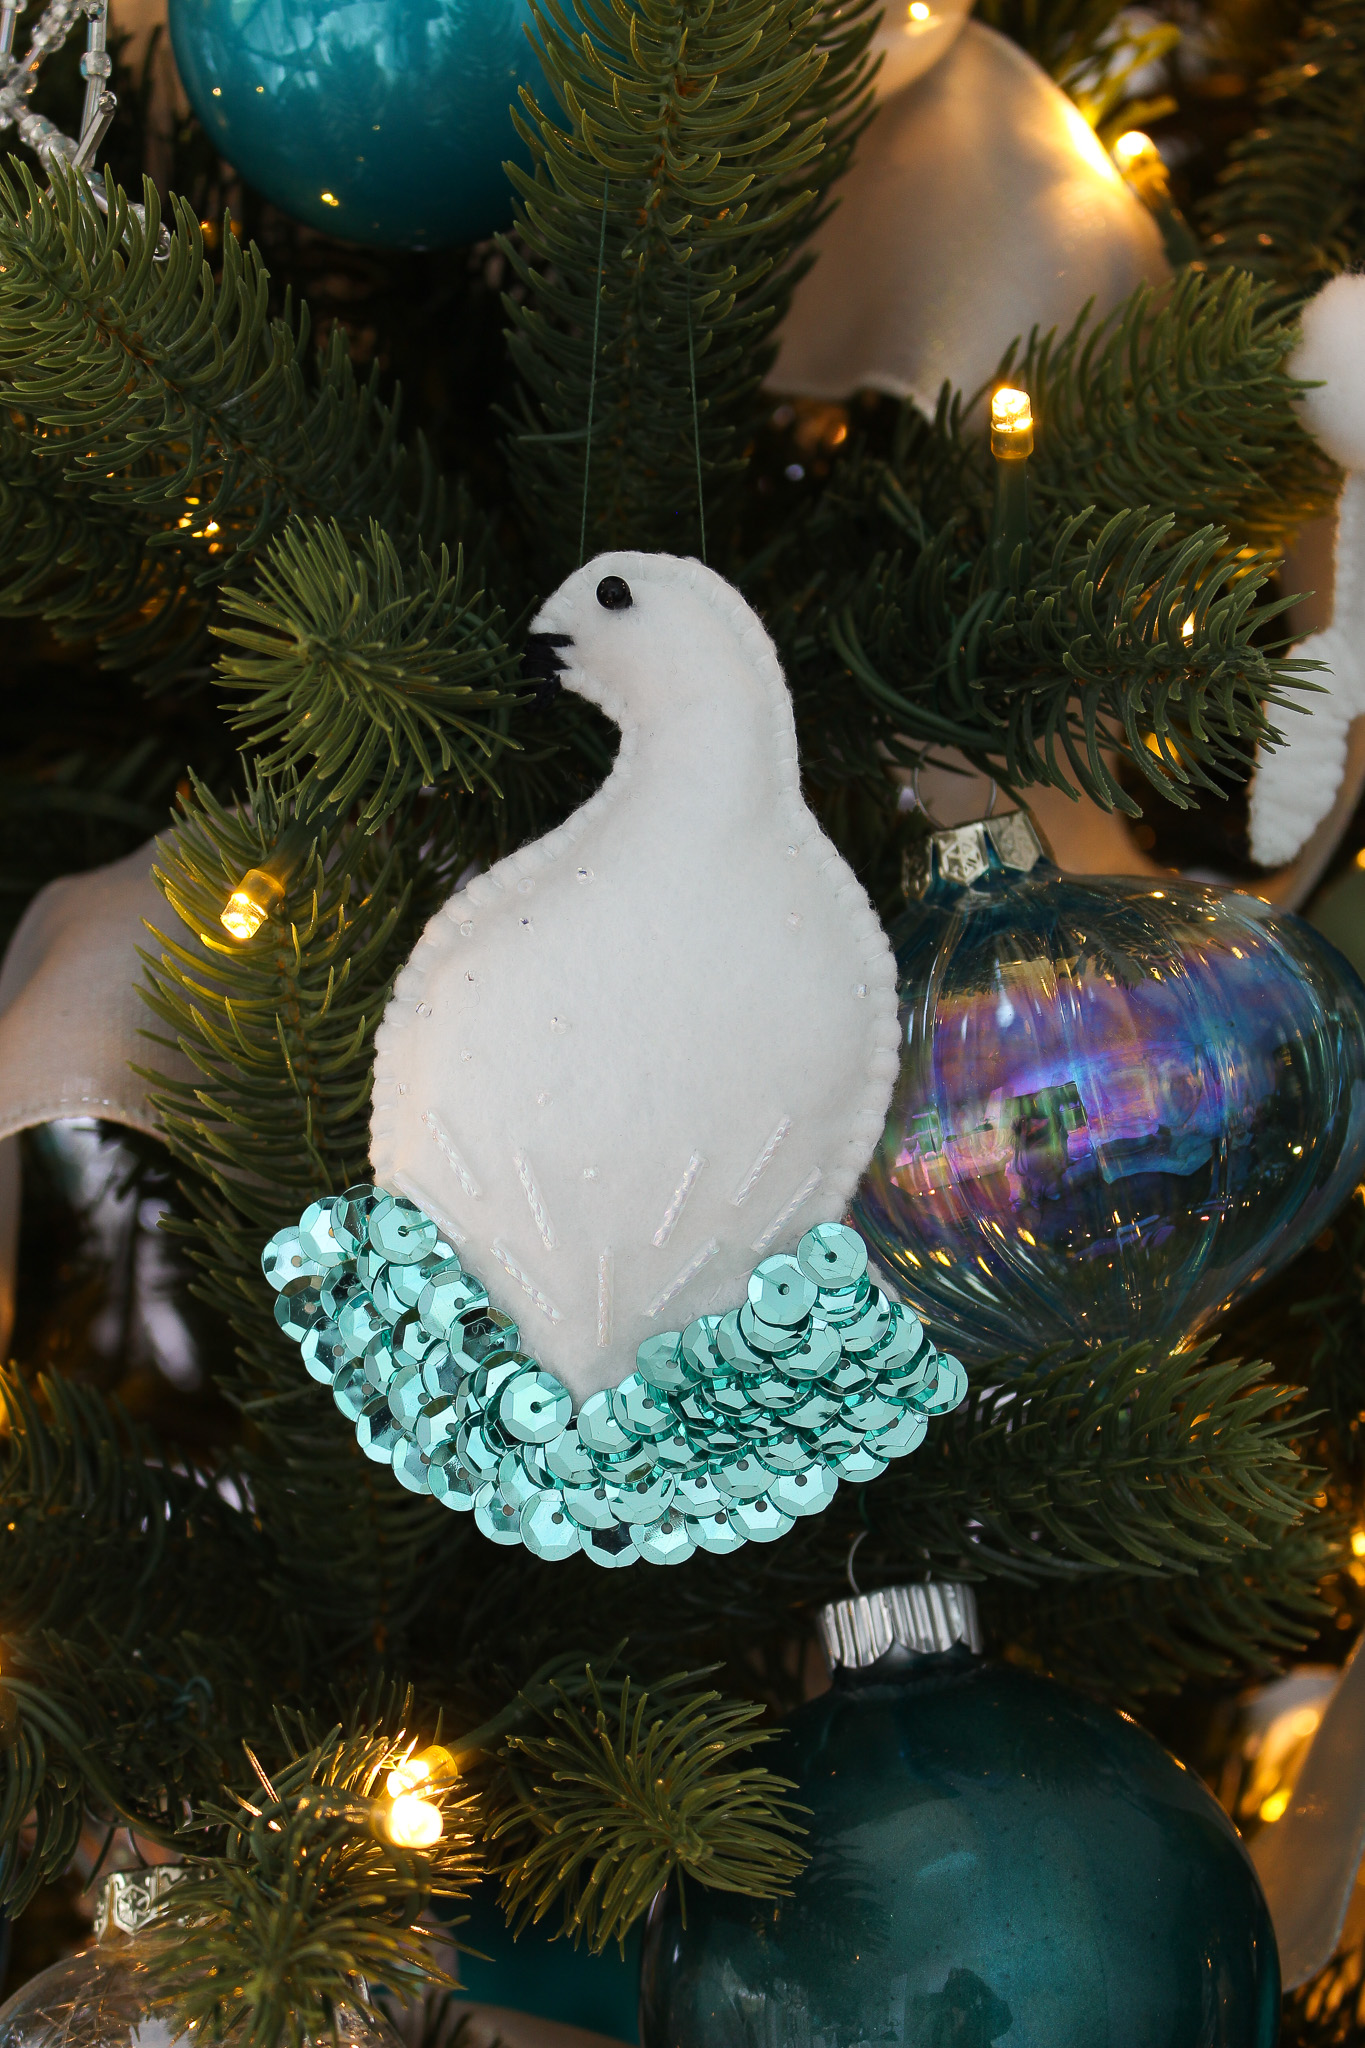
- Stitch on a sprinkle of glass seed beads for “snow”.
- Stitch on bugle beads for bum “feathers”.
- Still using a beading needle, switch to black thread for the next step:
- Stitch on the 3mm black round “eye” bead (or use a black seed bead).
- Switch to a hand sewing needle for the following steps:
- Stitch along the bum/tail as indicated on the pattern.
- If using stick on stabilizer, rinse it away.
- Stitch on rows of sequins.
- Using a blanket stitch, sew together the front and back of the felt bird, leaving the right side open
- Use a pencil/capped pen or stuffing tool to work small sections of stuffing at a time into the face and body.
- Keep sewing but stop every inch or so to add more batting.
- Repeat until the ornament is fully stuffed, and you’ve sewn the ornament fully closed.
- Once you have sewn the bird closed, knot the thread to secure it, bury the end and trim the thread.
- Still using a hand sewing needle, switch to black thread for the next step:
- Add stitches, starting from the back, to create the “beak” shape.
- Once the beak is shaped, knot the black thread at the back of the ornament, bury the end and trim the thread.
- Still using a hand sewing needle, switch to green thread for the next step:
- To hang, use a needle to string (preferably green) thread across the back.
- Form a loop with the thread and secure with a knot.
How to Sew a DIY Felt Bird VIDEO:
Below is a YouTube short I made, demonstrating the instructions above, but keep reading if you prefer more detailed written instructions featuring step-by-step photos. I also have additional videos in this post, showing a closer look at some of the hand sewing elements.
How to Sew a DIY Felt Bird Ornament – Detailed with Photos + Videos:
Print & Cut Out the Pattern:
After printing out my pattern, cut it out. I have typically recommended cutting inside the lines, but if you cut outside the lines it will show up better on white felt! These small scissors are great for cutting around the details – especially when cutting the felt in the next step.
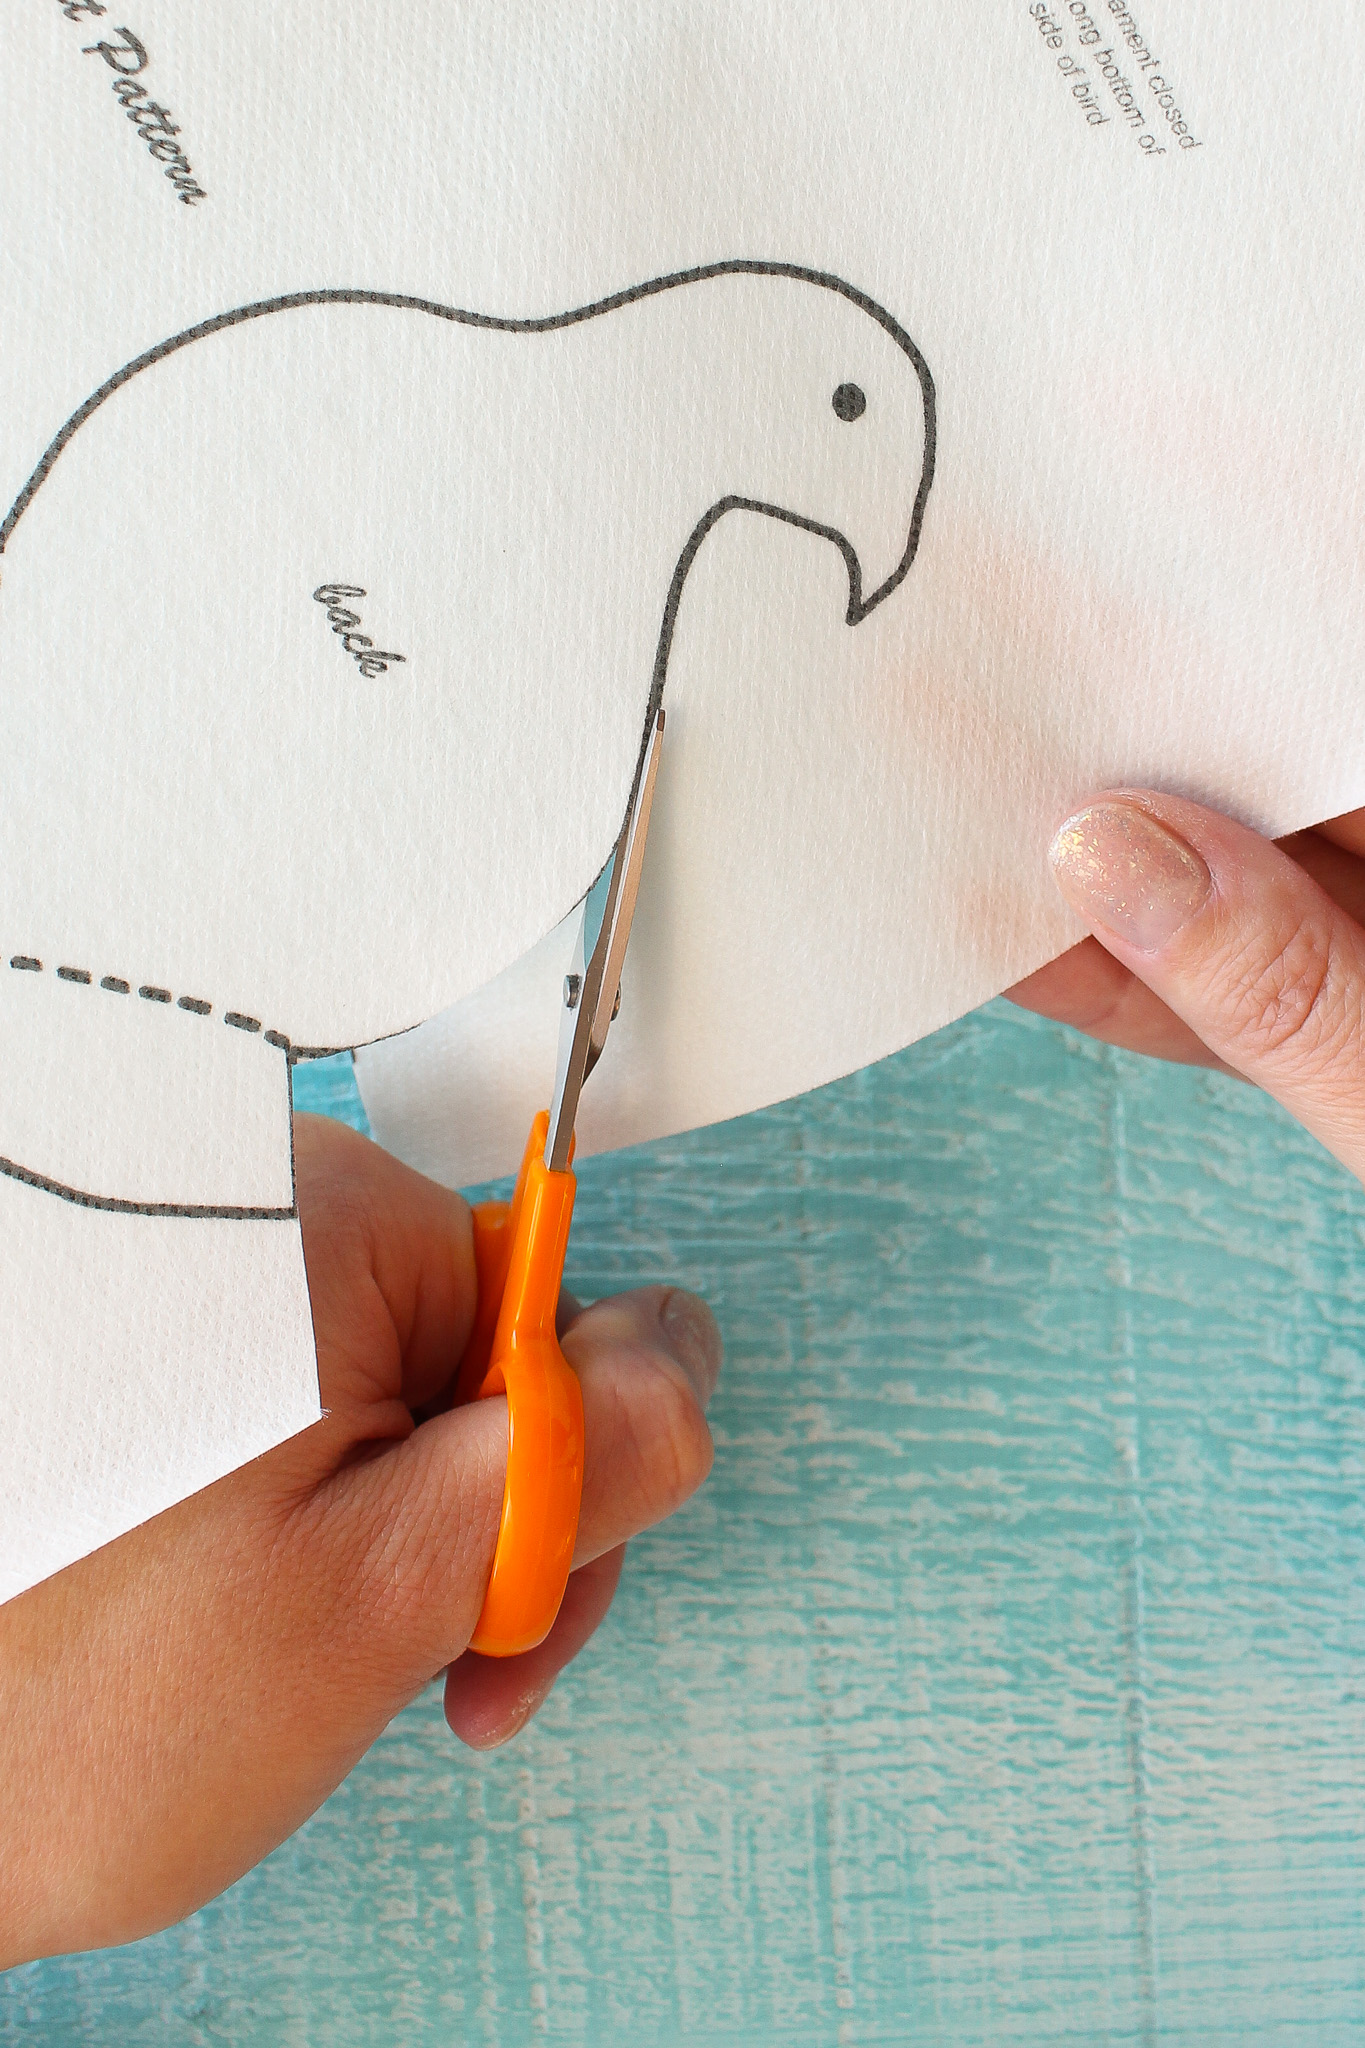
Transfer or Stick the Pattern onto the Felt:
Once you cut out the two shapes, stick them (or trace them) onto felt. Because I am using this dissolving stabilizer, I stick it onto the “good” side of the felt – for some felts, it’s more obvious than others which is the “right” or “wrong” side. For some brands, it doesn’t matter.

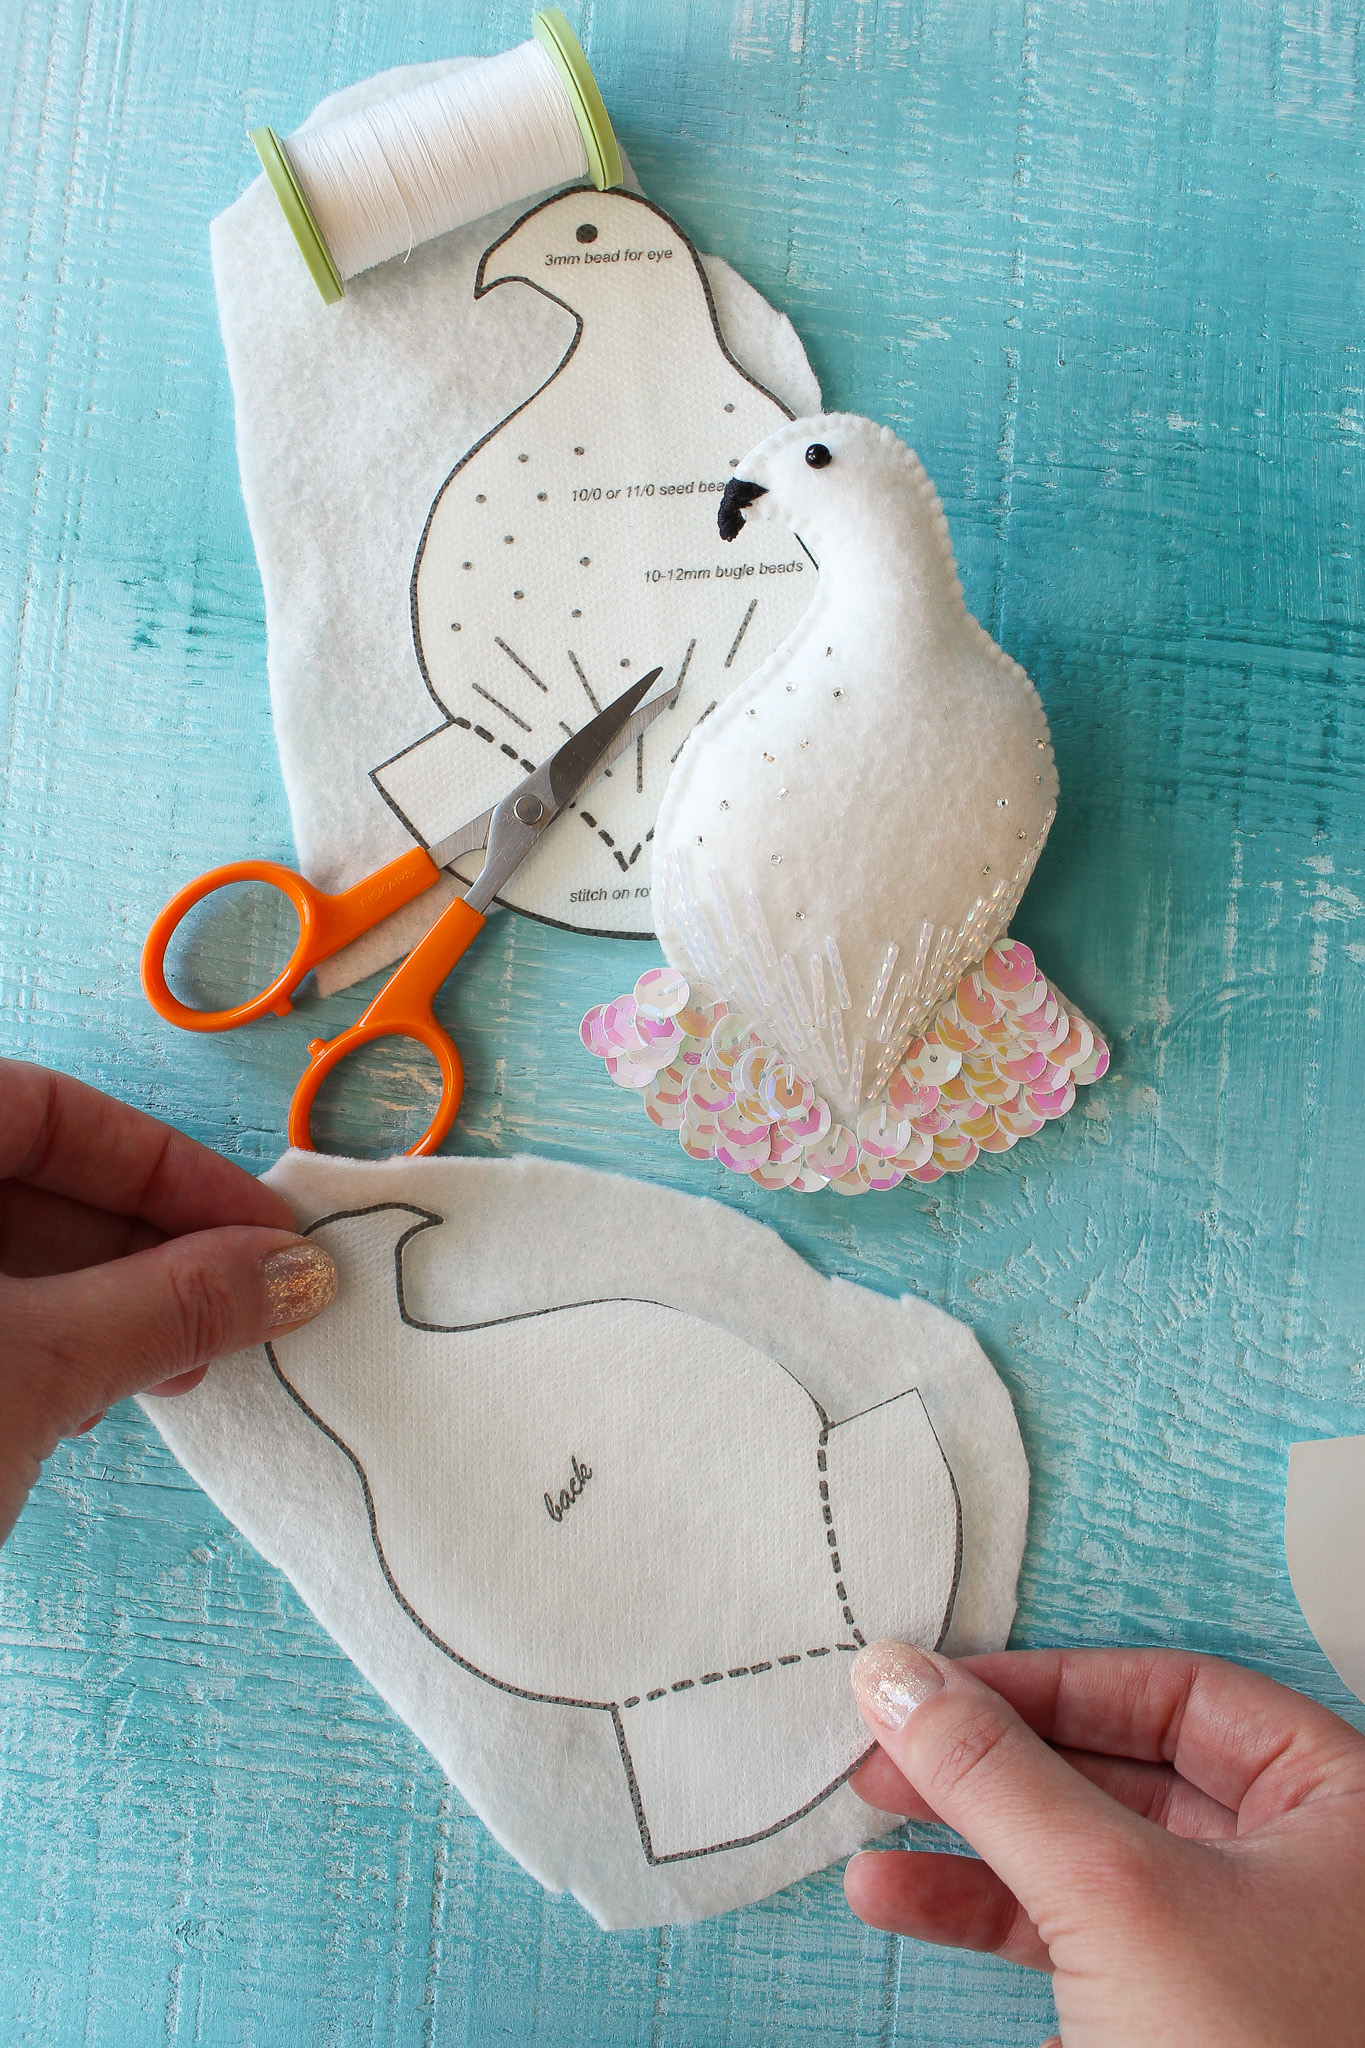
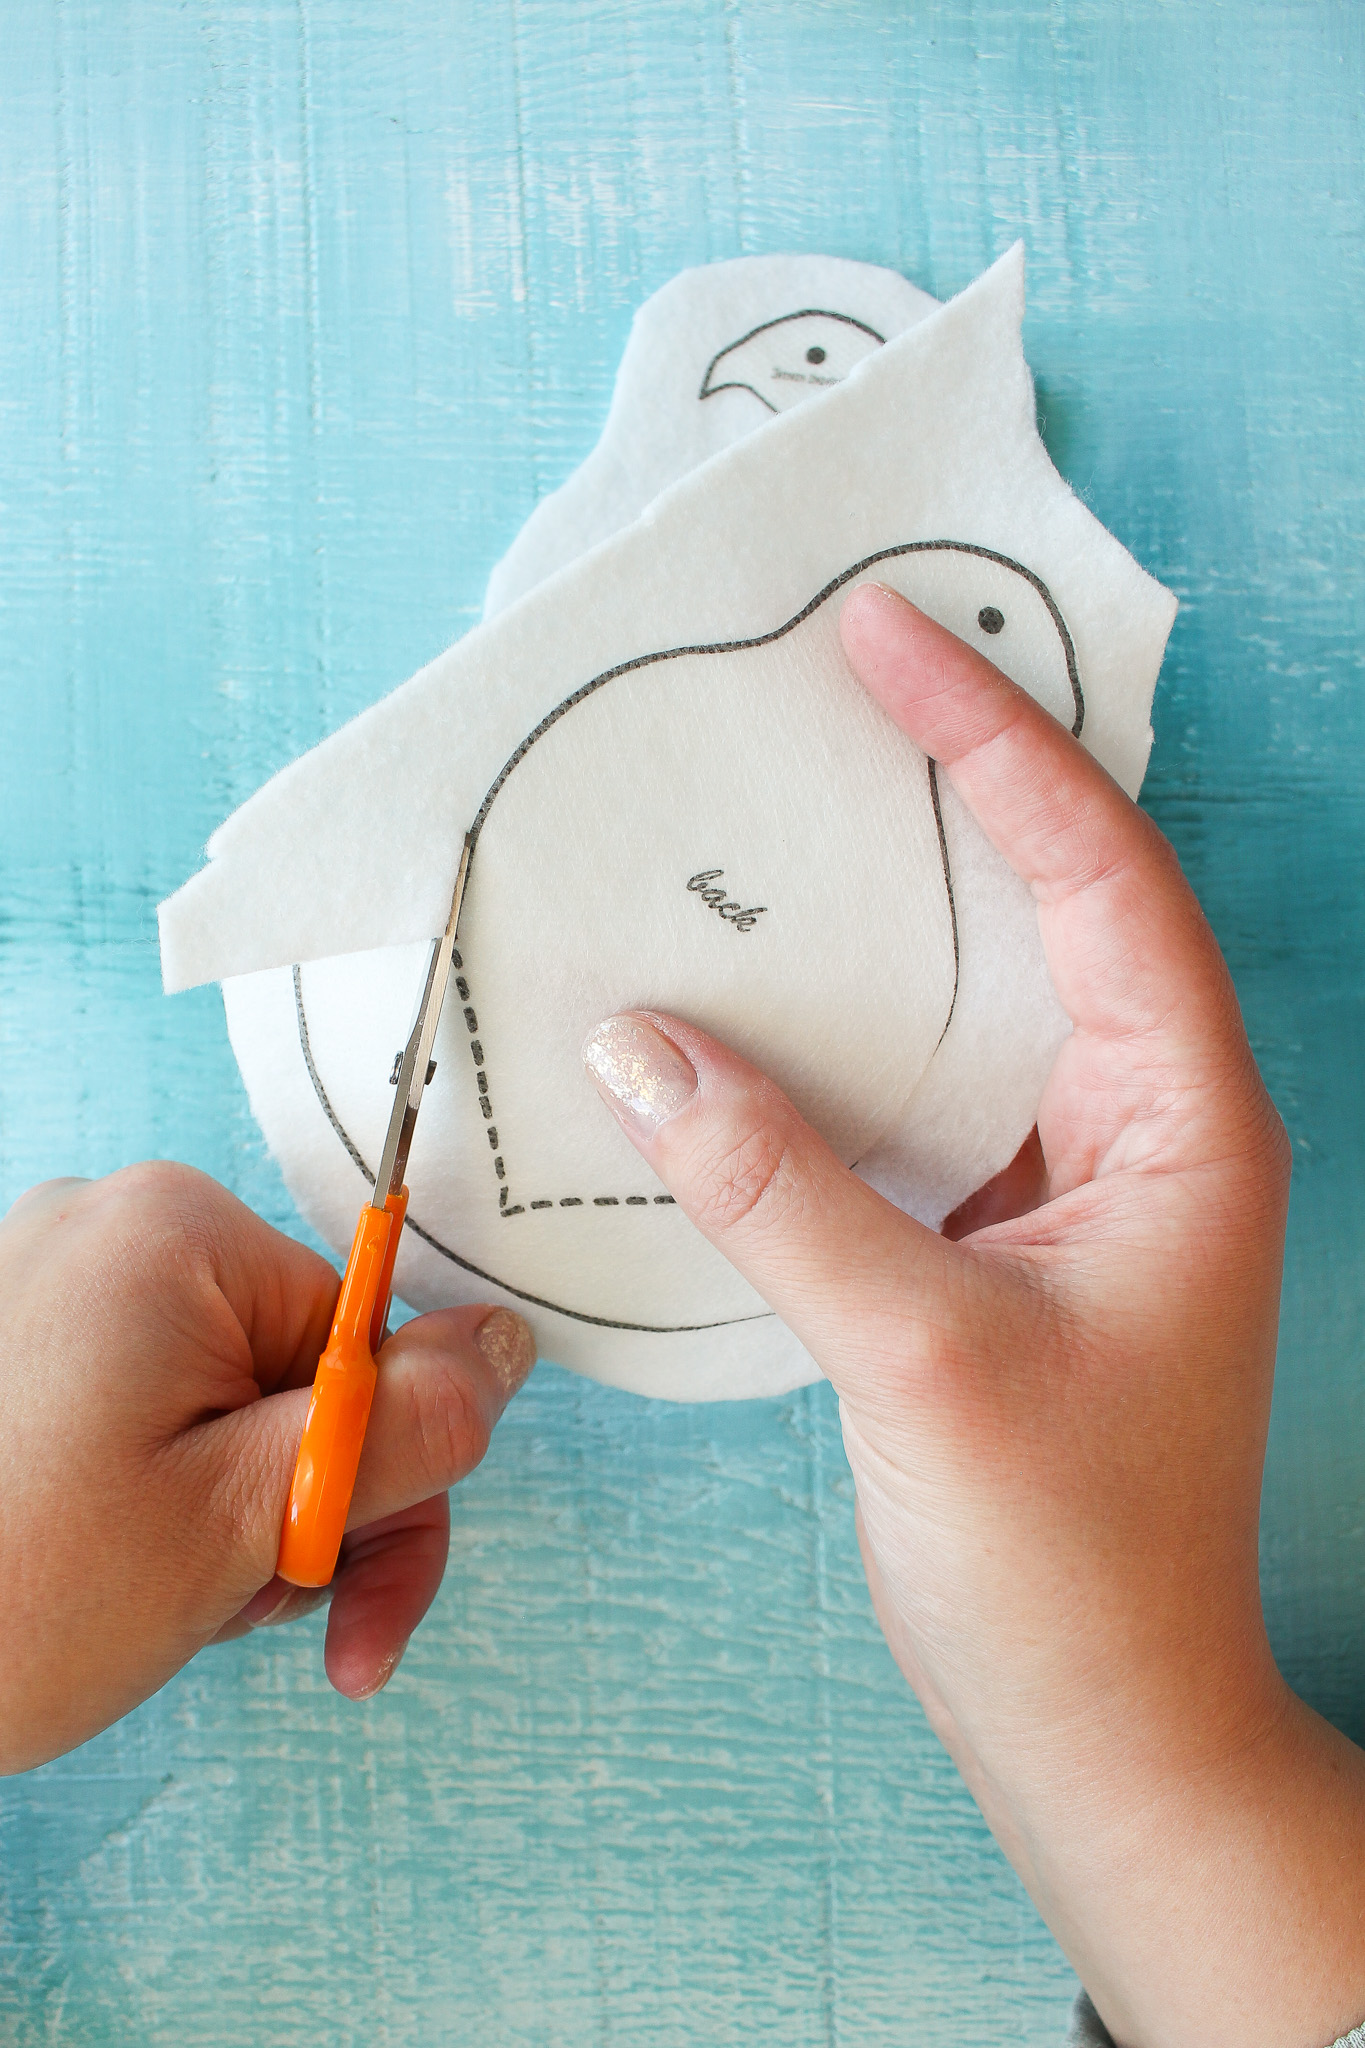
Cut Out Both Shapes from Felt:
Then cut out both shapes from your felt. Once again, these small scissors do a great job!
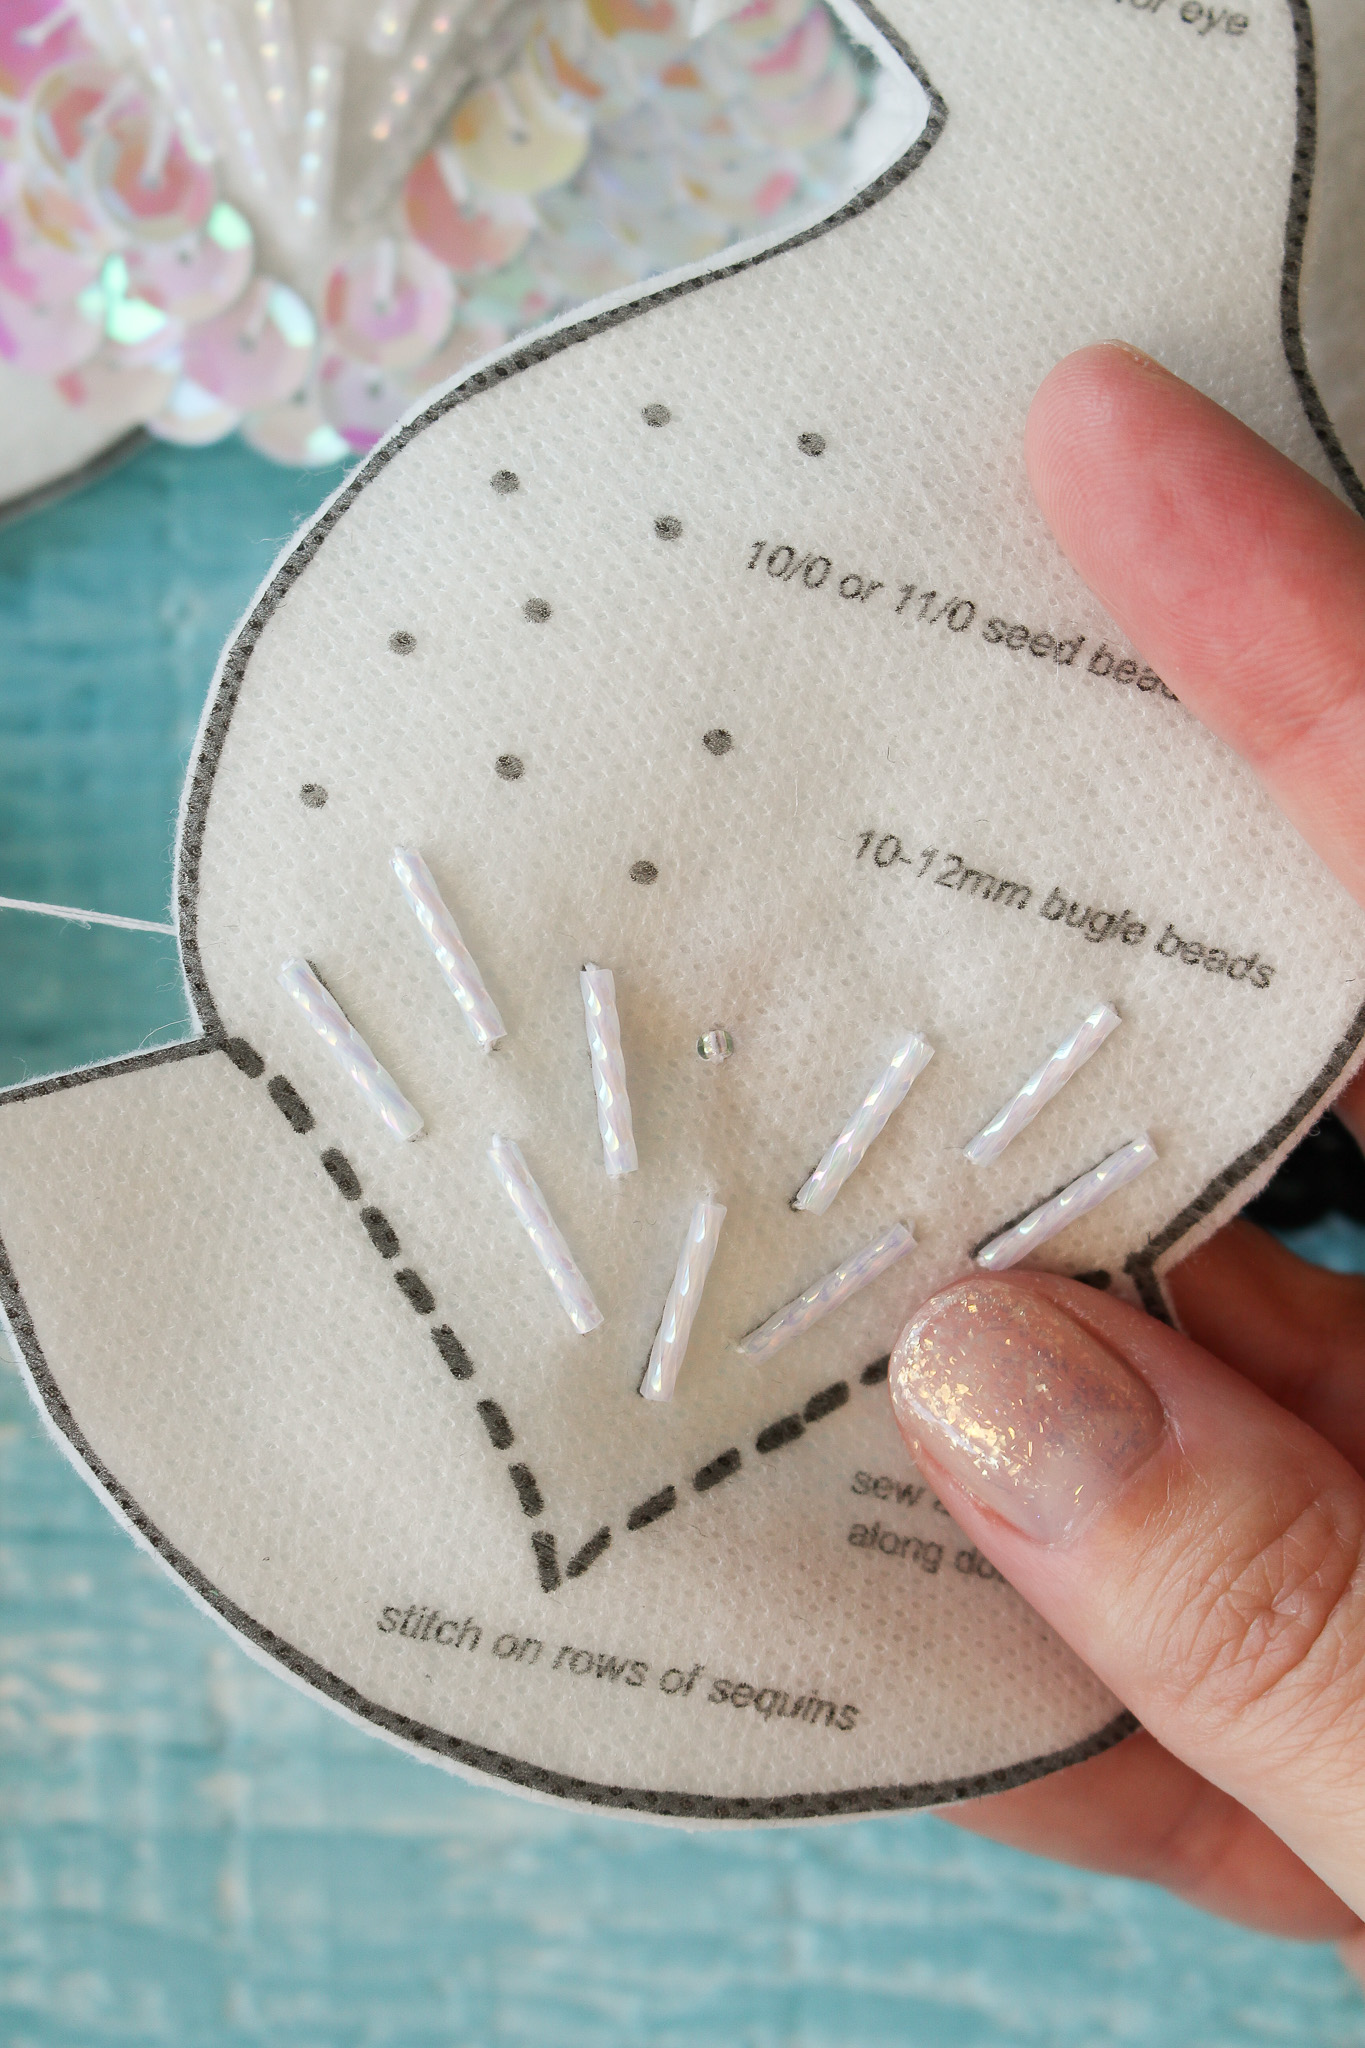
How to Stitch on Beads and Sequins
Next, stitch on the beads, following the pattern. Or feel free to get creative! Stitch on a few beads to keep this ornament easy to make or bead these birds very densely, for maximum sparkle. Below you’ll find a detailed video on how to stitch on beads and sequins – or keep reading for a photo tutorial.
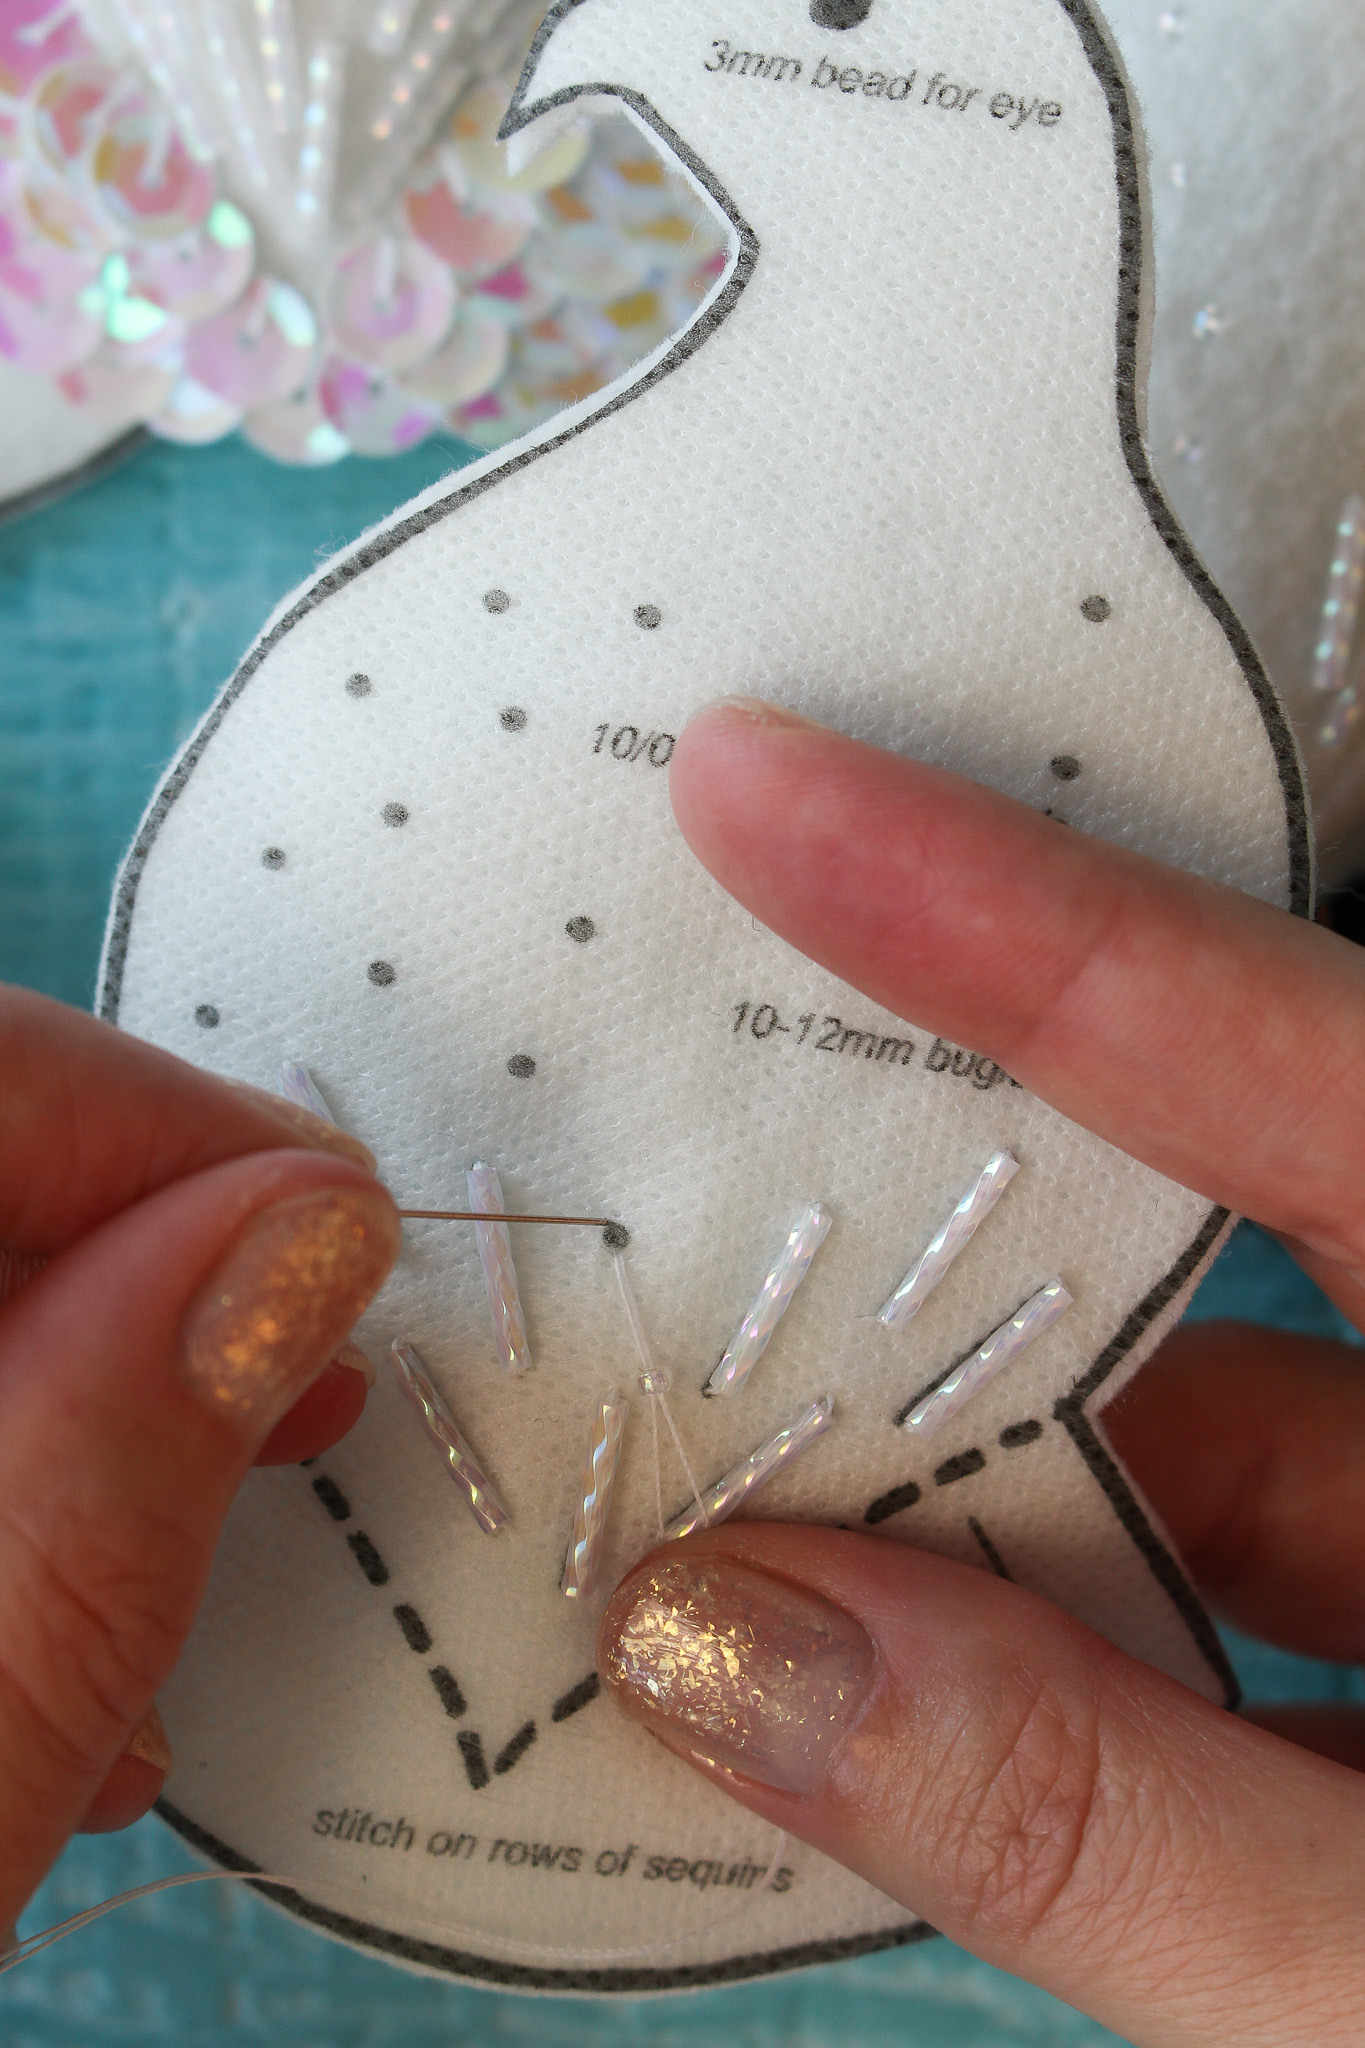
Stitch on the Beads:
Here are the basic instructions for stitching beads onto felt. Using a beading needle threaded with hand quilting thread (my personal preference, use what you have or prefer), bring your needle up from the back of the felt, slide on a bead, position it, and push the needle back down on the other end of the bead:
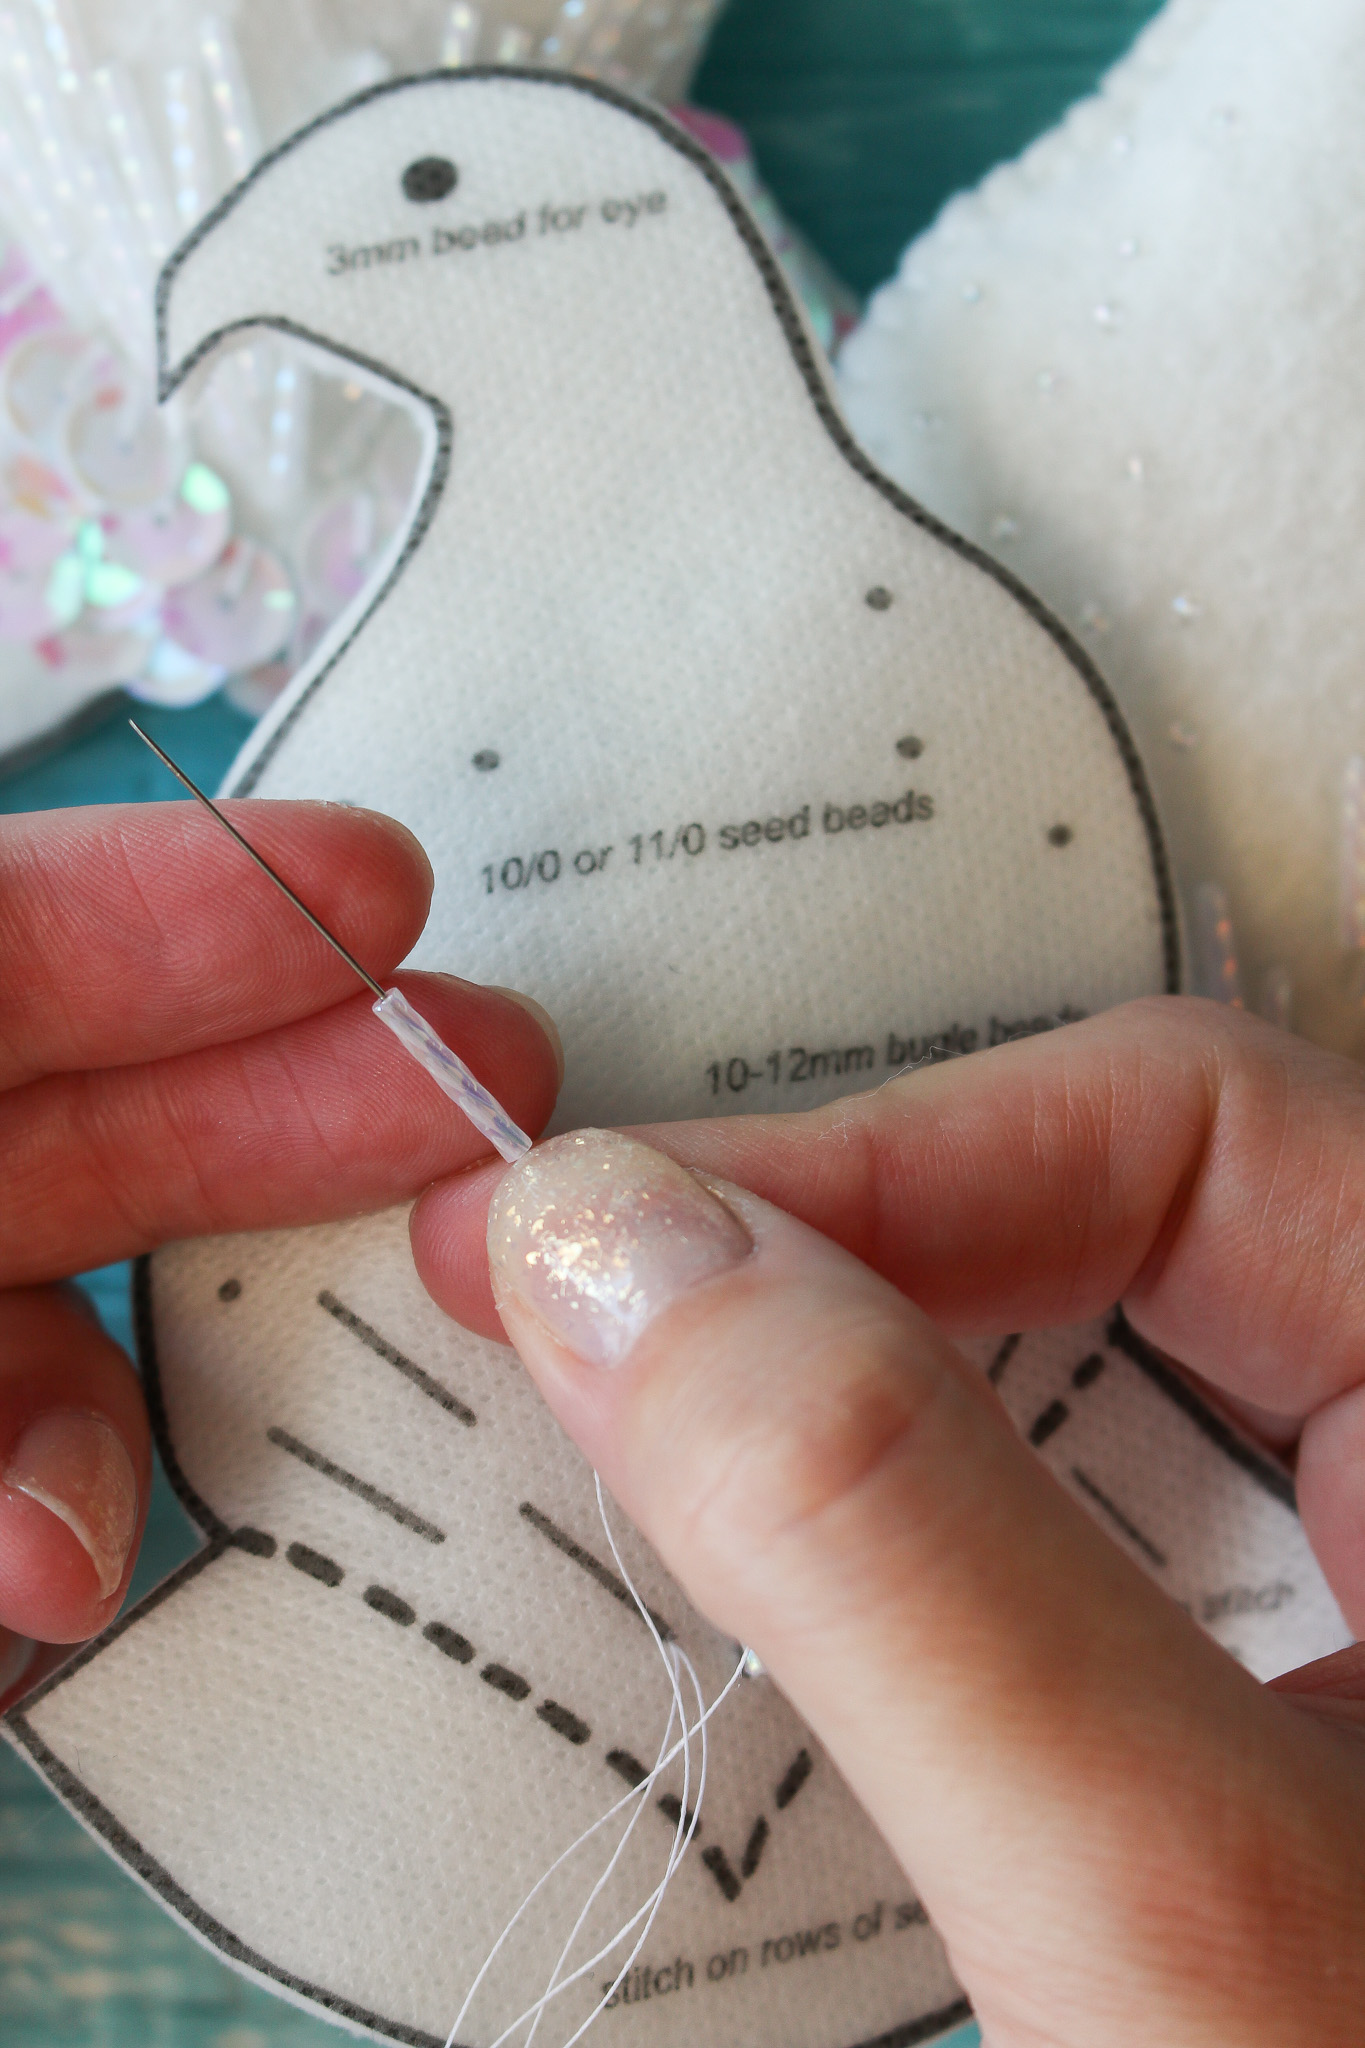

I stitch through bugle beads twice, so they’re nice and secure and don’t cut through the thread, but I stitch through seed beads only once. Stitching on seed beads is the same process as stitching on the bugle beads, shown above:


When you’re done stitching on the beads, the back will look something like this:
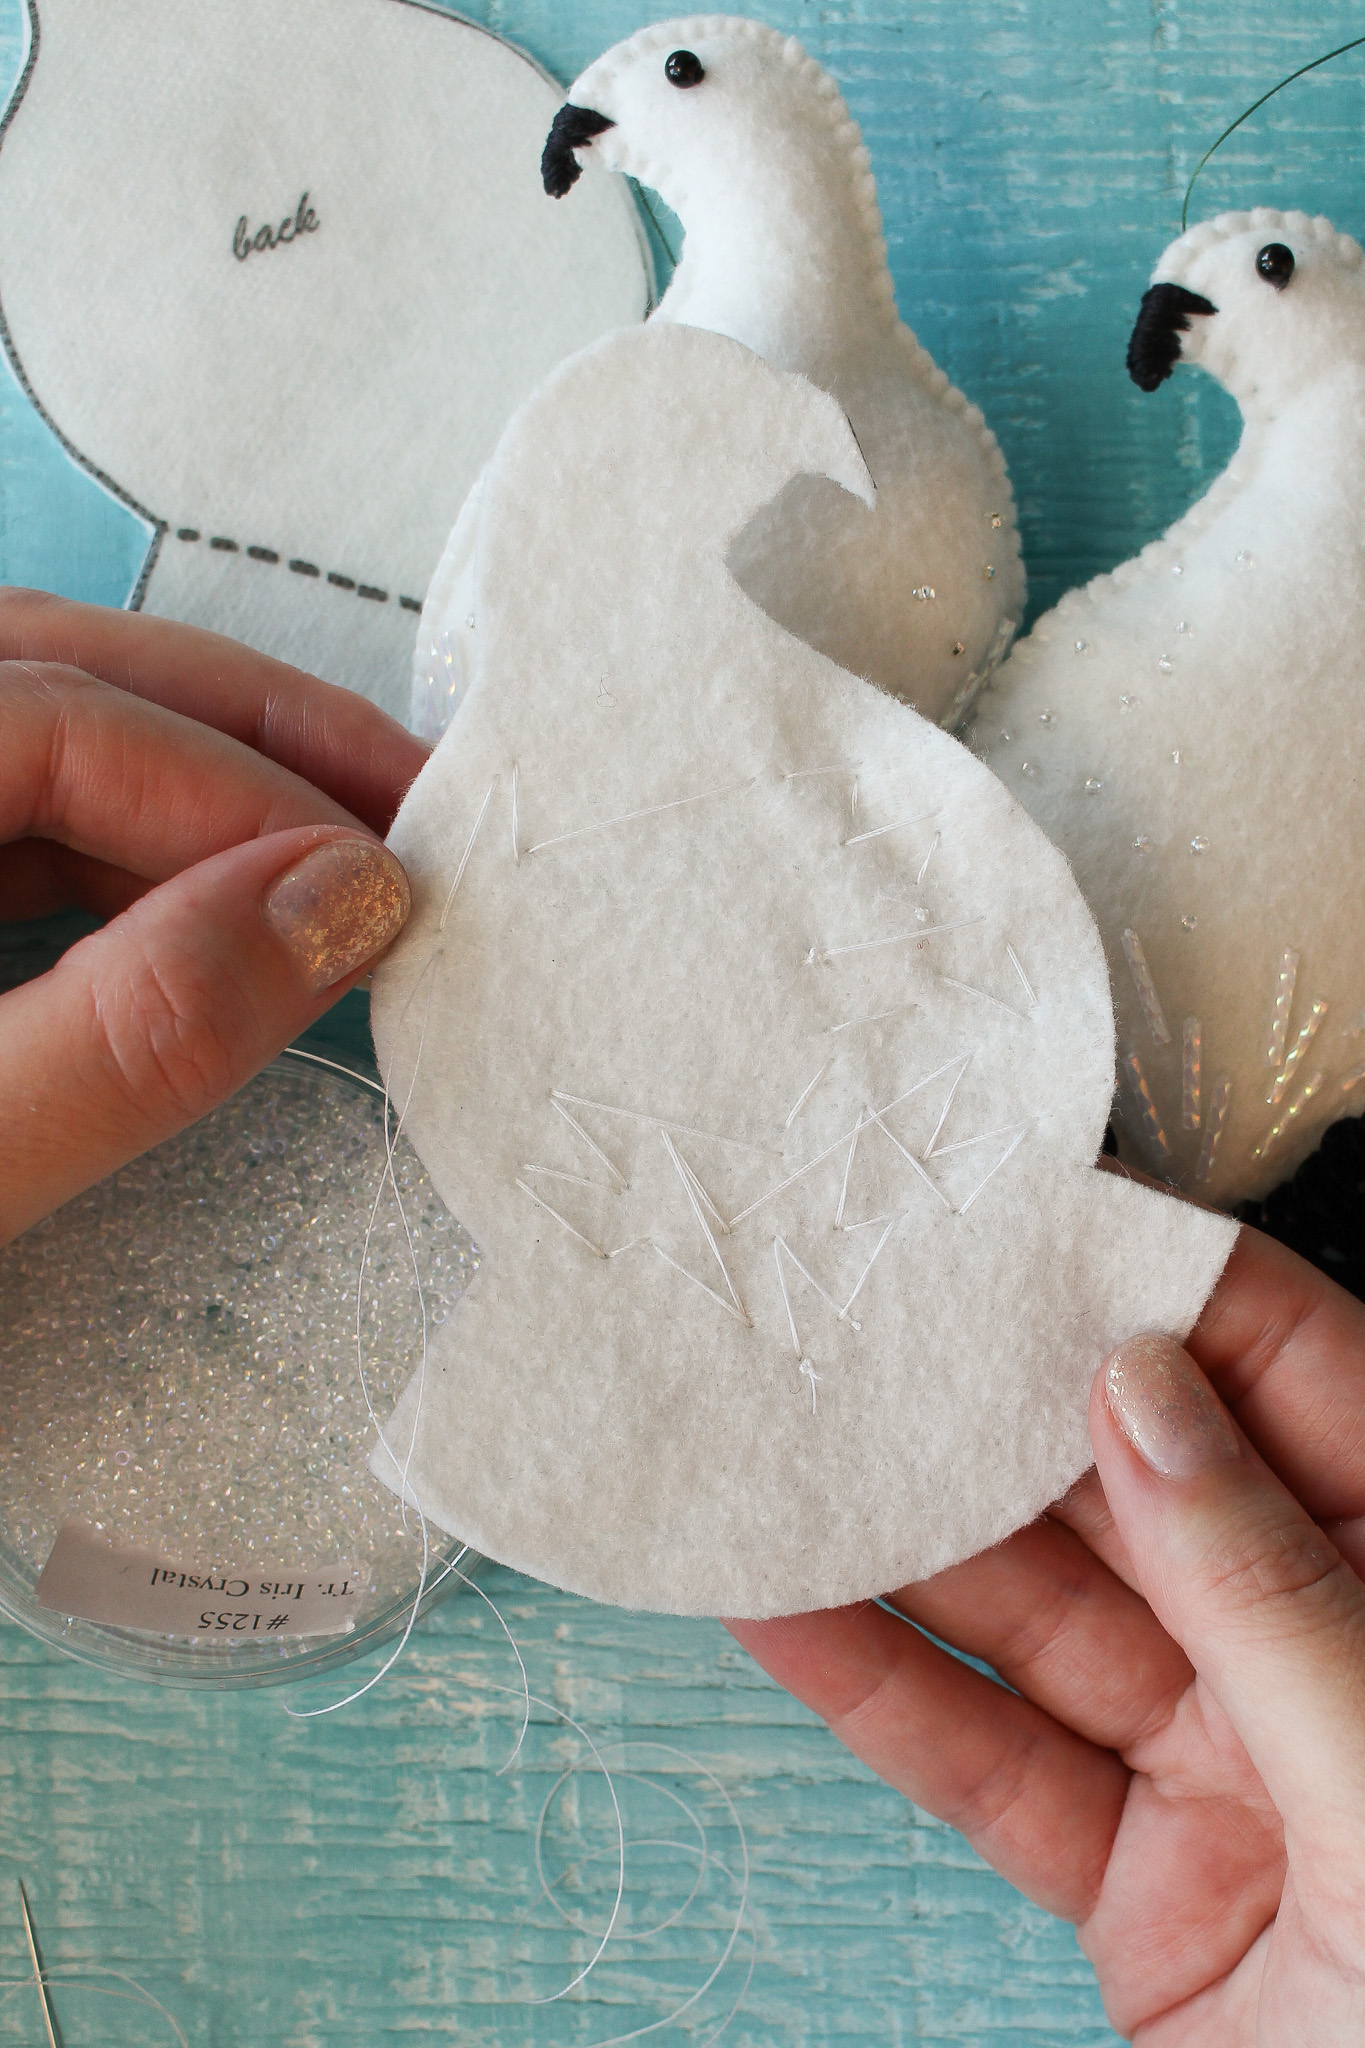
Next stitch on the eye bead, using the same process outlined above. To help secure a larger bead like this, I like the stitch through a few times before tying/knotting my thread at the back. I also like to use black thread for this, so it blends in with the black bead.

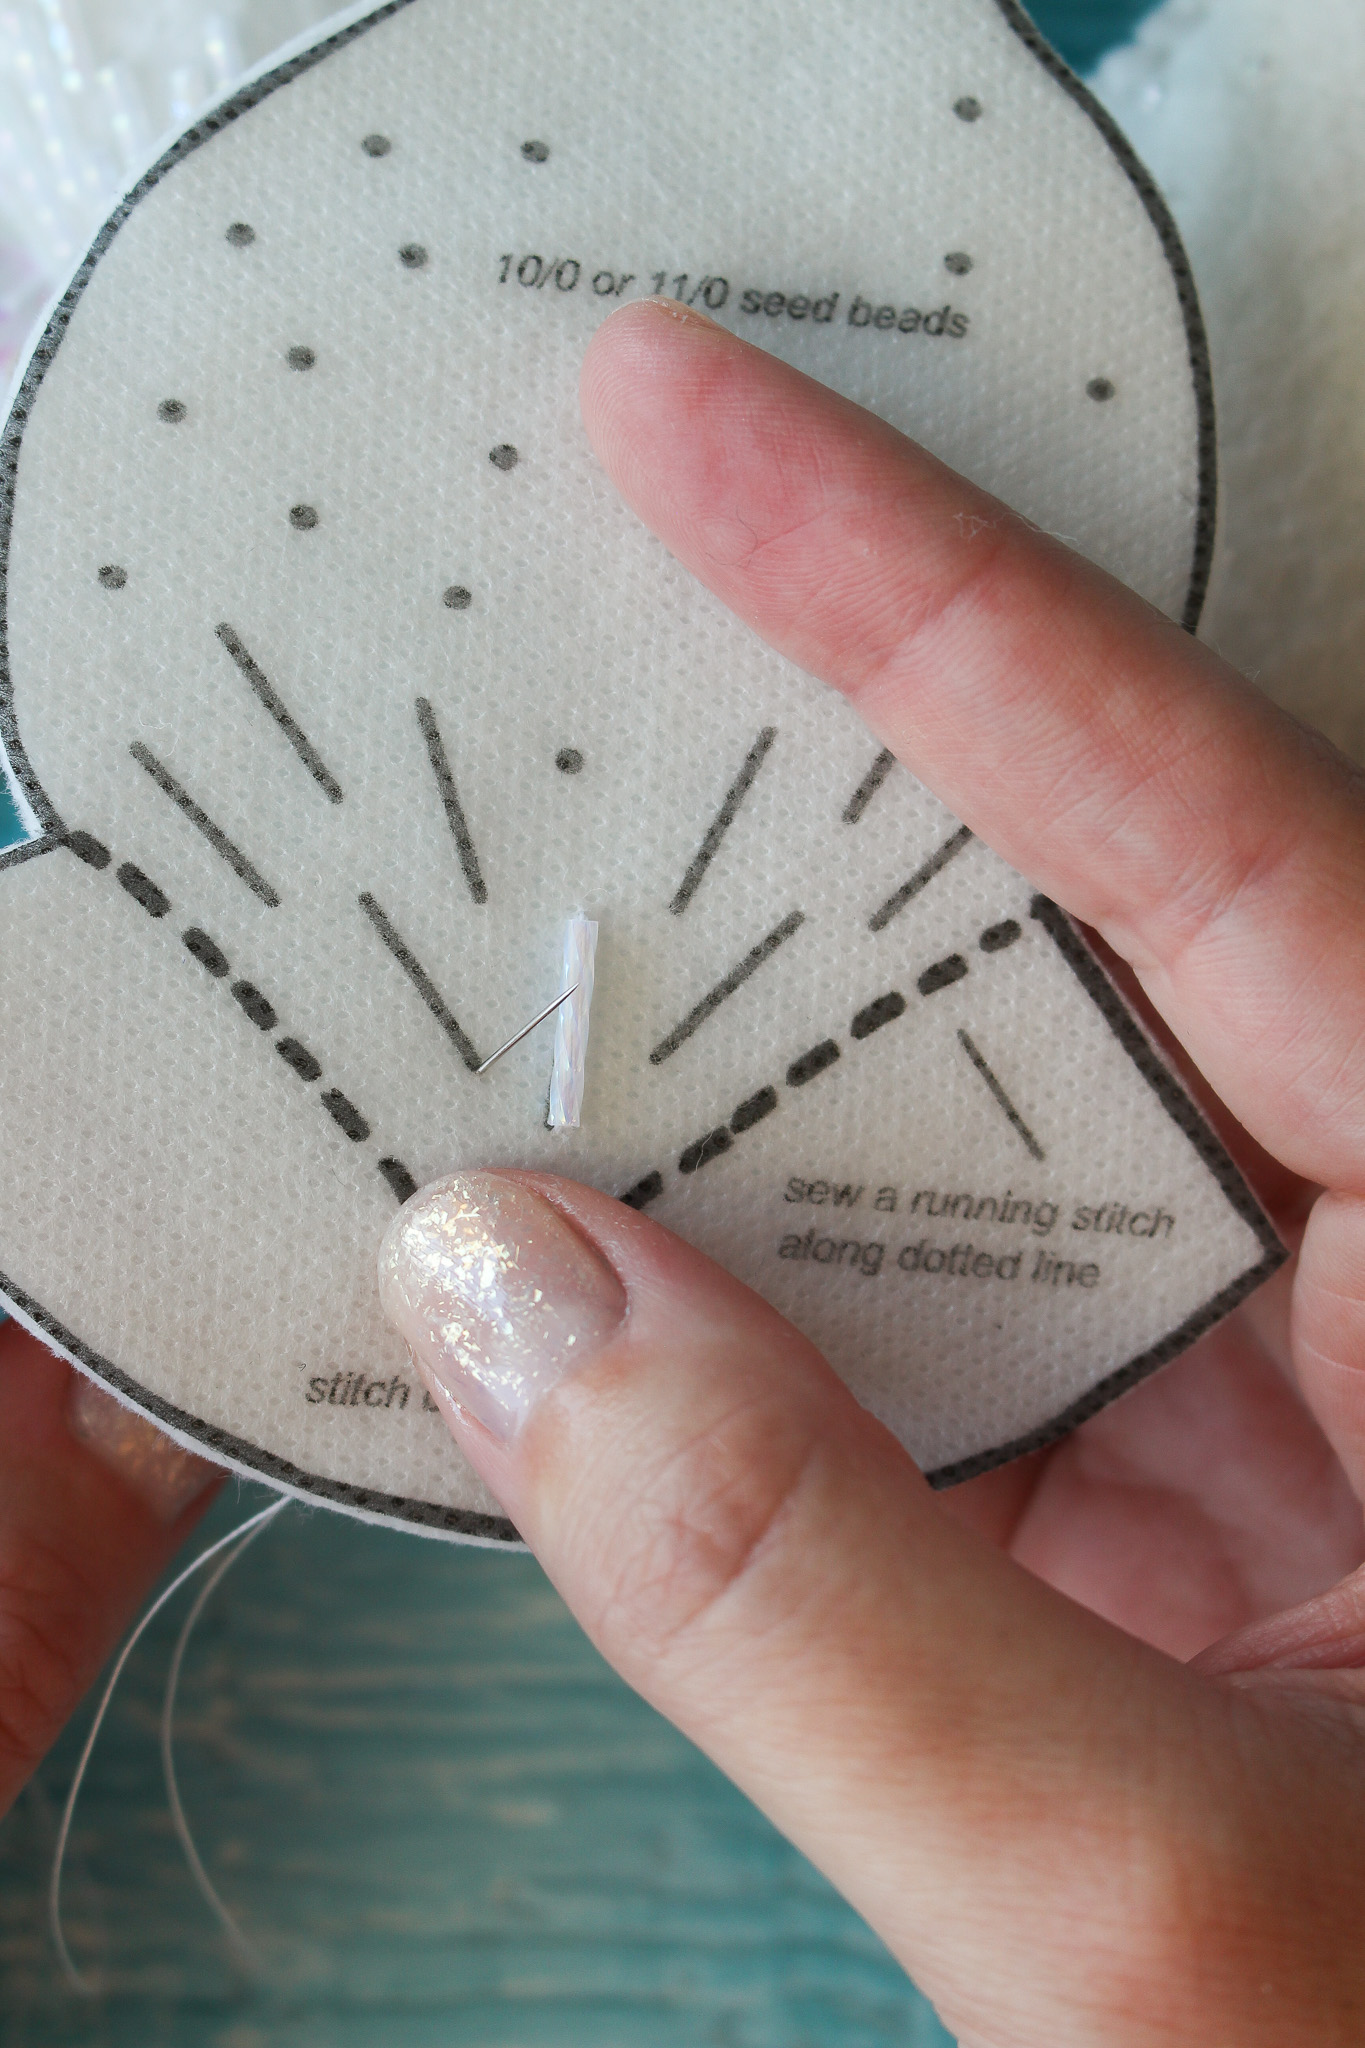
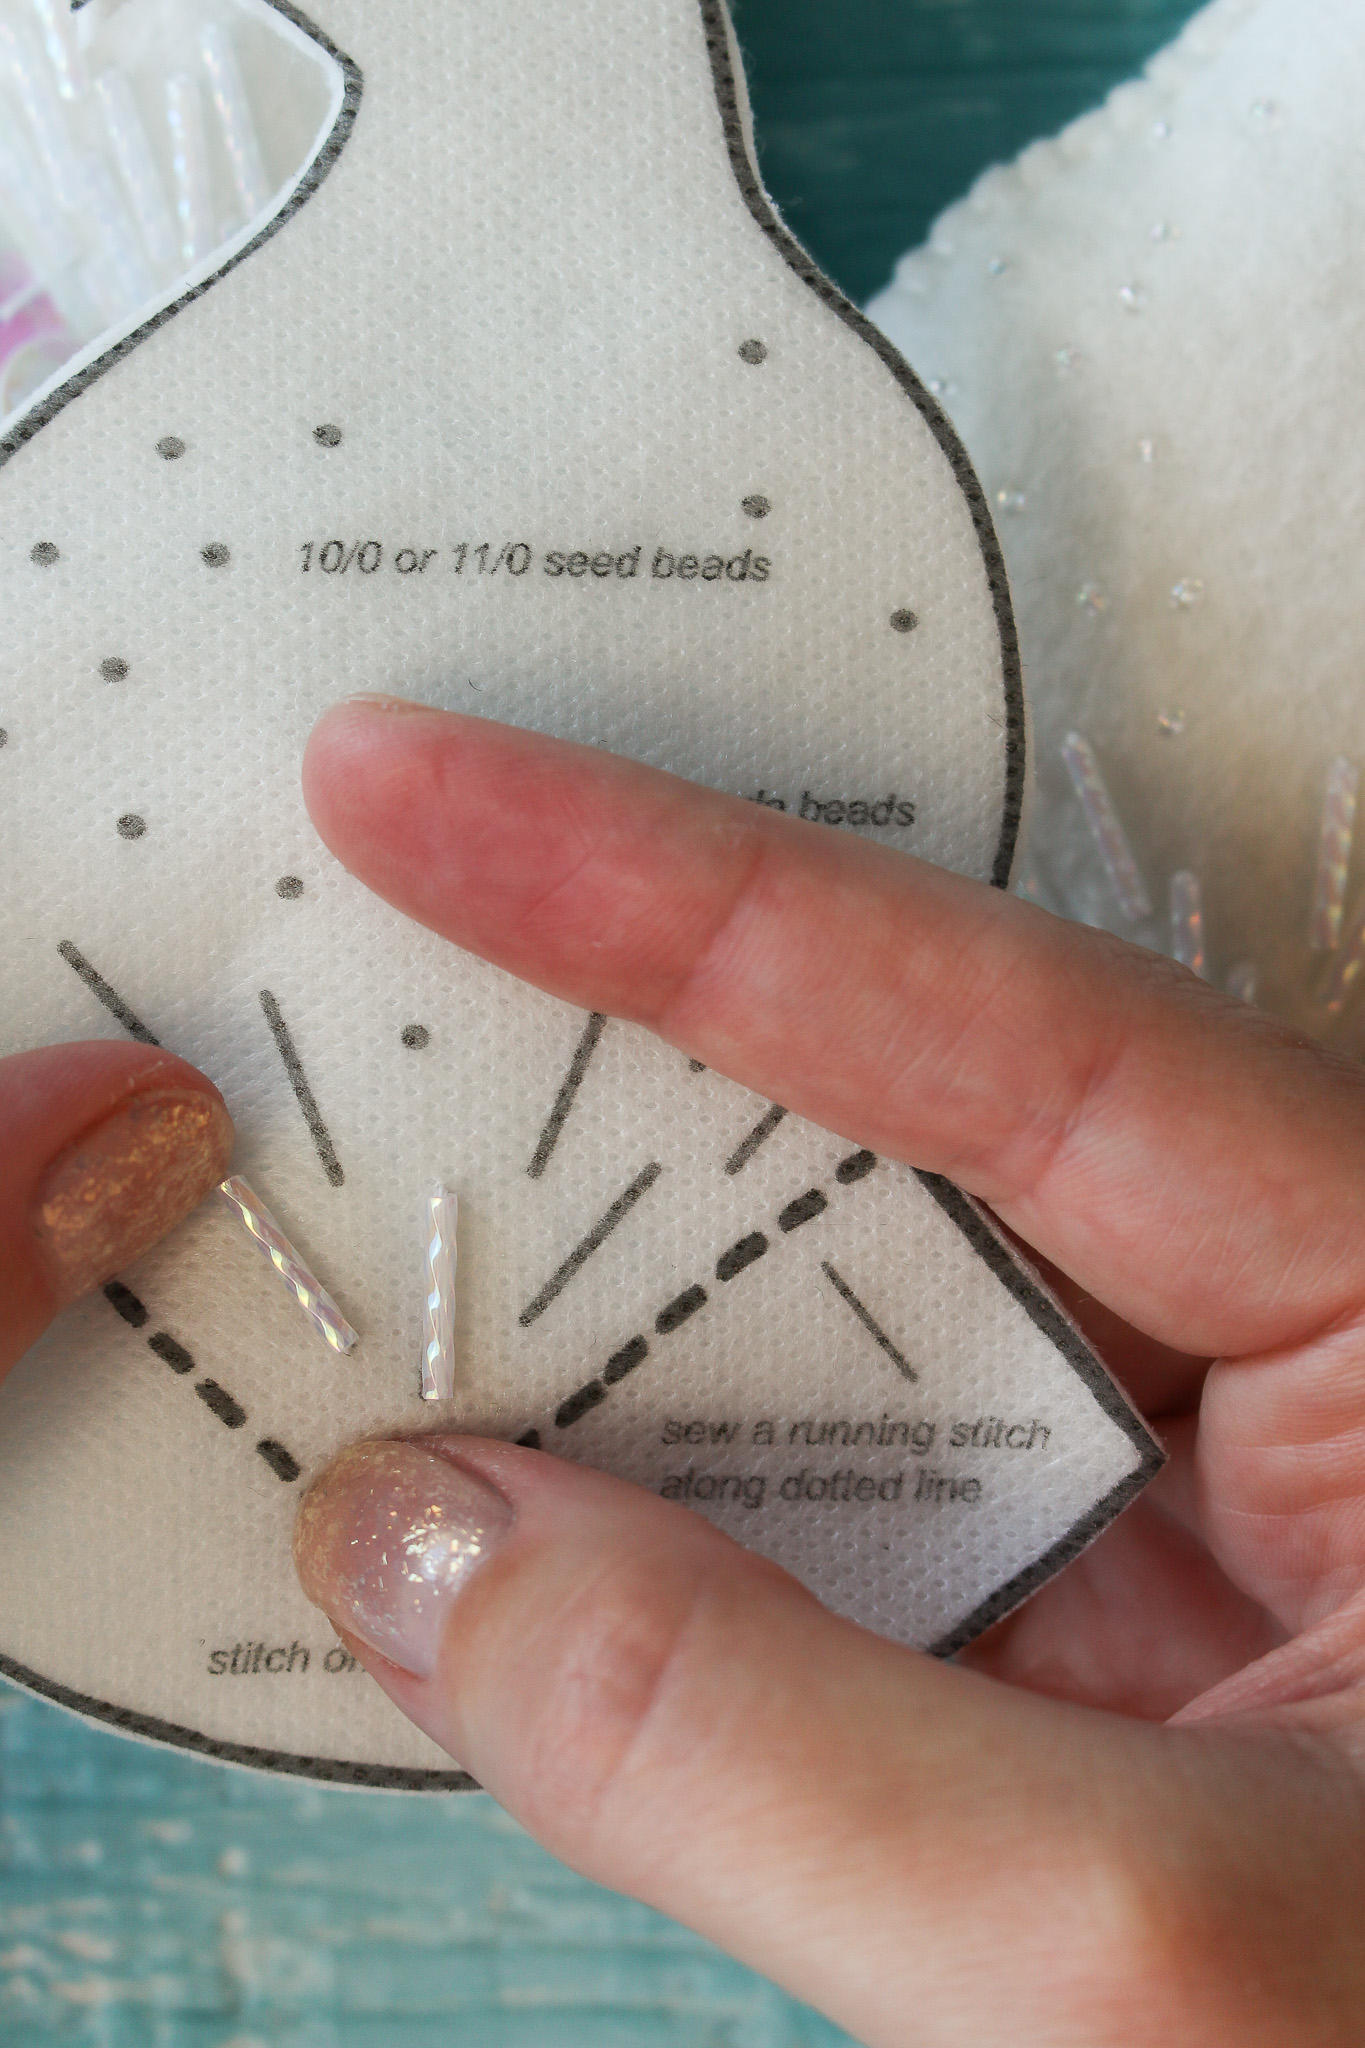
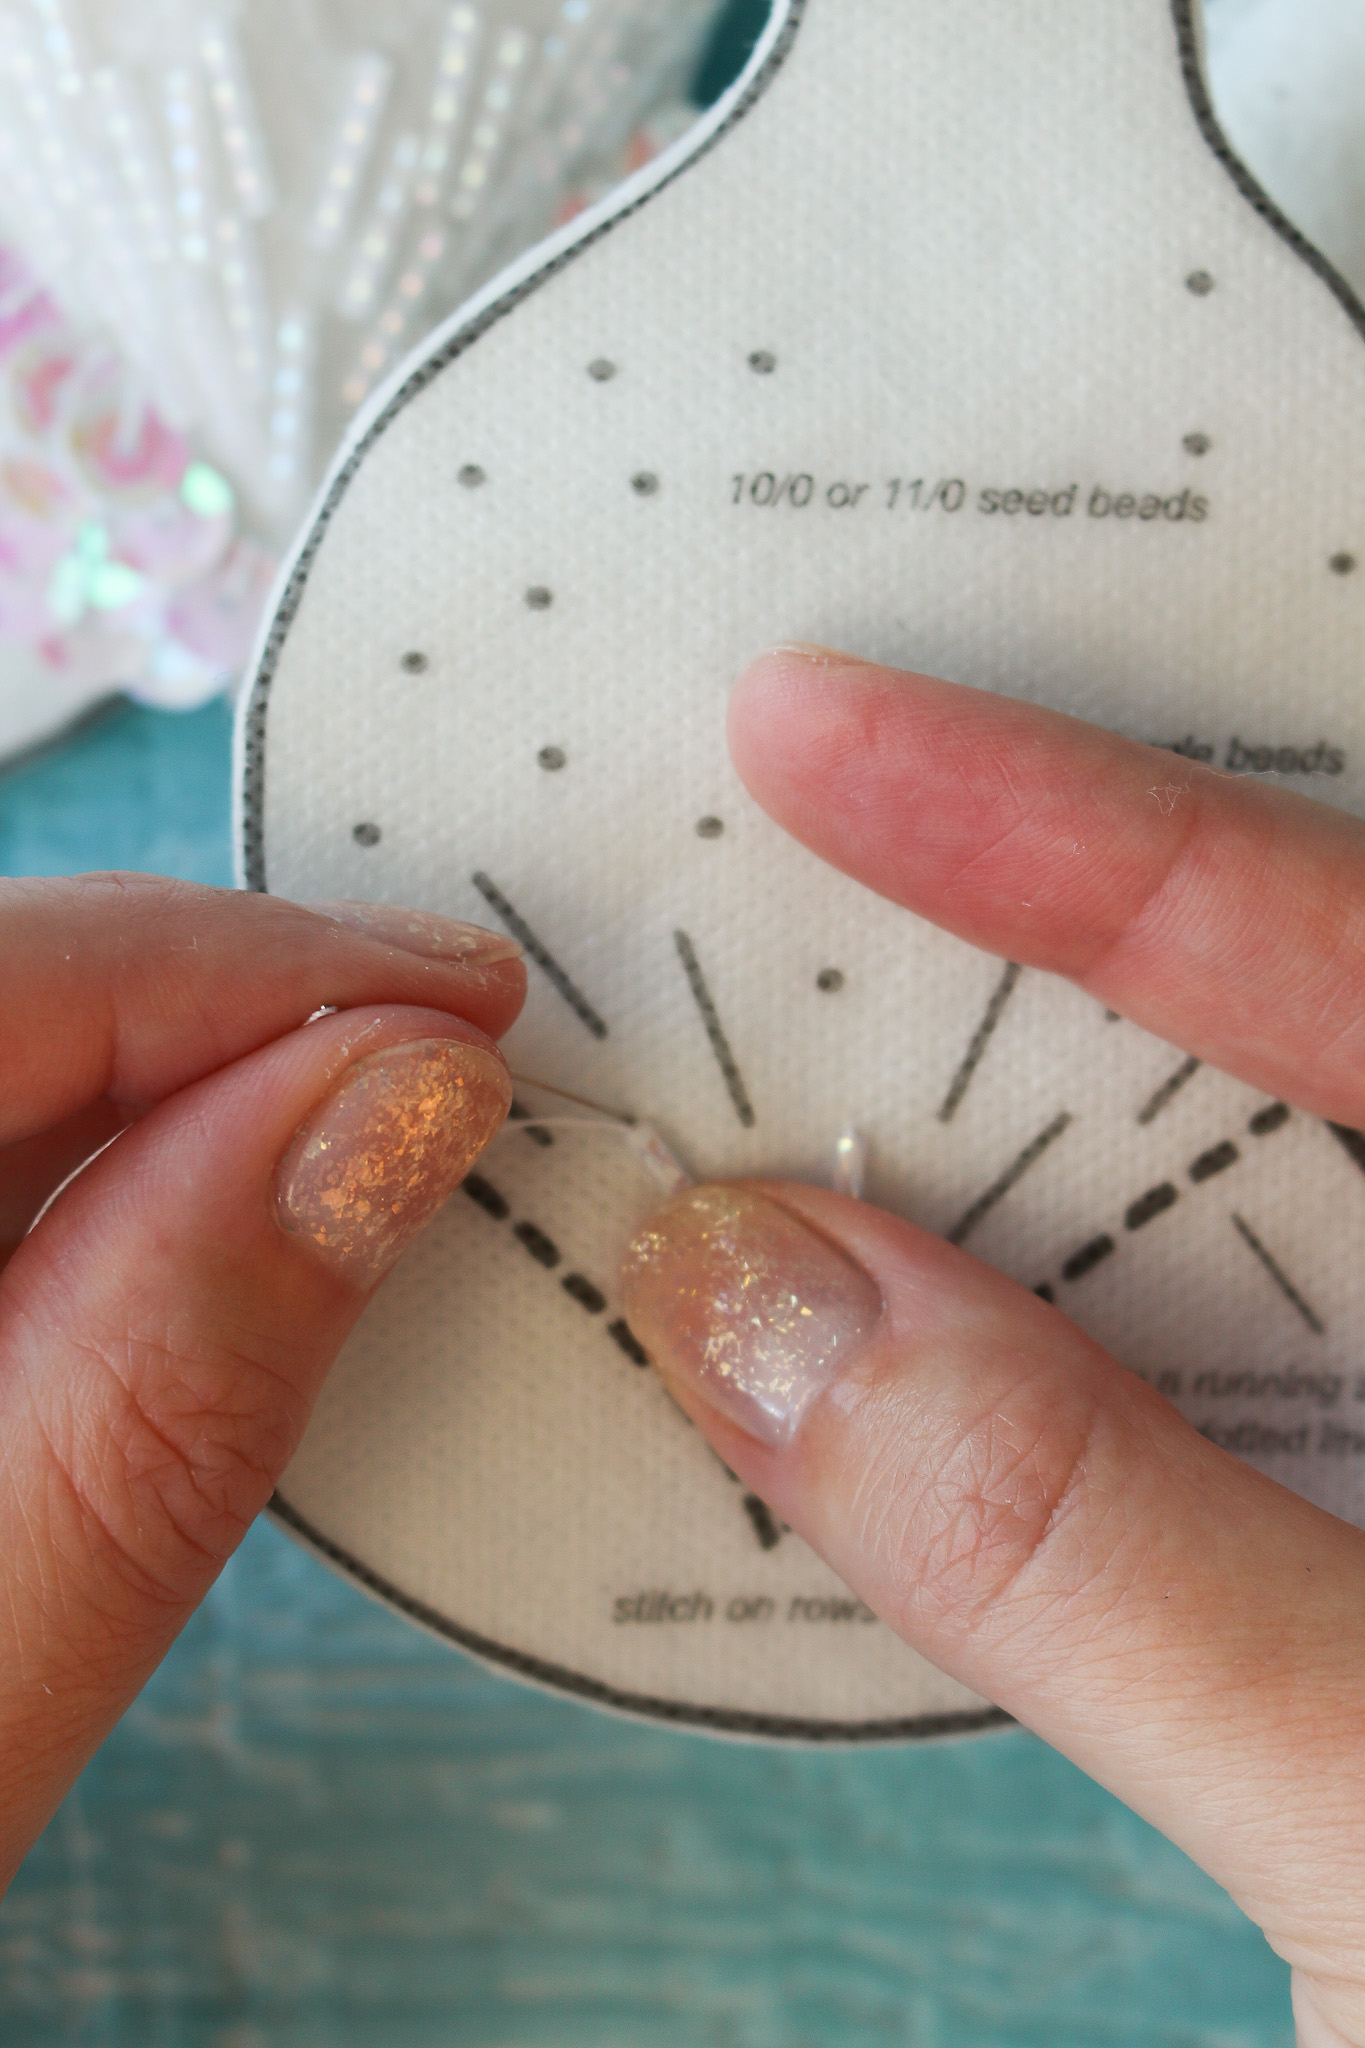
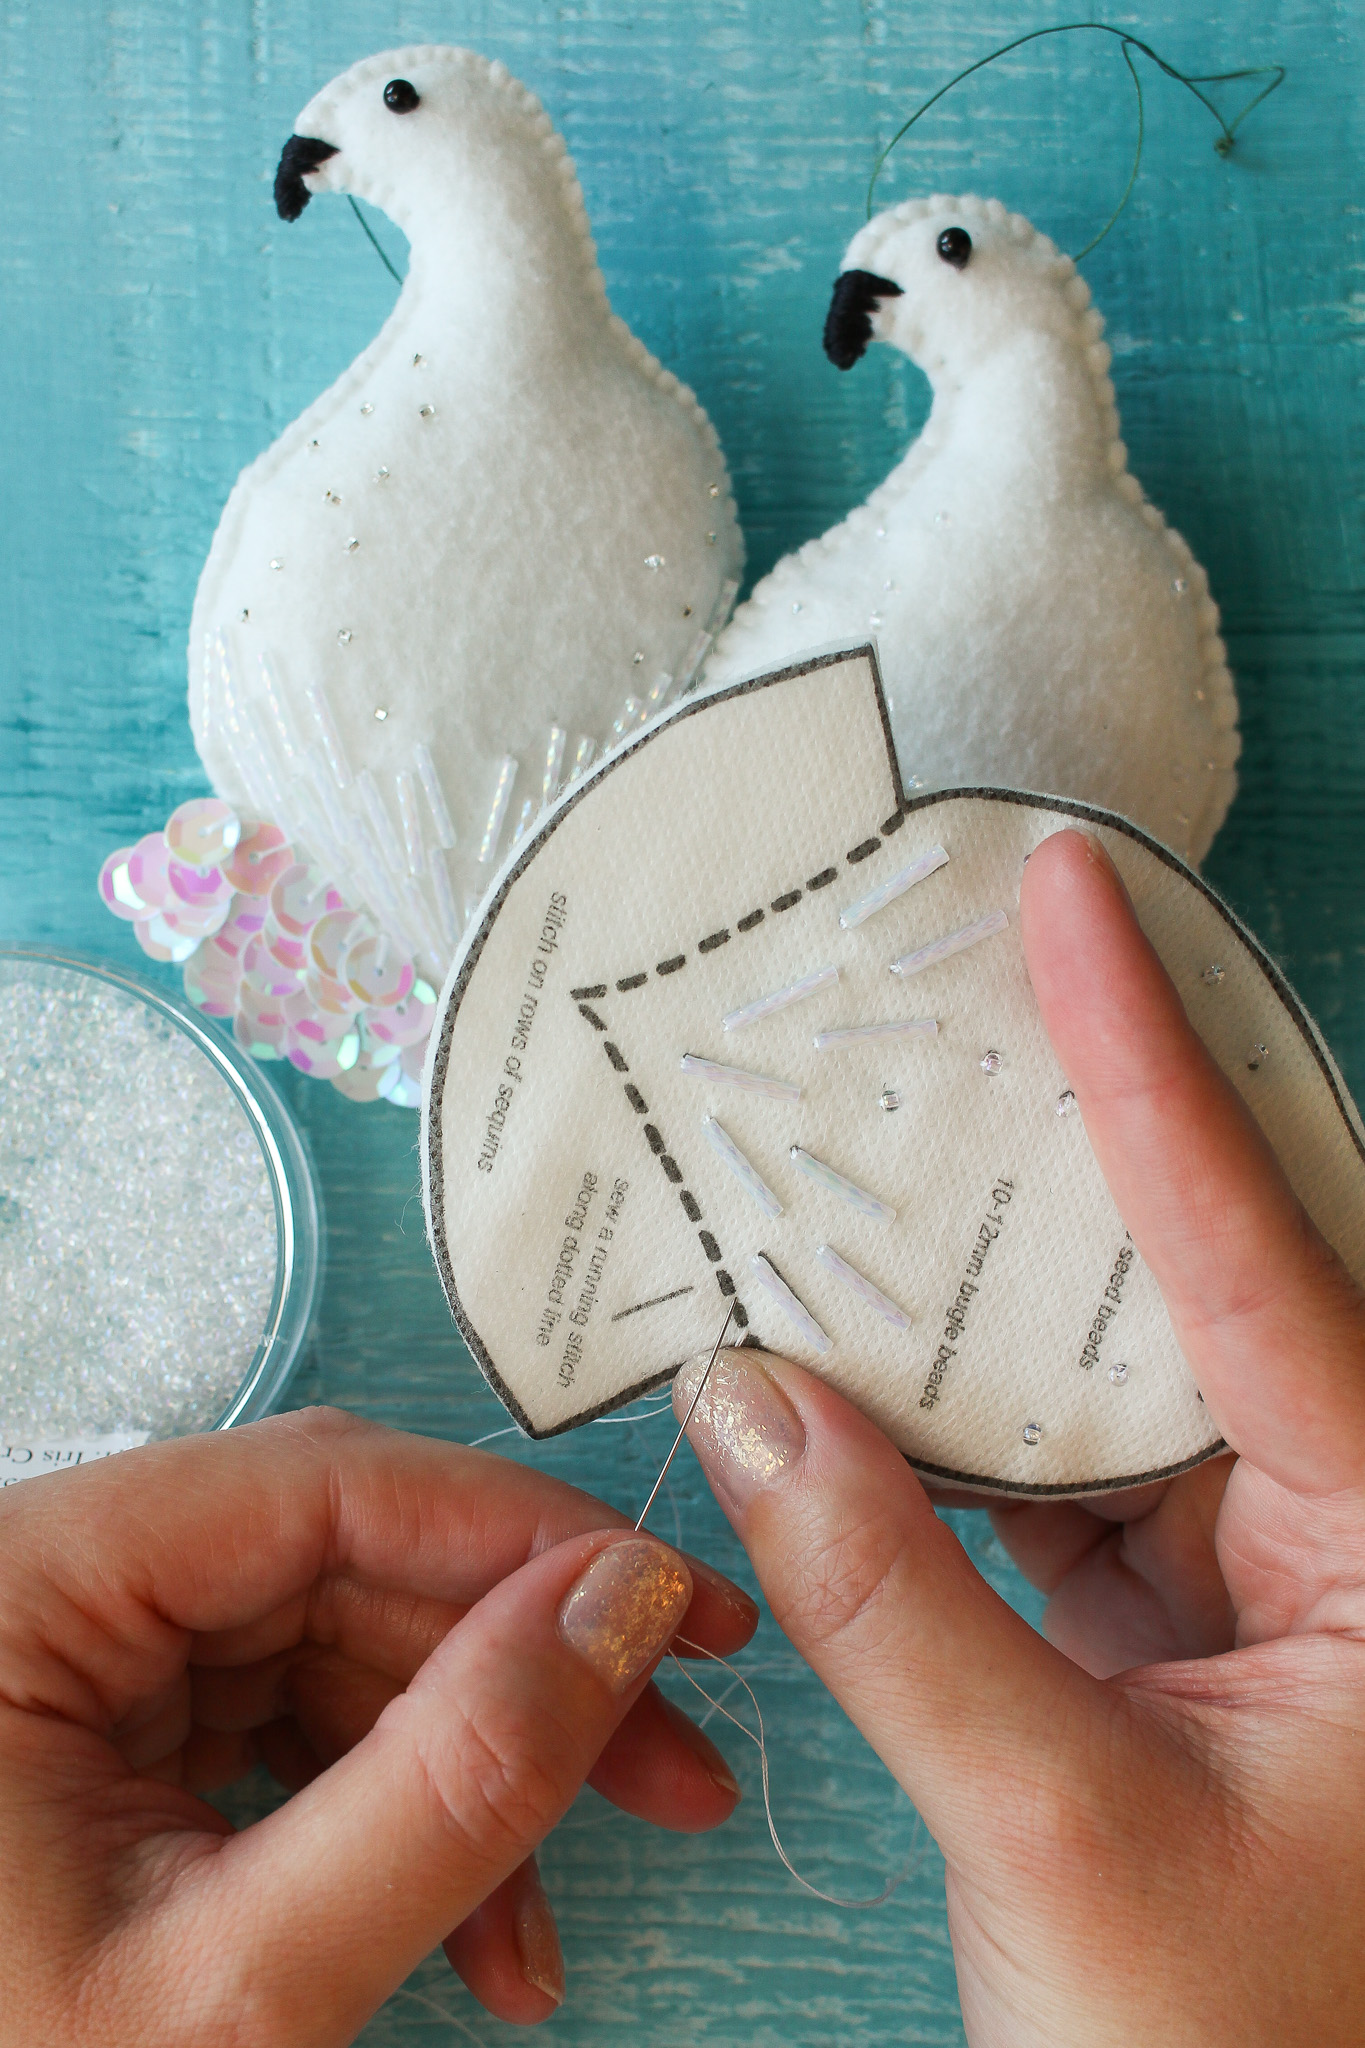
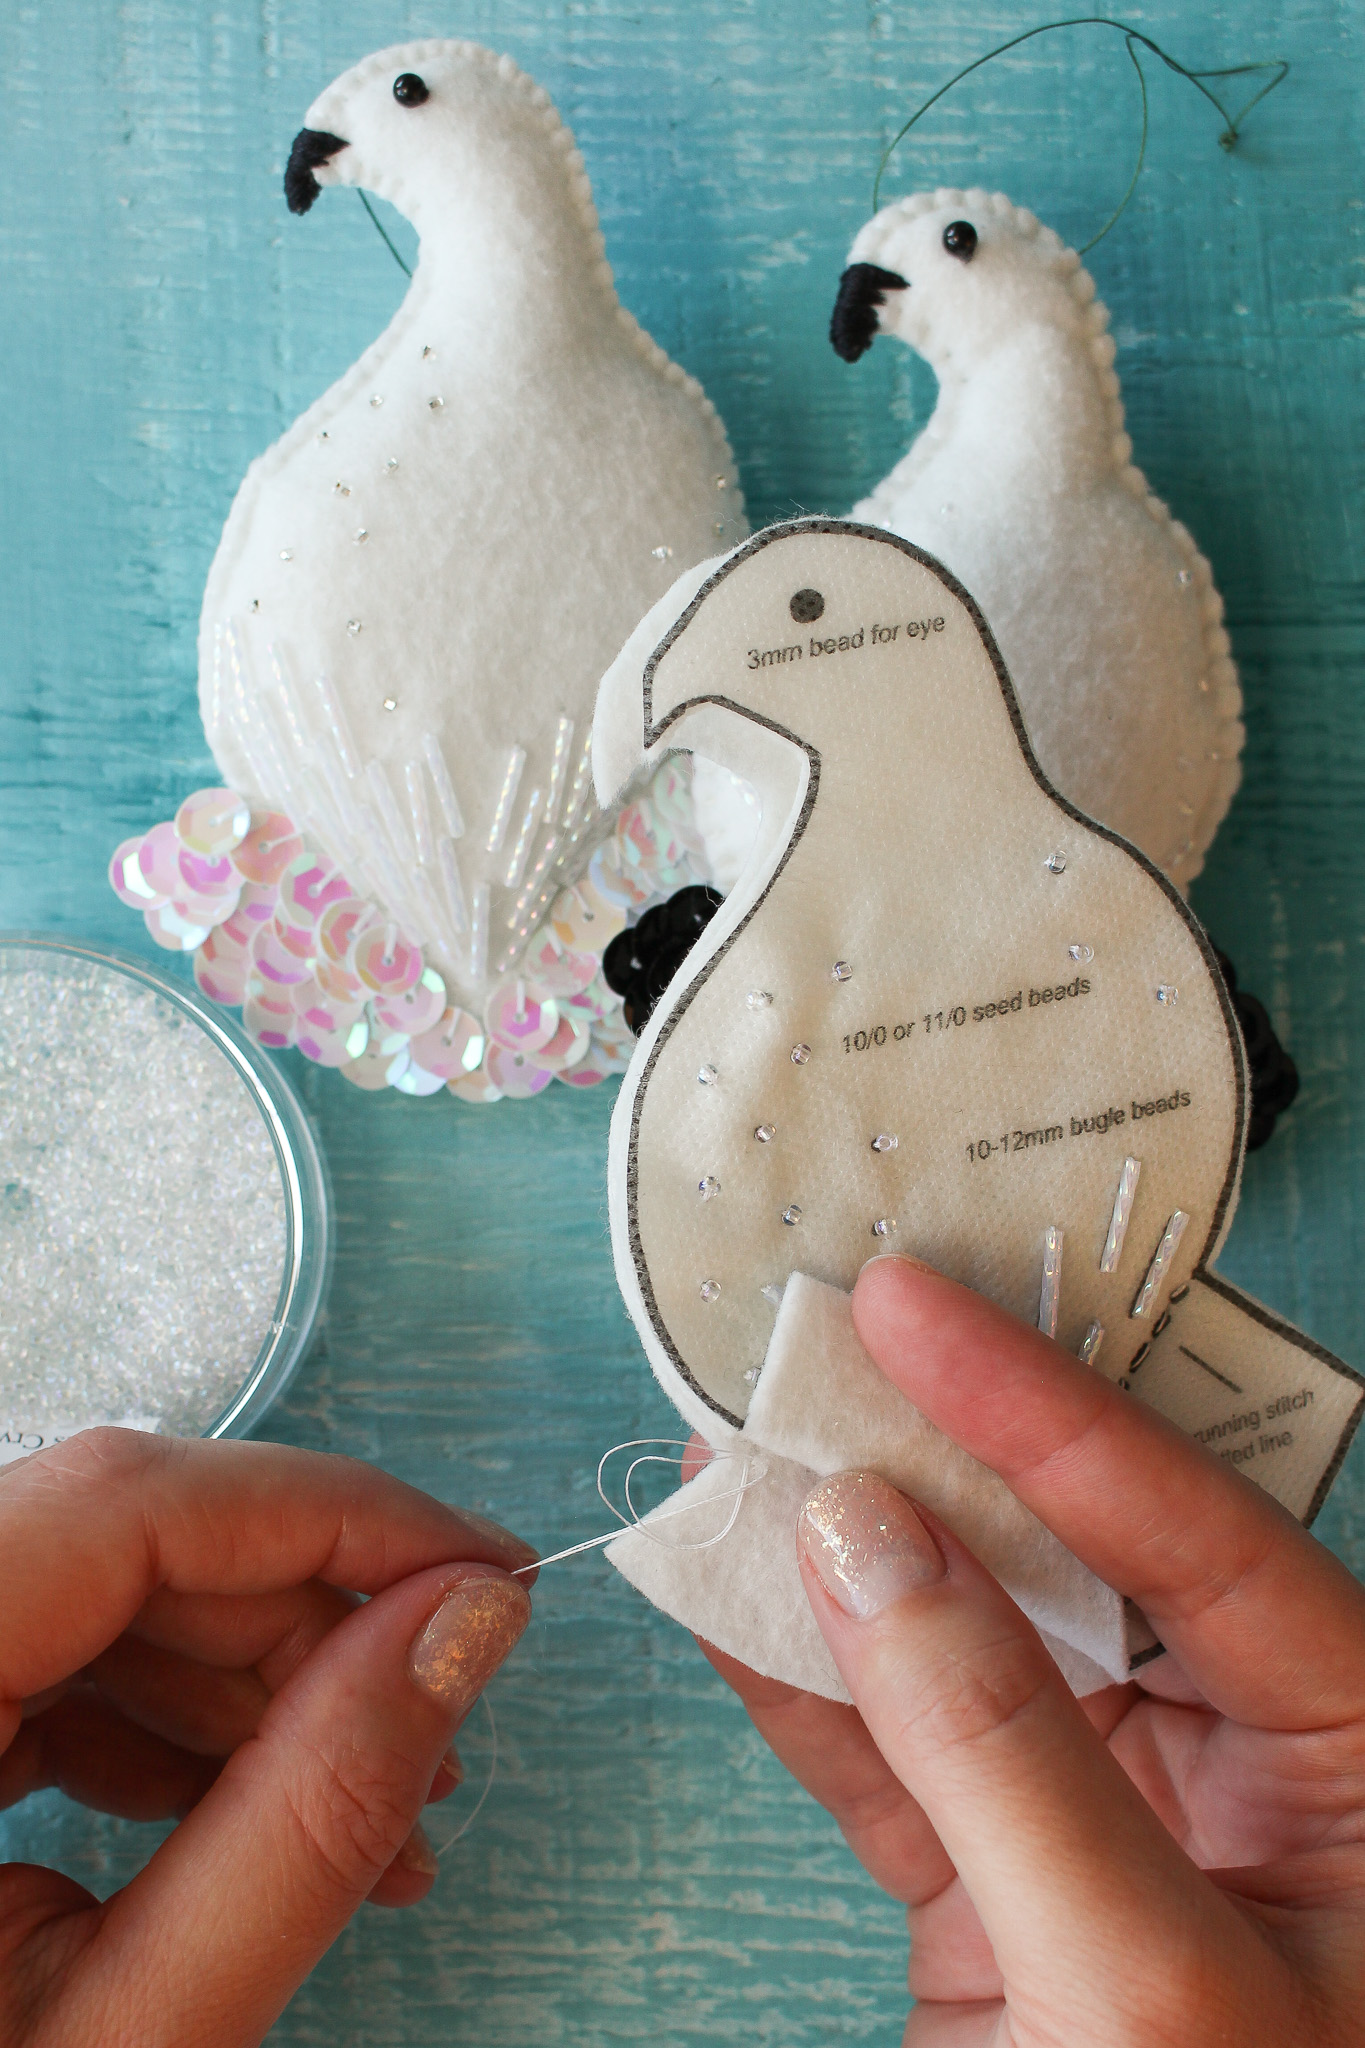
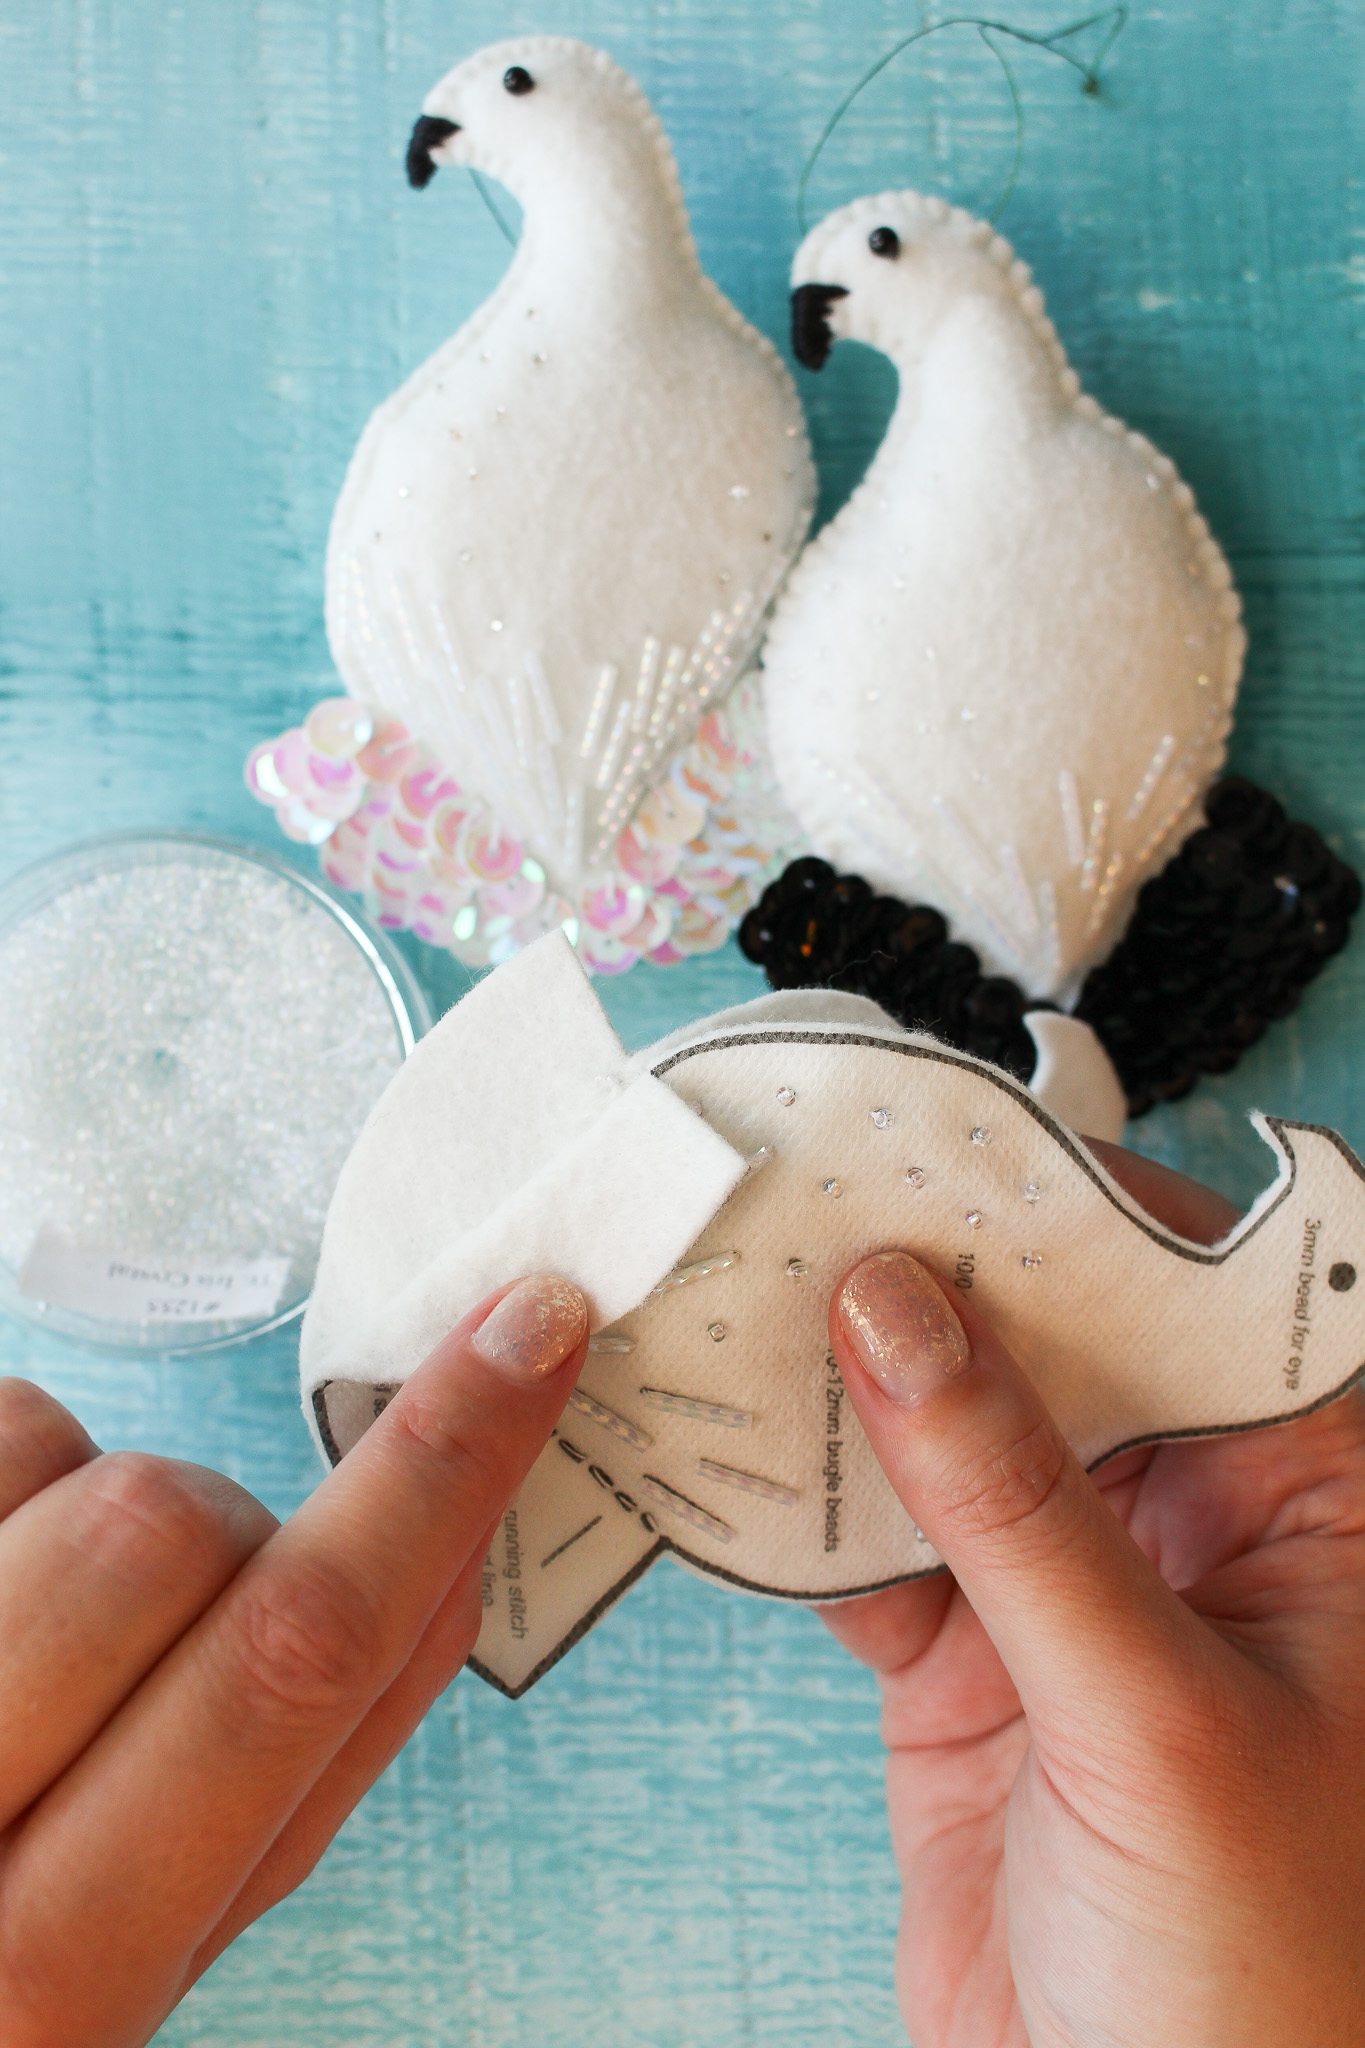
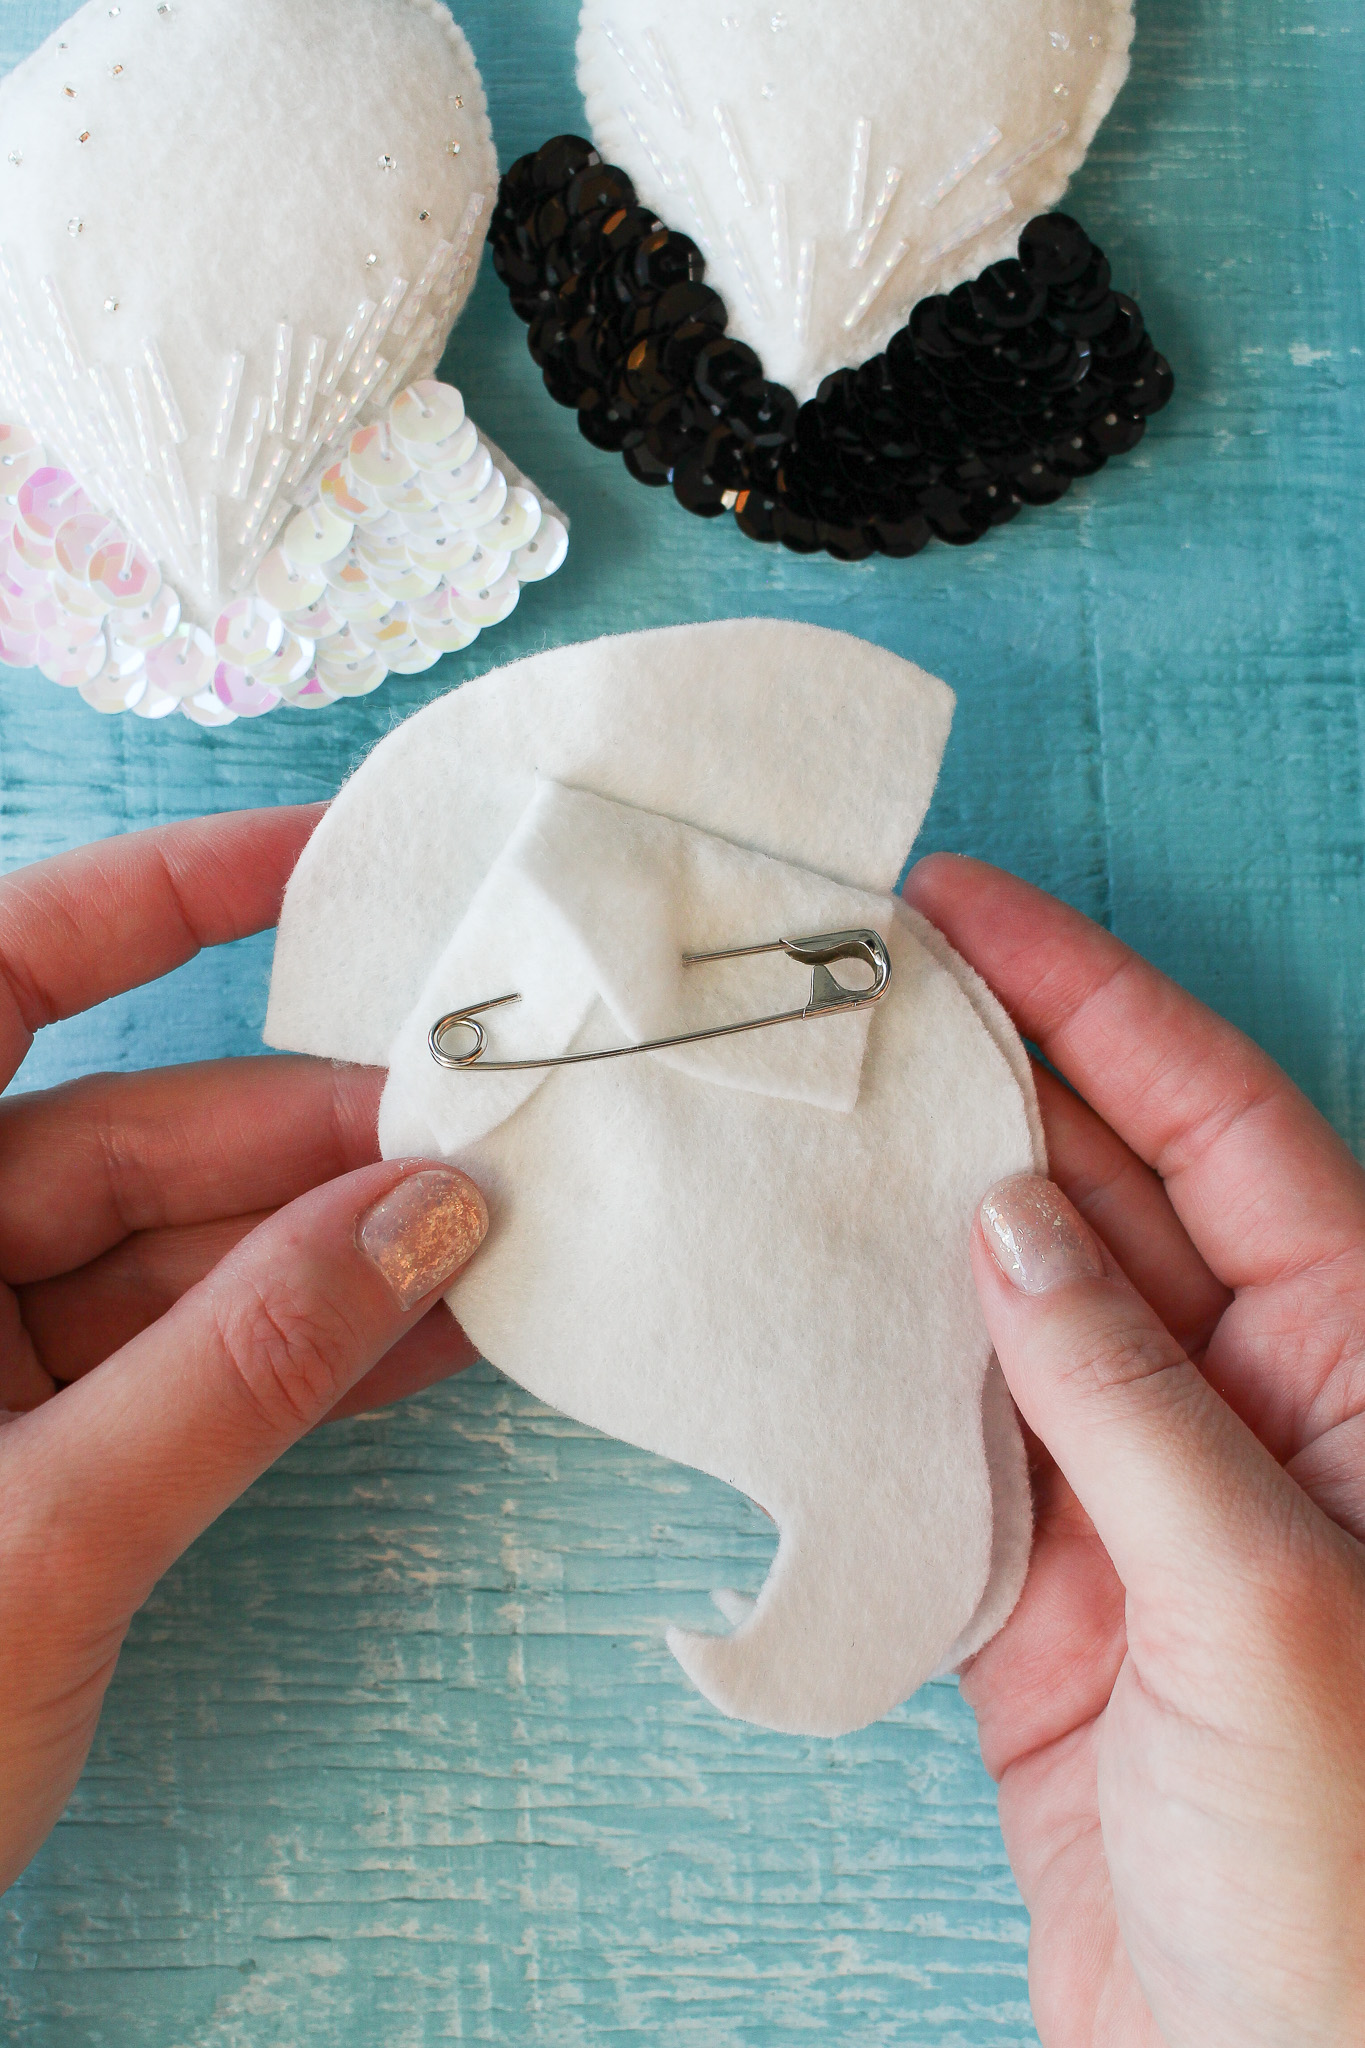
Stitch Together the Bird – at the Tail Only:
Now you’re going to stitch together the two pieces. Use a basic running stitch and white thread, sew ONLY along the dotted line on the pattern:
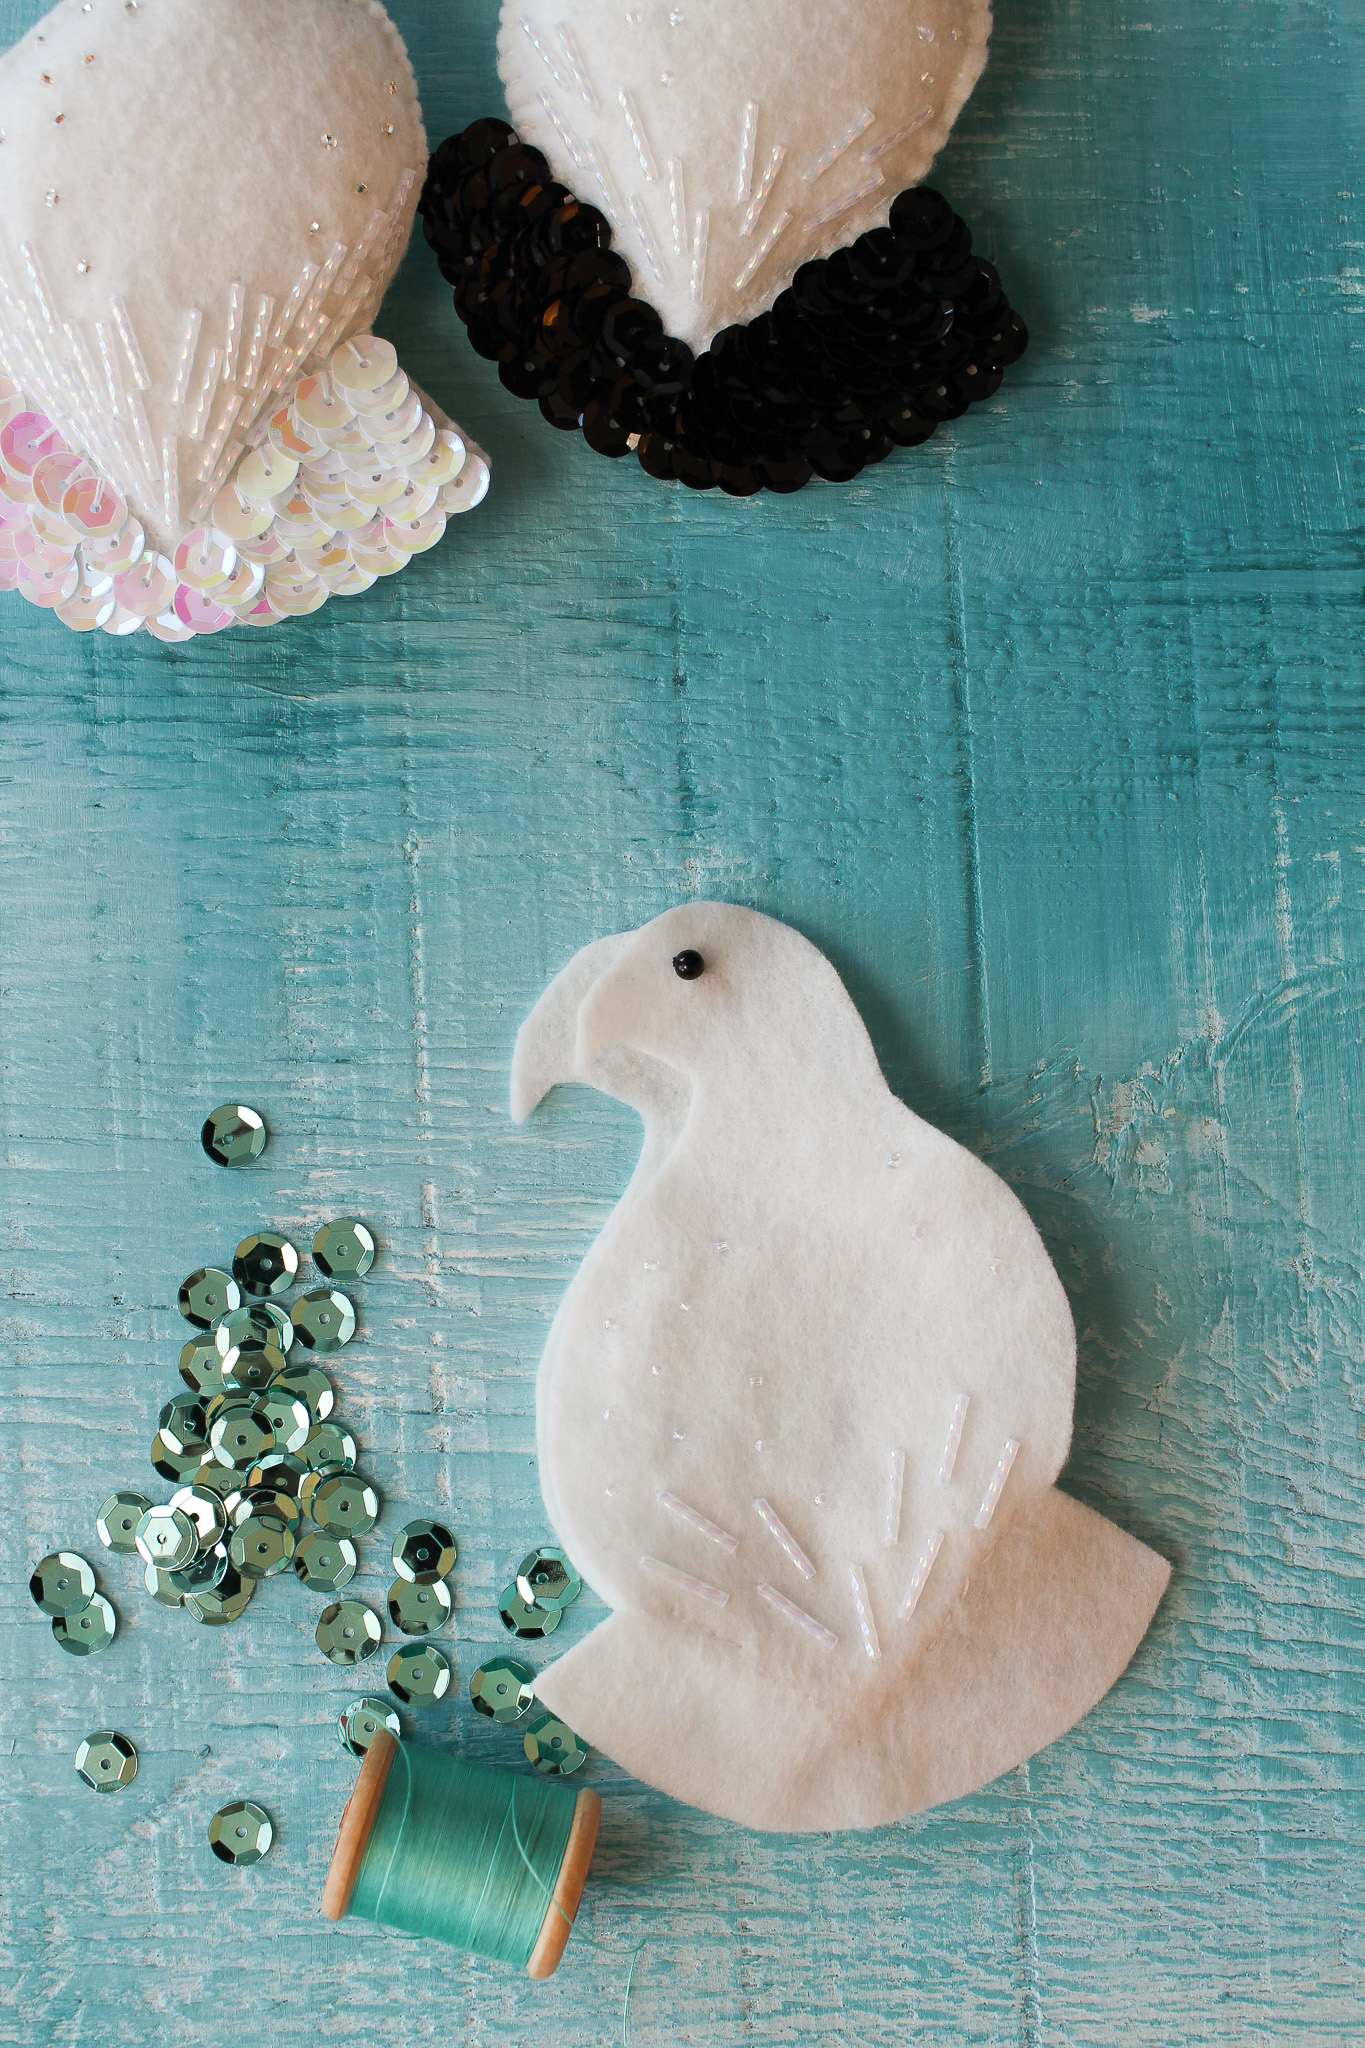
Rinse off the Stabilizer:
If you’ve used the stabilizer, now is the time to rinse it off. You can soak it in warm water or just hold the ornament under warm running water. The stabilizer will break apart and dissolve. If you’ve stitched very tightly, as I do, you may need to soak the ornament for a few minutes or gently rub any stubborn areas with your fingers. Be gentle and patient – the stabilizer WILL come off!

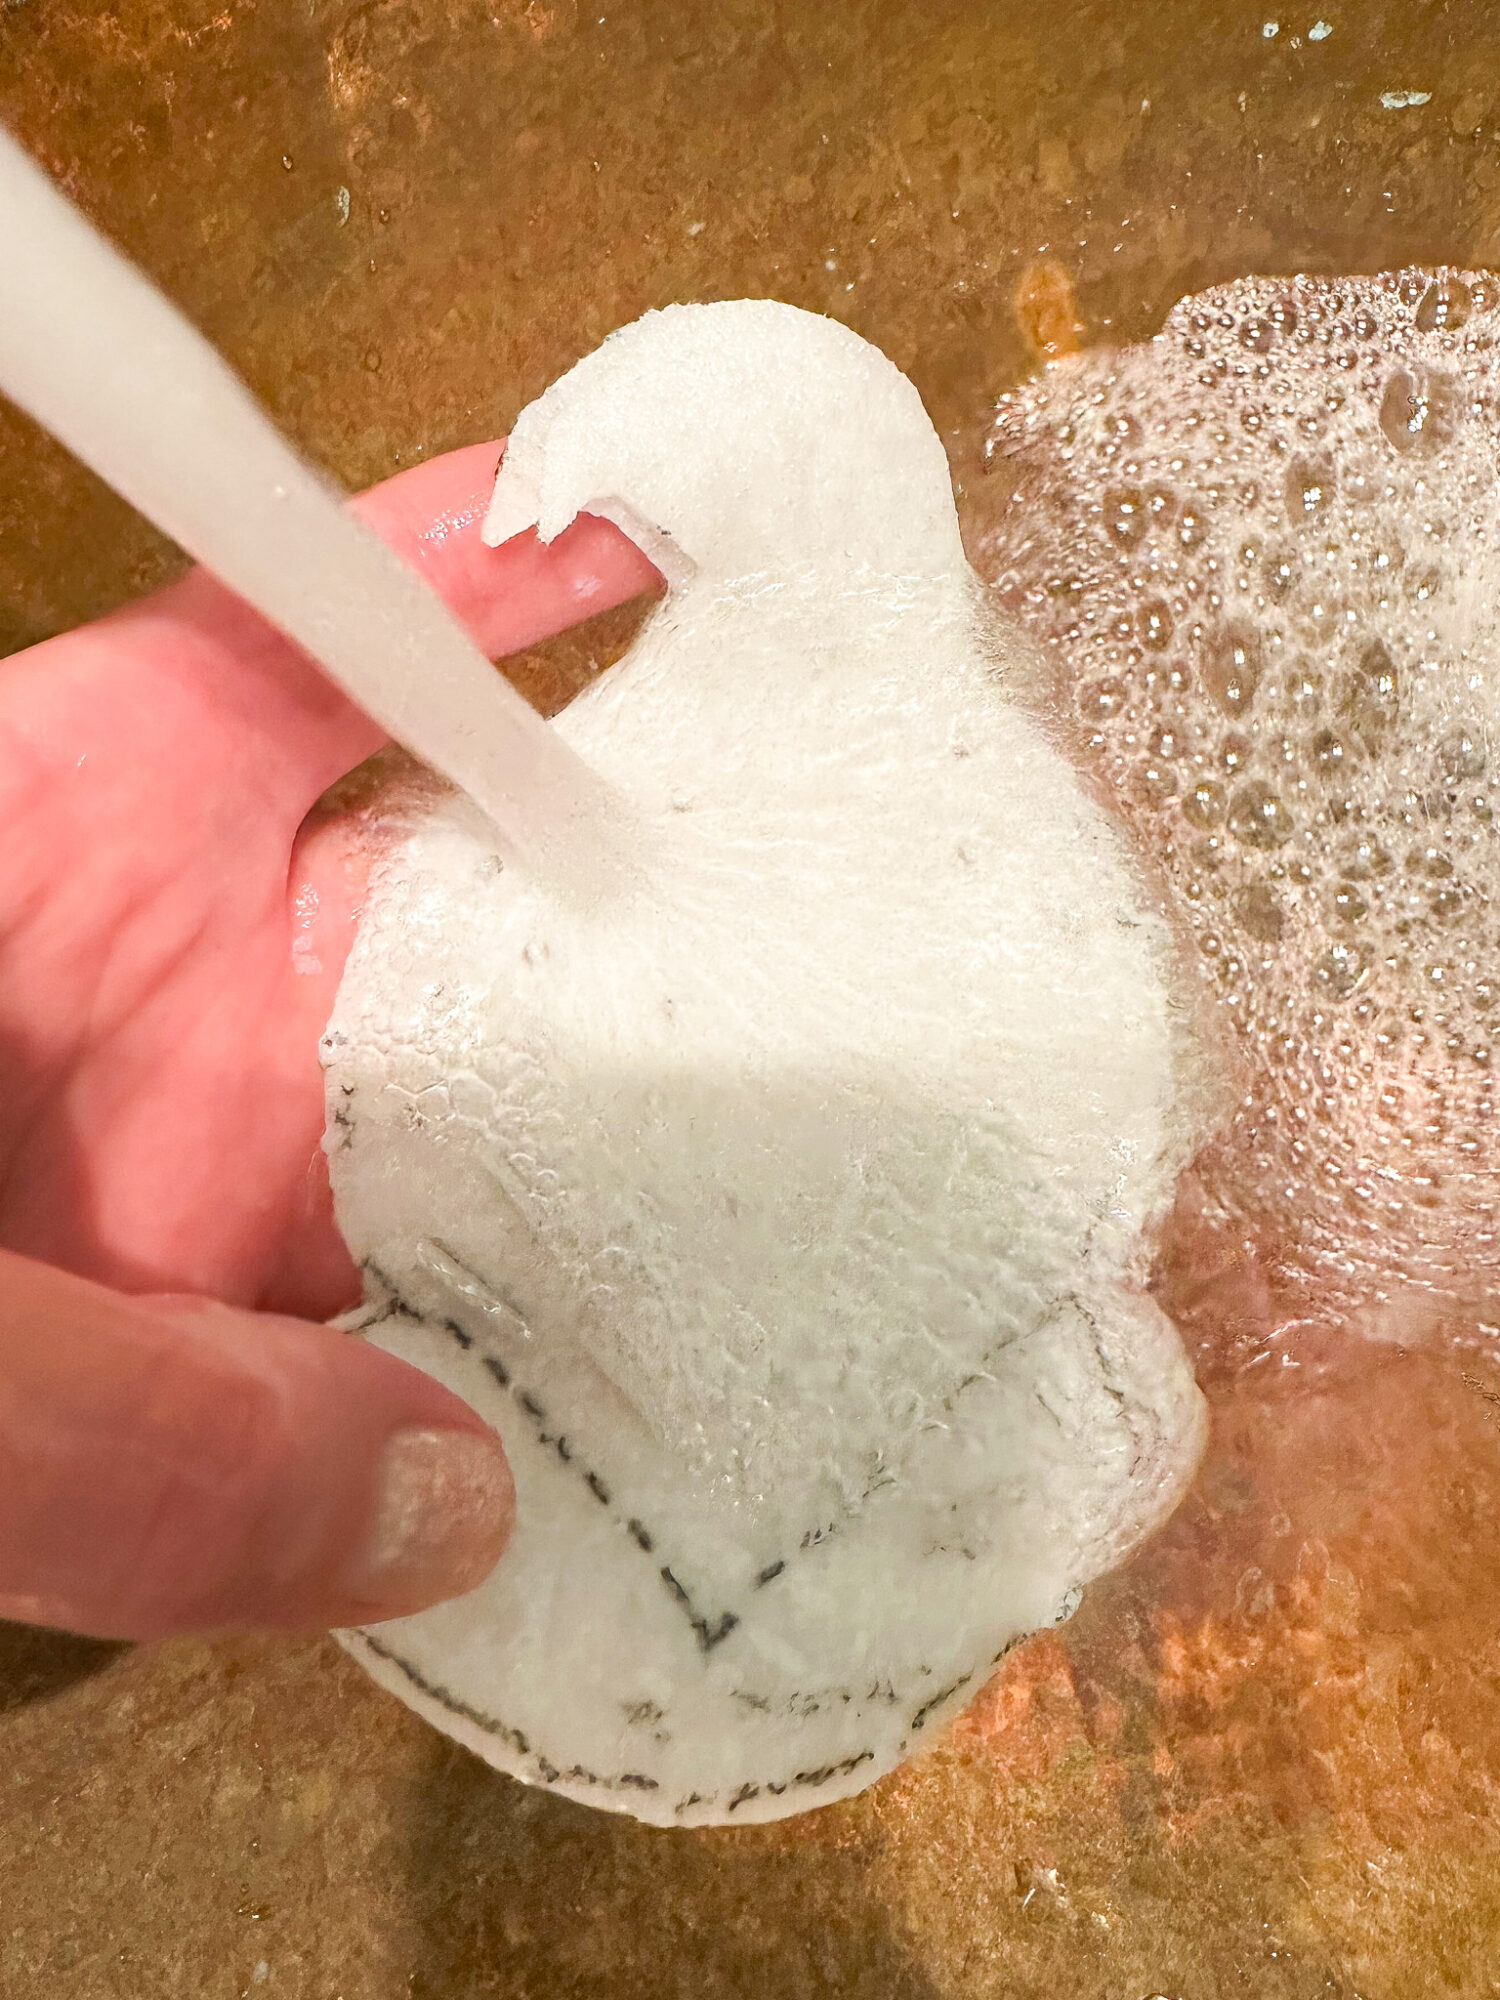
At this point the felt will be wet so you can either let it air dry or sandwich it inside a tea towel and gently press it with a warm iron set to wool or synthetic – a low heat. Gently press, being careful not the crush the beads. I like to move it around to dry areas of the tea towel as I do this. This will speed dry the felt in a few minutes and you’ll have something like this:
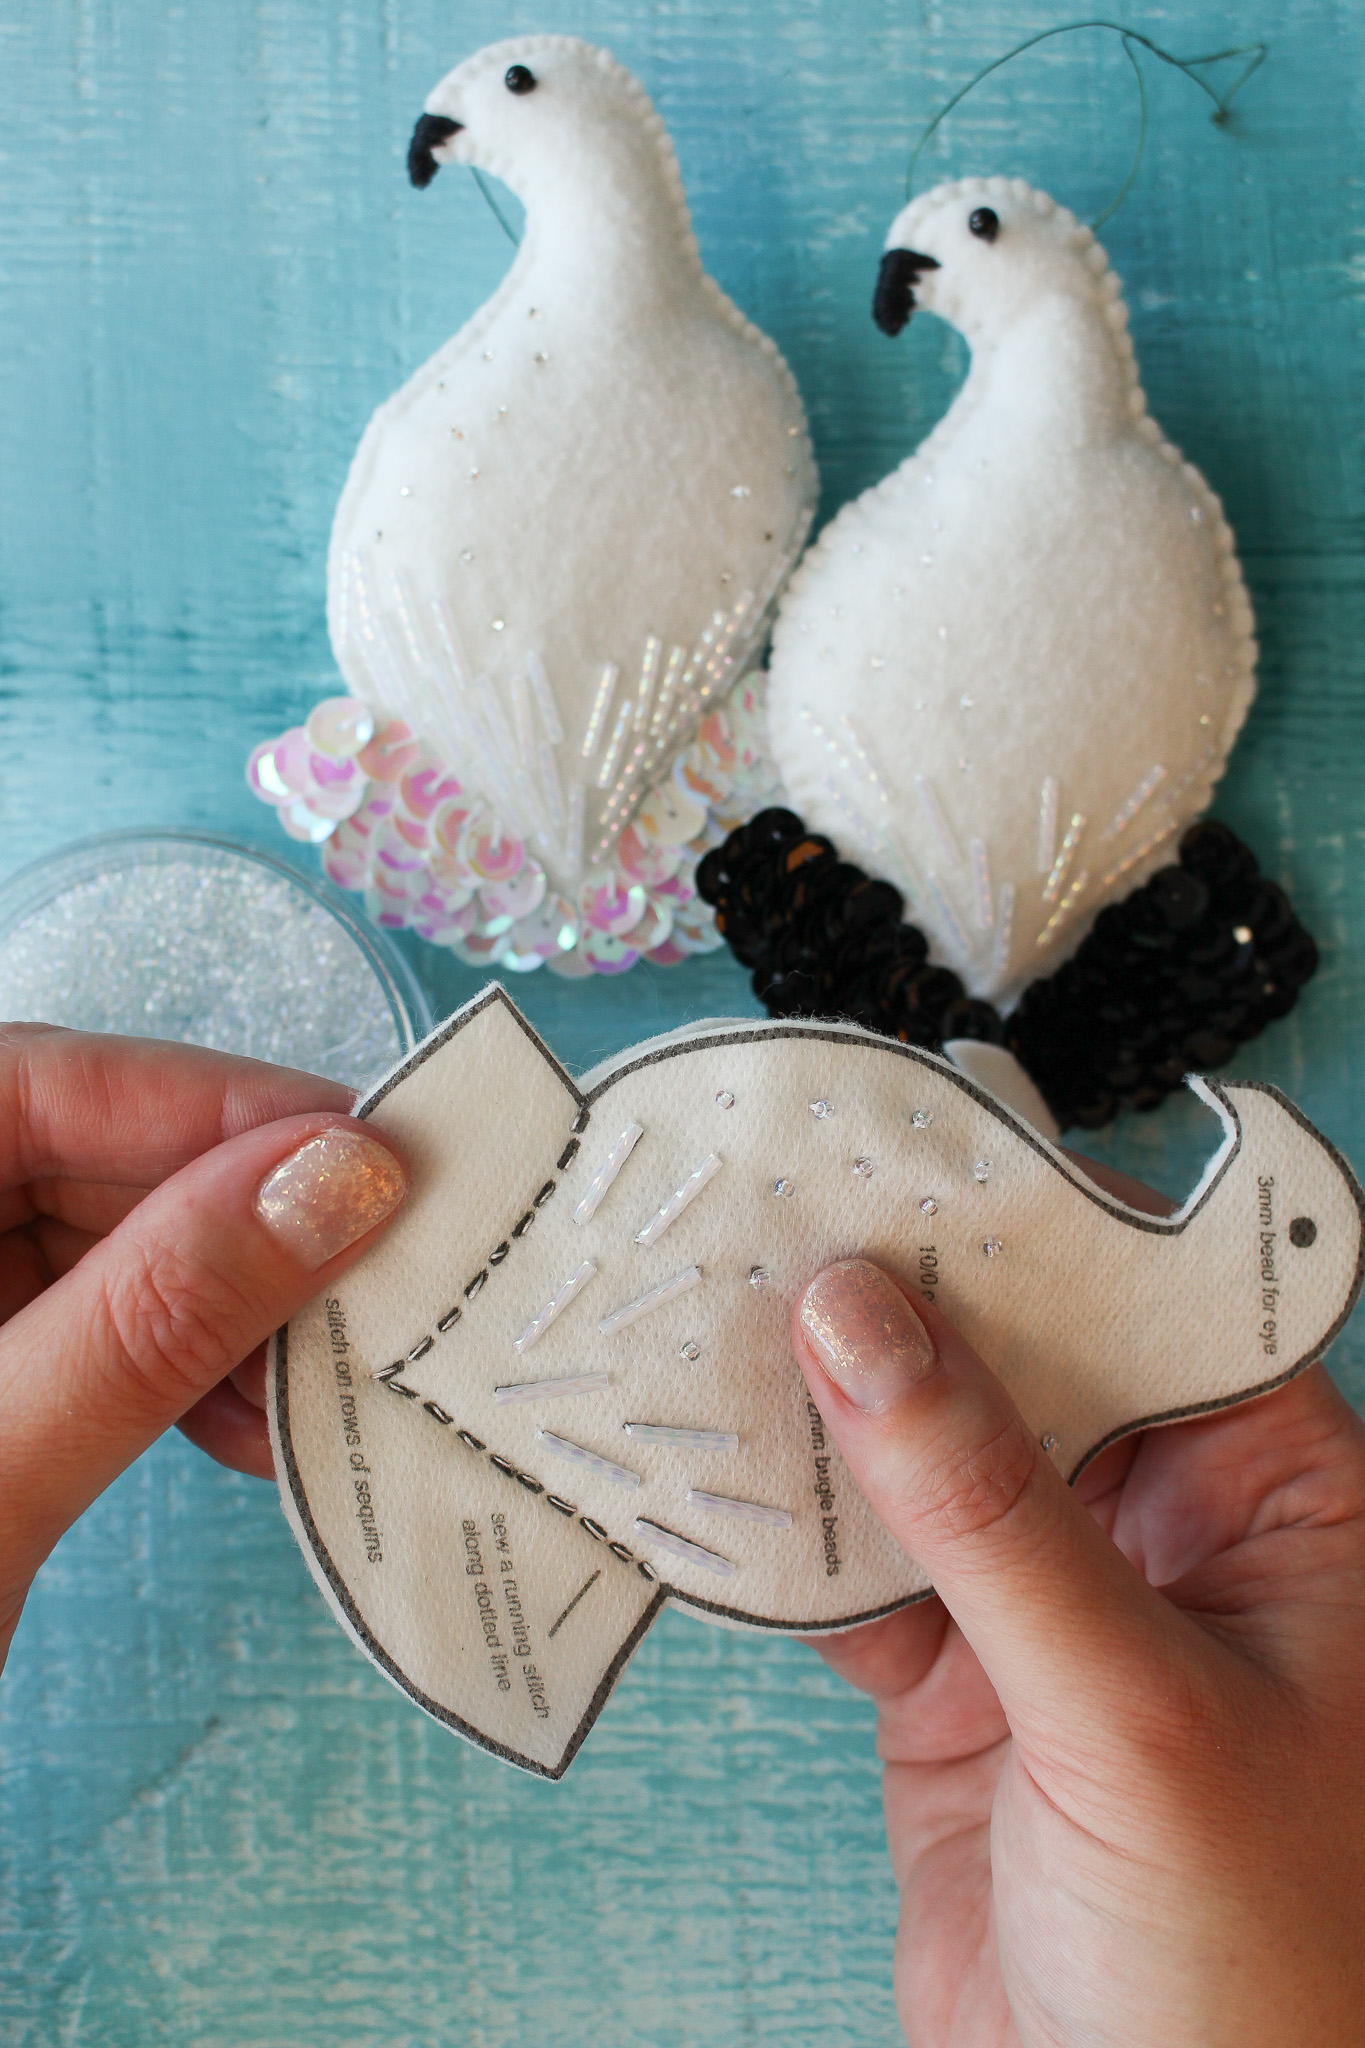
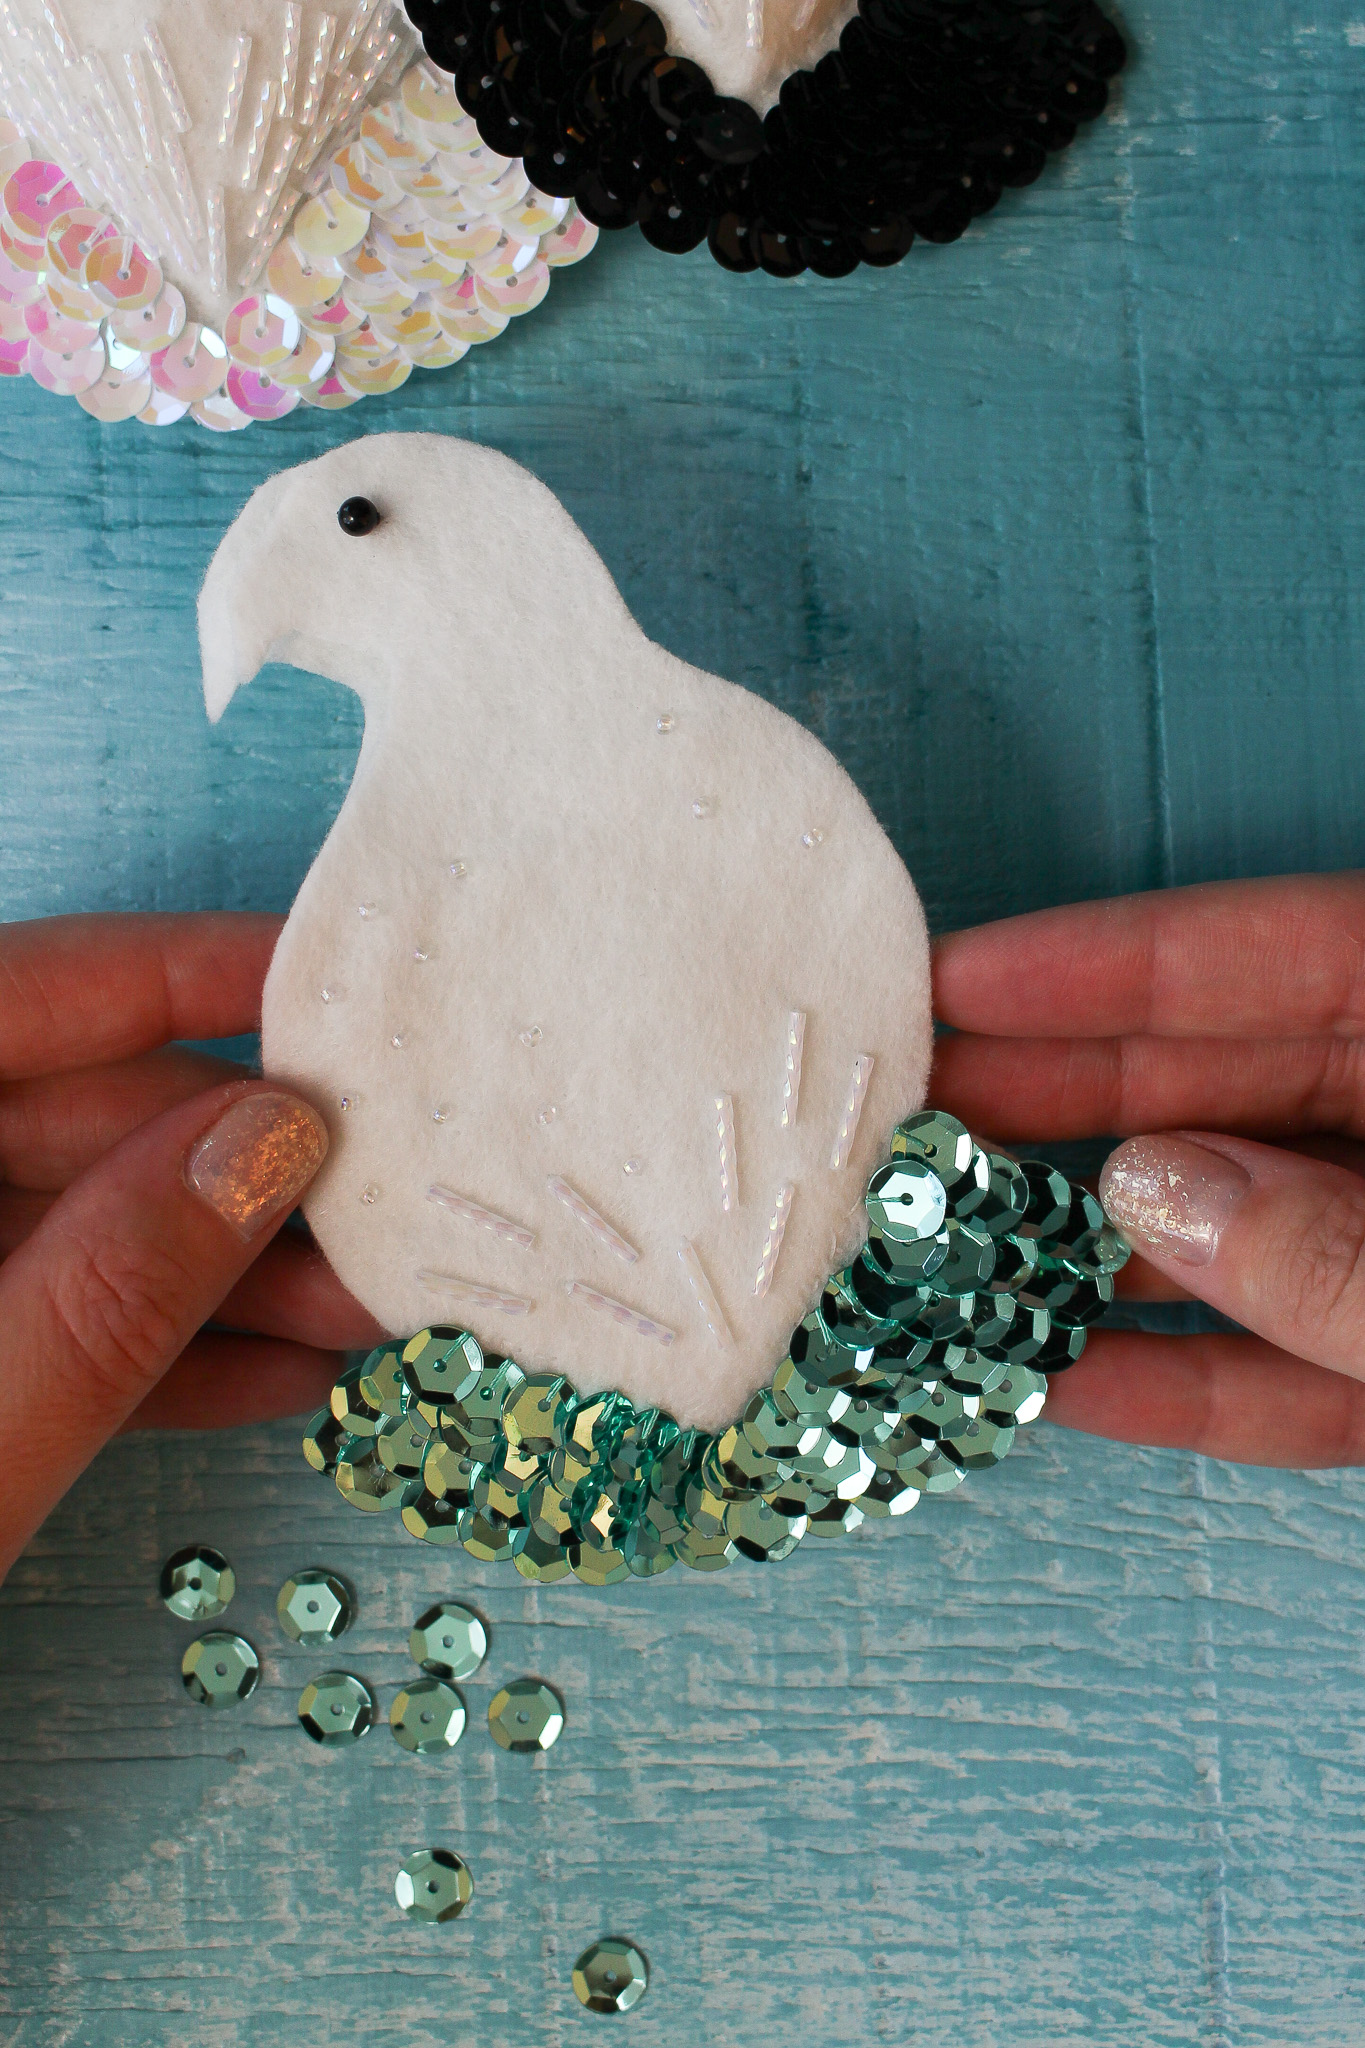
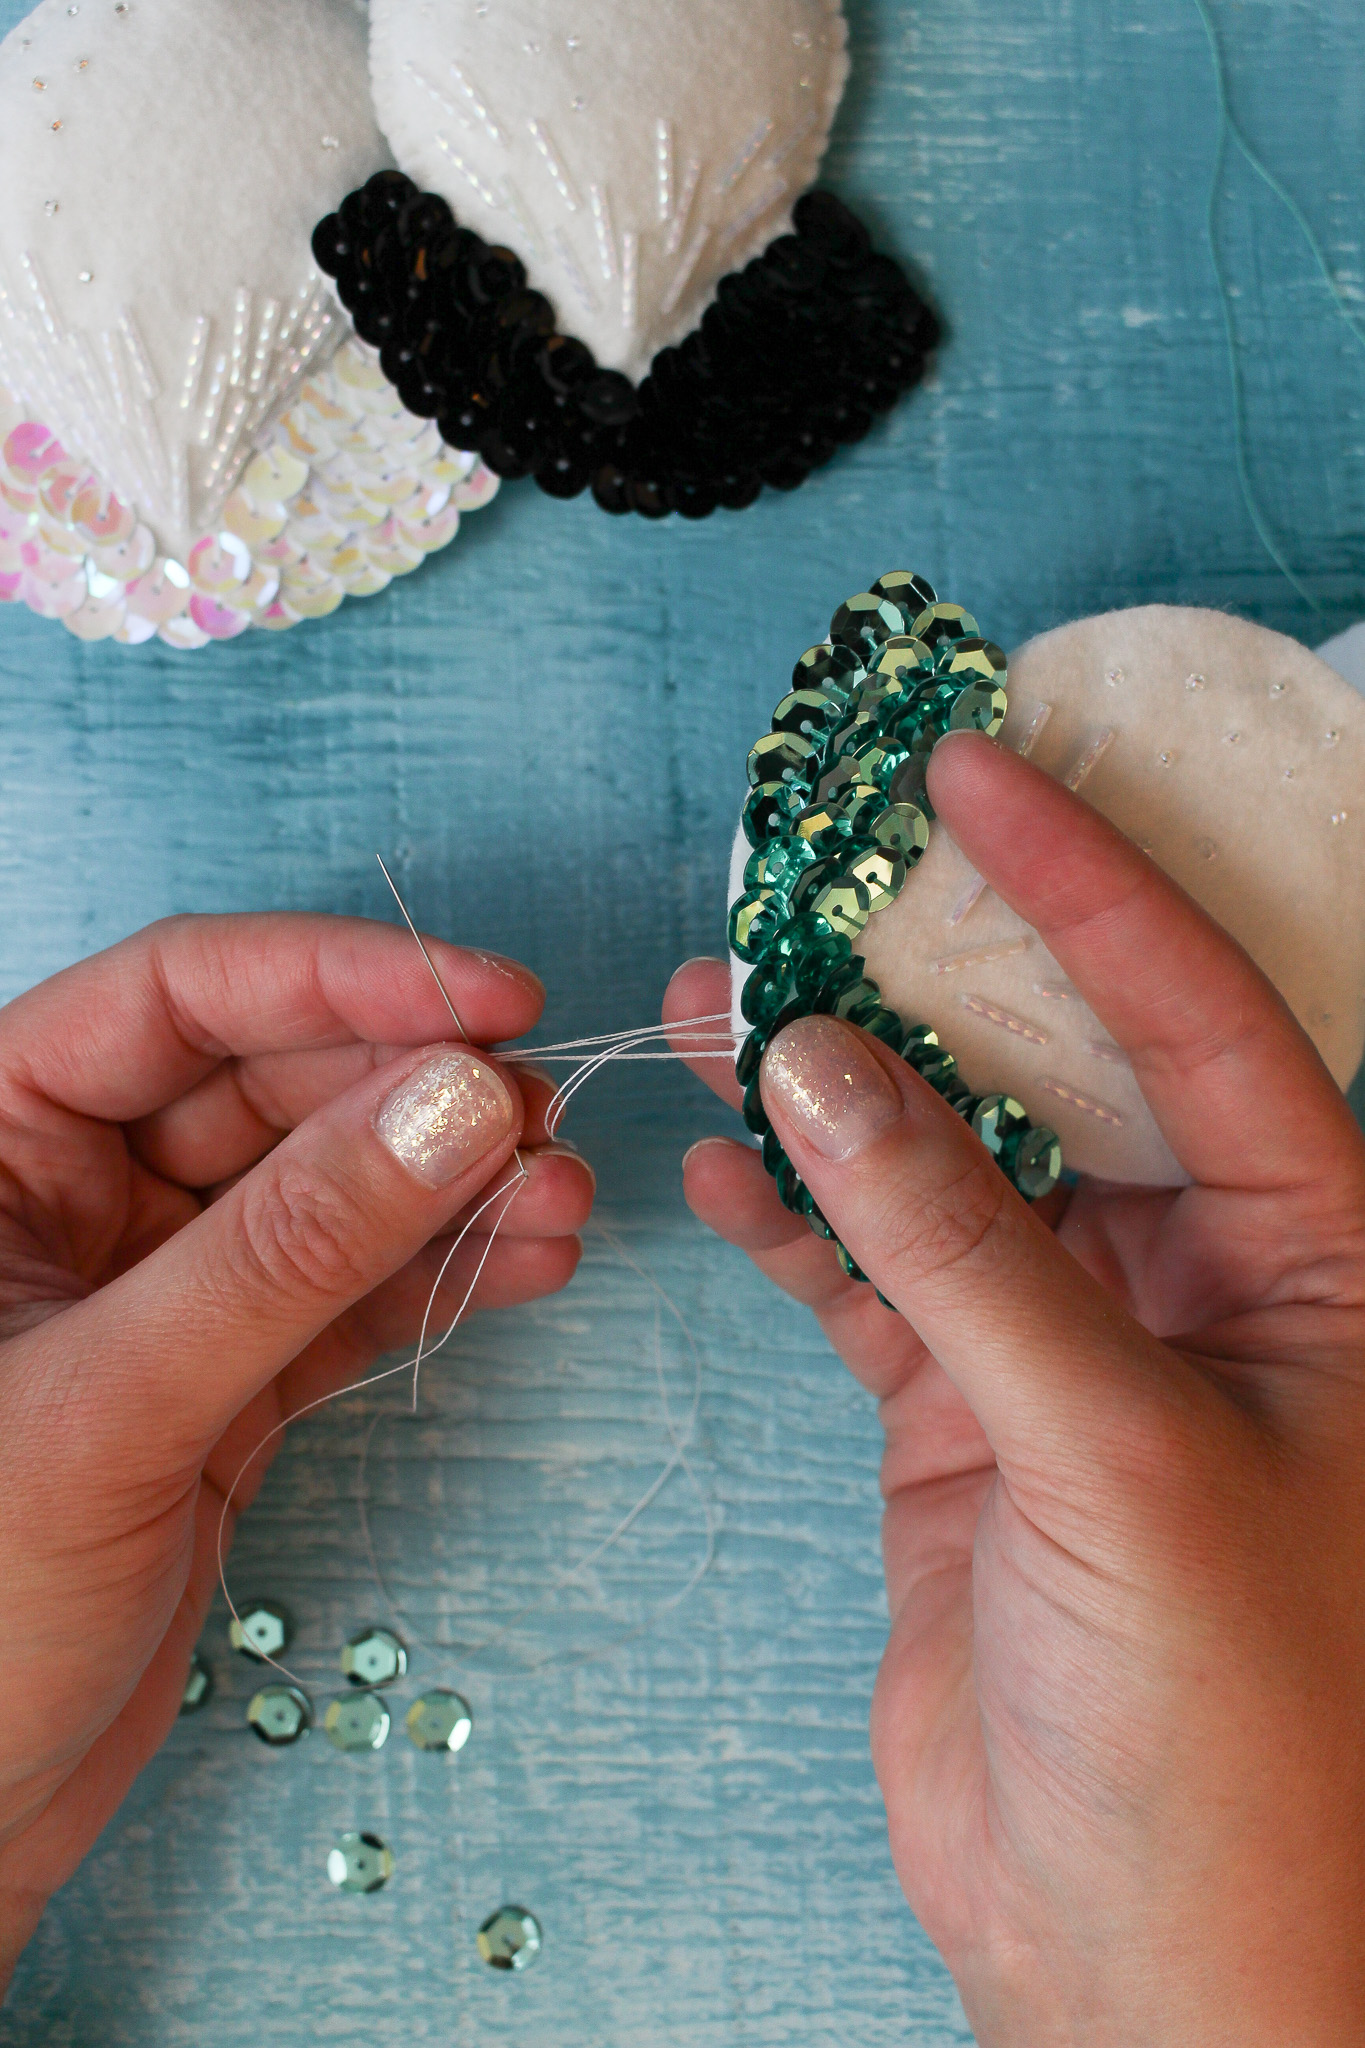
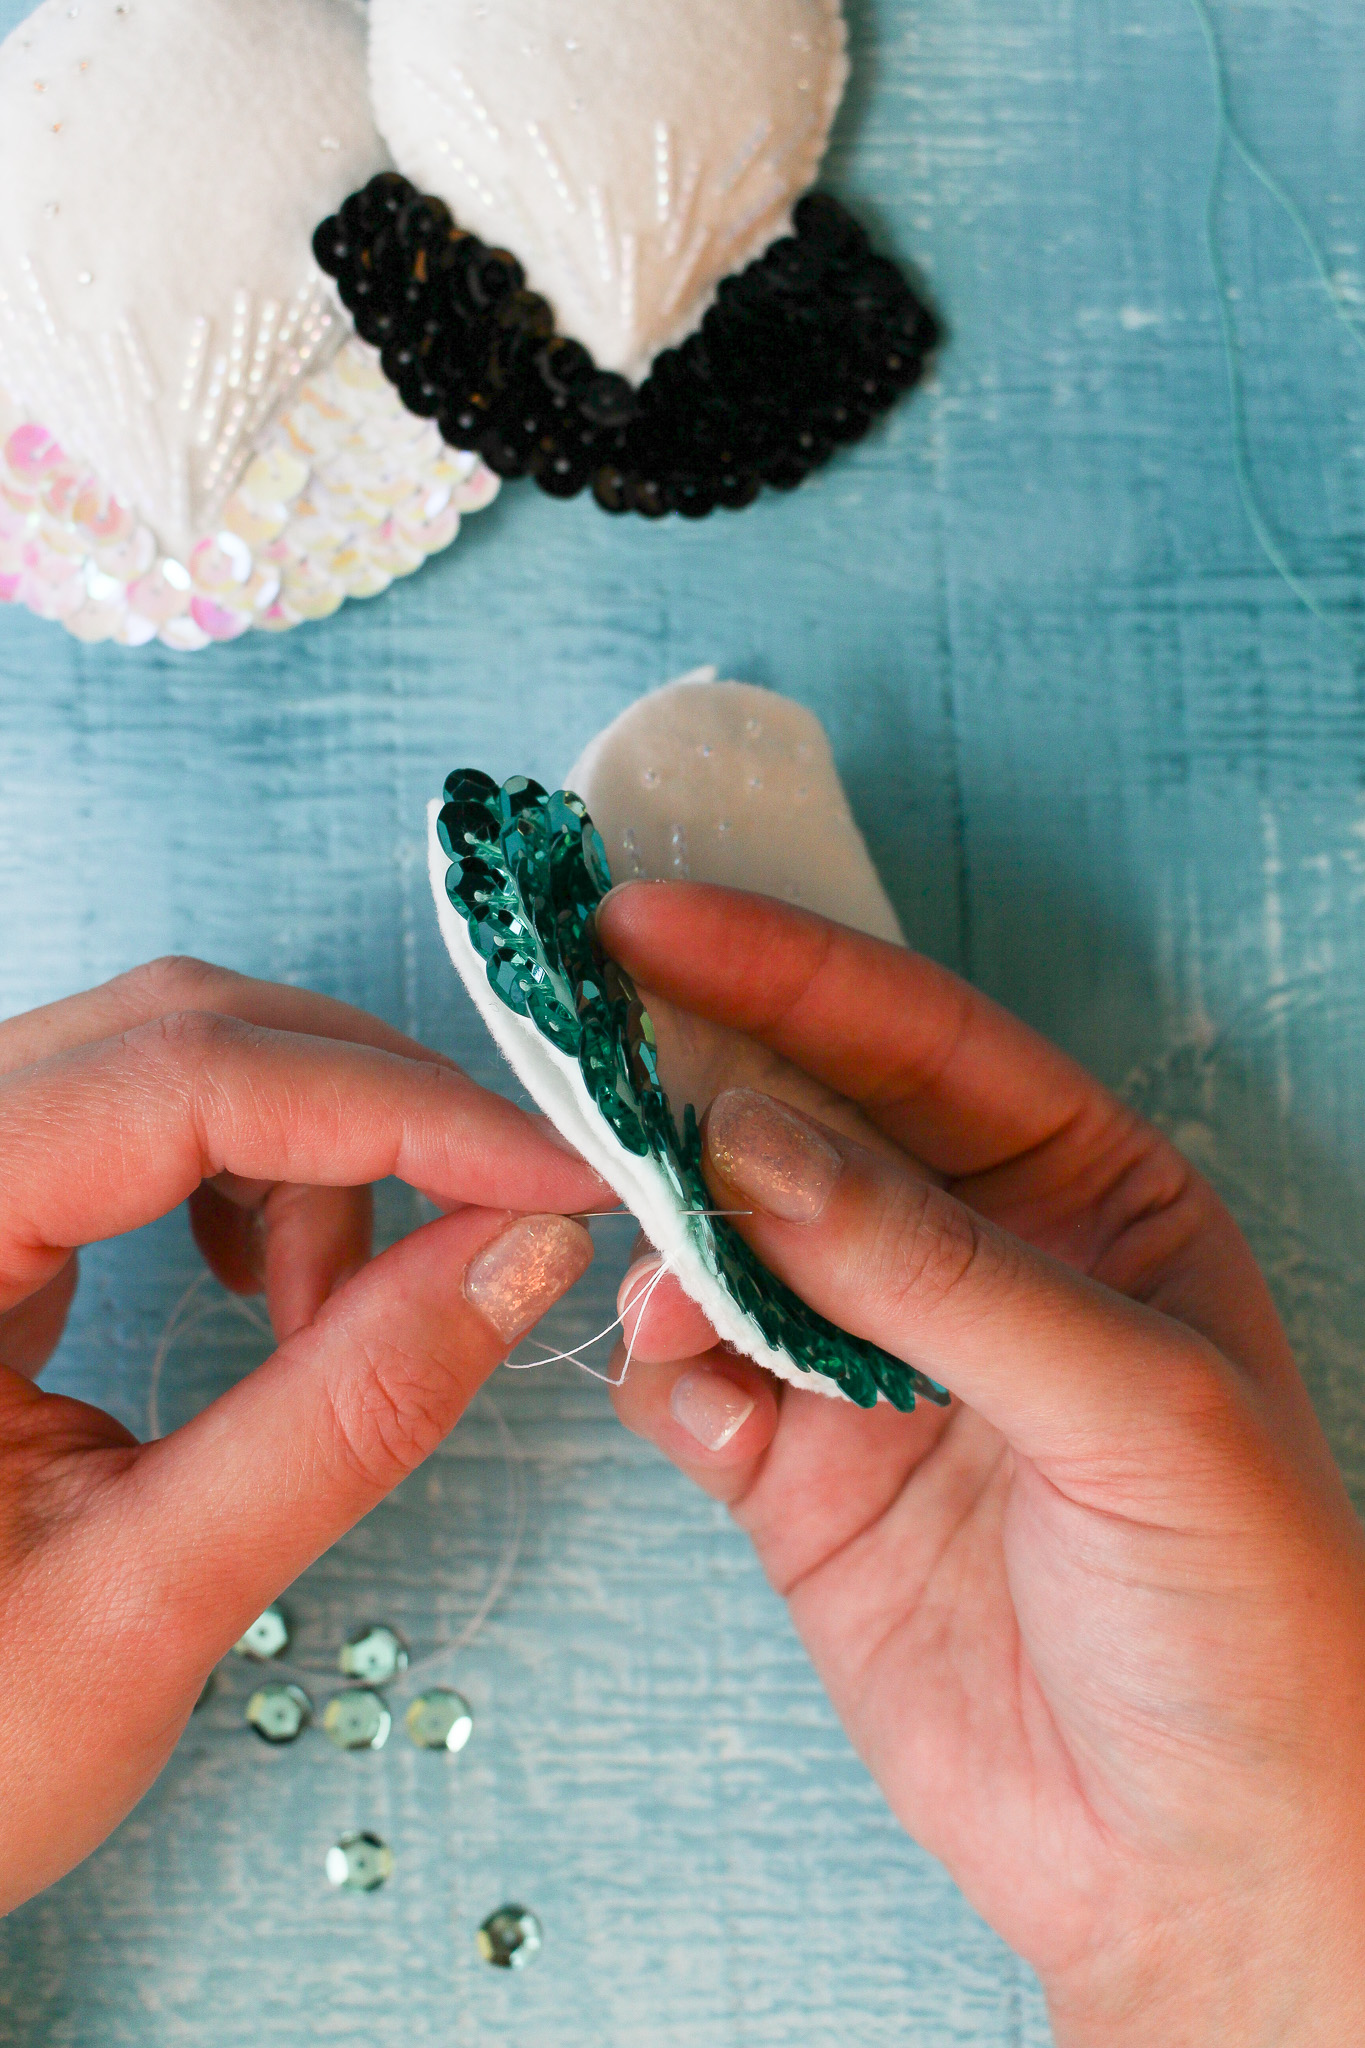
Stitch on the Sequins:
In the video above, I also shared how to stitch on sequins. First, I pin the back of what will become the tail feathers of the bird out of the way:
To stitch on the sequins, I attach them one at a time. I position one in place and then bring my threaded needle up through the hole. I then position the thread across one side of the sequin, and push the needle back down through the felt at the outside edge of the sequin. I overlap the sequins as I stitch them on to hide the thread:
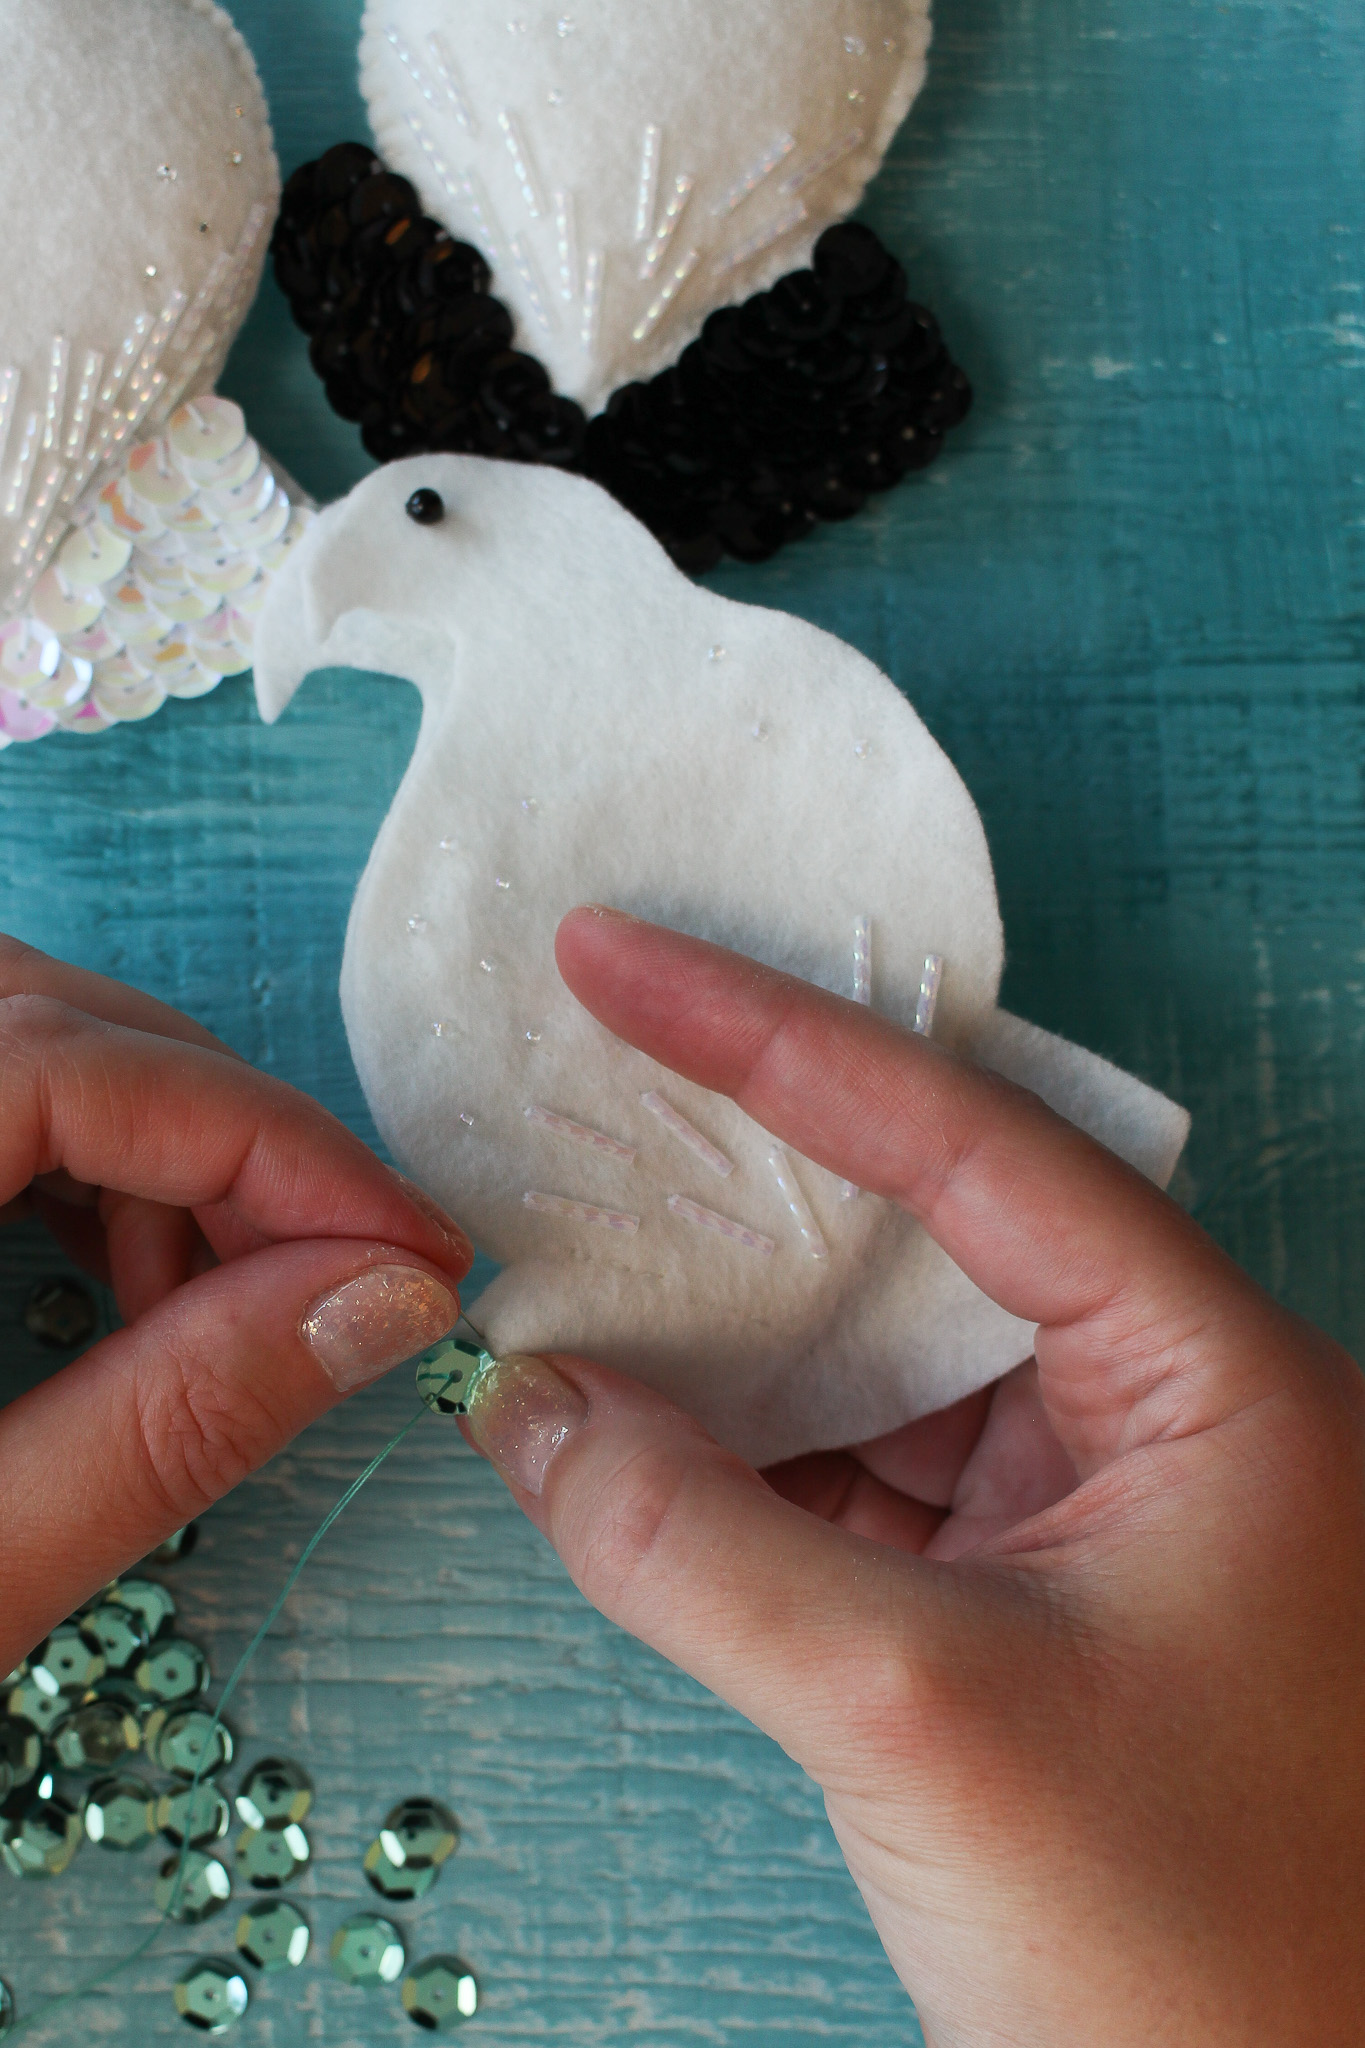
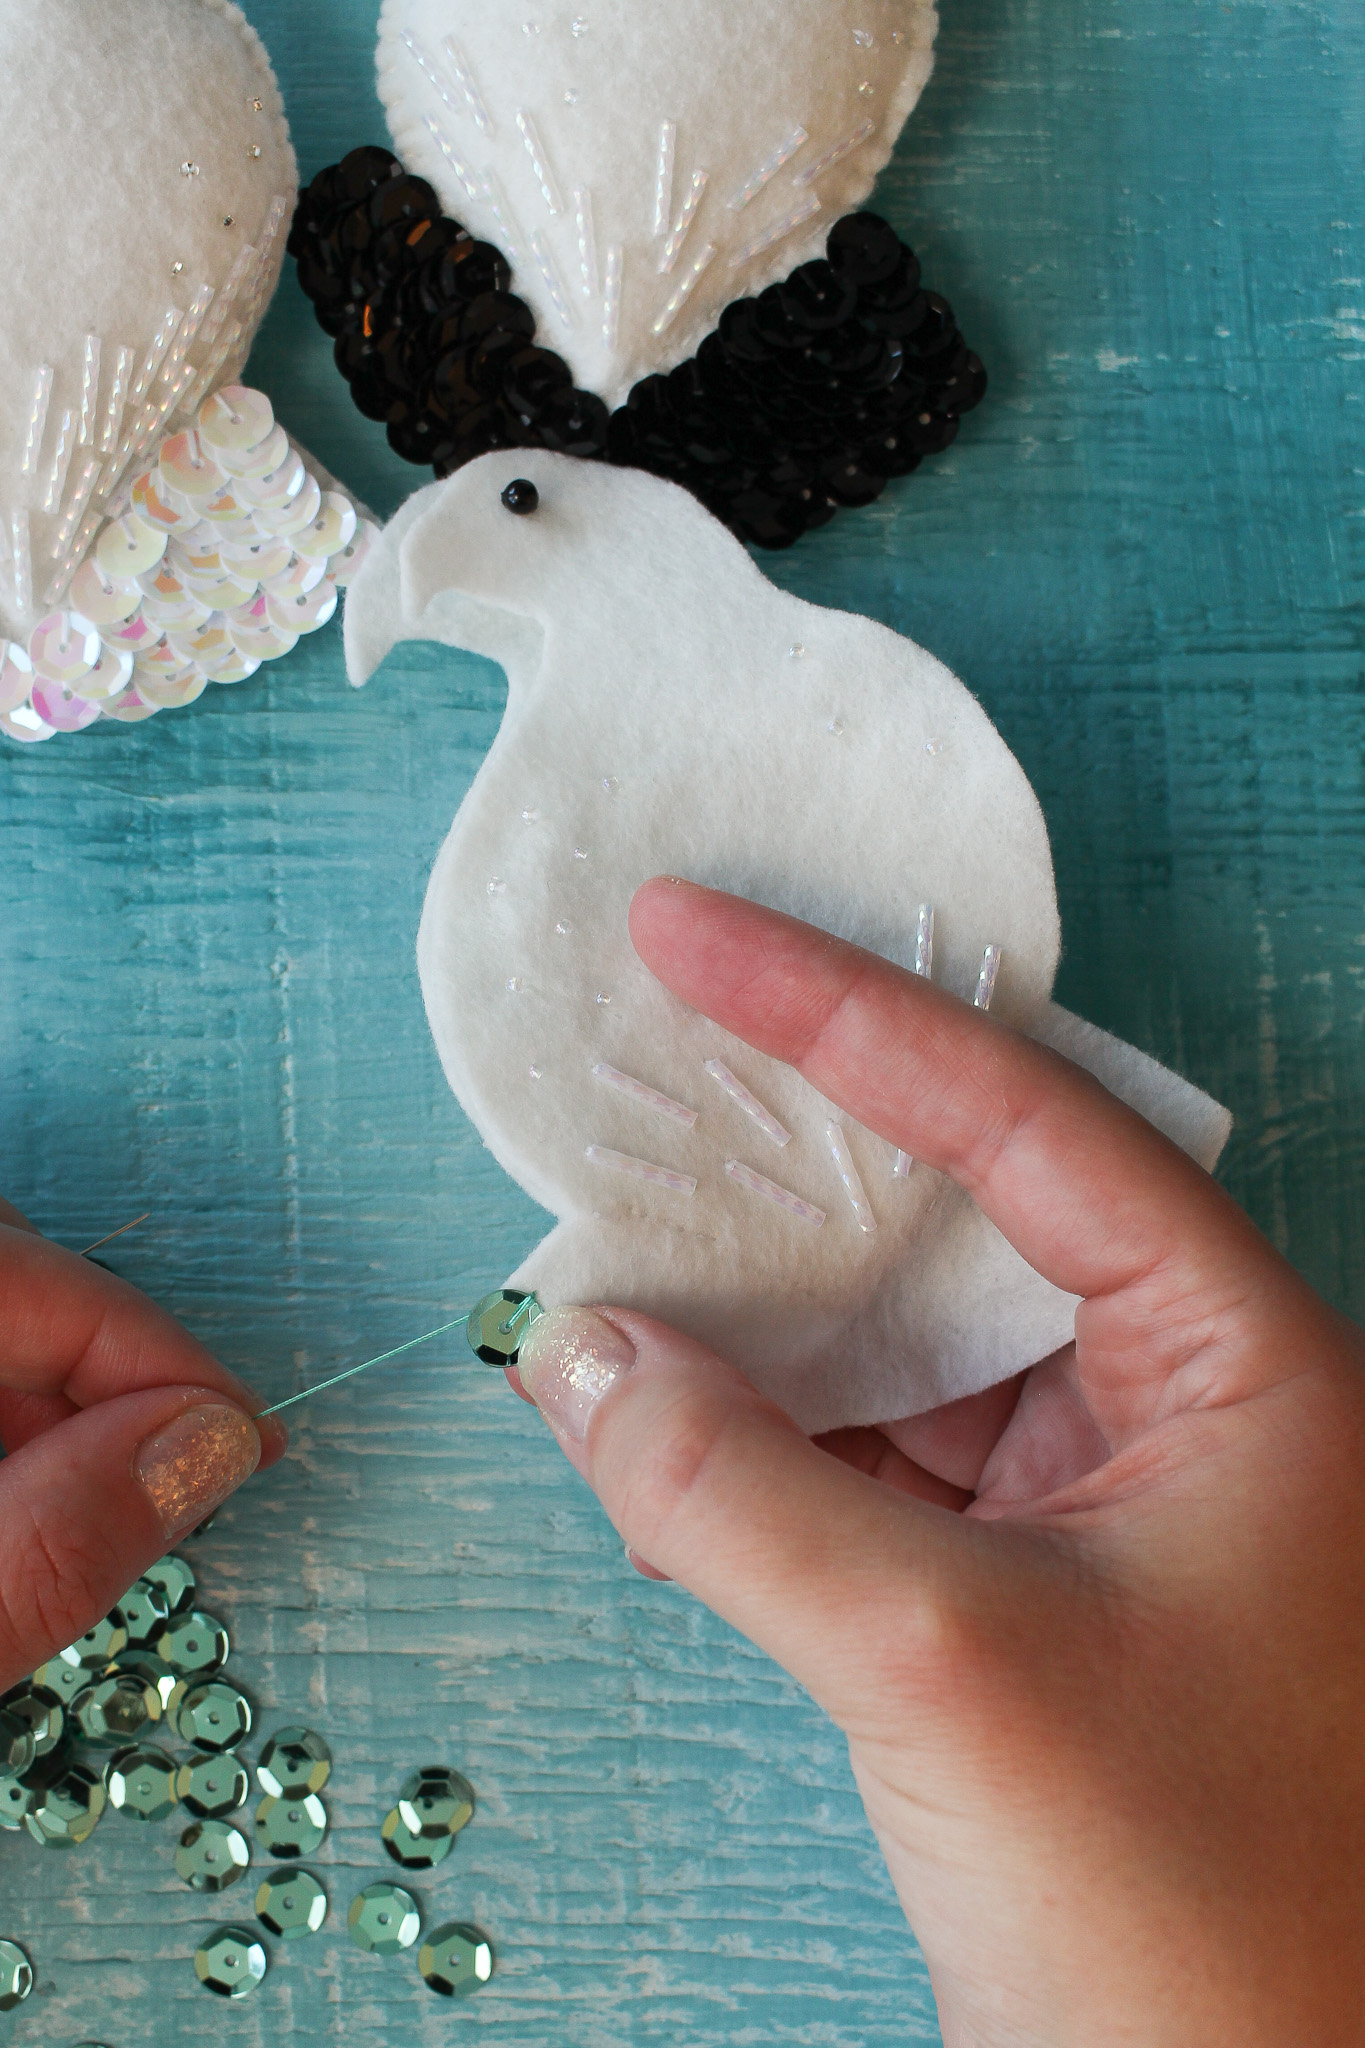
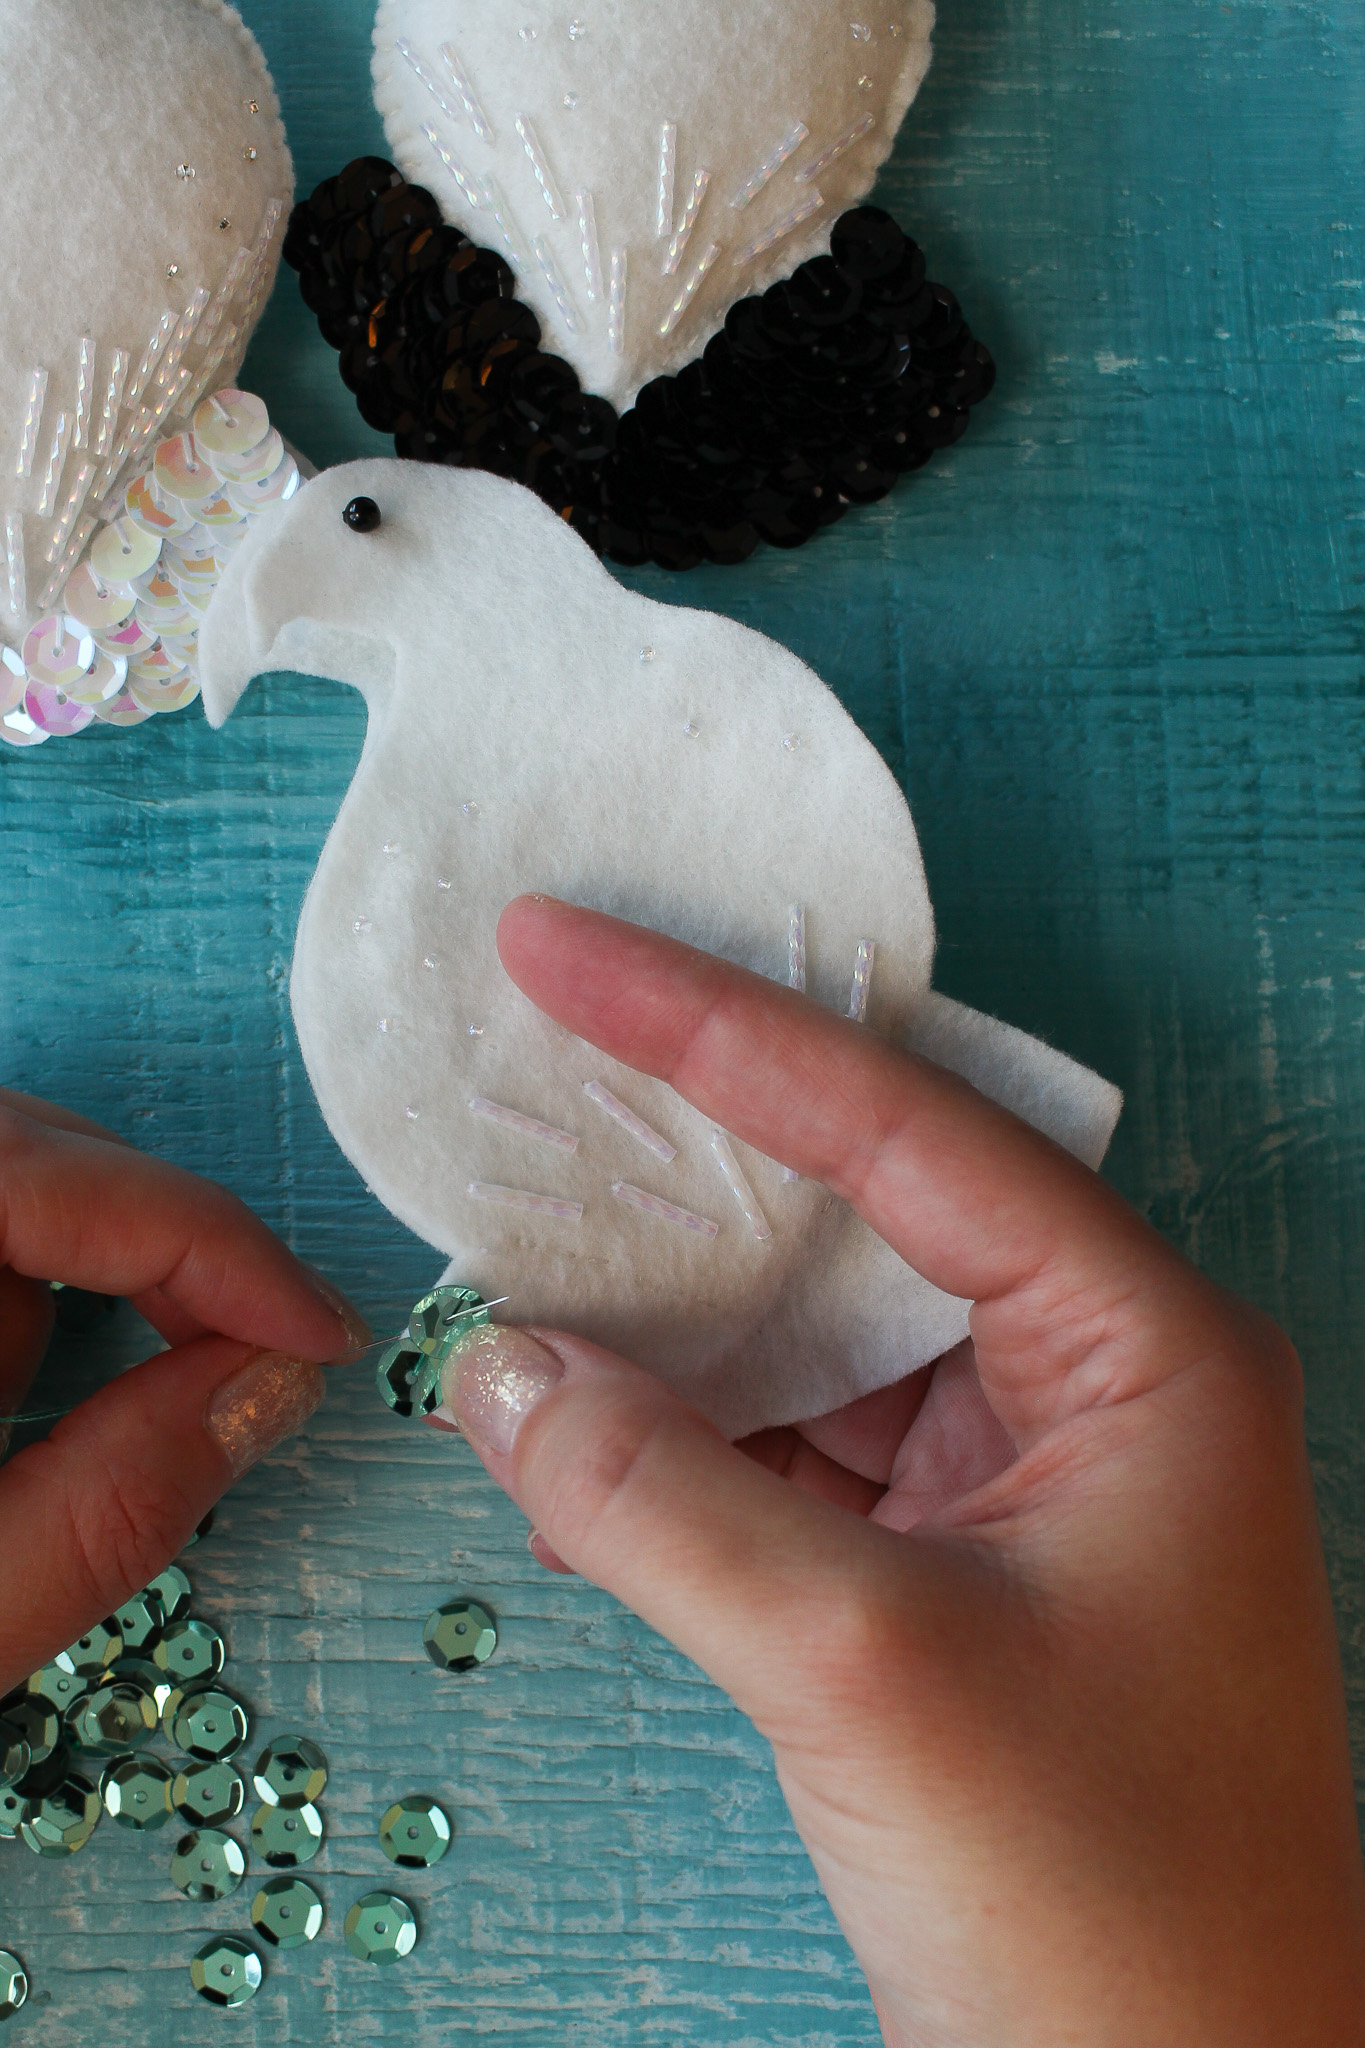
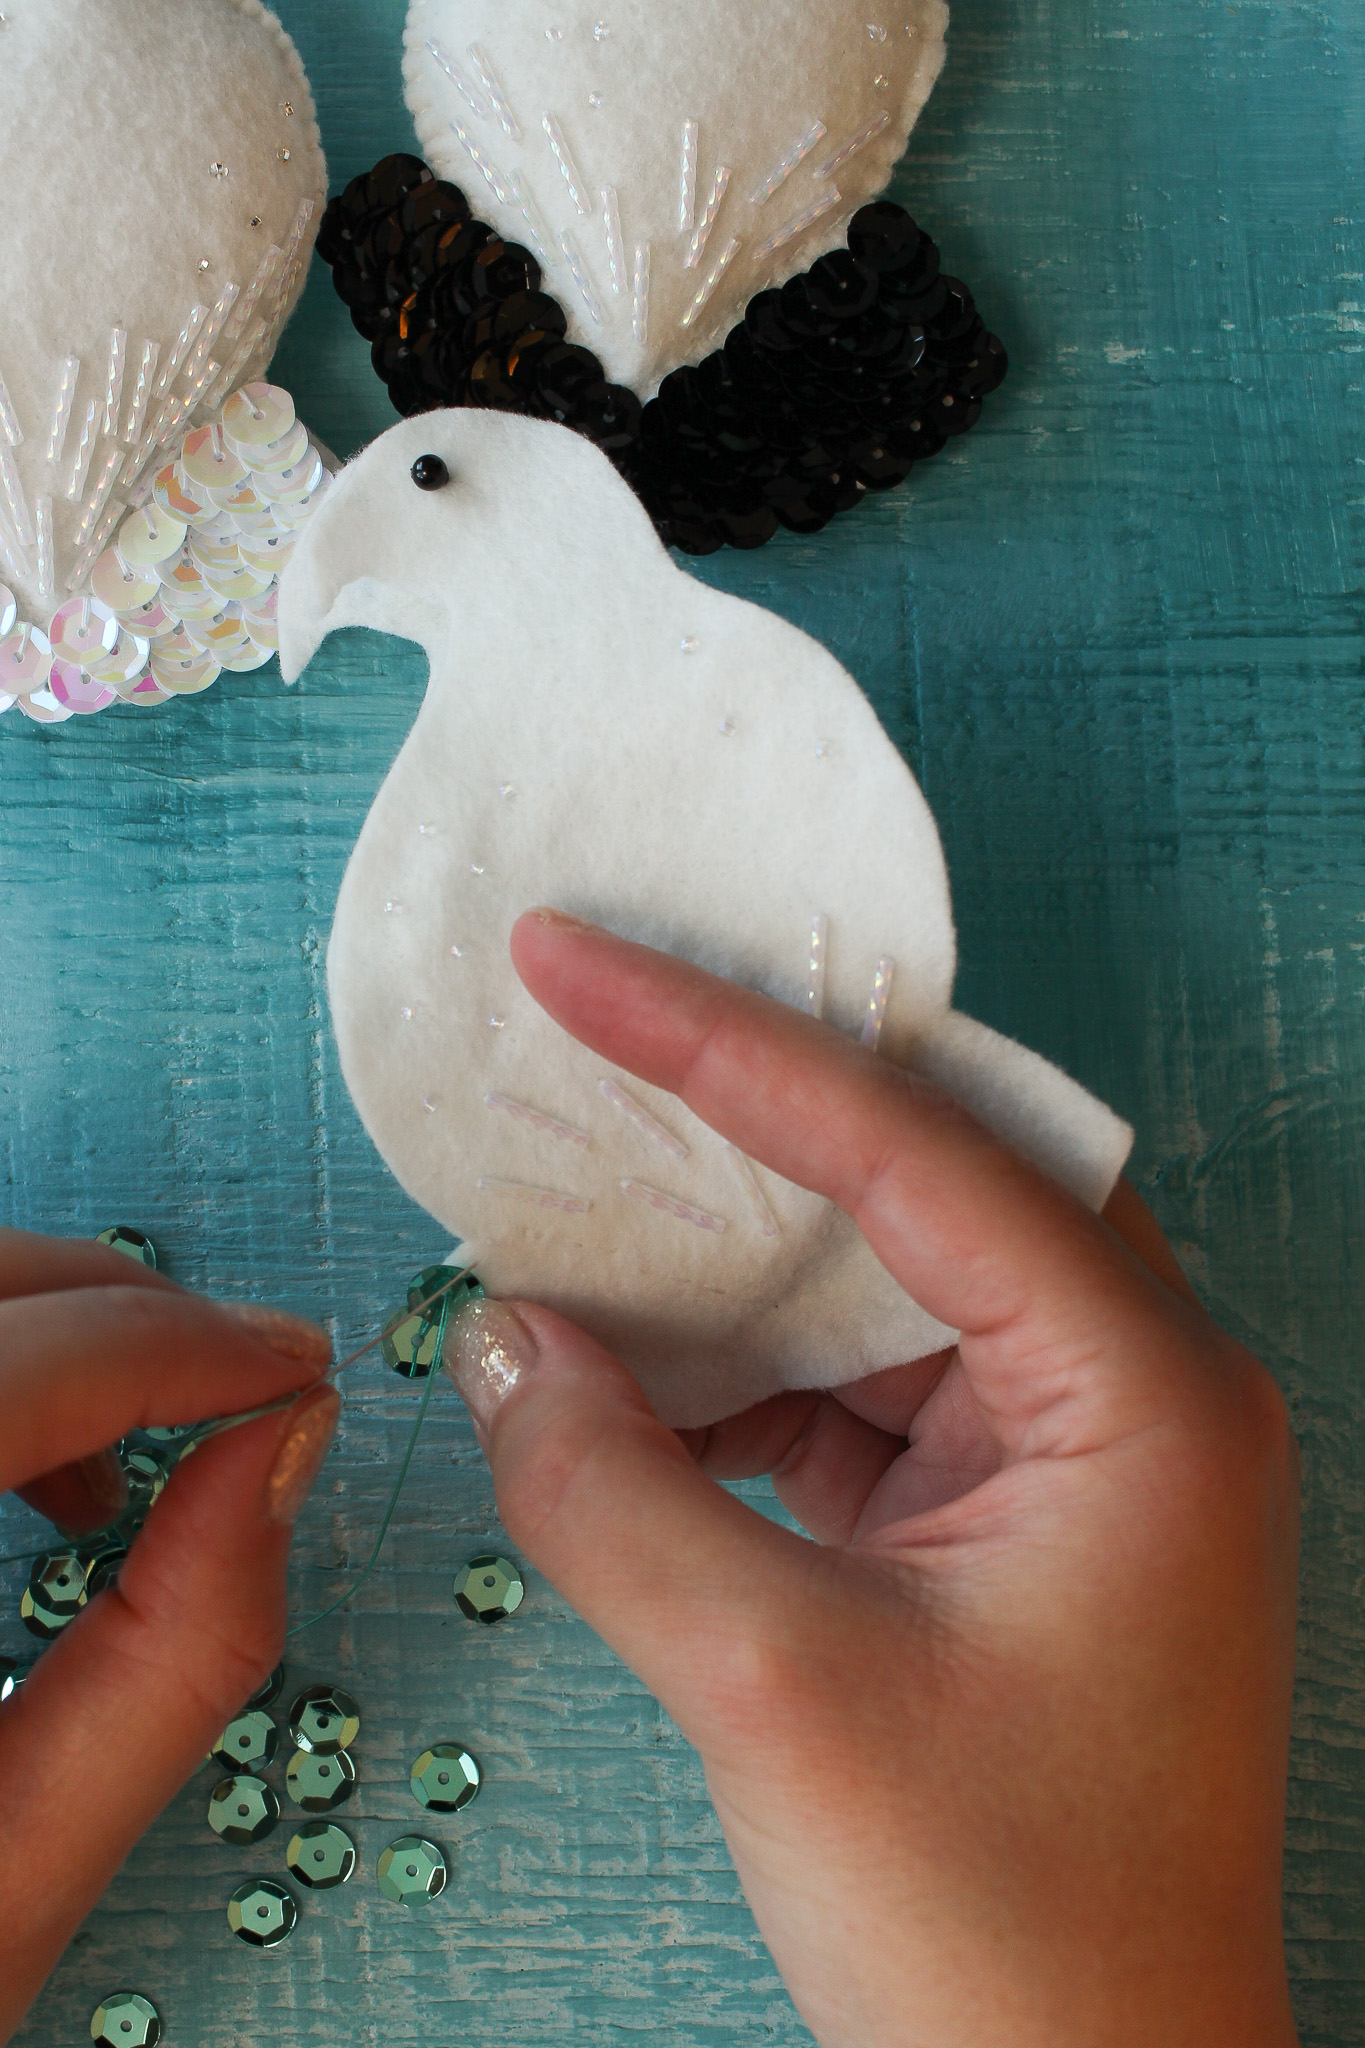
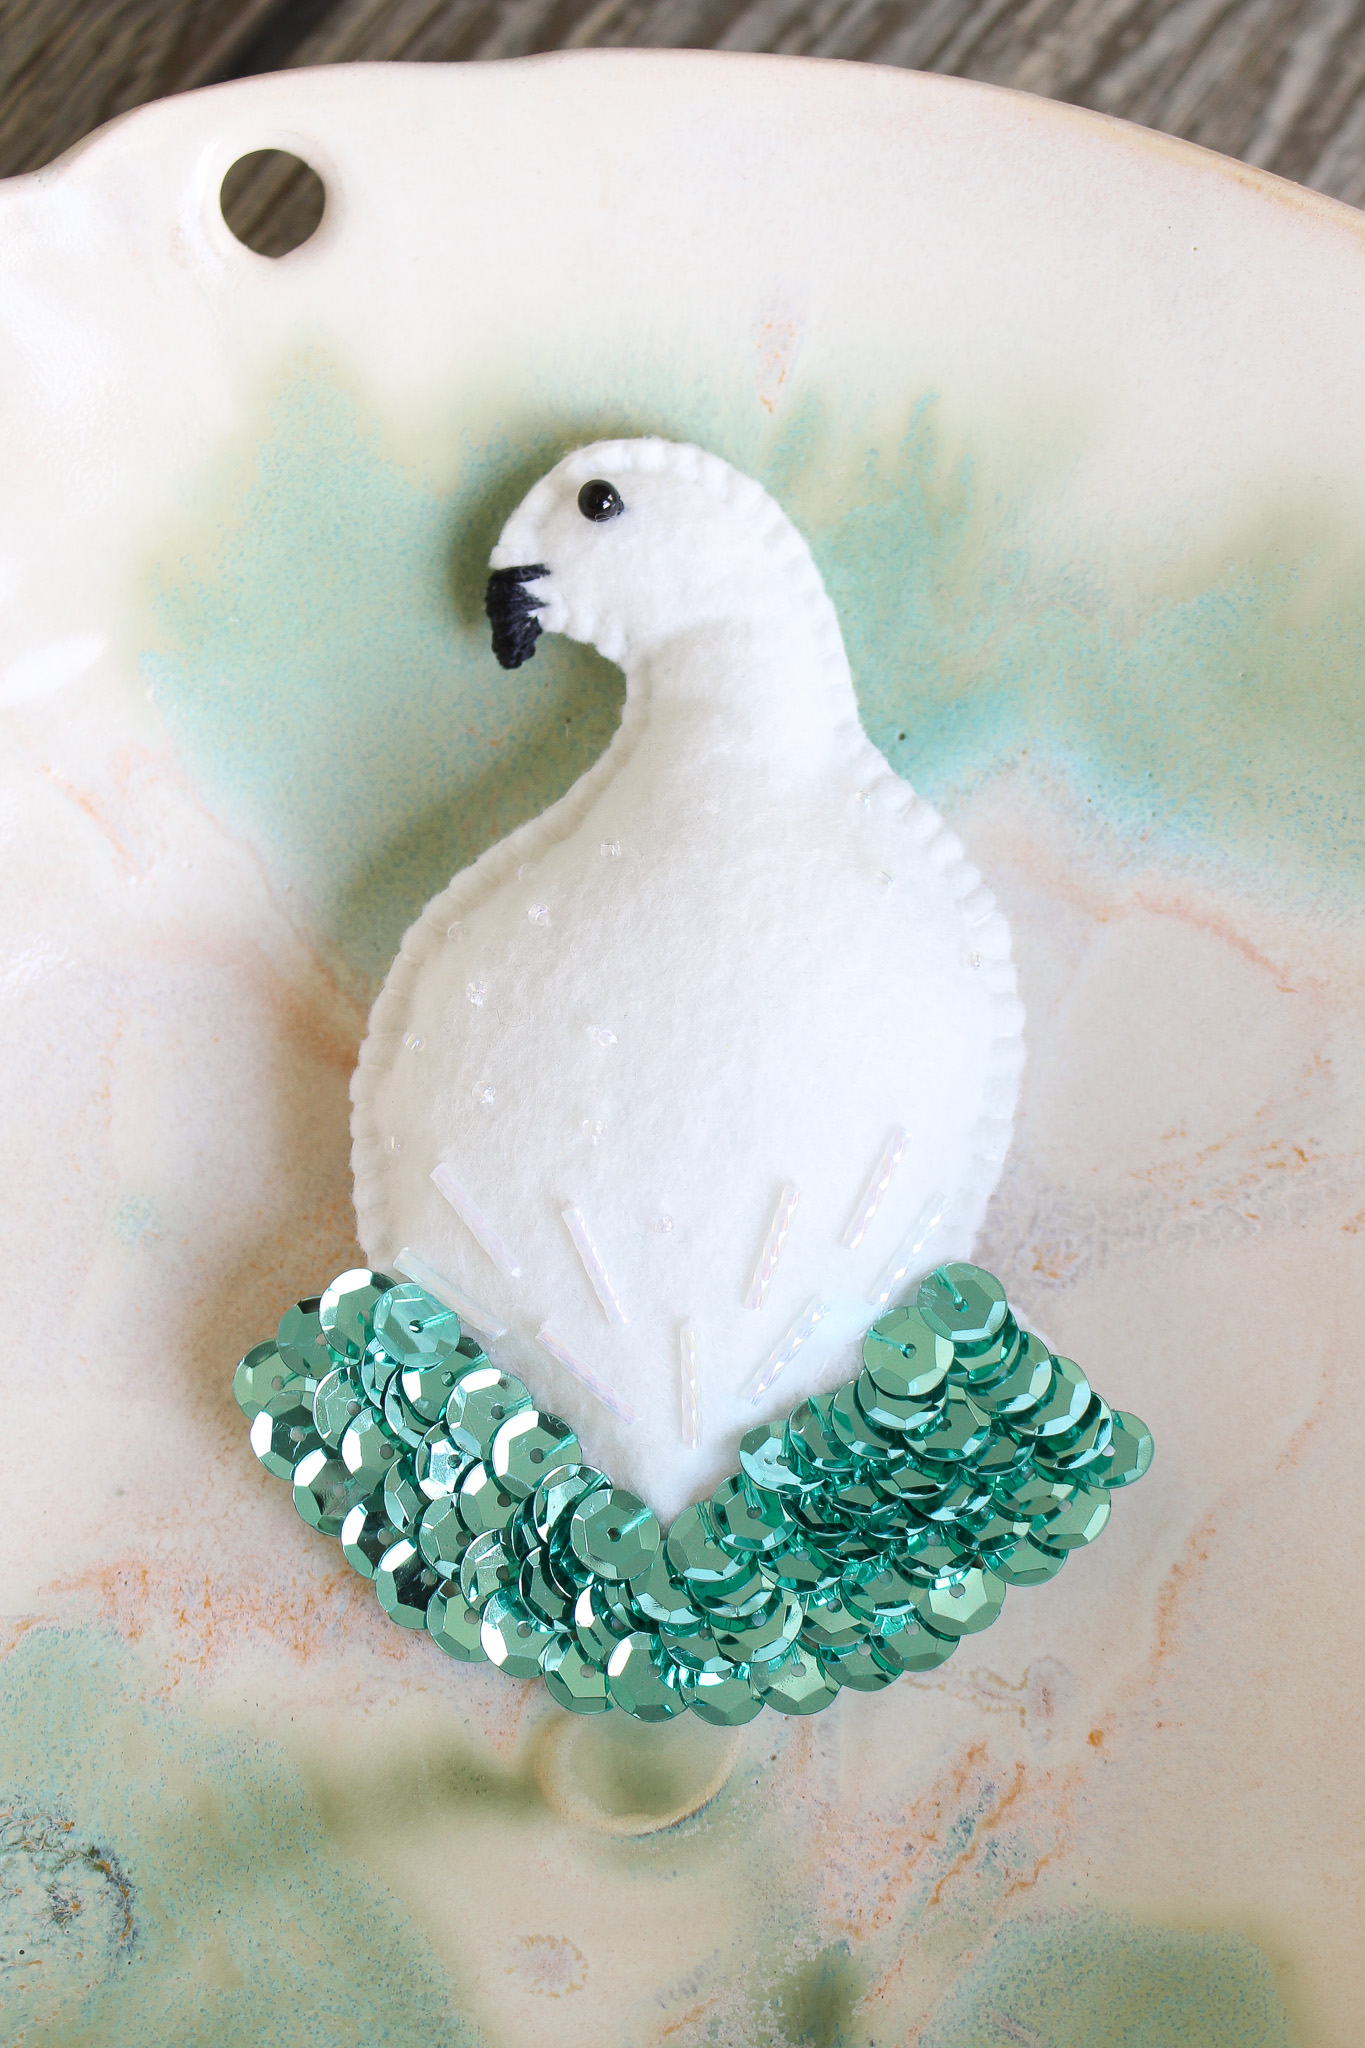
You can do as many or as few sequins as you’d like – or mix in other beads. I stitched on rows of sequins for a feathery look:
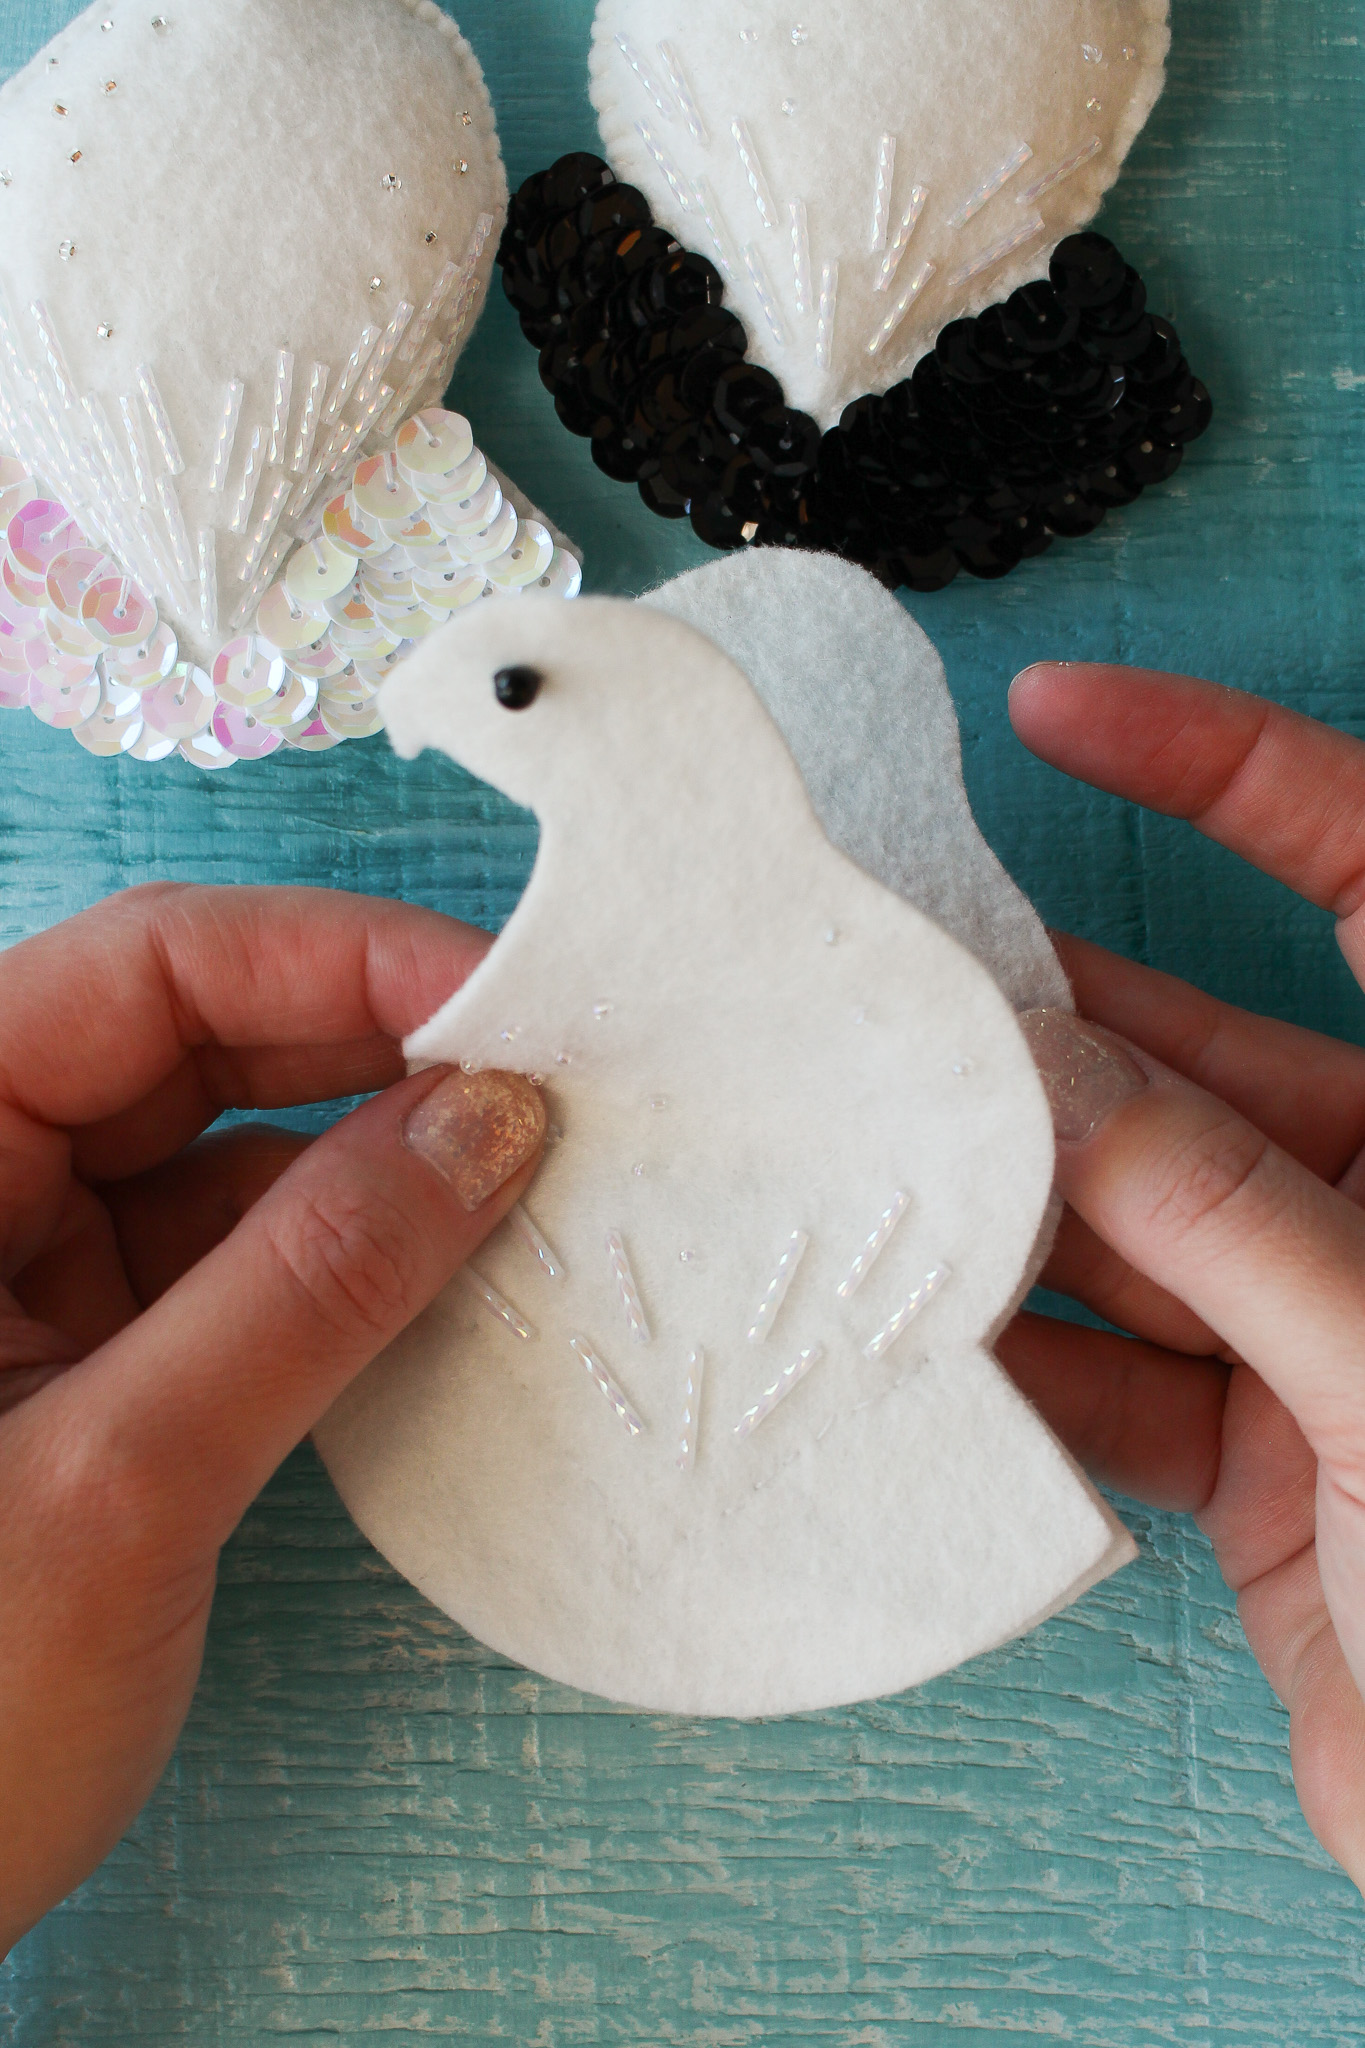
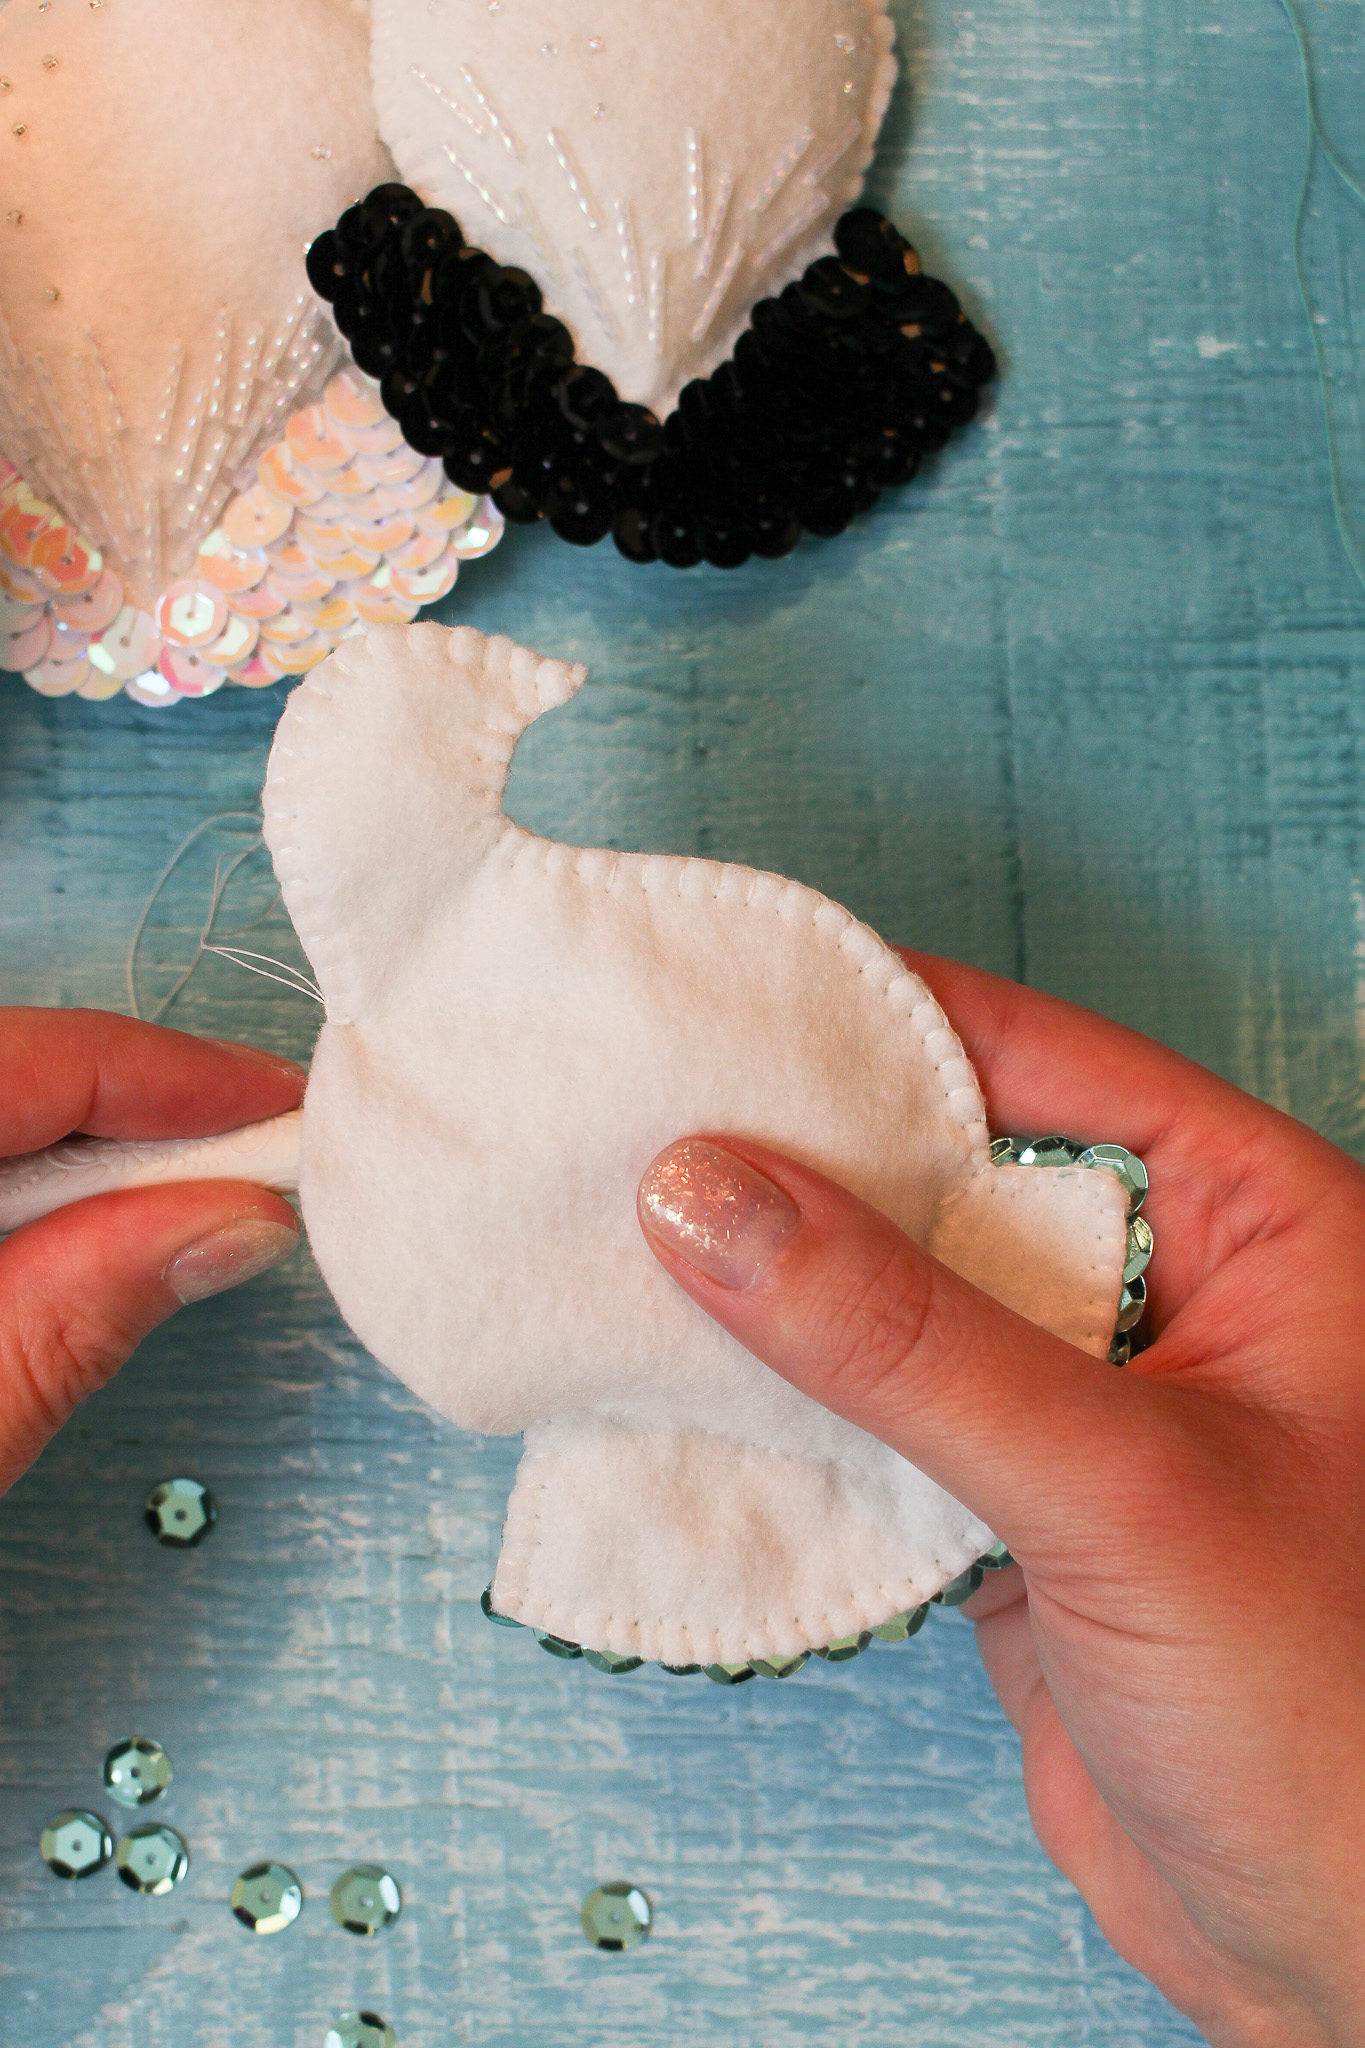
Sew the Felt Ornament Together:
I find it easiest to begin stitching the ornament closed where the tail meets the body, on the right side of the bird, working down along the tail and up towards the beak. Around the sequins, work slowly to ensure your needle is going under and not through the sequin. If you’re new to blanket stitching or hand sewing, watch my video below for a detailed tutorial.
How to Sew a Blanket Stitch
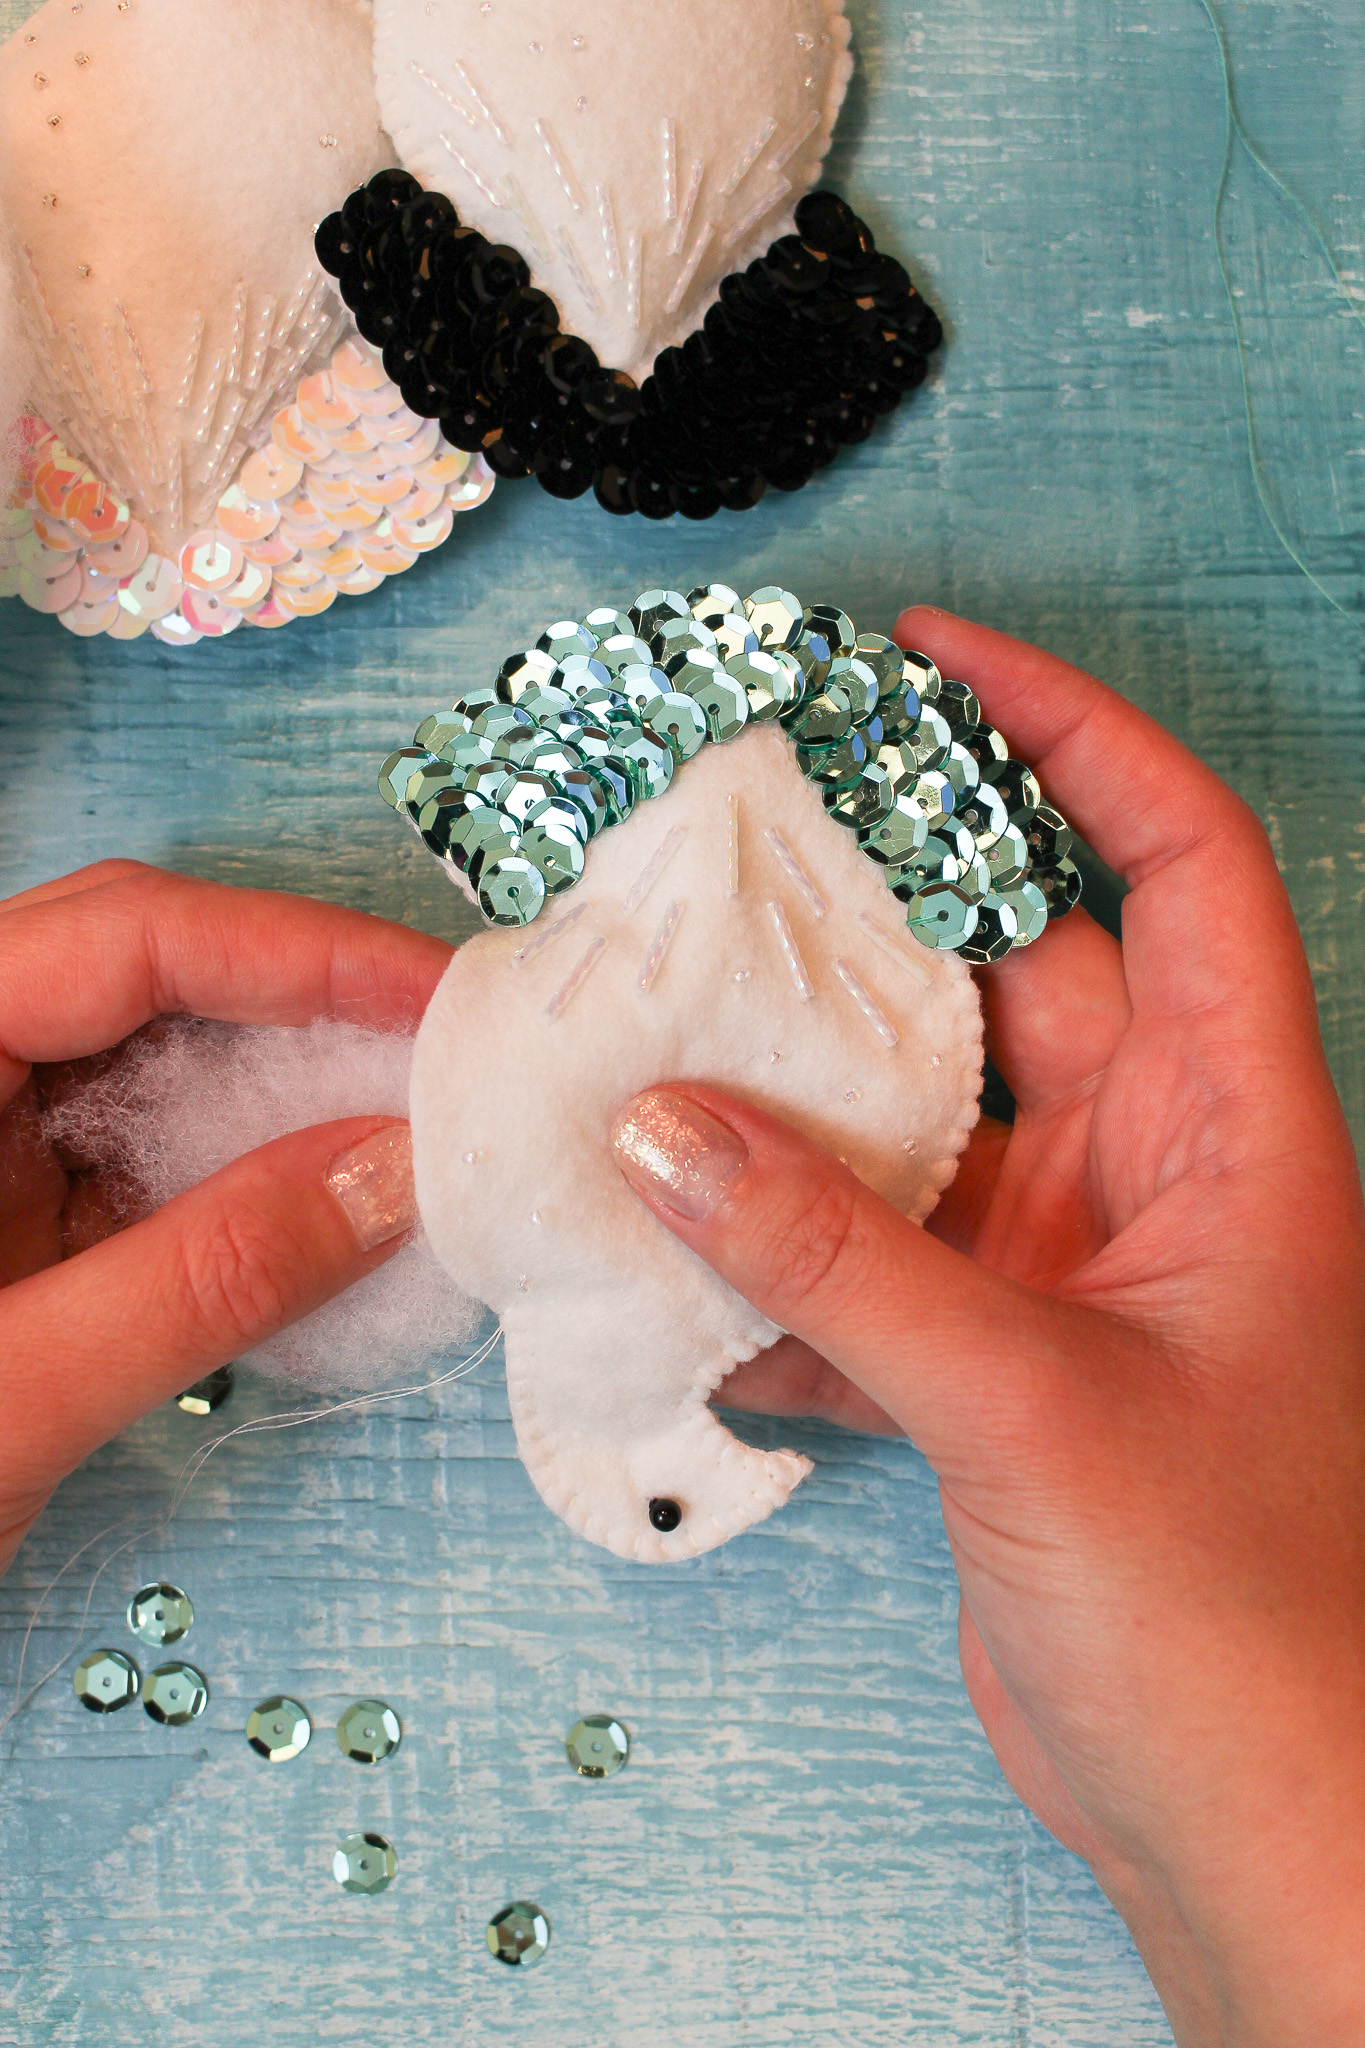
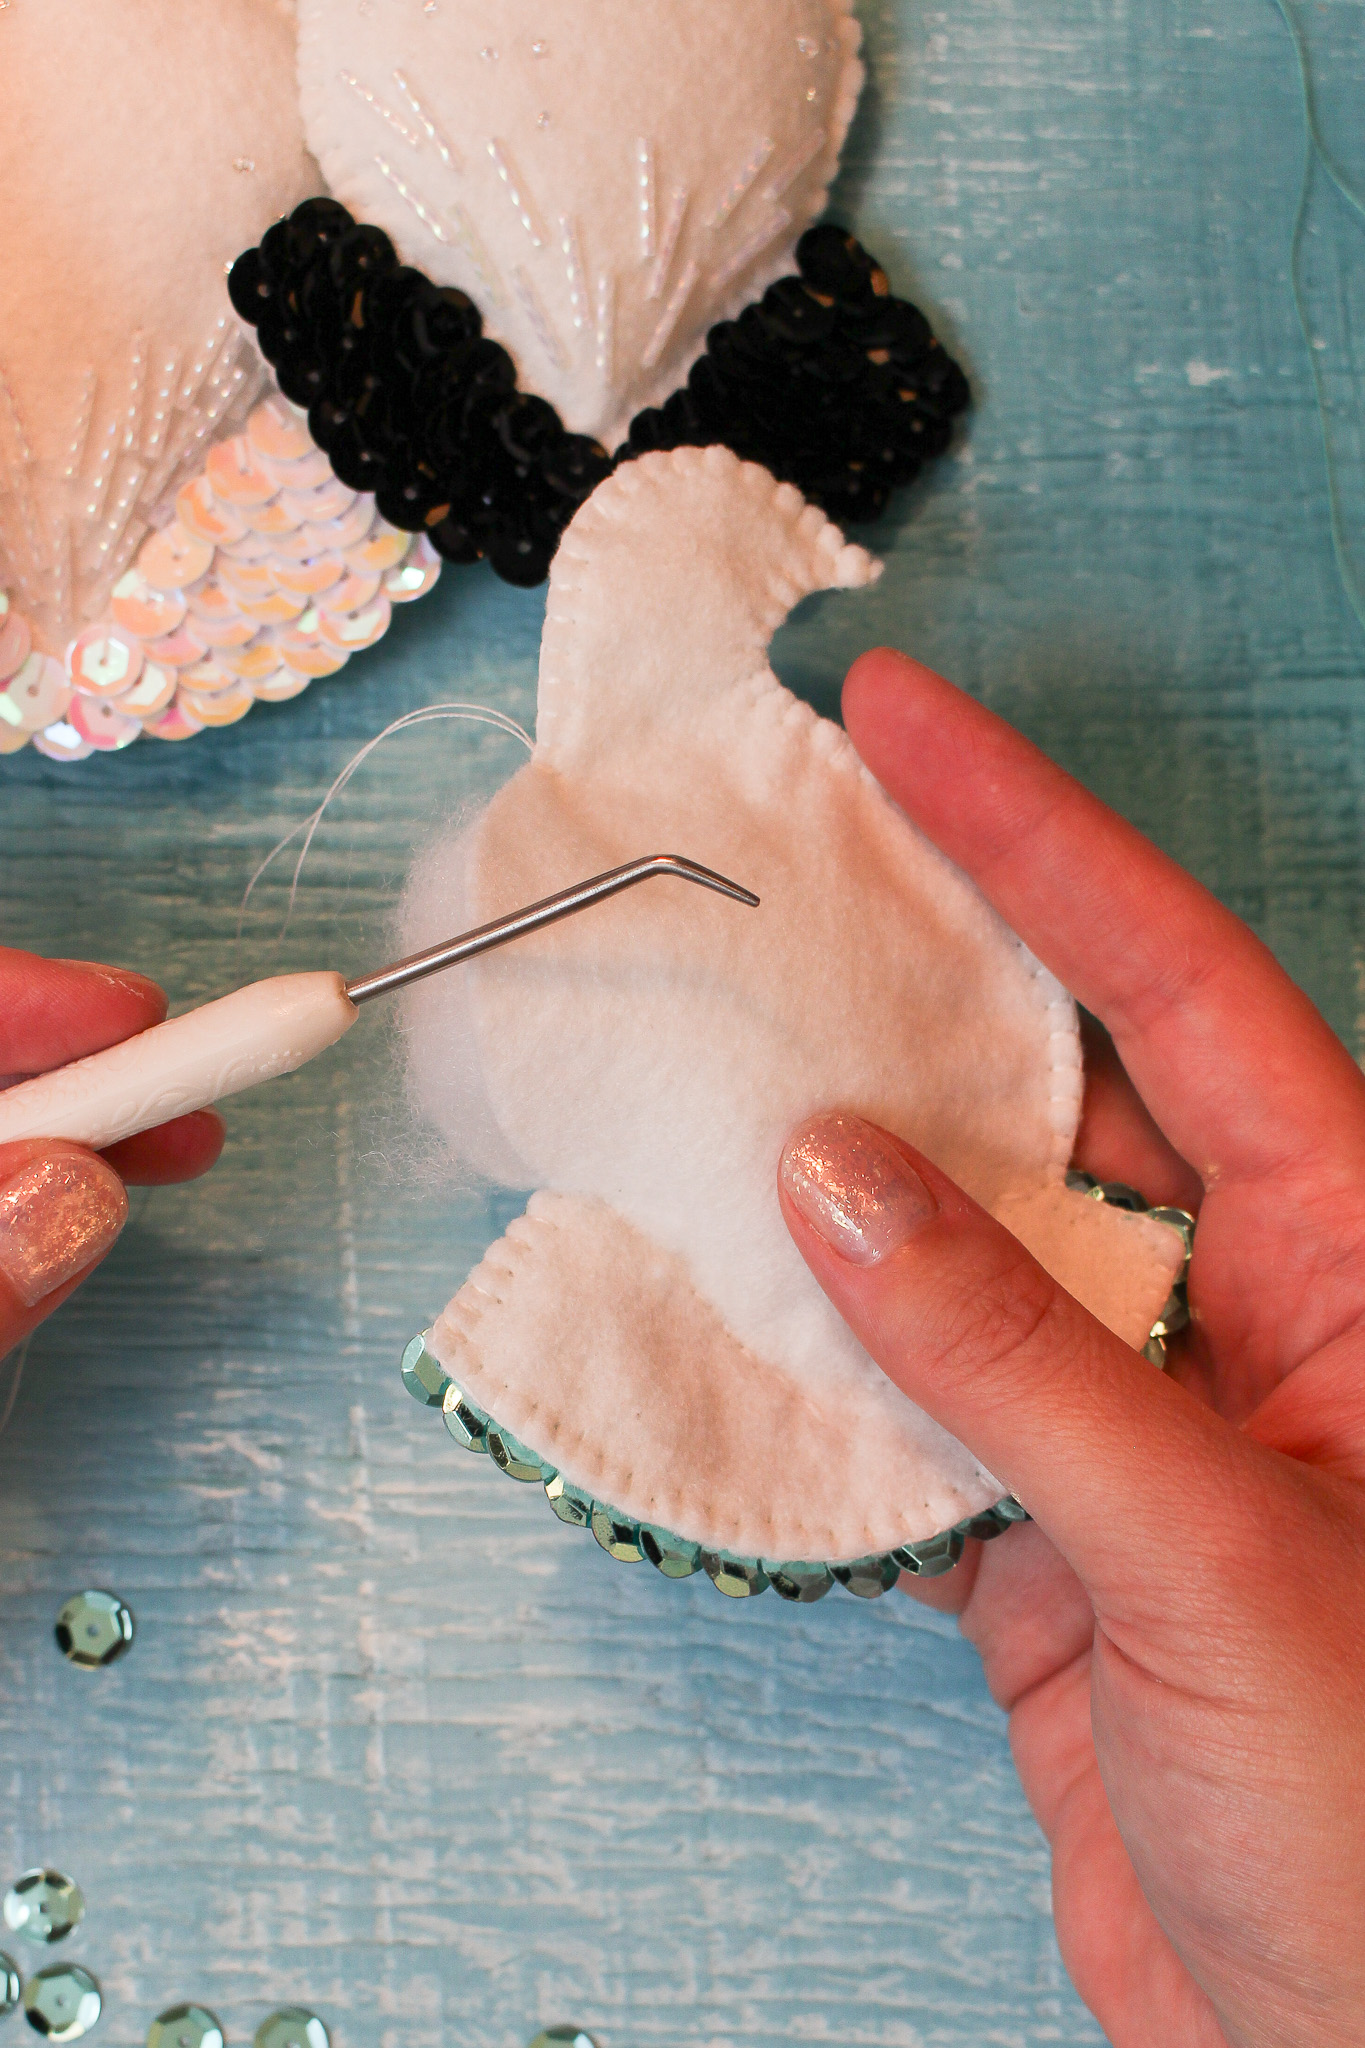
Stuff the Felt Ornament:
When you’ve sewn around the ornament and have reached the head of the bird, it’s time to stop sewing and start stuffing! I find this stuffing tool makes it easier to work the batting into small areas, but it’s not necessary. You can grab a chopstick or knitting needle or capped pen to help you! Work the poly-fill into the bird so it has a nice, plump shape, and then continue sewing the ornament closed. I will usually sew a little, stuff, sew, stuff until the ornament is complete.
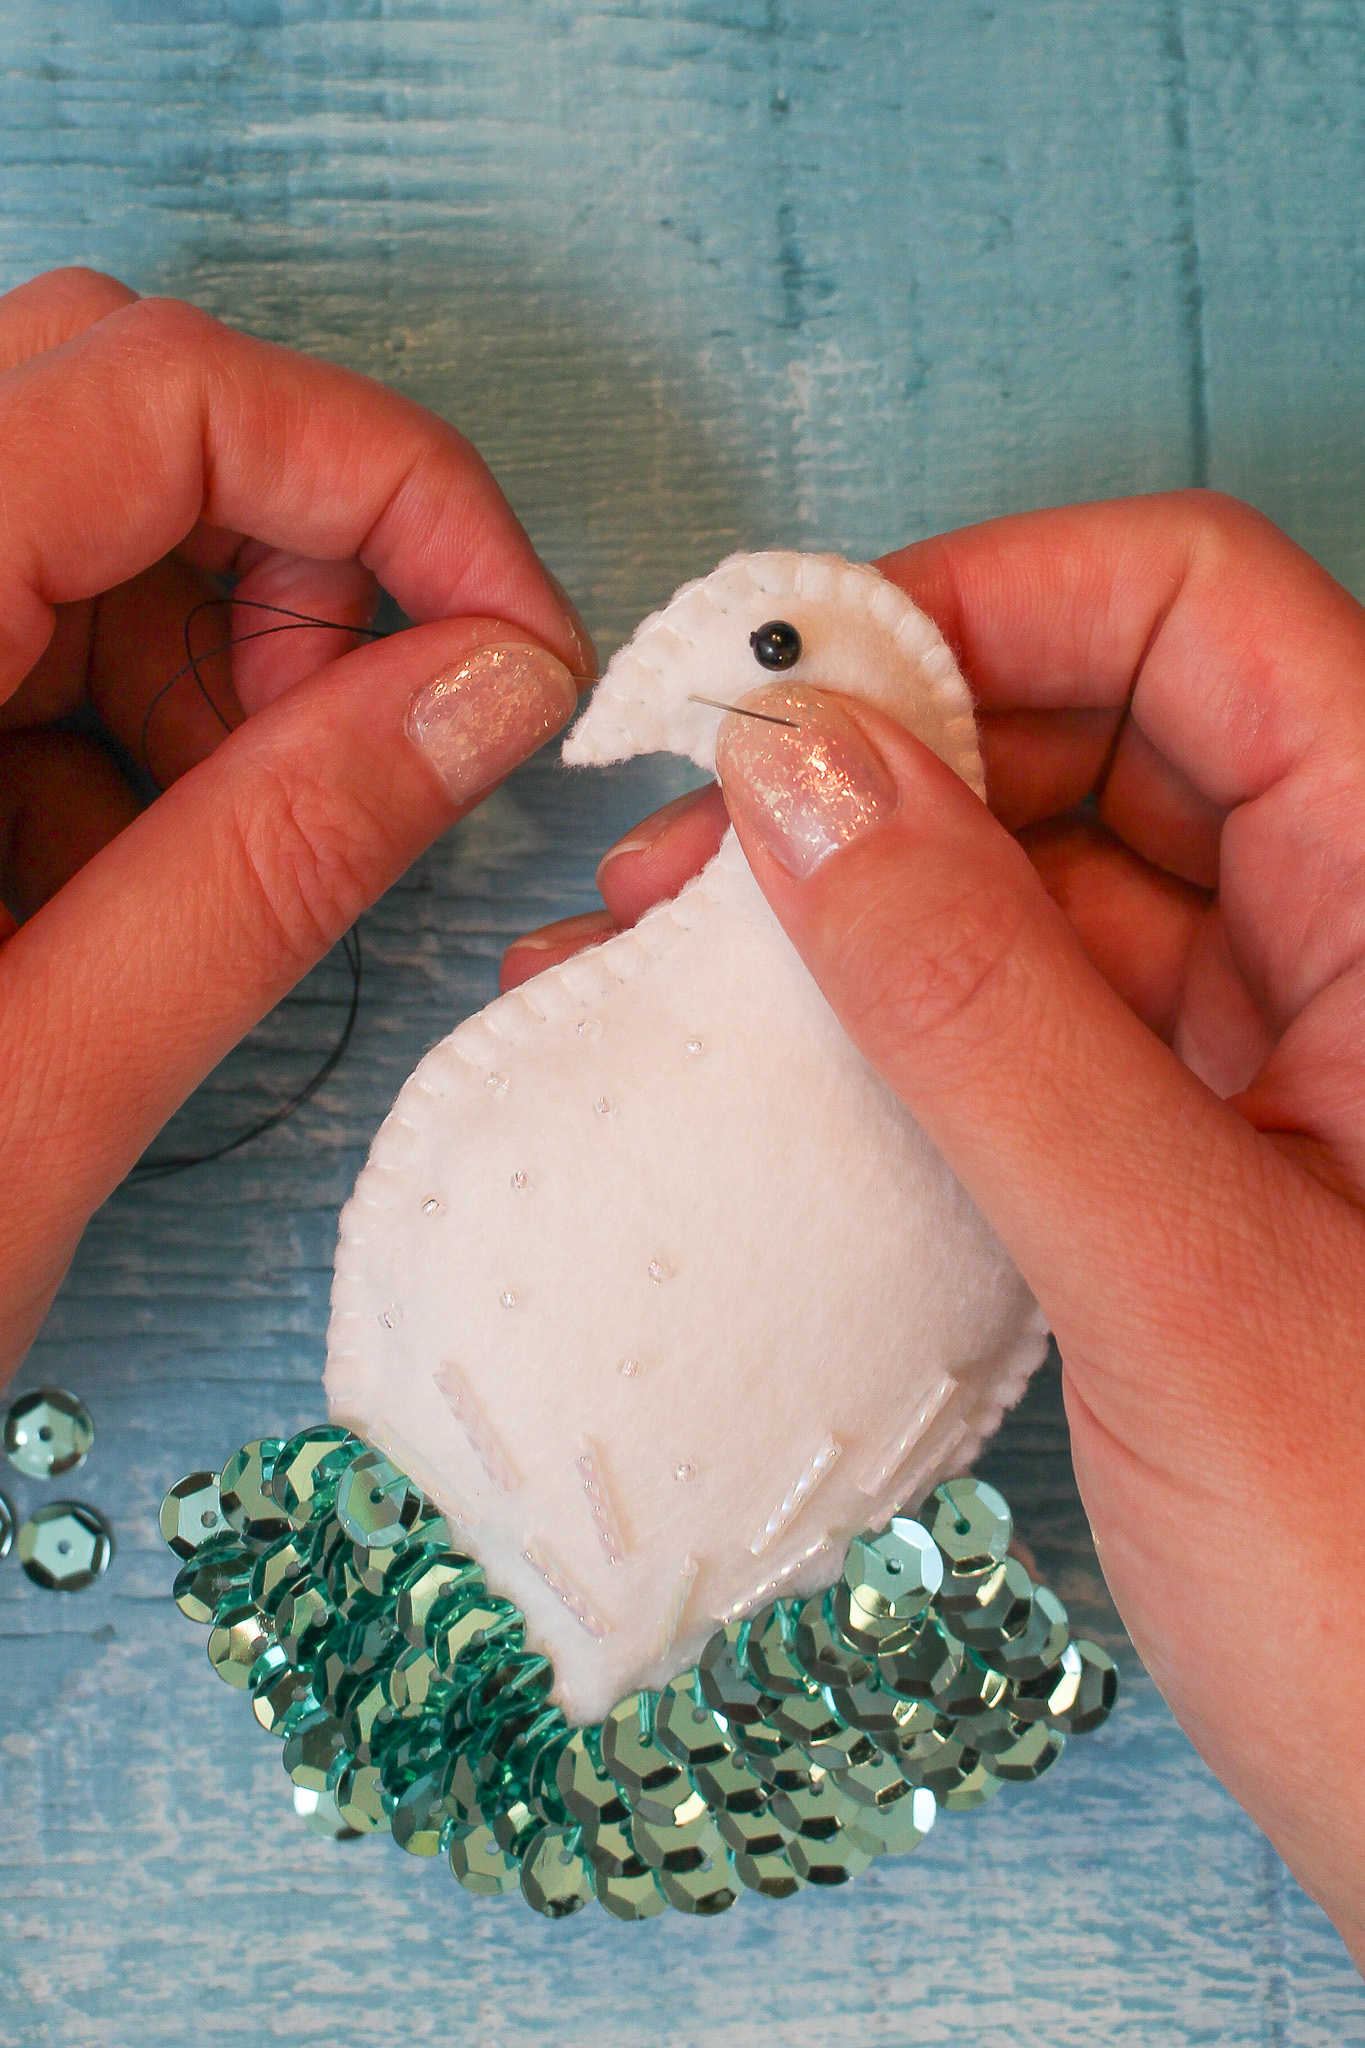
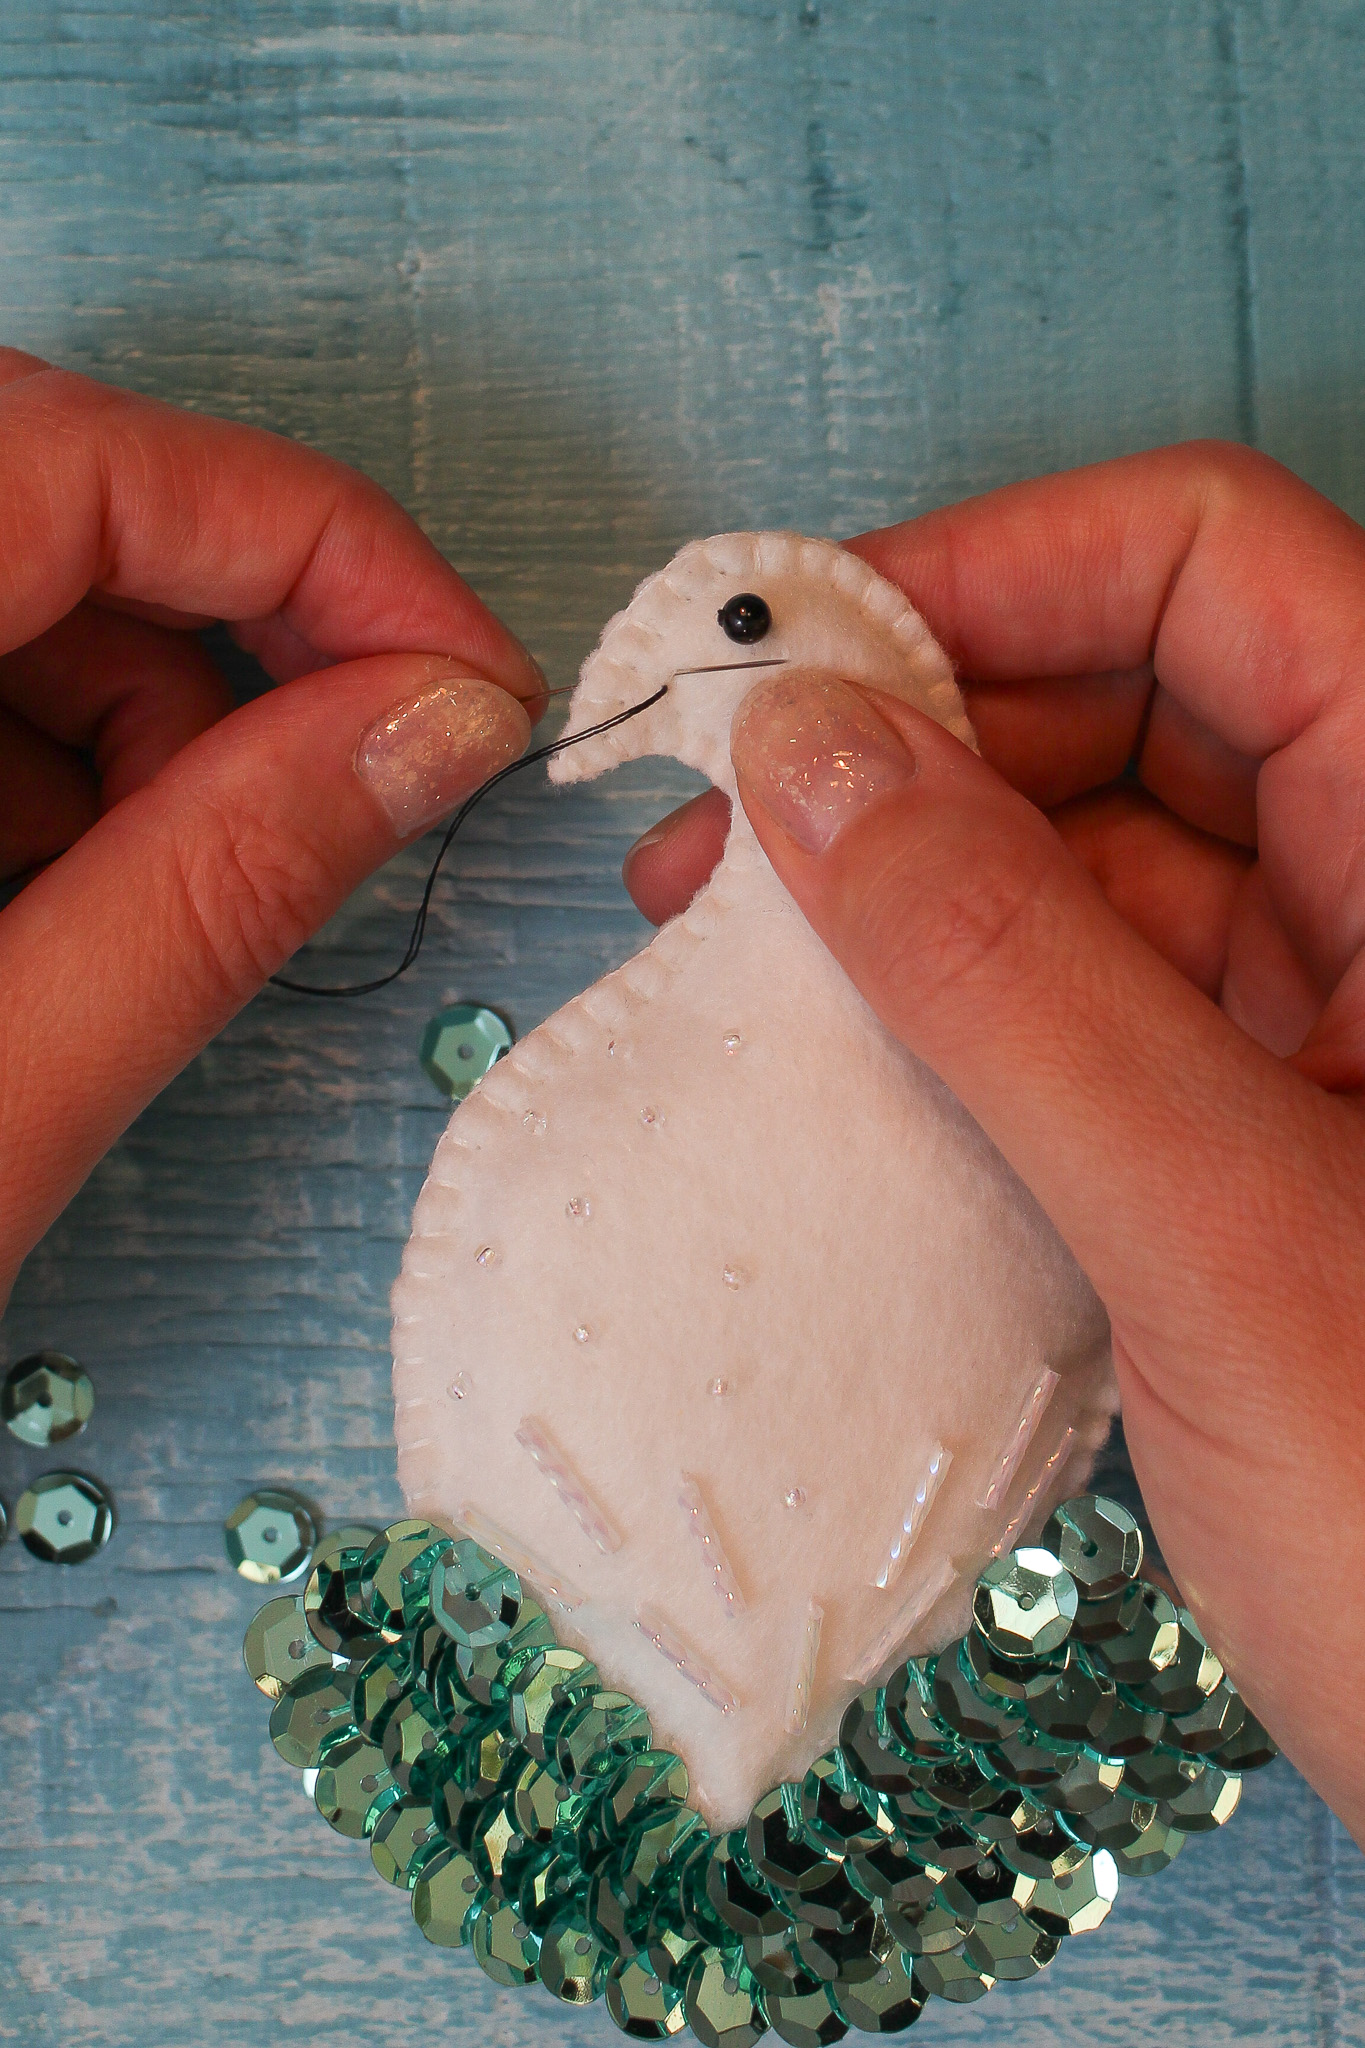
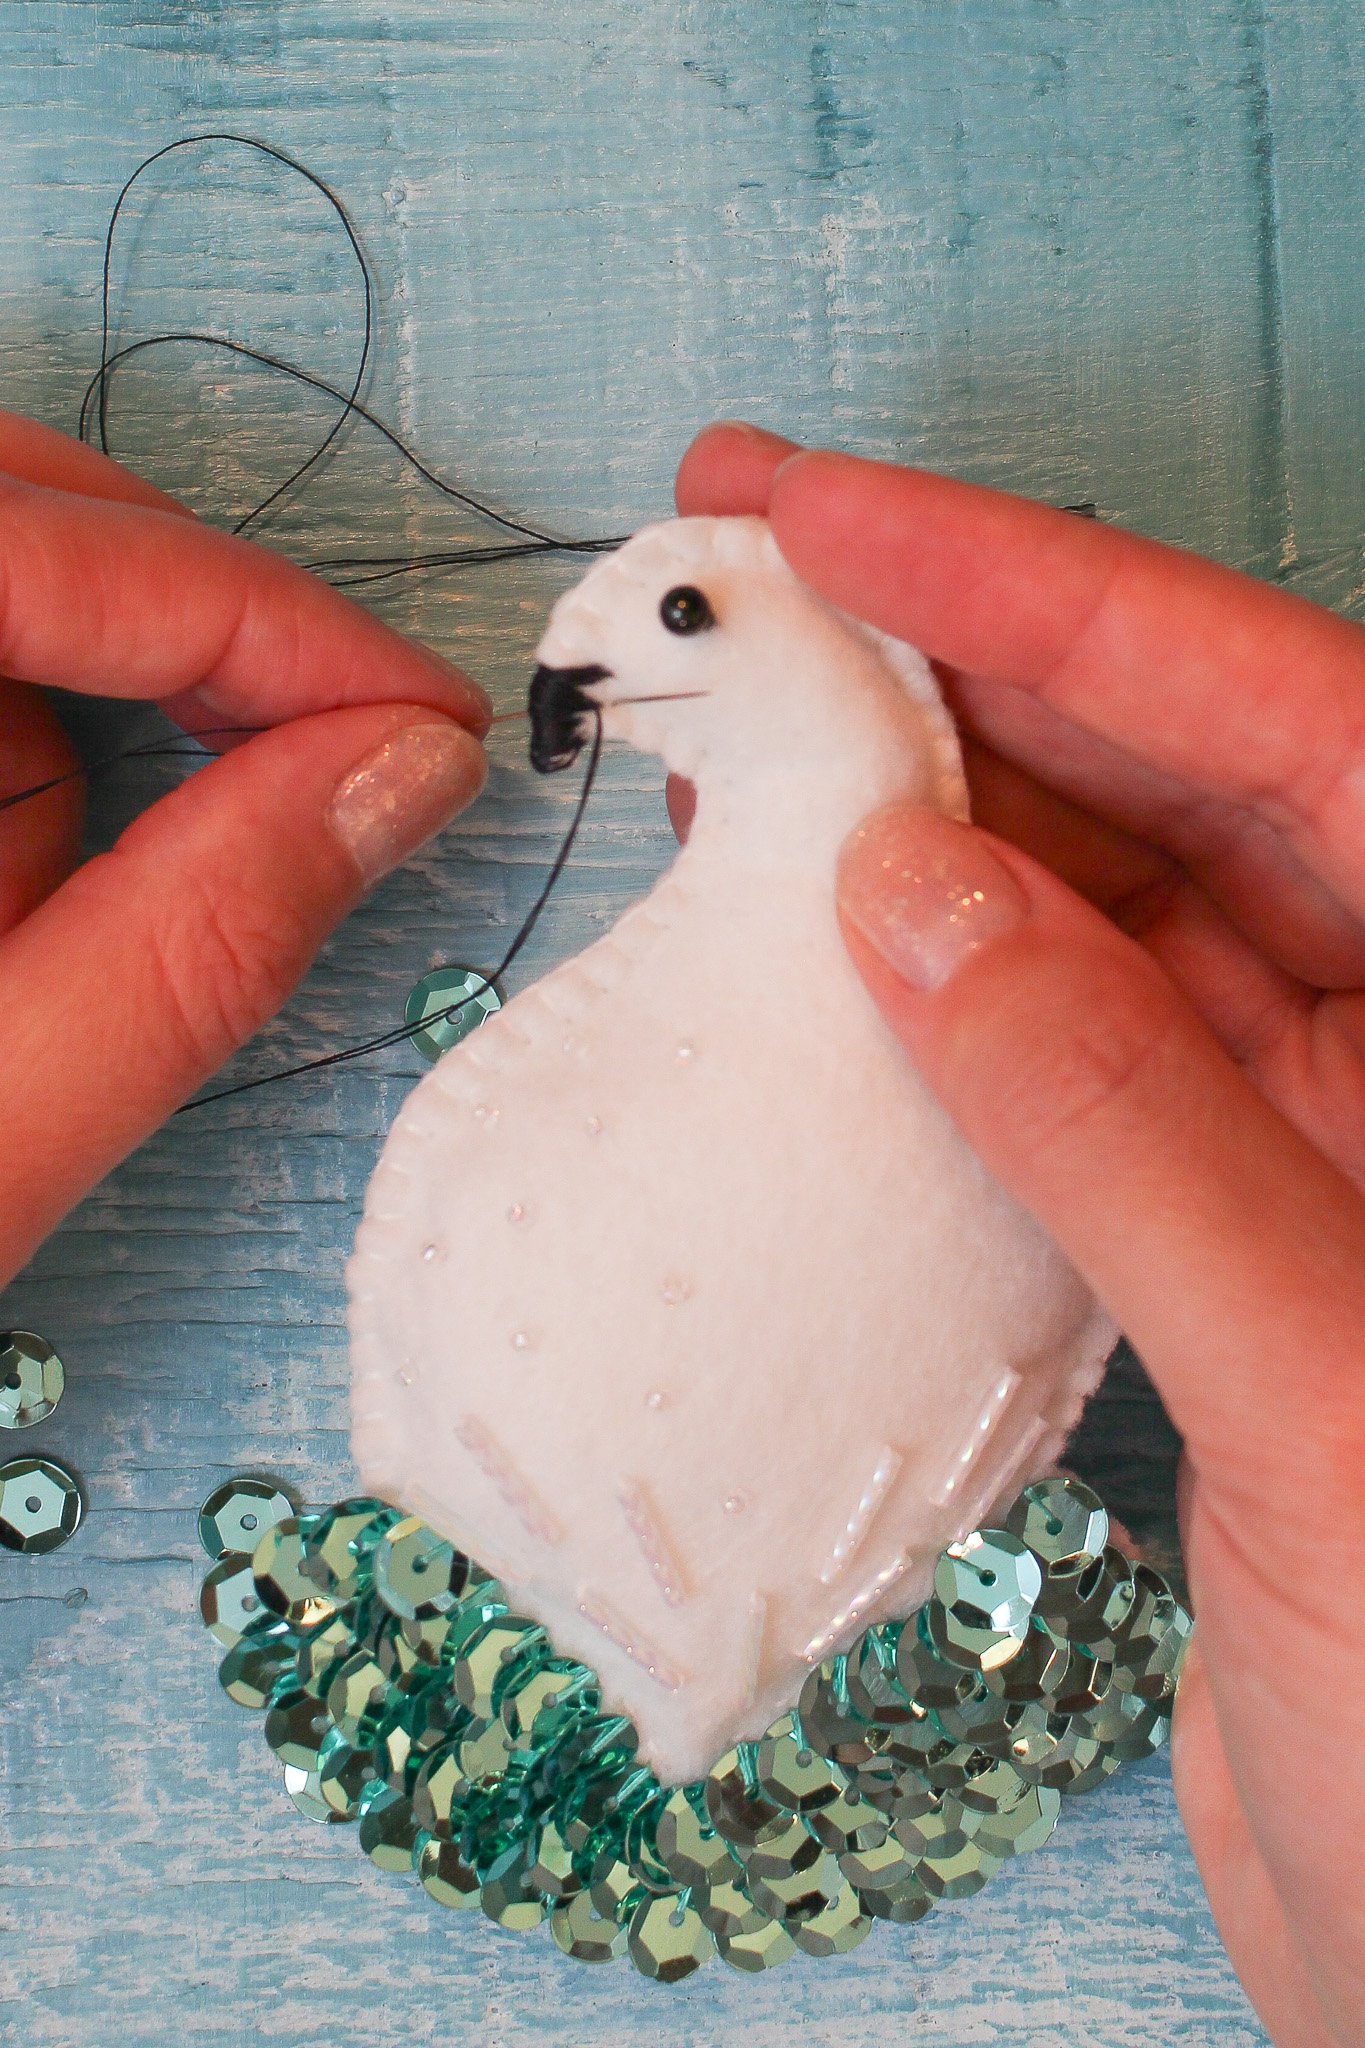
Stitch on the Beak:
As a final step, use a black thread or embroidery thread to stitch on the beak. I start from the back and bring my needle a few mm from the edge of the ornament. I bring the thread up and then over, toward the left edge of the beak. I wrap the thread around and then bring it back up again. I repeat this many times, to create a solidly black beak:
How to Hang Felt Ornaments:
I like to just add some green thread to the back of ornaments, instead of sewing in a ribbon loop. This way the thread disappears in the branches and the ornament is the star!
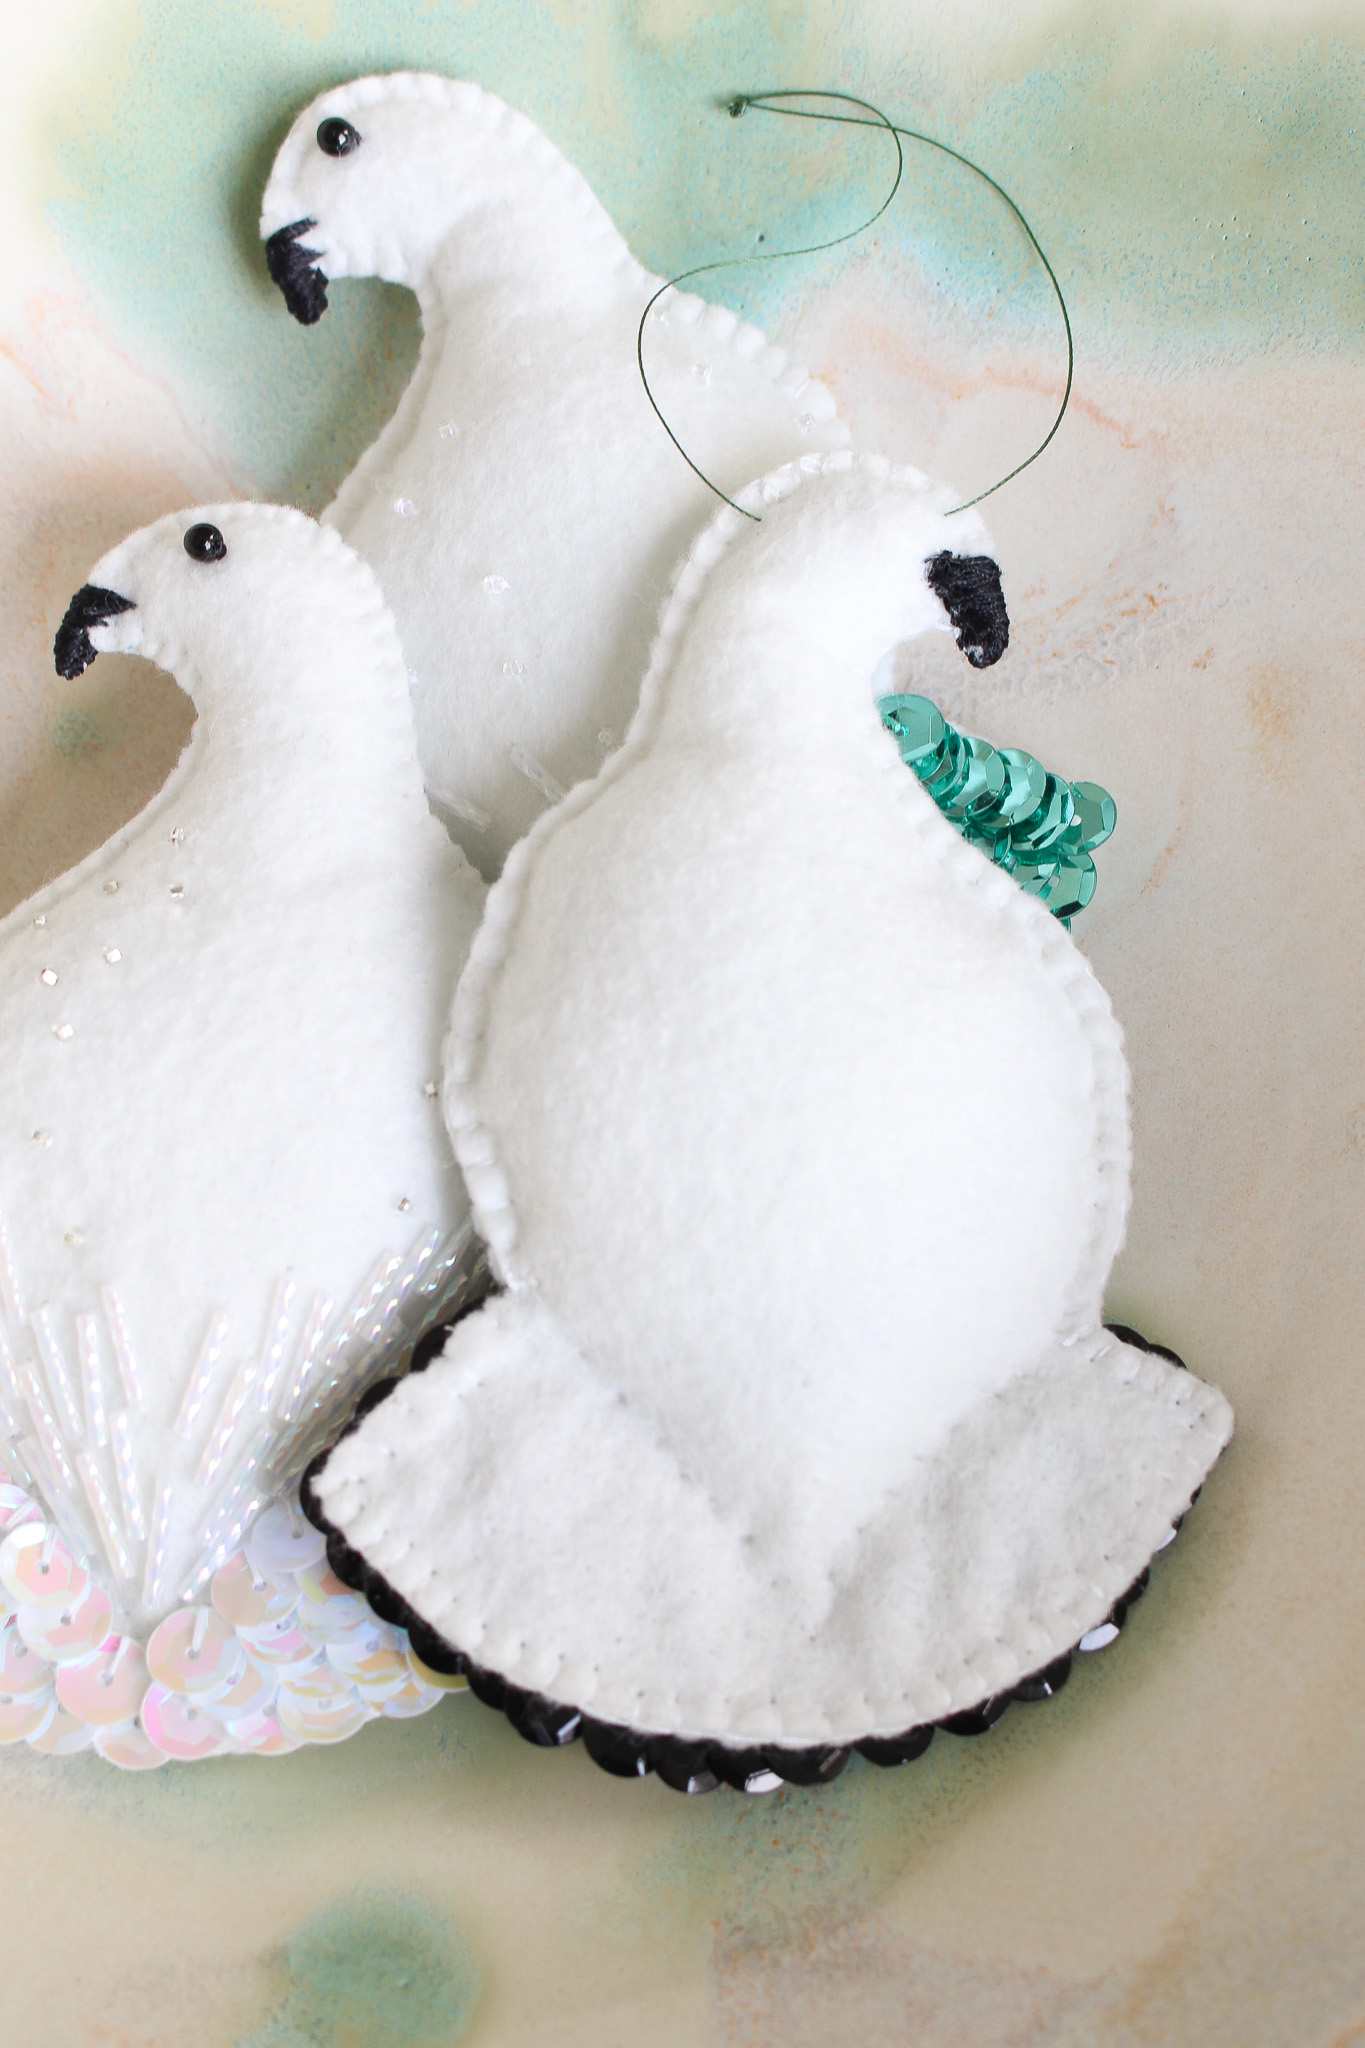
And that’s how to sew this DIY felt bird ornament! You can see the turquoise sequins just add a fun twist, but the black sequins are the most “ptarmigan-like”. There is a lot of room for creativity and personalization with this DIY felt bird ornament pattern and you can customize it so many ways.
More DIY Felt Ornament Tutorials + Patterns:
Find all of my DIY felt ornament patterns here, and check out these other blog posts for more DIY felt ornament tutorials:
- DIY Felt Seal Ornament Tutorial (with pattern)
- DIY Felt Fox Ornament Tutorial (with pattern)
- DIY Felt Polar Bear Ornament Tutorial (with pattern)
- DIY Felt Bunny Ornament Tutorial (with pattern)
- DIY Felt Gingerbread House Ornament Tutorial (with pattern)
- DIY Beaded Felt Moon Ornament Tutorial
- DIY Beaded Felt Heart Ornament Tutorial
- DIY Felt Cookies Ornaments Tutorial (with pattern)

