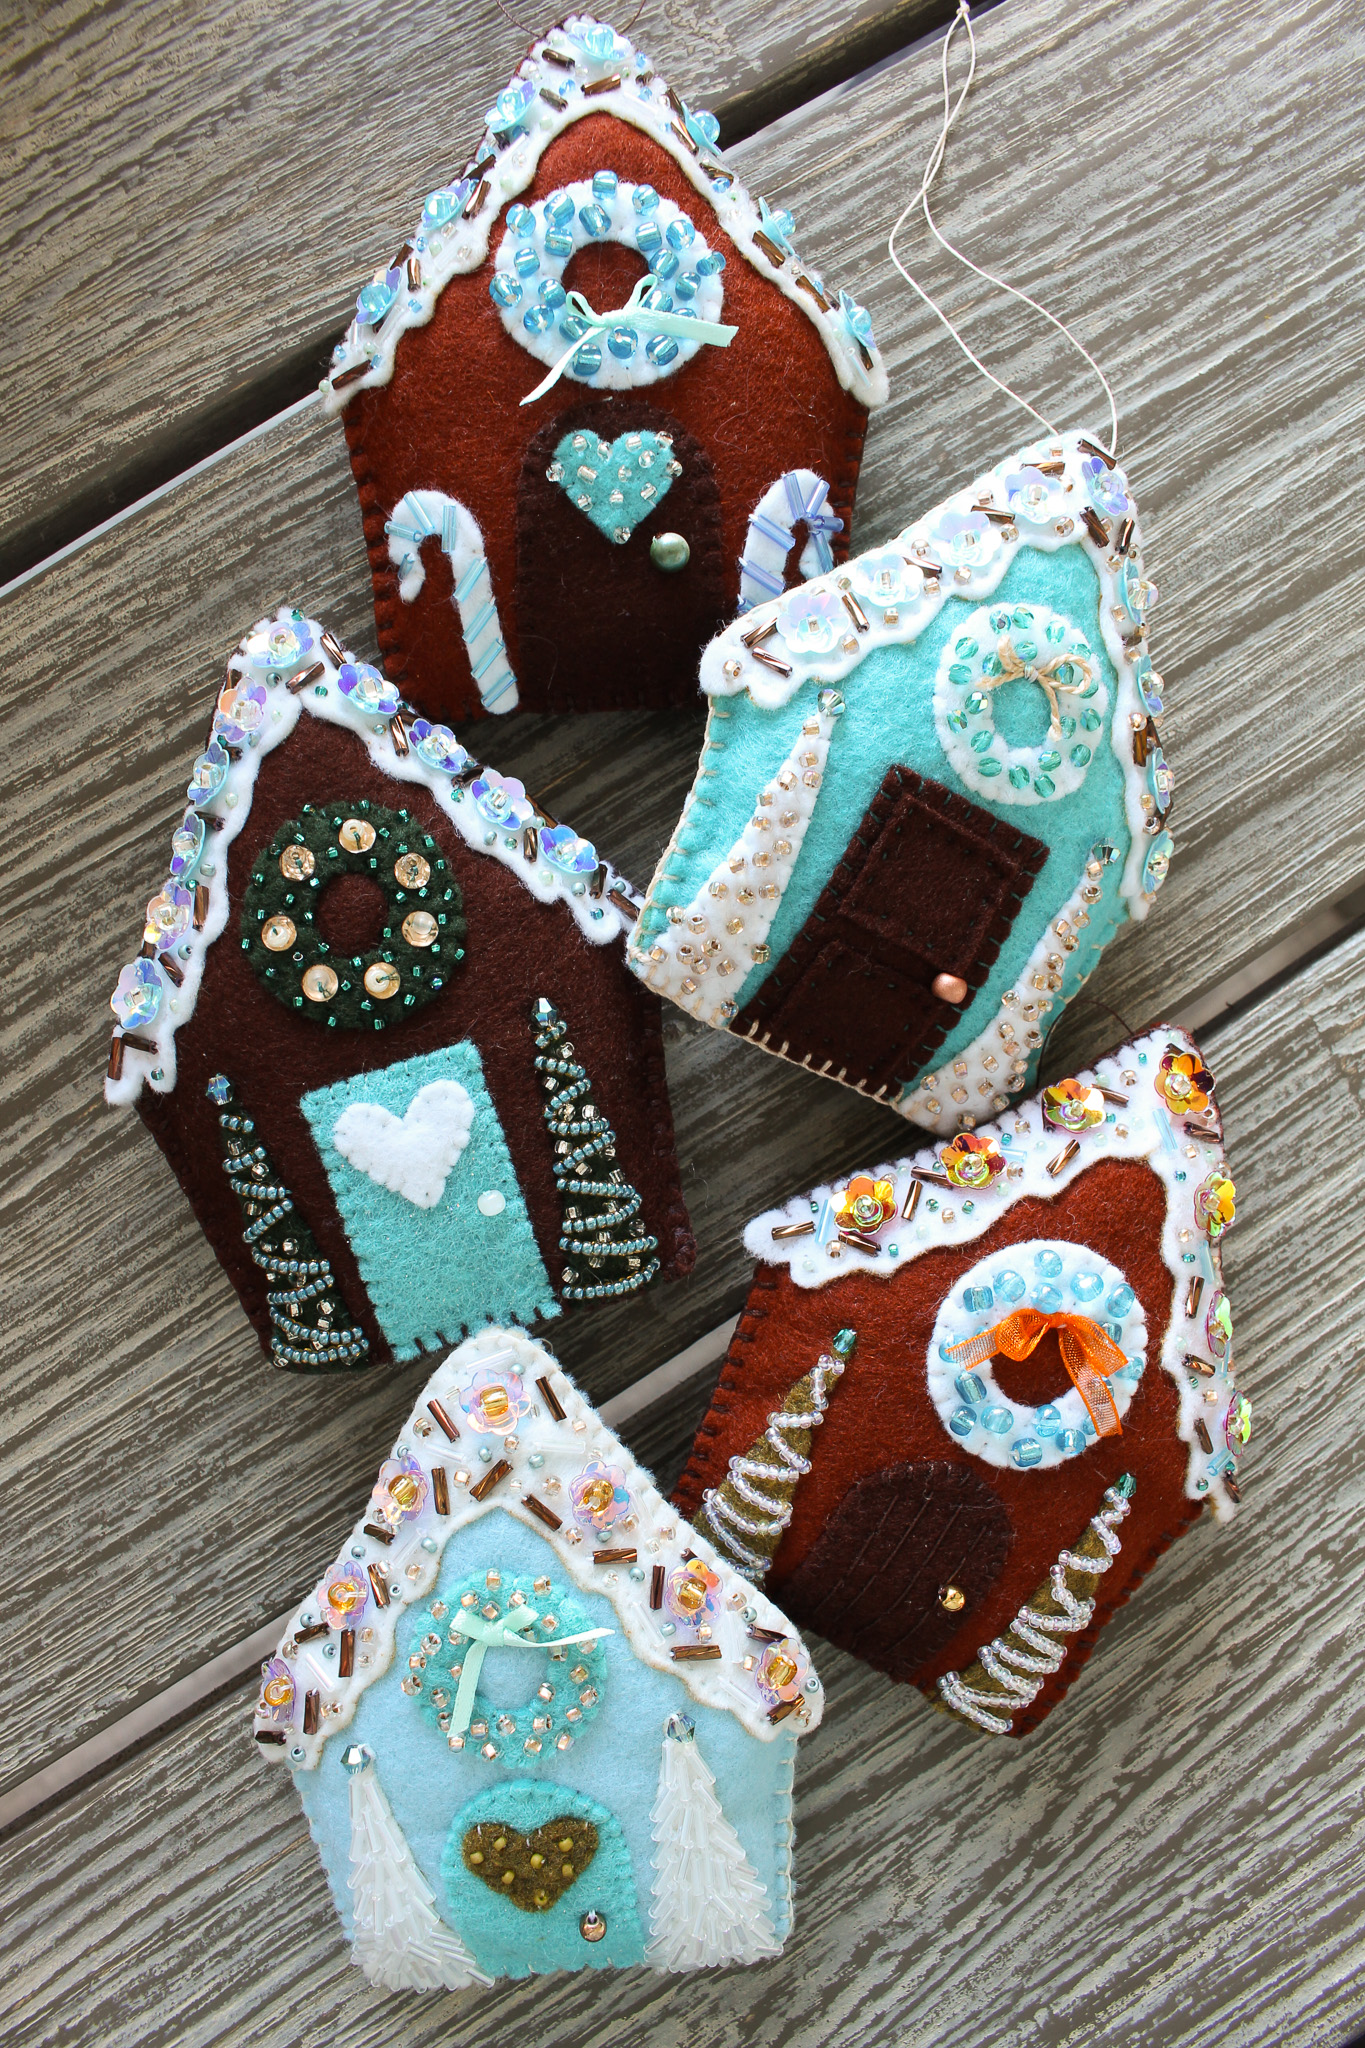
If you’ve liked my DIY felt ornaments from years past (like my DIY felt animal ornaments, DIY beaded felt moon ornaments, DIY velvet and felt mushroom ornaments, and DIY beaded felt heart ornaments), I think you’ll really love this DIY felt gingerbread house ornament with free pattern. Not only is this a great way to use up felt scraps from other DIY felt Christmas ornaments, you can also personalize this DIY gingerbread house ornament in so many ways. Beyond switching out windows for wreaths or trees for candy canes, you could create custom gingerbread house ornaments based on your own home! Like me, you can also substitute gingerbread colored felt for your favorite color – or skip any resemblance to candy at all and just create a cute and sparkly felt house ornament. Lots of possibilities with this hand sewn gingerbread house ornament idea!


Get a Free Gingerbread House Ornament Pattern!
If you’d like to download the template I used to make these felt gingerbread houses, just sign up for my newsletter to receive it immediately. A few times a month, I send out an email with DIY tutorials and I’ll be including more free downloads, patterns, and exclusive project ideas. Despite my lofty ambitions for the future of the Dans le Lakehouse newsletter, I promise I’m a lazy emailer and you won’t be inundated.
Supplies for Sewing a Felt Gingerbread House Ornament:
- Felt
- Gingerbread House Template
- Permanent Marker (I find tailor’s pencils/chalk doesn’t work well on felt)
- OR Applique Freezer Paper (instead of marker – optional)
- Thread
- Hand Sewing Needle
- Beading Needle
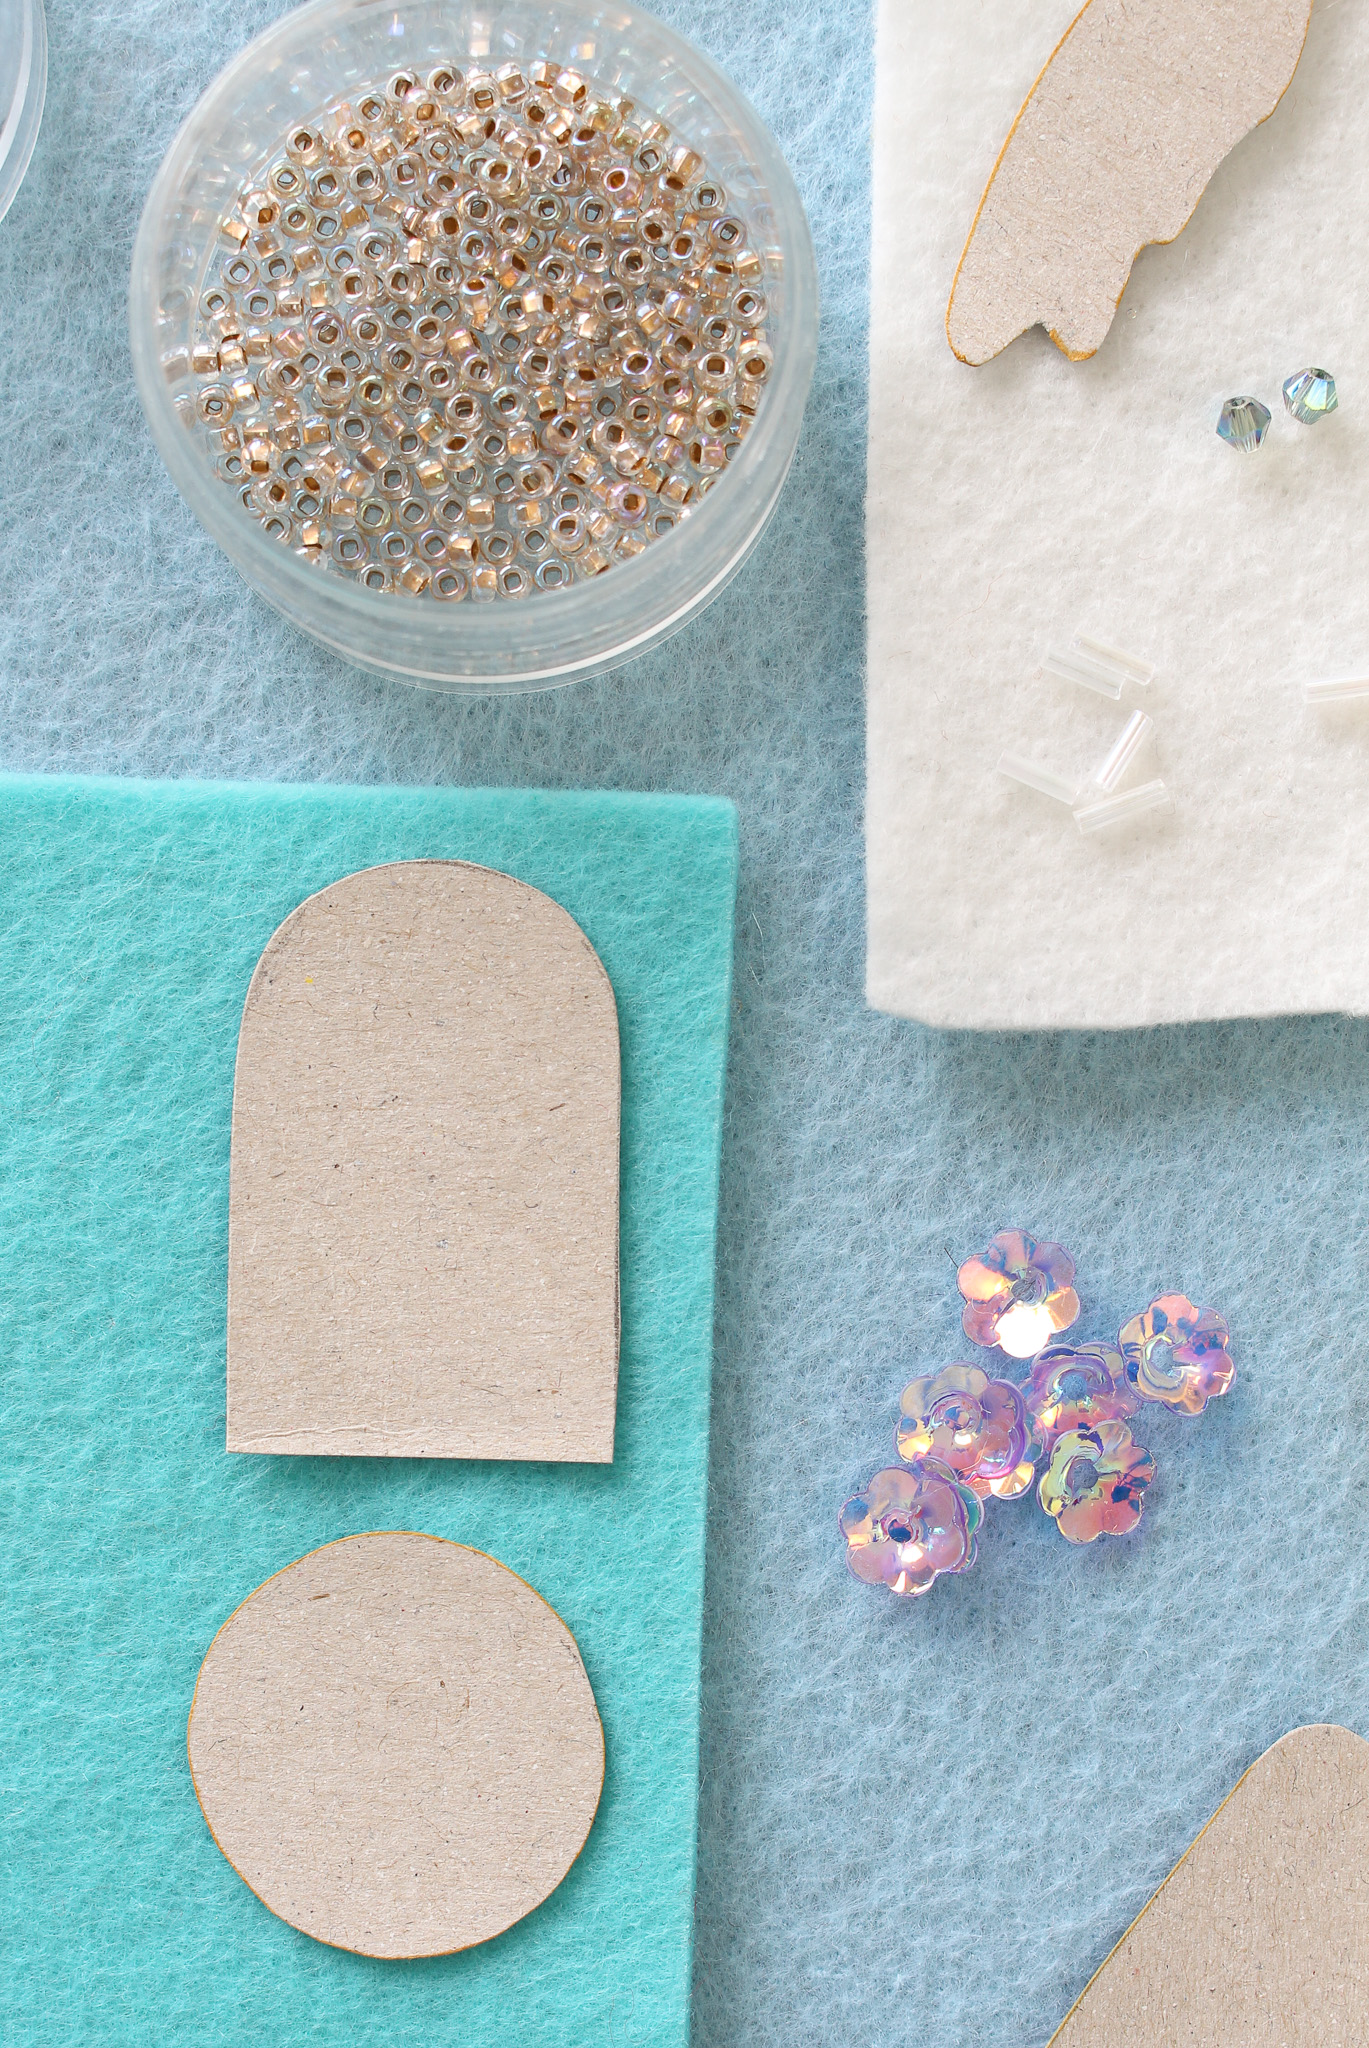
- Seed Beads, Larger Glass Beads & Bugle Beads (the kit I linked has everything: bugles, seed beads, larger glass beads, and sequins but if you want “chocolate” sprinkles this kit is perfect)
- Sequins (I think this link is the exact same as mine – but mine are from the dollar store)
- Batting or Poly-fil
- Sharp Scissors
Notes on supplies: Check out more felt ornament supplies here. I buy my felt from fabric stores (by the yard or small sheet) and Michaels (mostly small sheets, they have bulk in limited colors), but you can also find felt online or the dollar store – make sure it’s soft and not the really rigid/stiff kind. My gorgeous sequins came from the dollar store, as did some of the beads – but here are the same sequins – I can’t believe I found a link! I recently bought a really great pack of beads from Dollarama to test the quality and they’re lovely, so if you have a small budget and need to buy everything for these felt gingerbread house tree ornaments, definitely check out the dollar store for supplies. Otherwise I tend to support local bead shops and buy most of my beads locally – but this bead kit has everything you’d need: sequins, bugles, and seed beads! If you’d like the beads to look like chocolate chip, look for brown bugle beads – this kit looks very chocolatey to me. Whatever beads you buy, make sure the beads used to secure the sequins are larger than the sequin hole, otherwise you can choose whatever size of bead you’d like!
How to Make DIY Gingerbread House Ornaments:
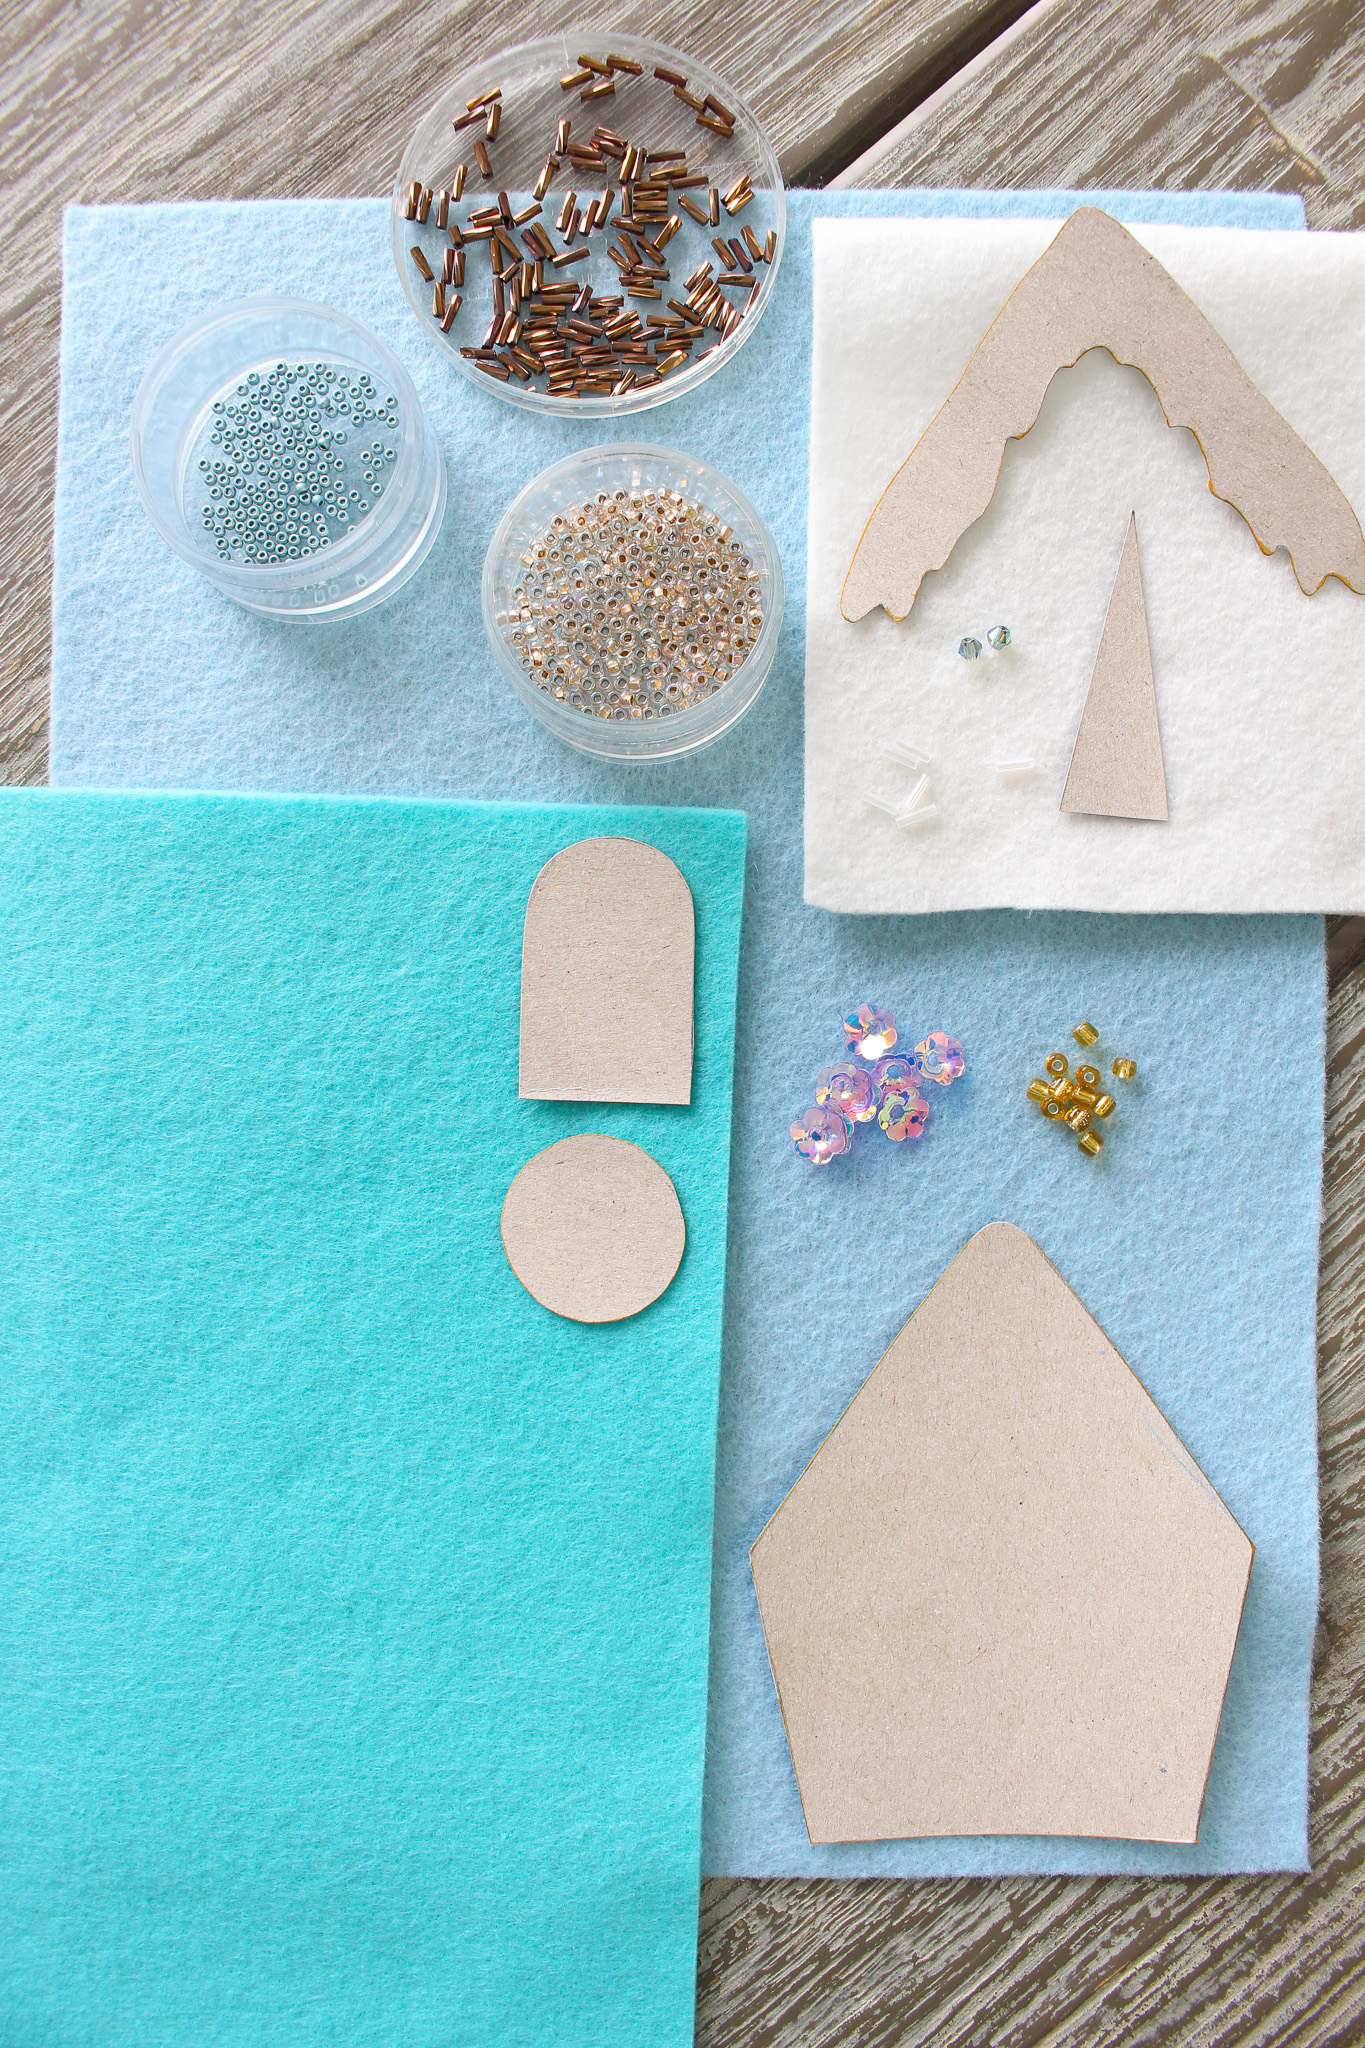
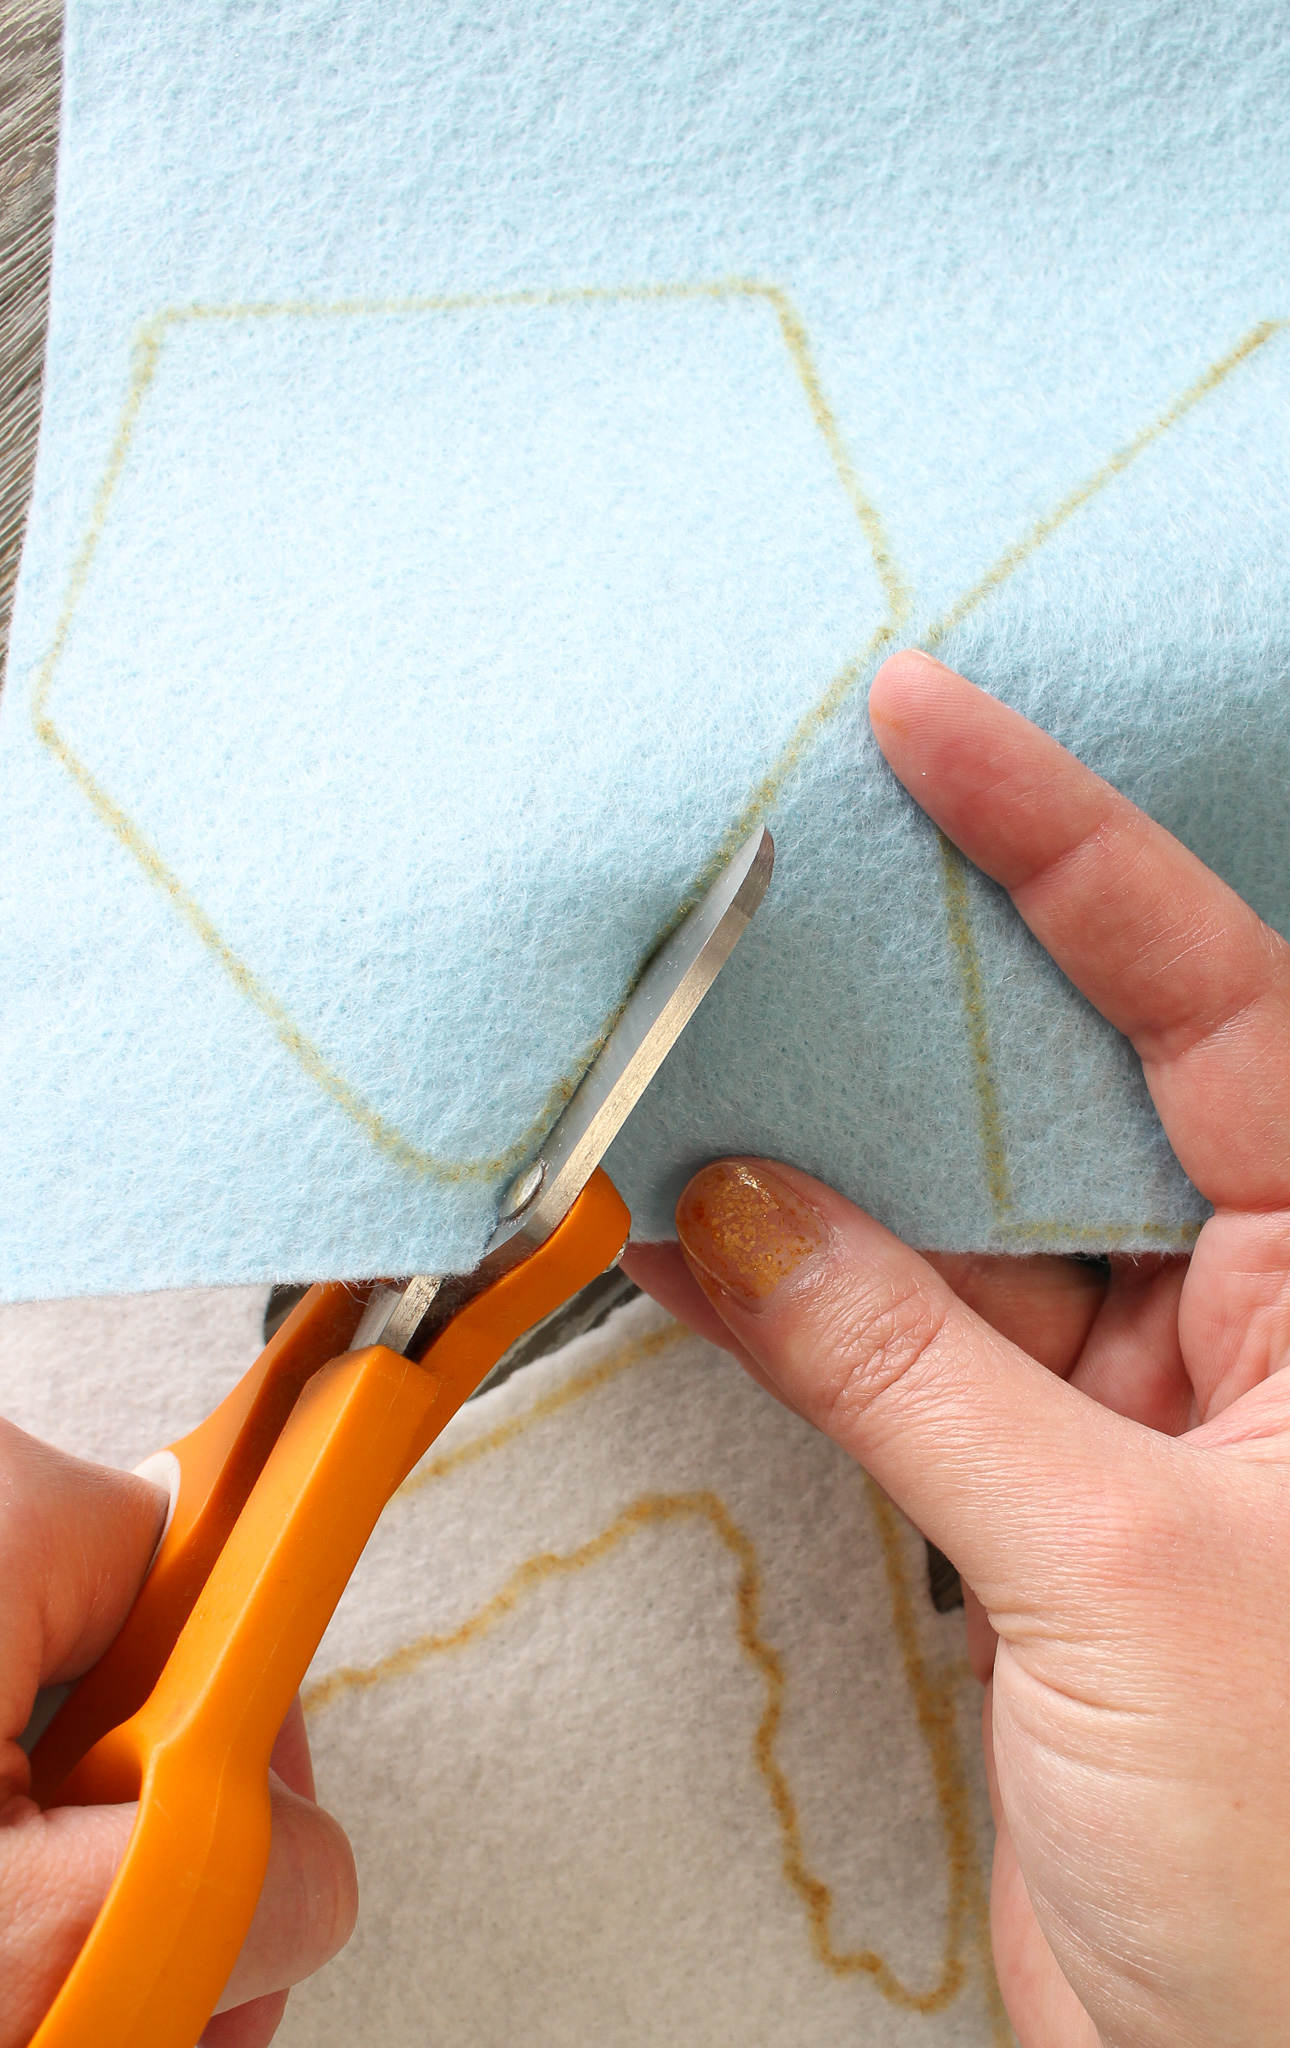
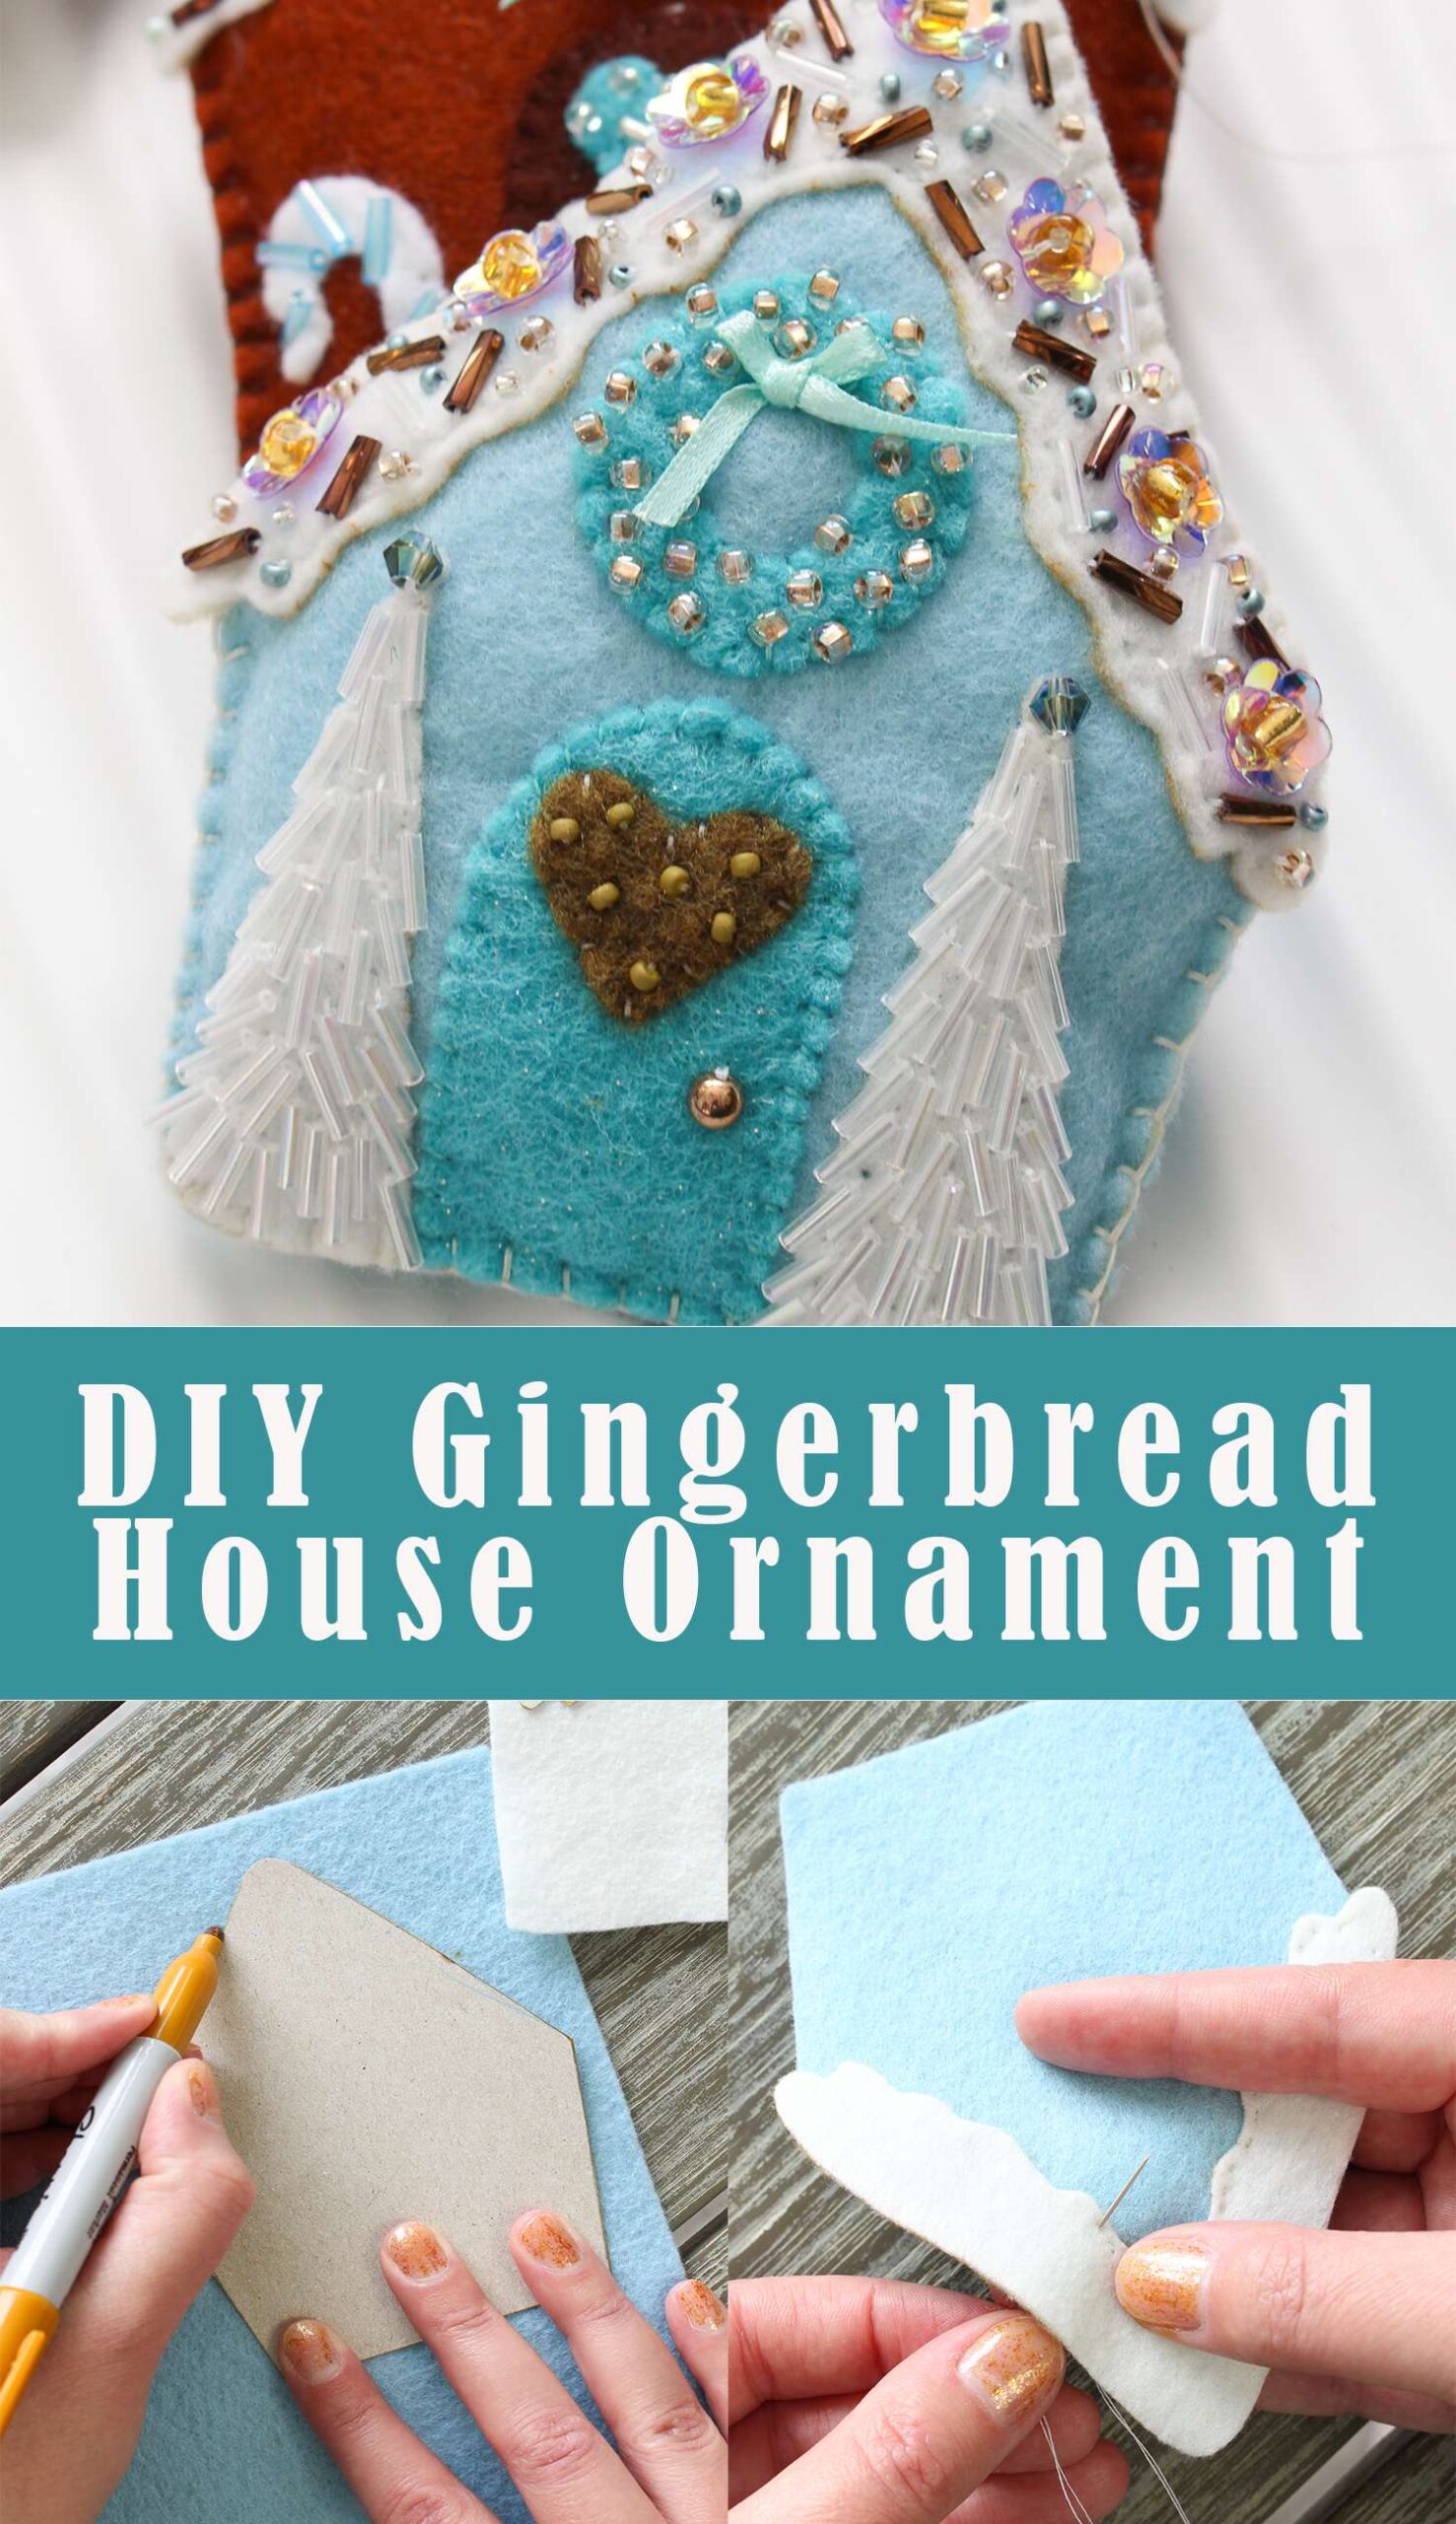
Step 1: Print, Cut, and Trace the Gingerbread House Ornament Pattern. Download and print the gingerbread house template – or make your own. You can print it on regular paper, cut out and trace that on the felt. OR you can print the pattern directly on applique freezer paper, and then iron that onto your felt and cut around. OR you can trace the printed cut out onto cardboard, cut it out, and then use that as a sturdier template. You can even hand draw your own design and use that as a template. Lots of possibilities and methods, use whichever suits your craft abilities and budget. Hot tip: I find using a permanent marker is best for tracing, because none of the tailor’s chalk/pencils I have bought will draw nicely on this material.

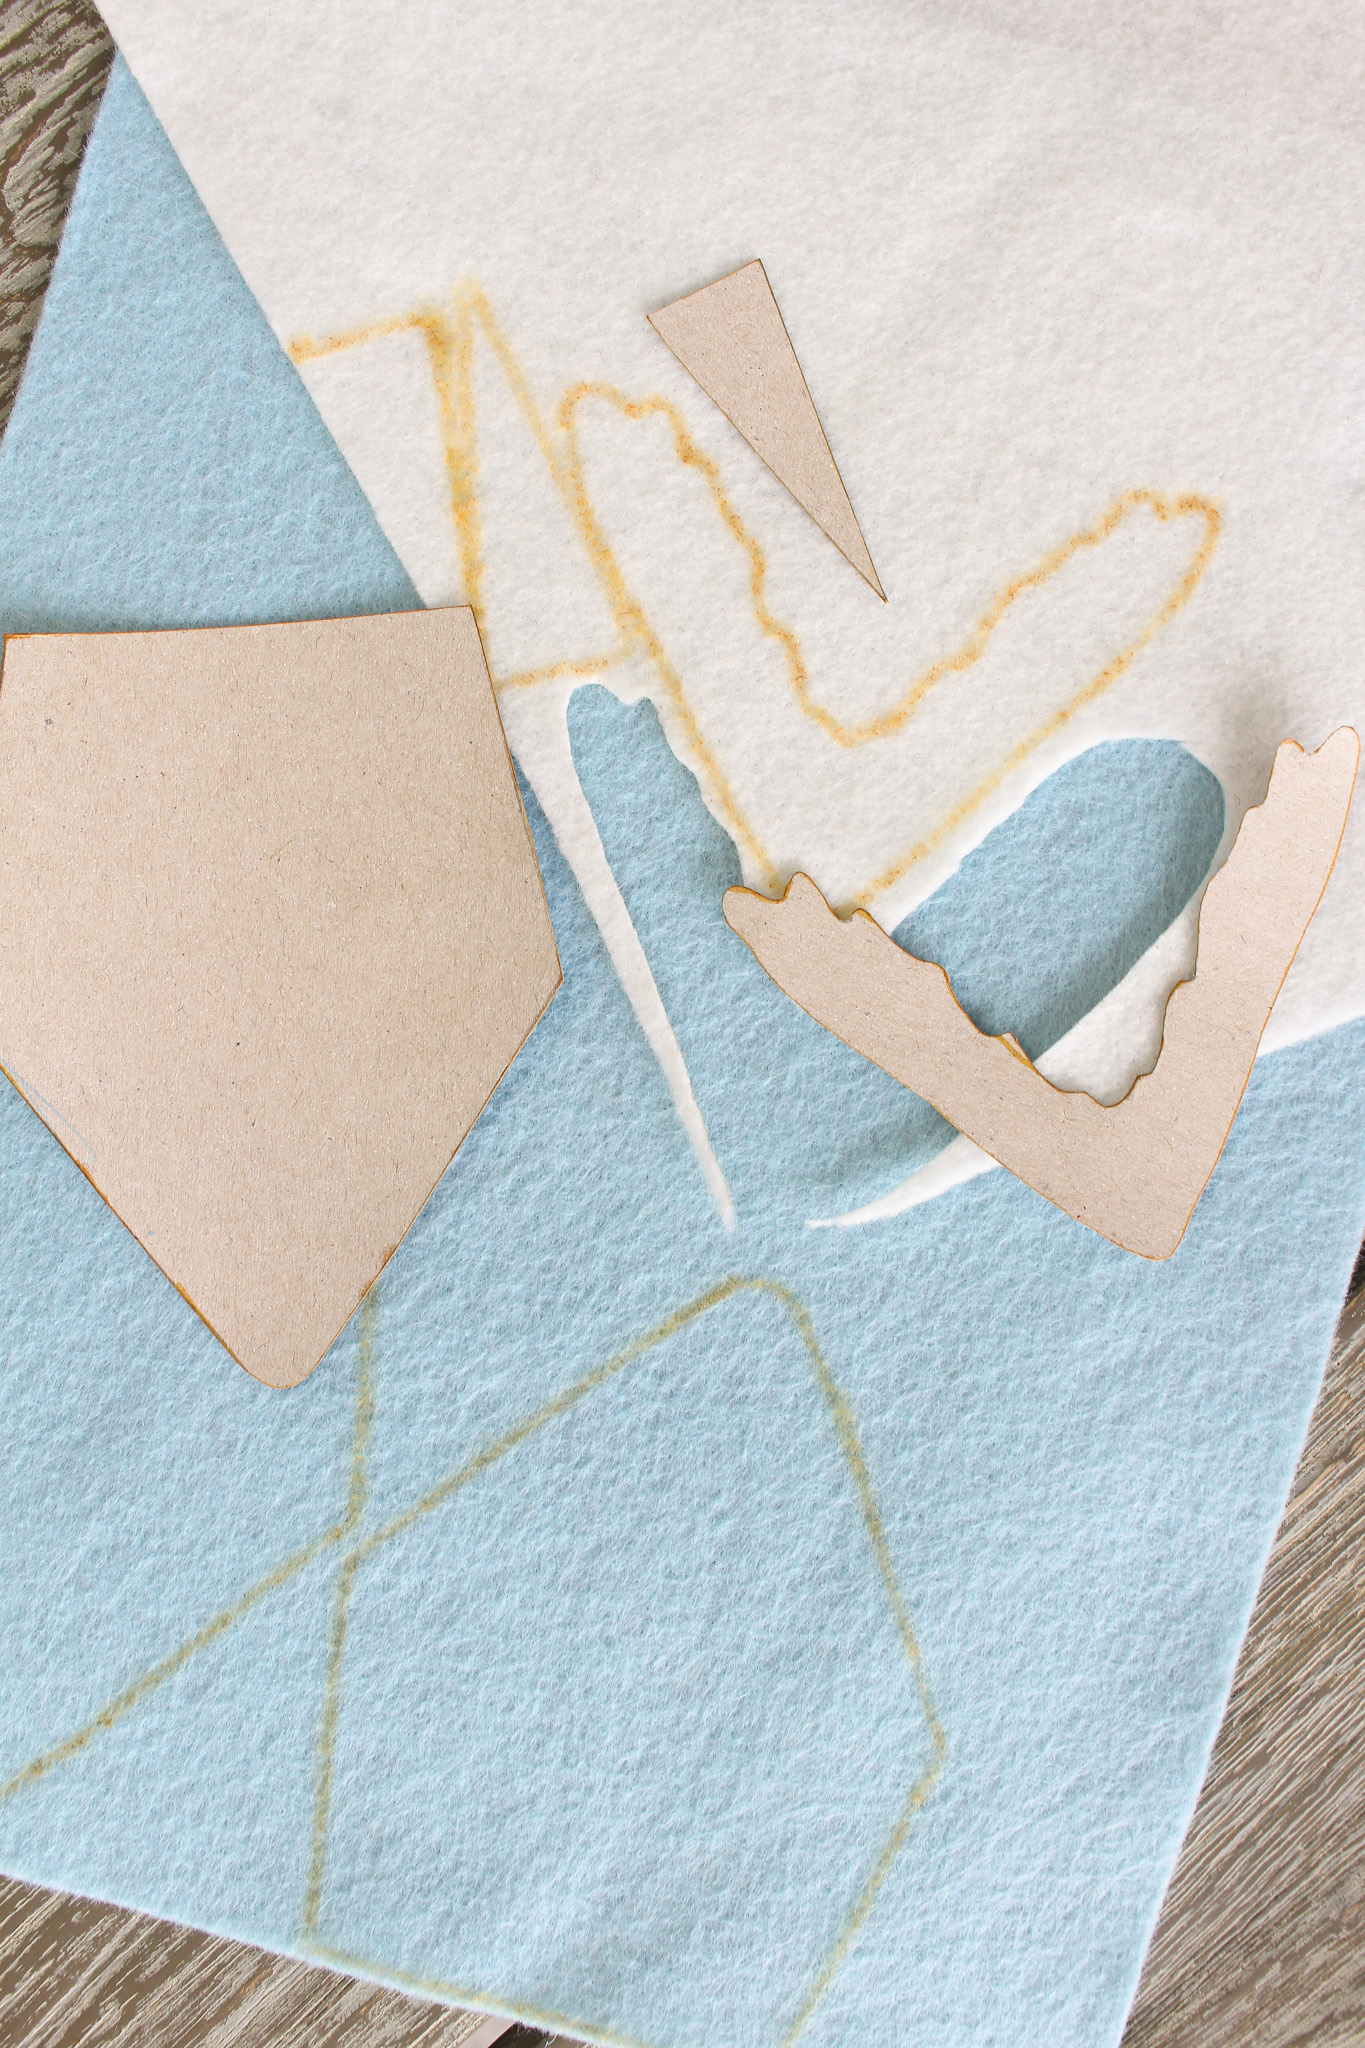
Step 2: Cut Out the Felt Shapes. Cut out the felt shapes, using a pair of sharp scissors.
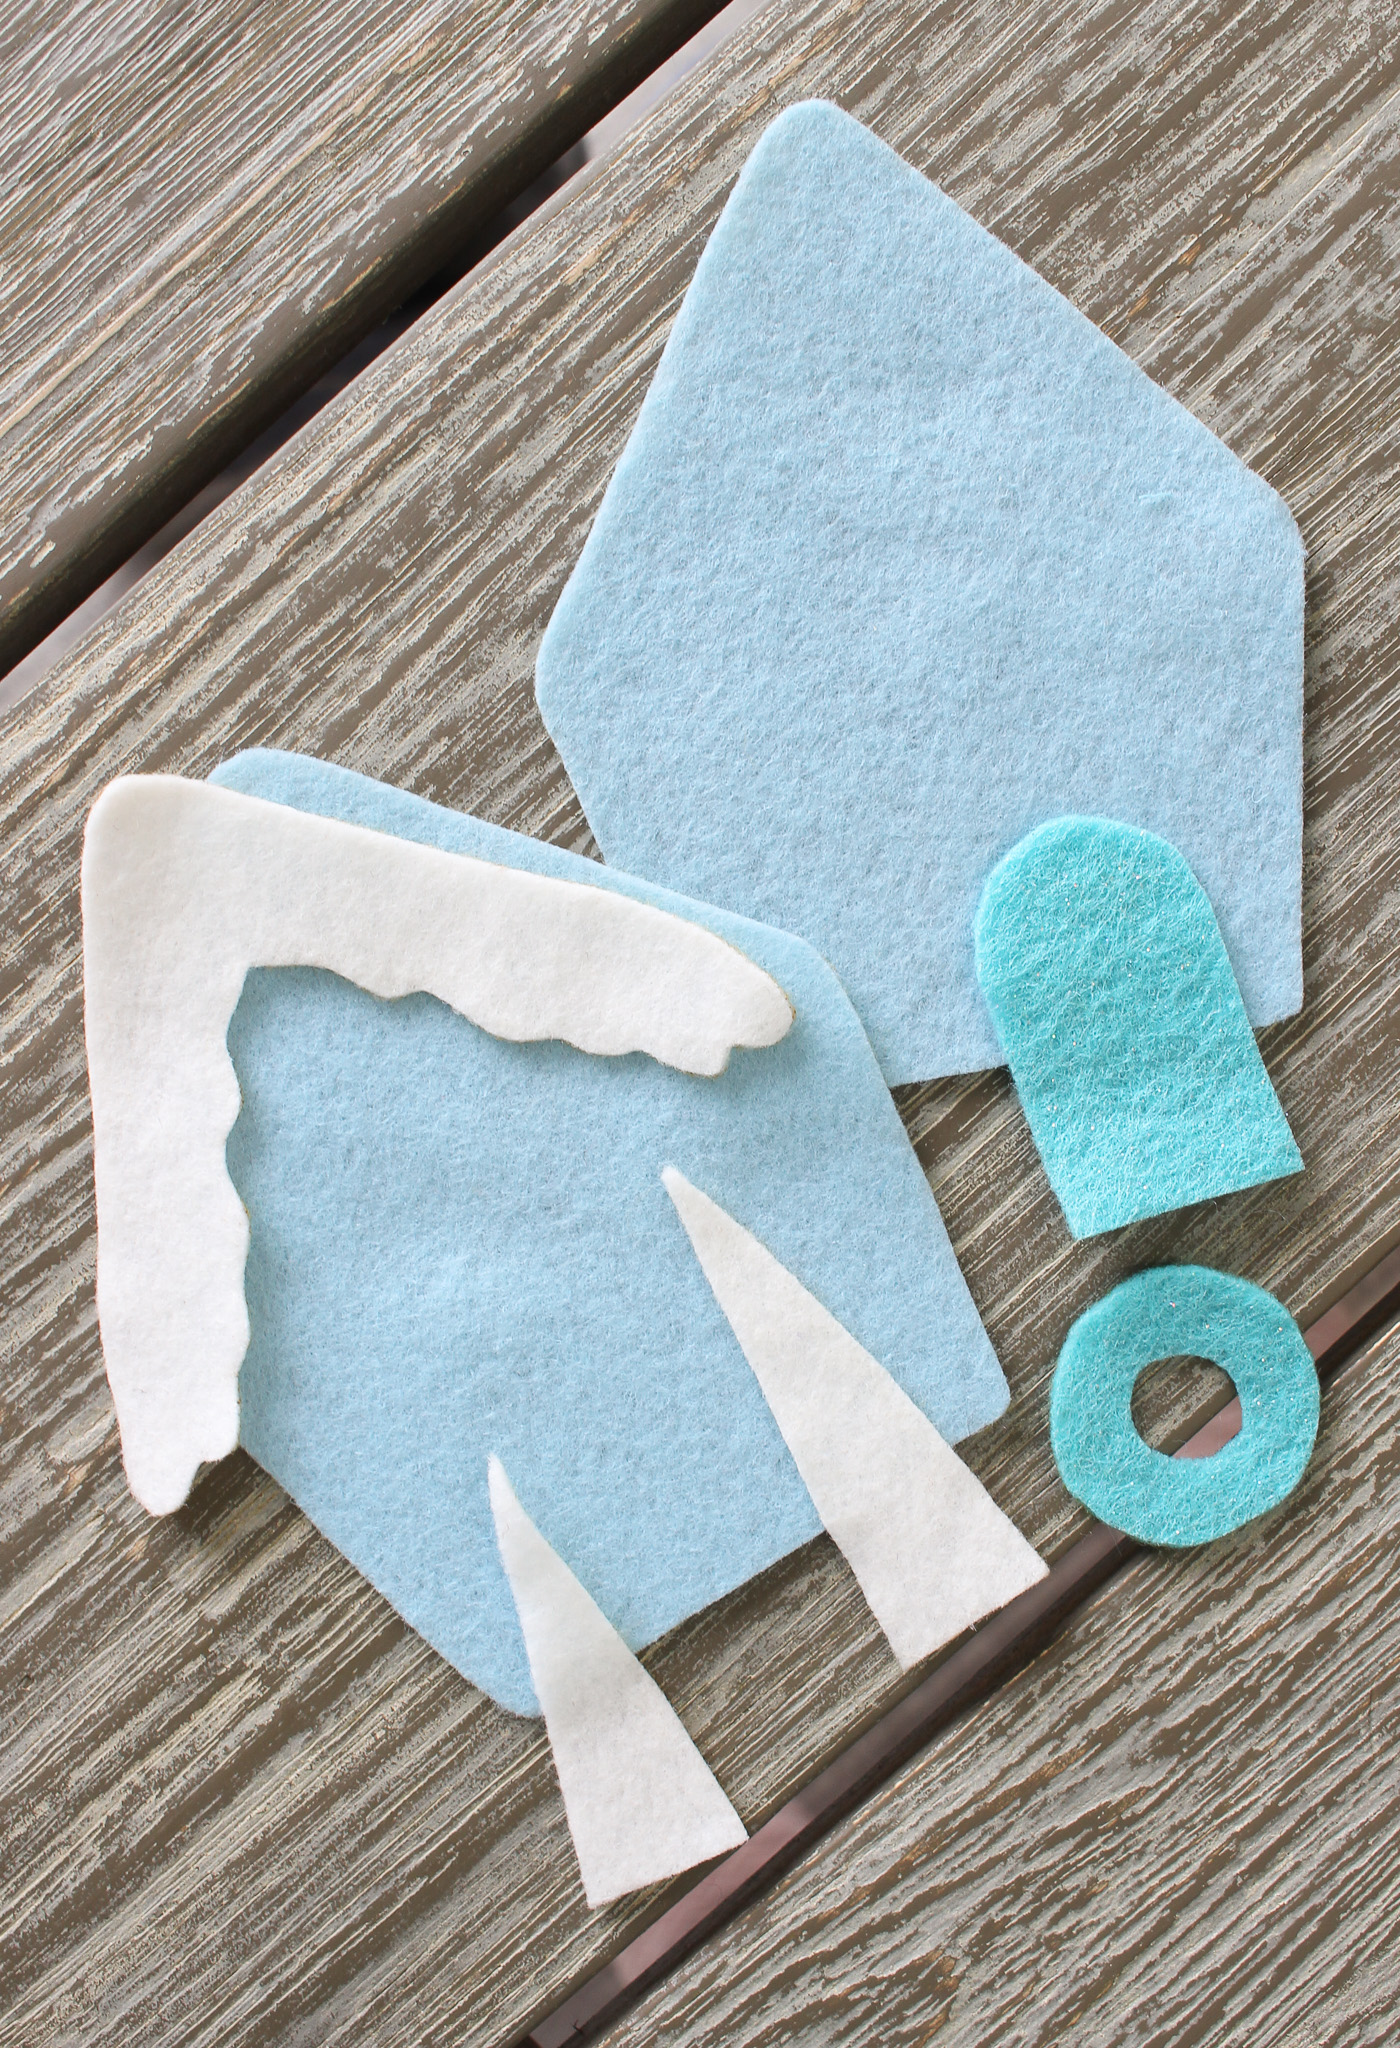
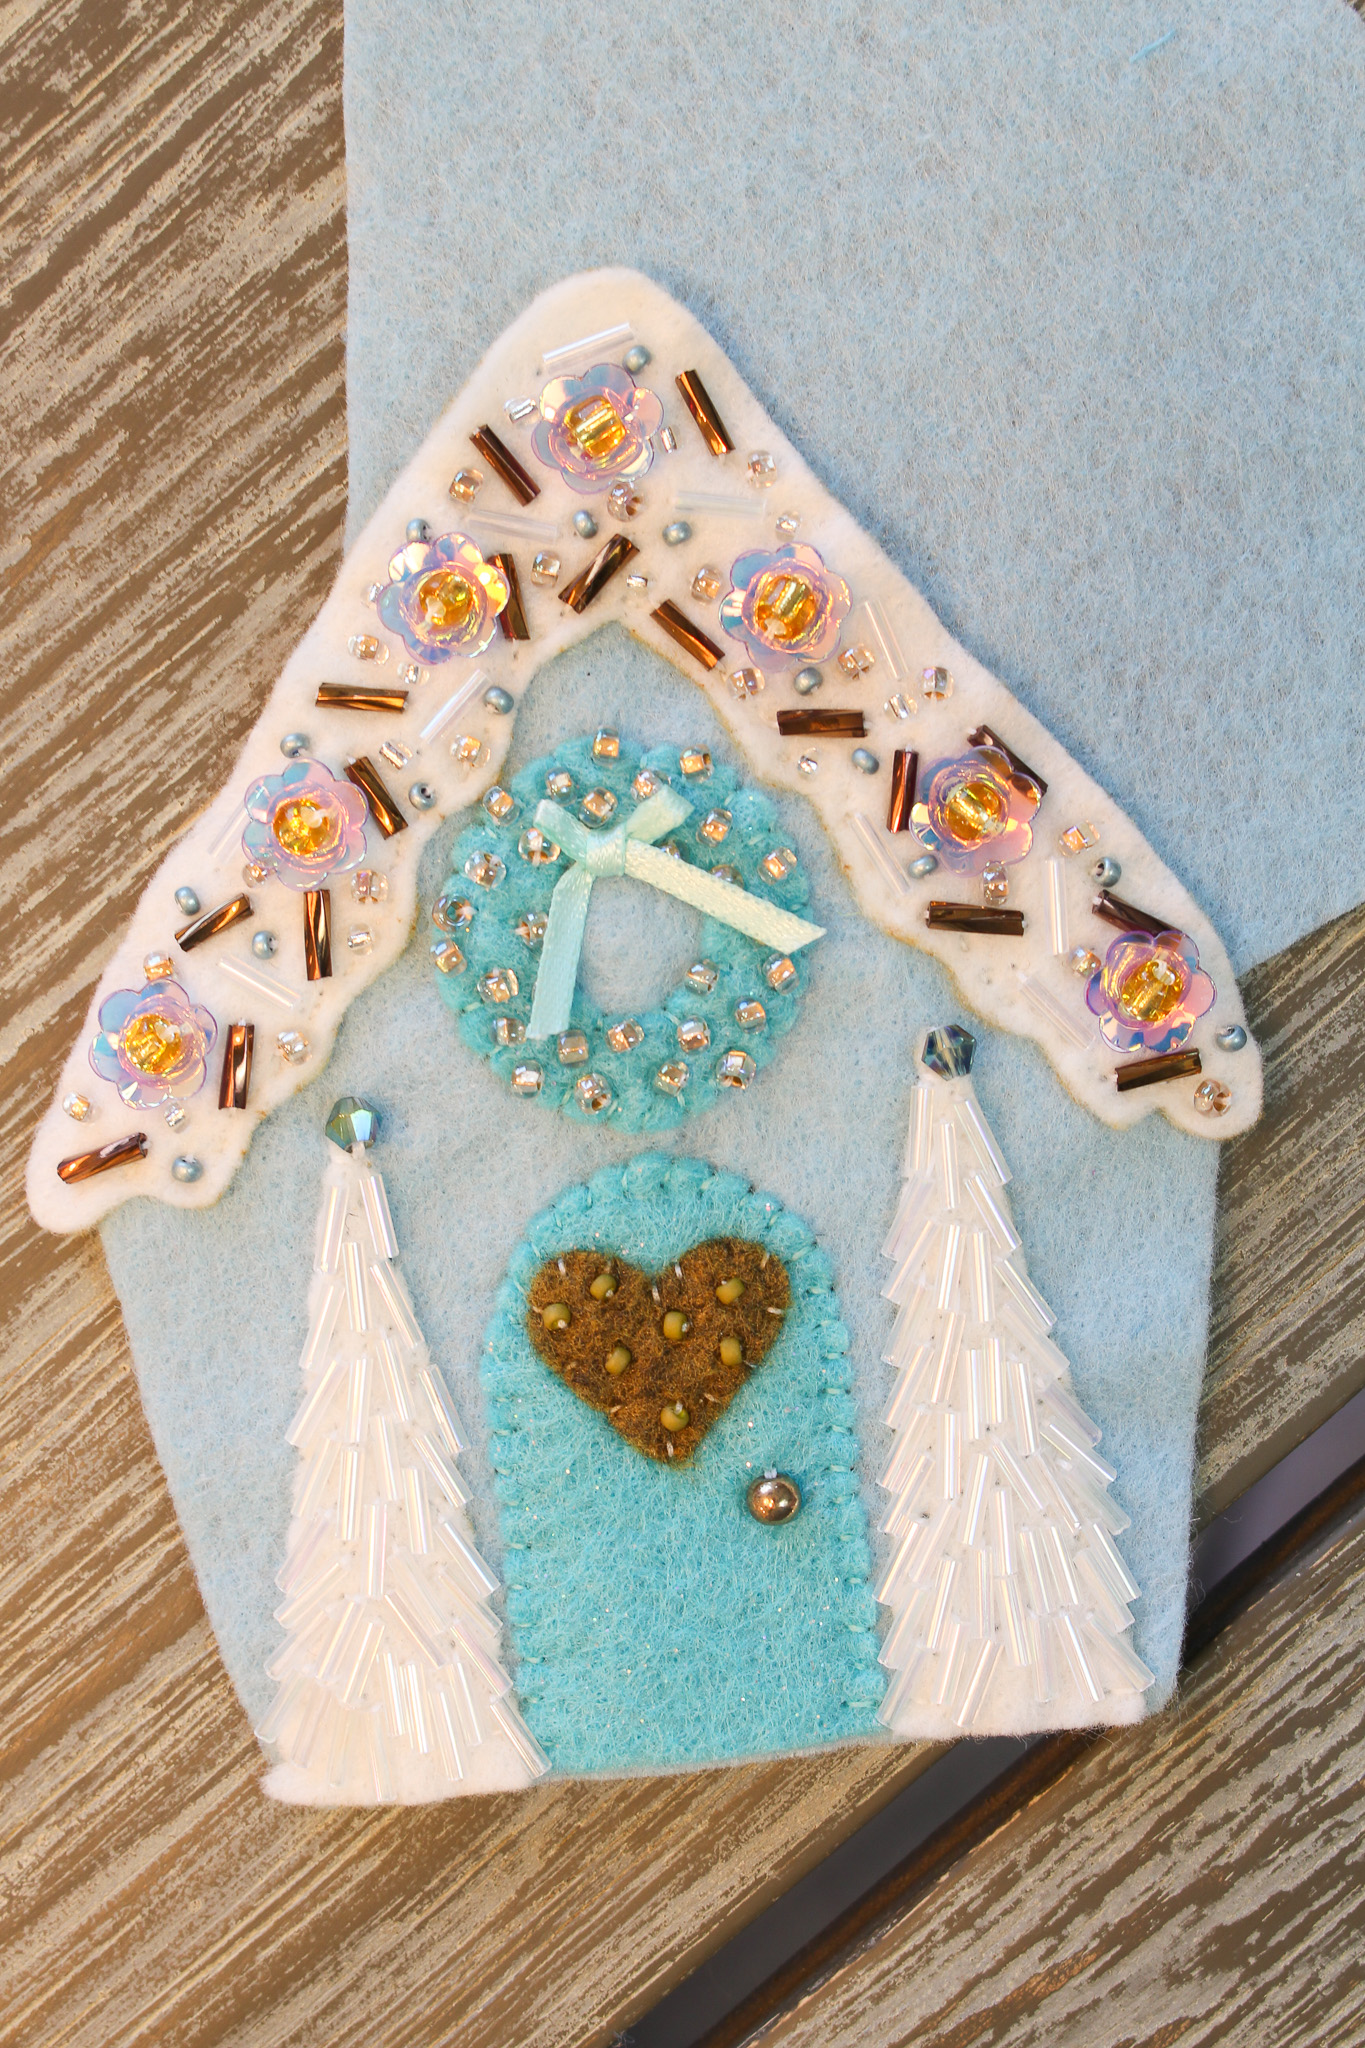
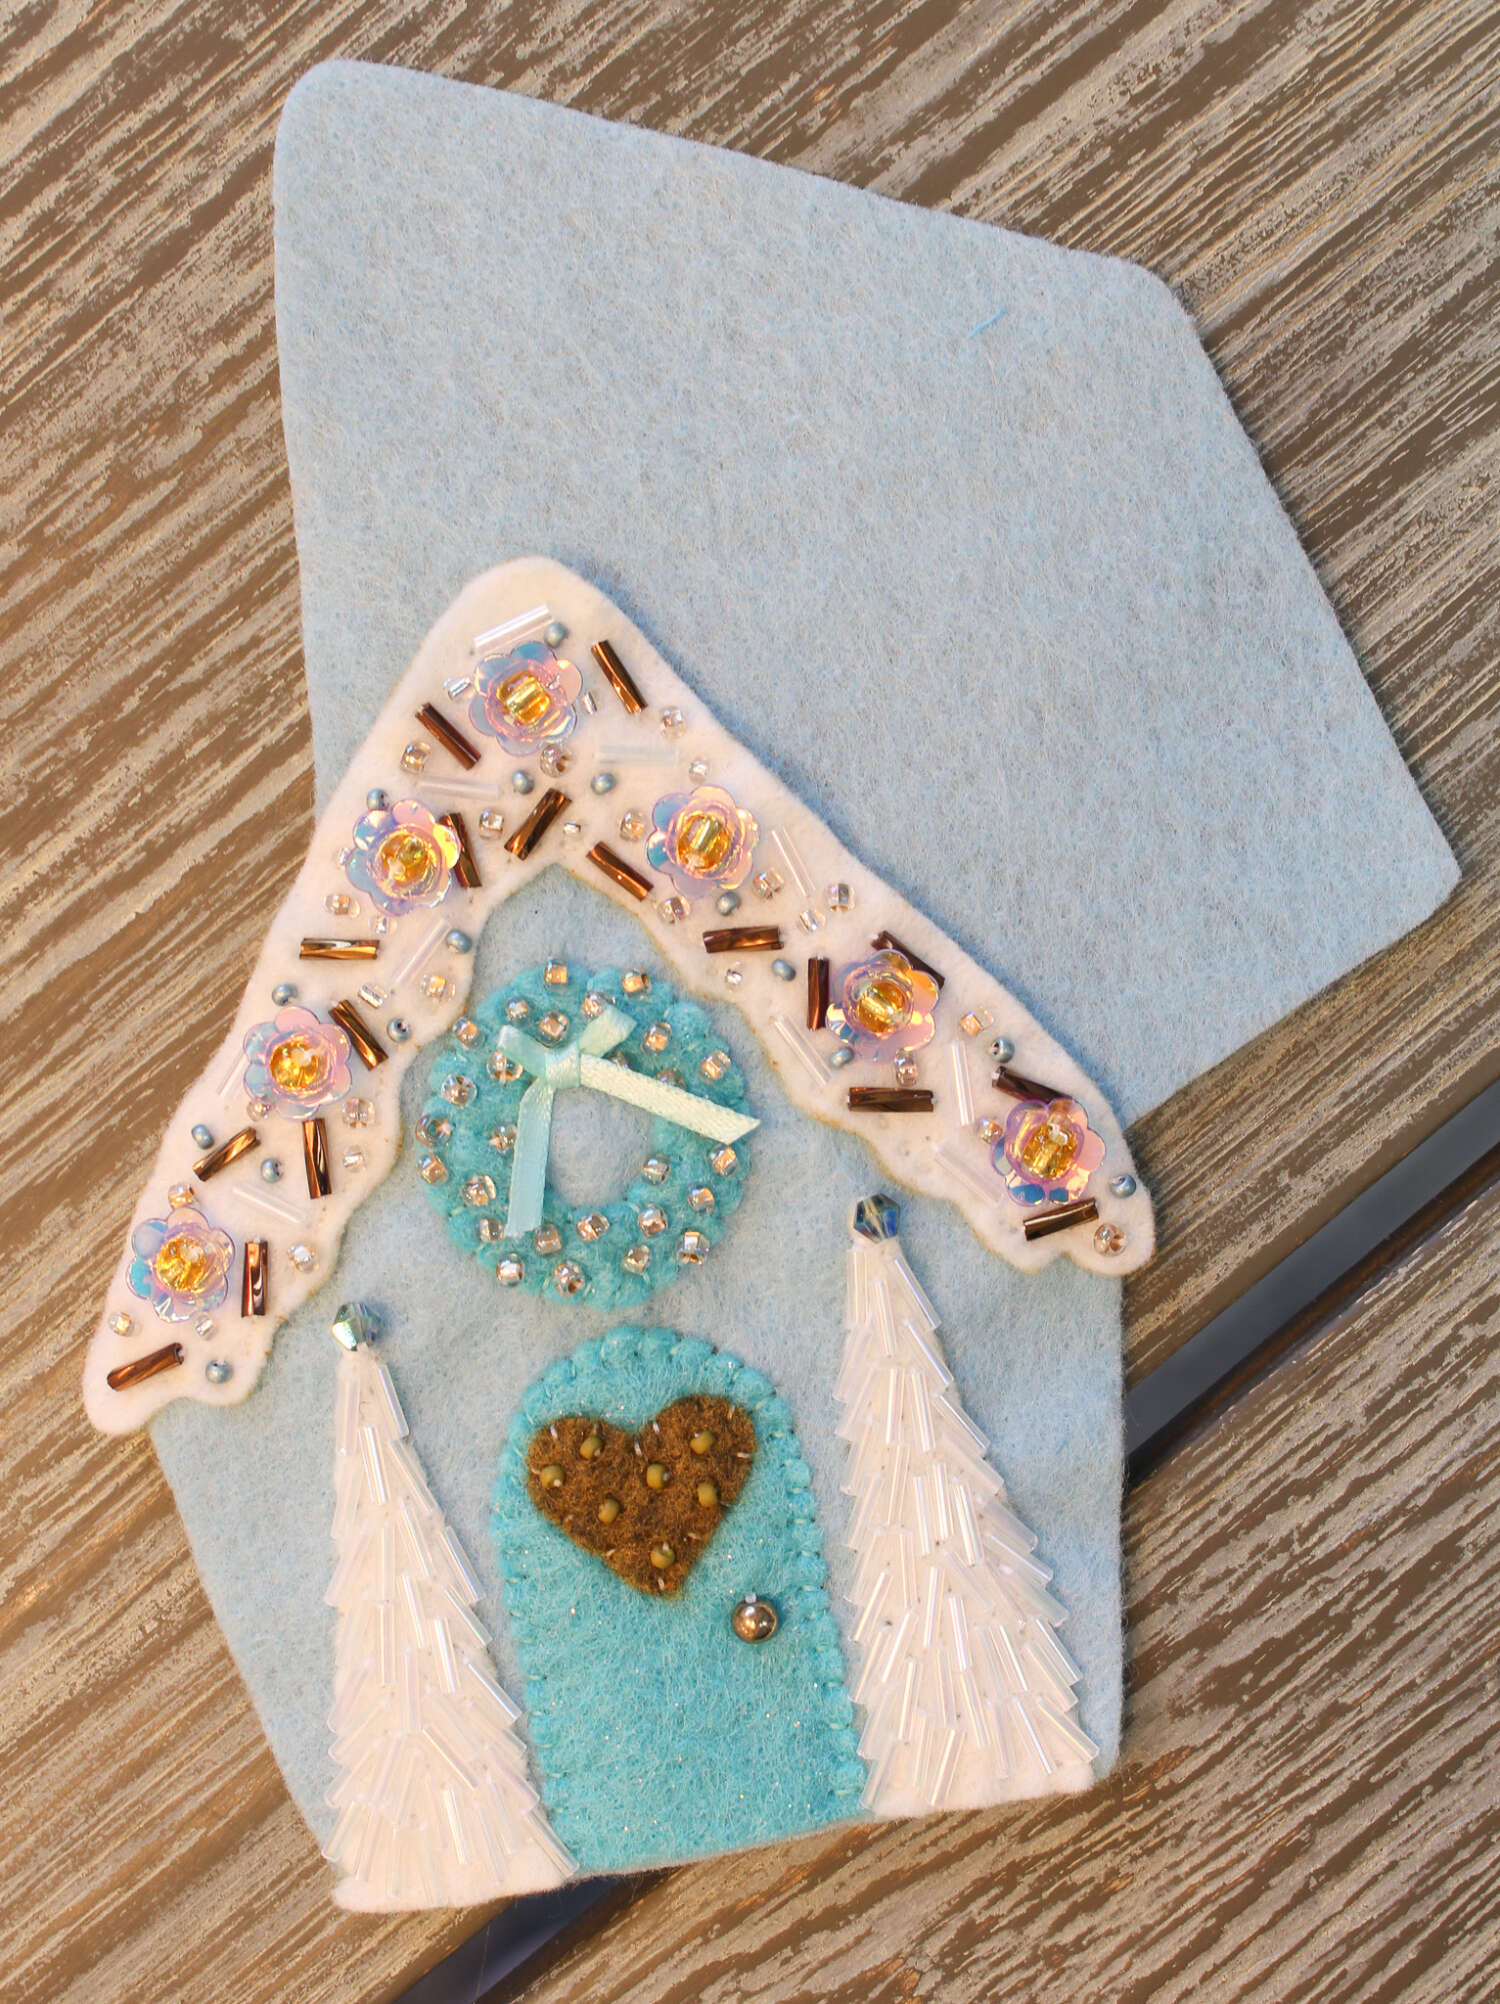
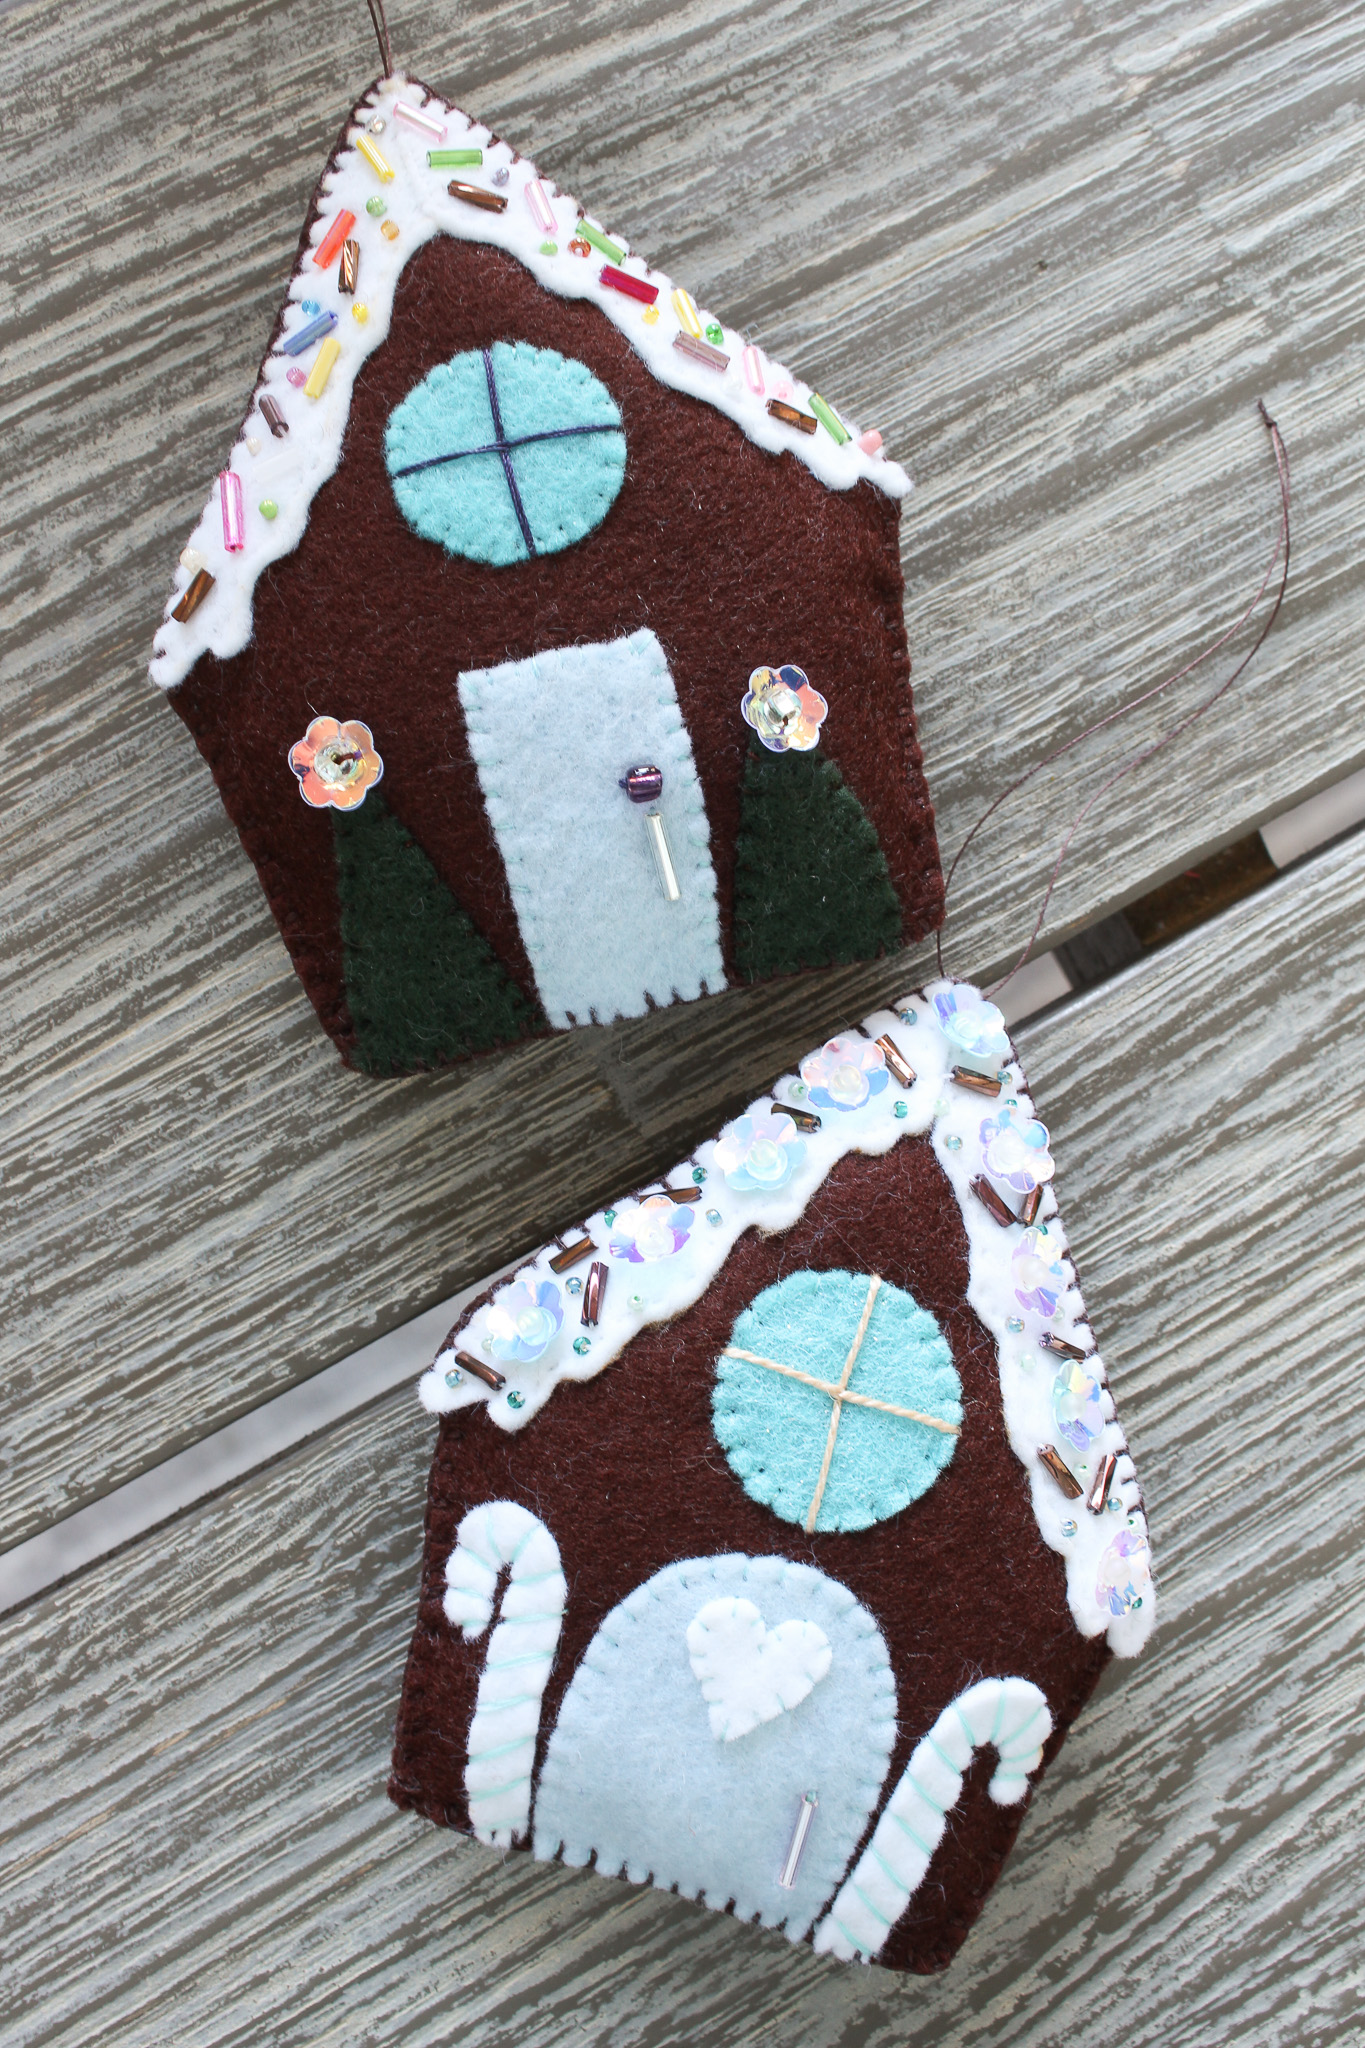
You can decorate your gingerbread house ornament however you like! Experiment with adding candy cane shapes or a window instead of a wreath. But to make yours look exactly like mine, you will need to cut out the following shapes from felt:
- Two (2) trapezoid “house” shapes (pale blue)
- One (1) roof icing (white)
- One (1) door (turquoise)
- One (1) wreath (turquoise)
- Two (two) trees (white)
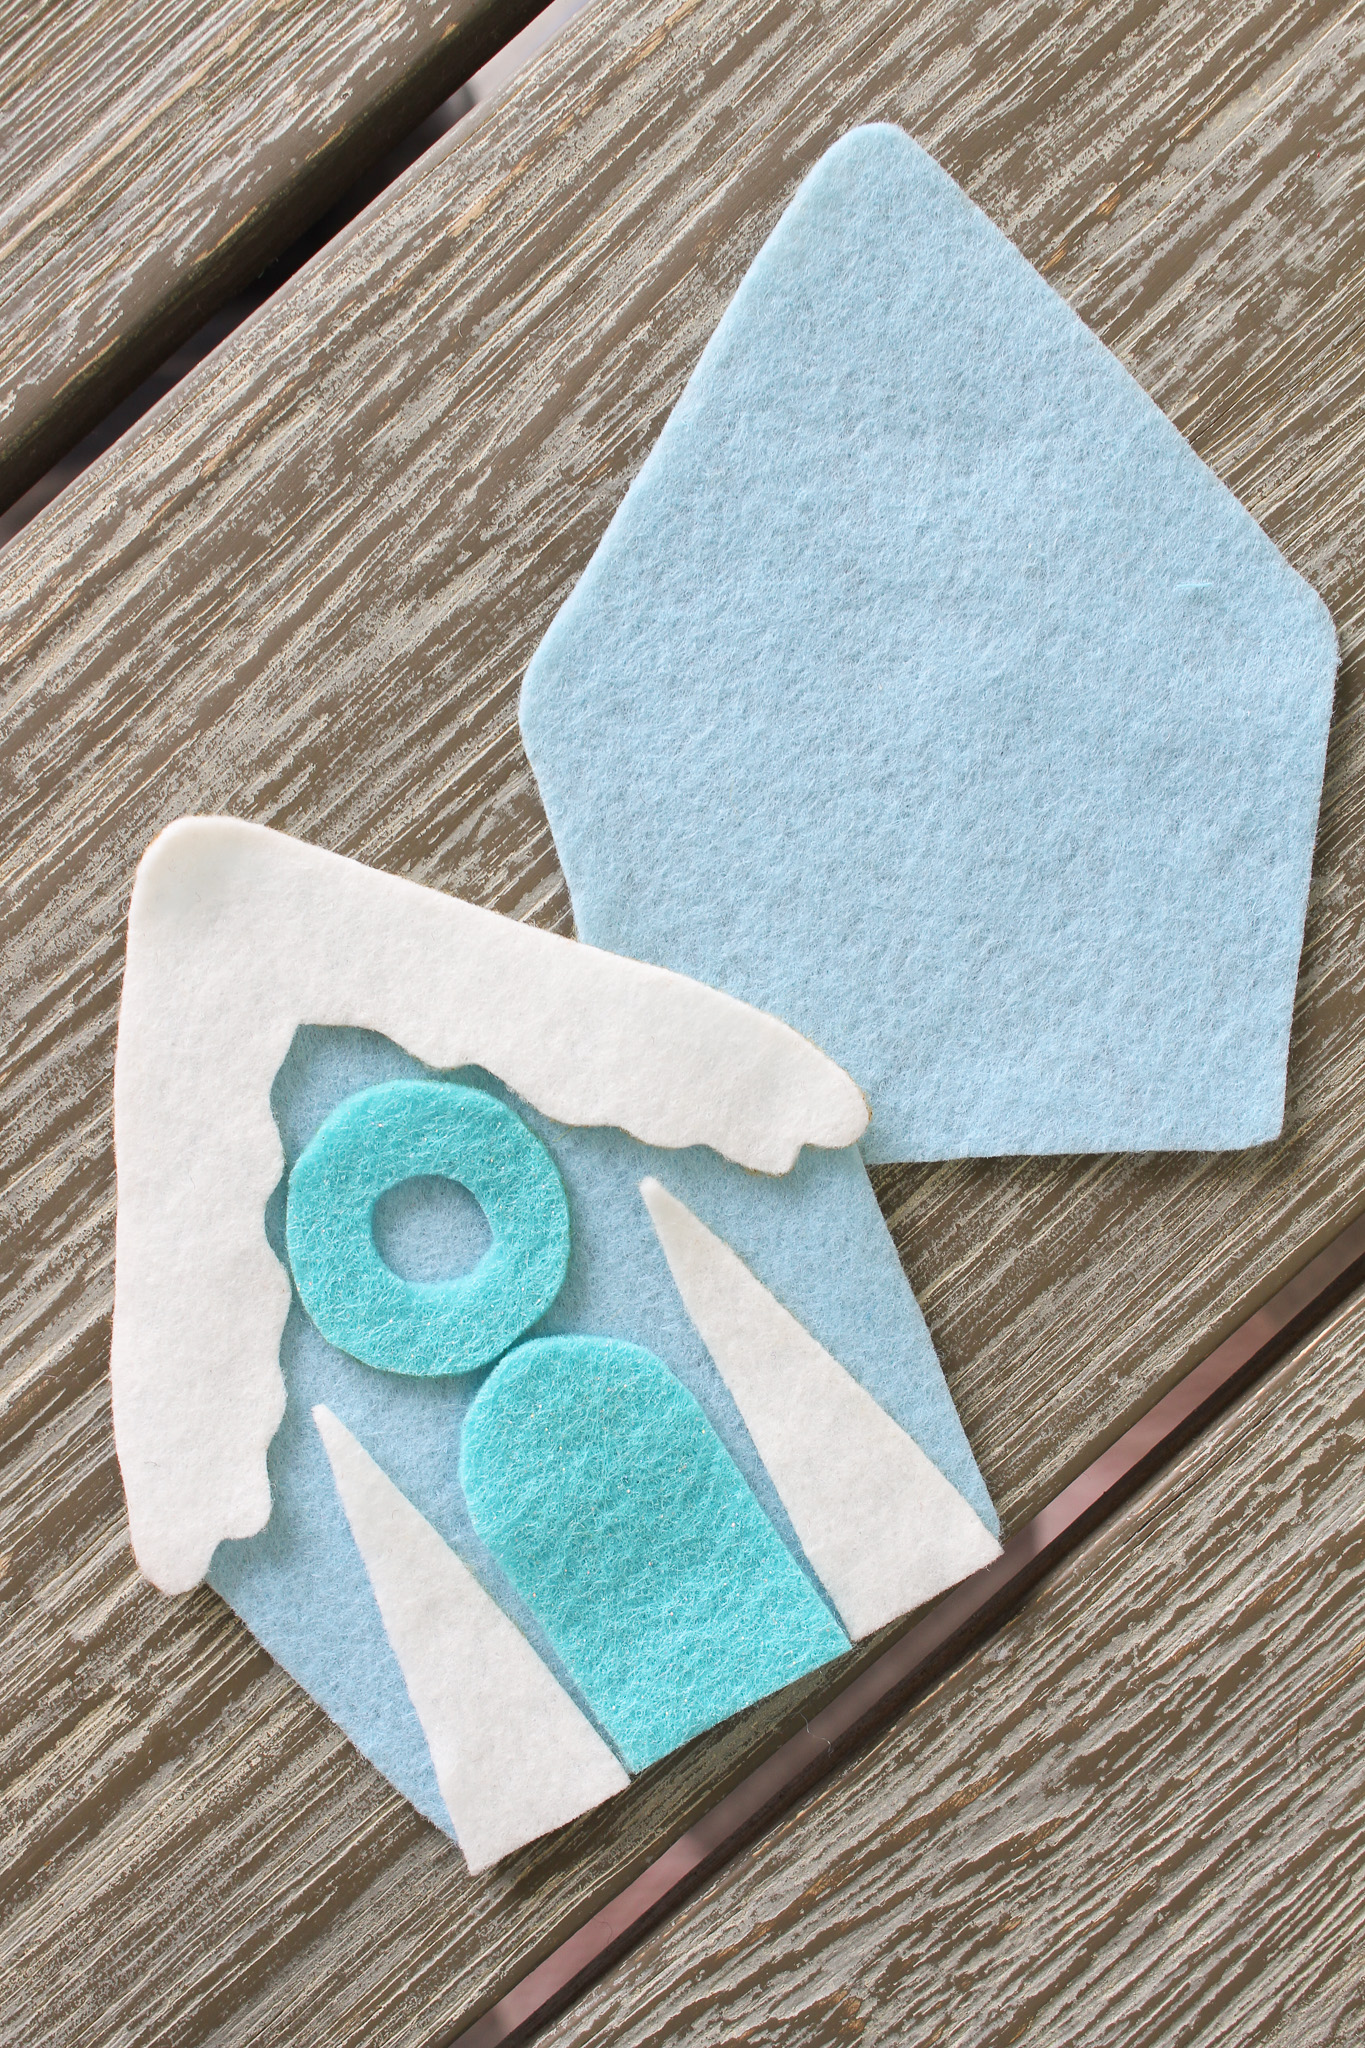
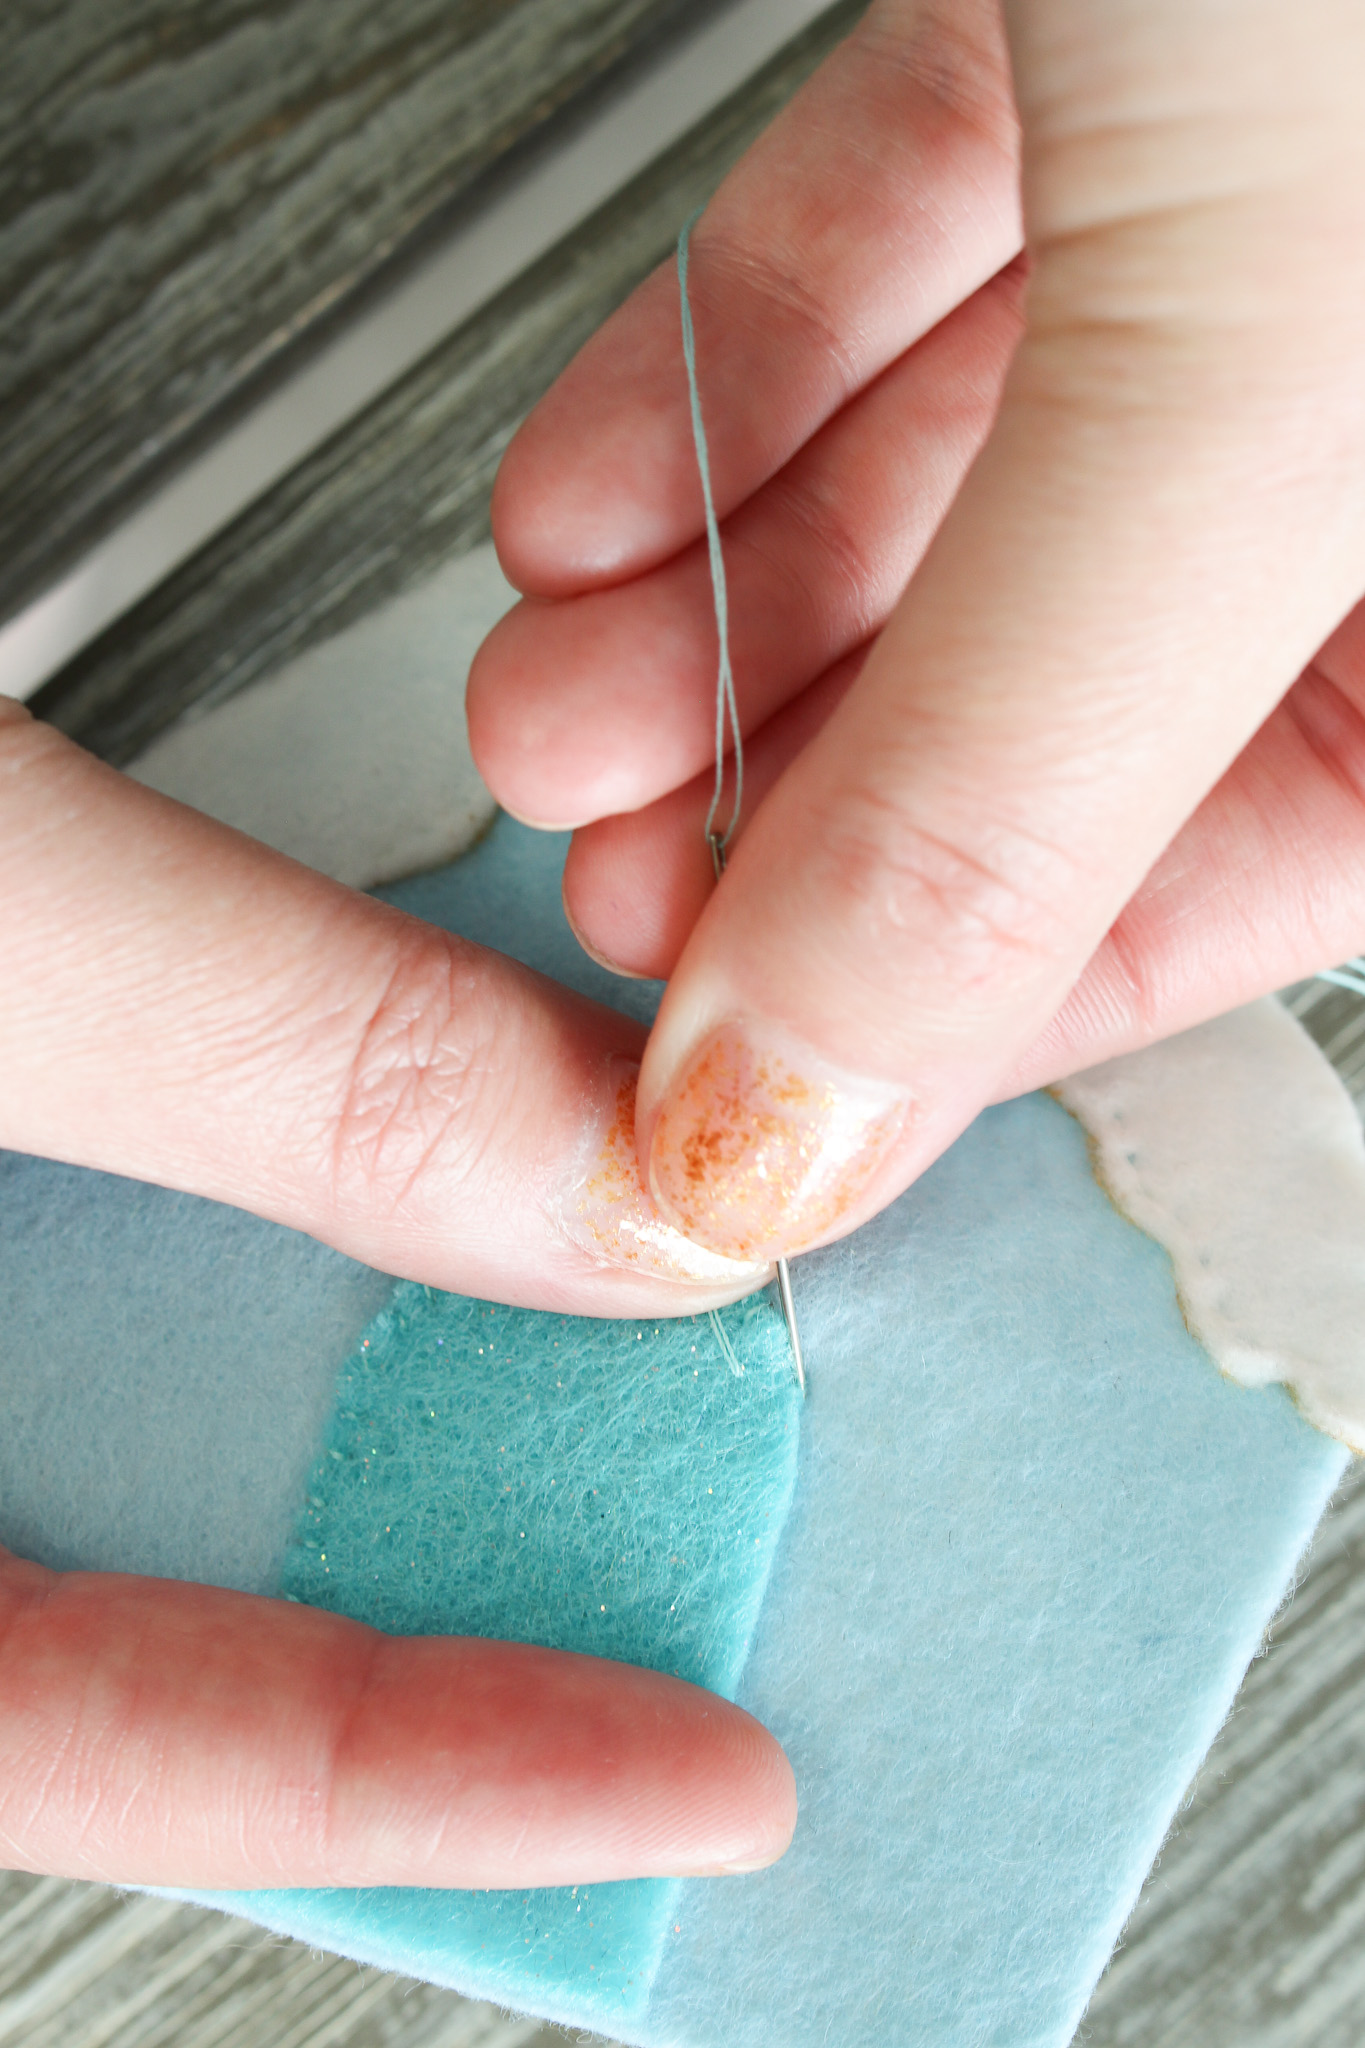
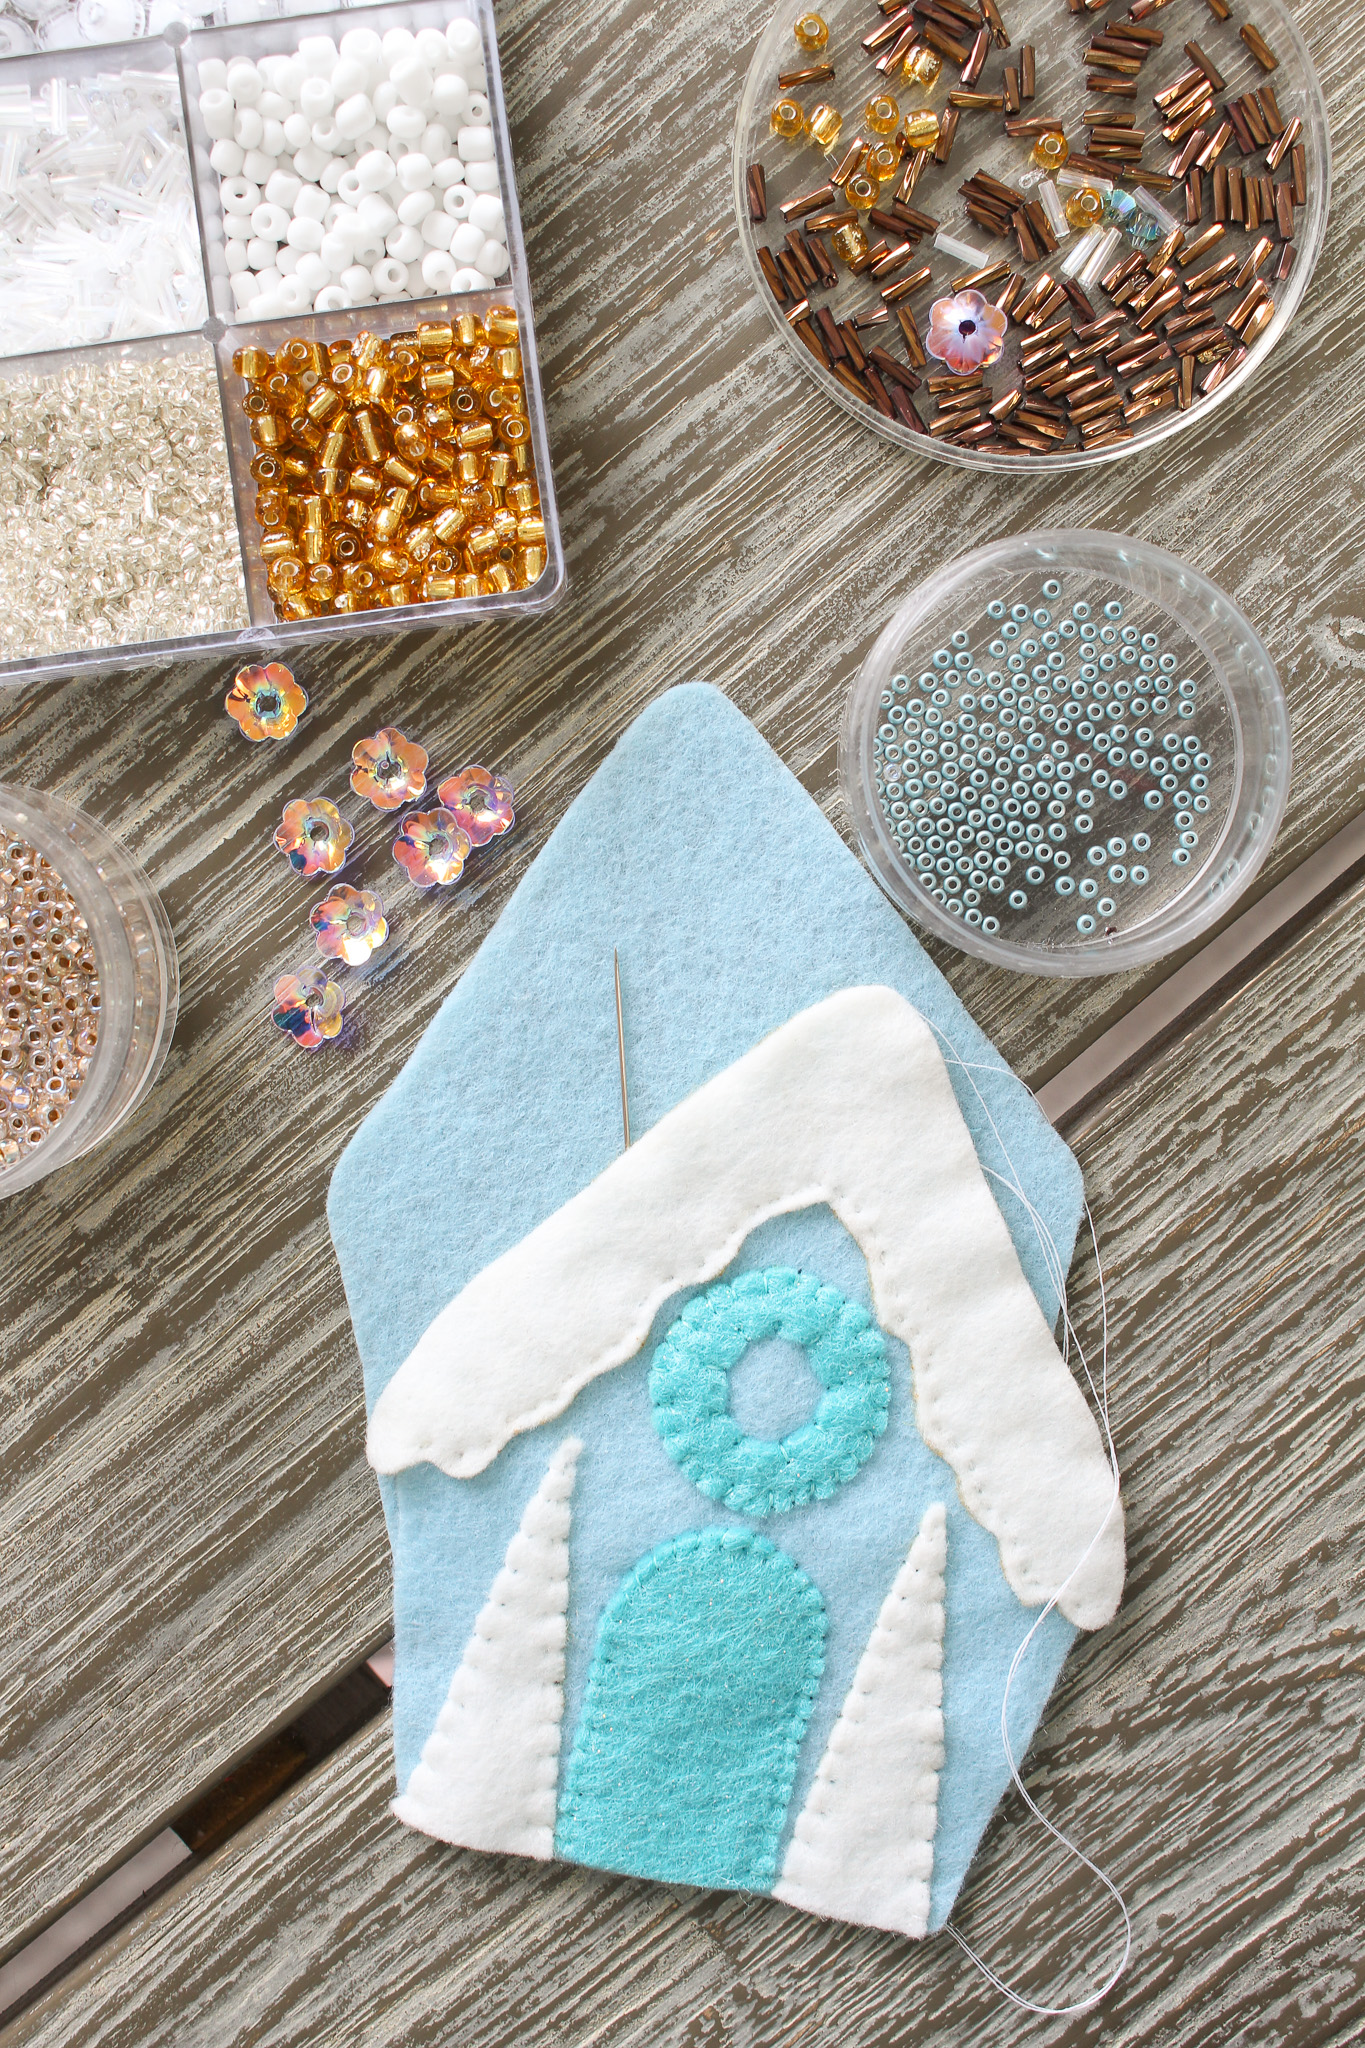
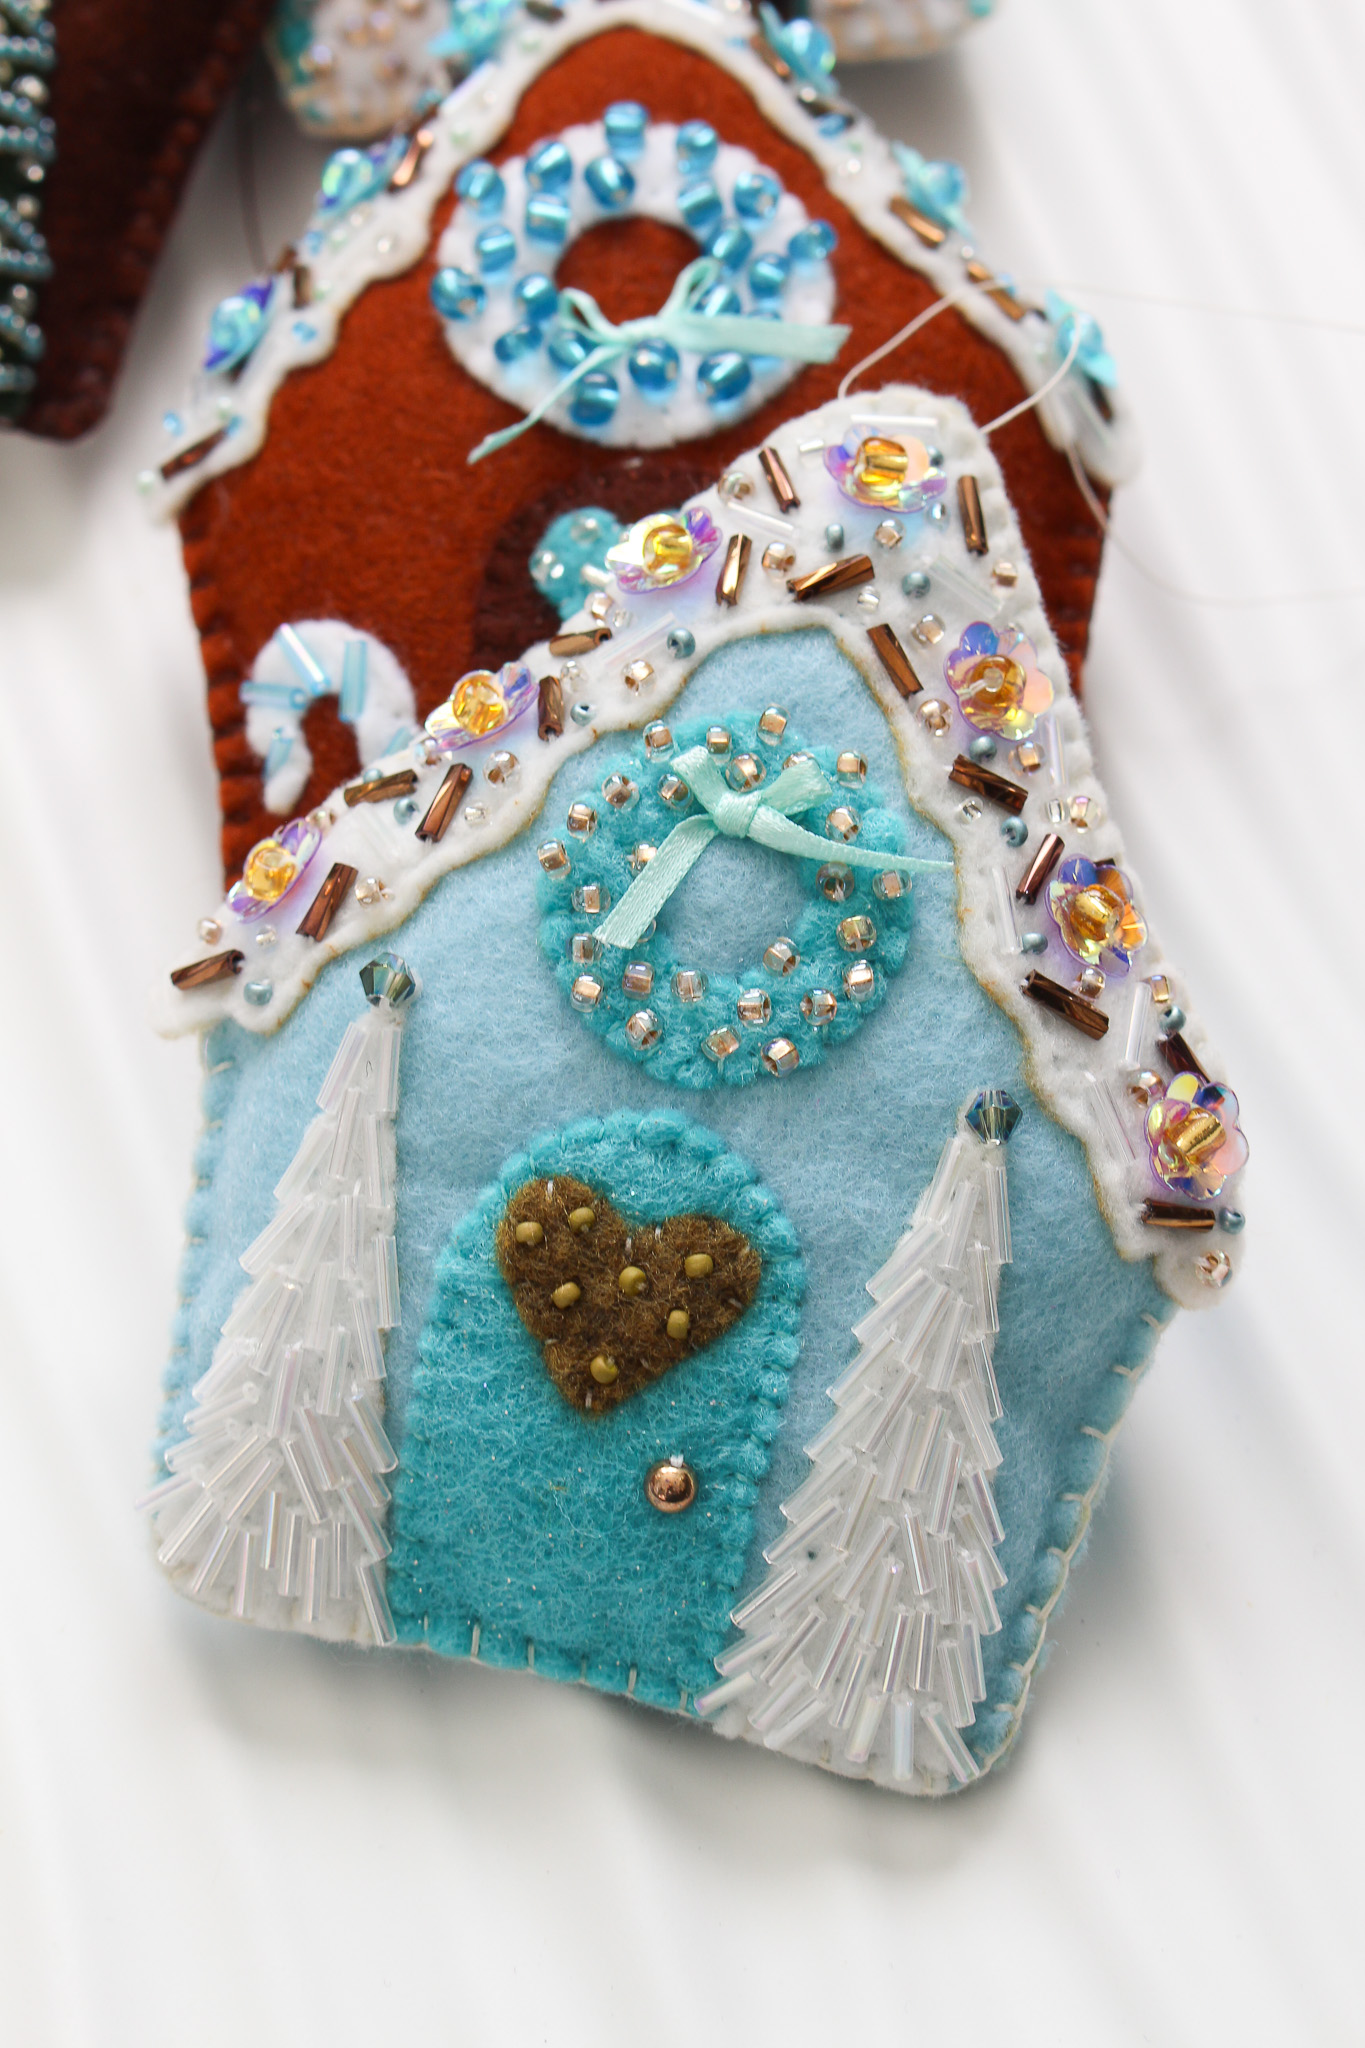
Step 3: Stitch on the “Snow,” Door, Wreath, and Trees. The first step, once everything is cut out, is to stitch the details onto the front of the ornament. You can do a little running stitch or just tack it on, whatever you’re most comfortable doing. Just try to keep the stitches really small and close to the edge of the felt details. Keeping stitches to the edge of the felt prevent little flaps of felt, which helps keep it from getting curled or messed up in handling or storage. I stitch the “snow” on the roof first, and position it so it overhangs the top of the blue trapezoid just a bit. Then I stitch on the door, wreath and, finally, the two trees.

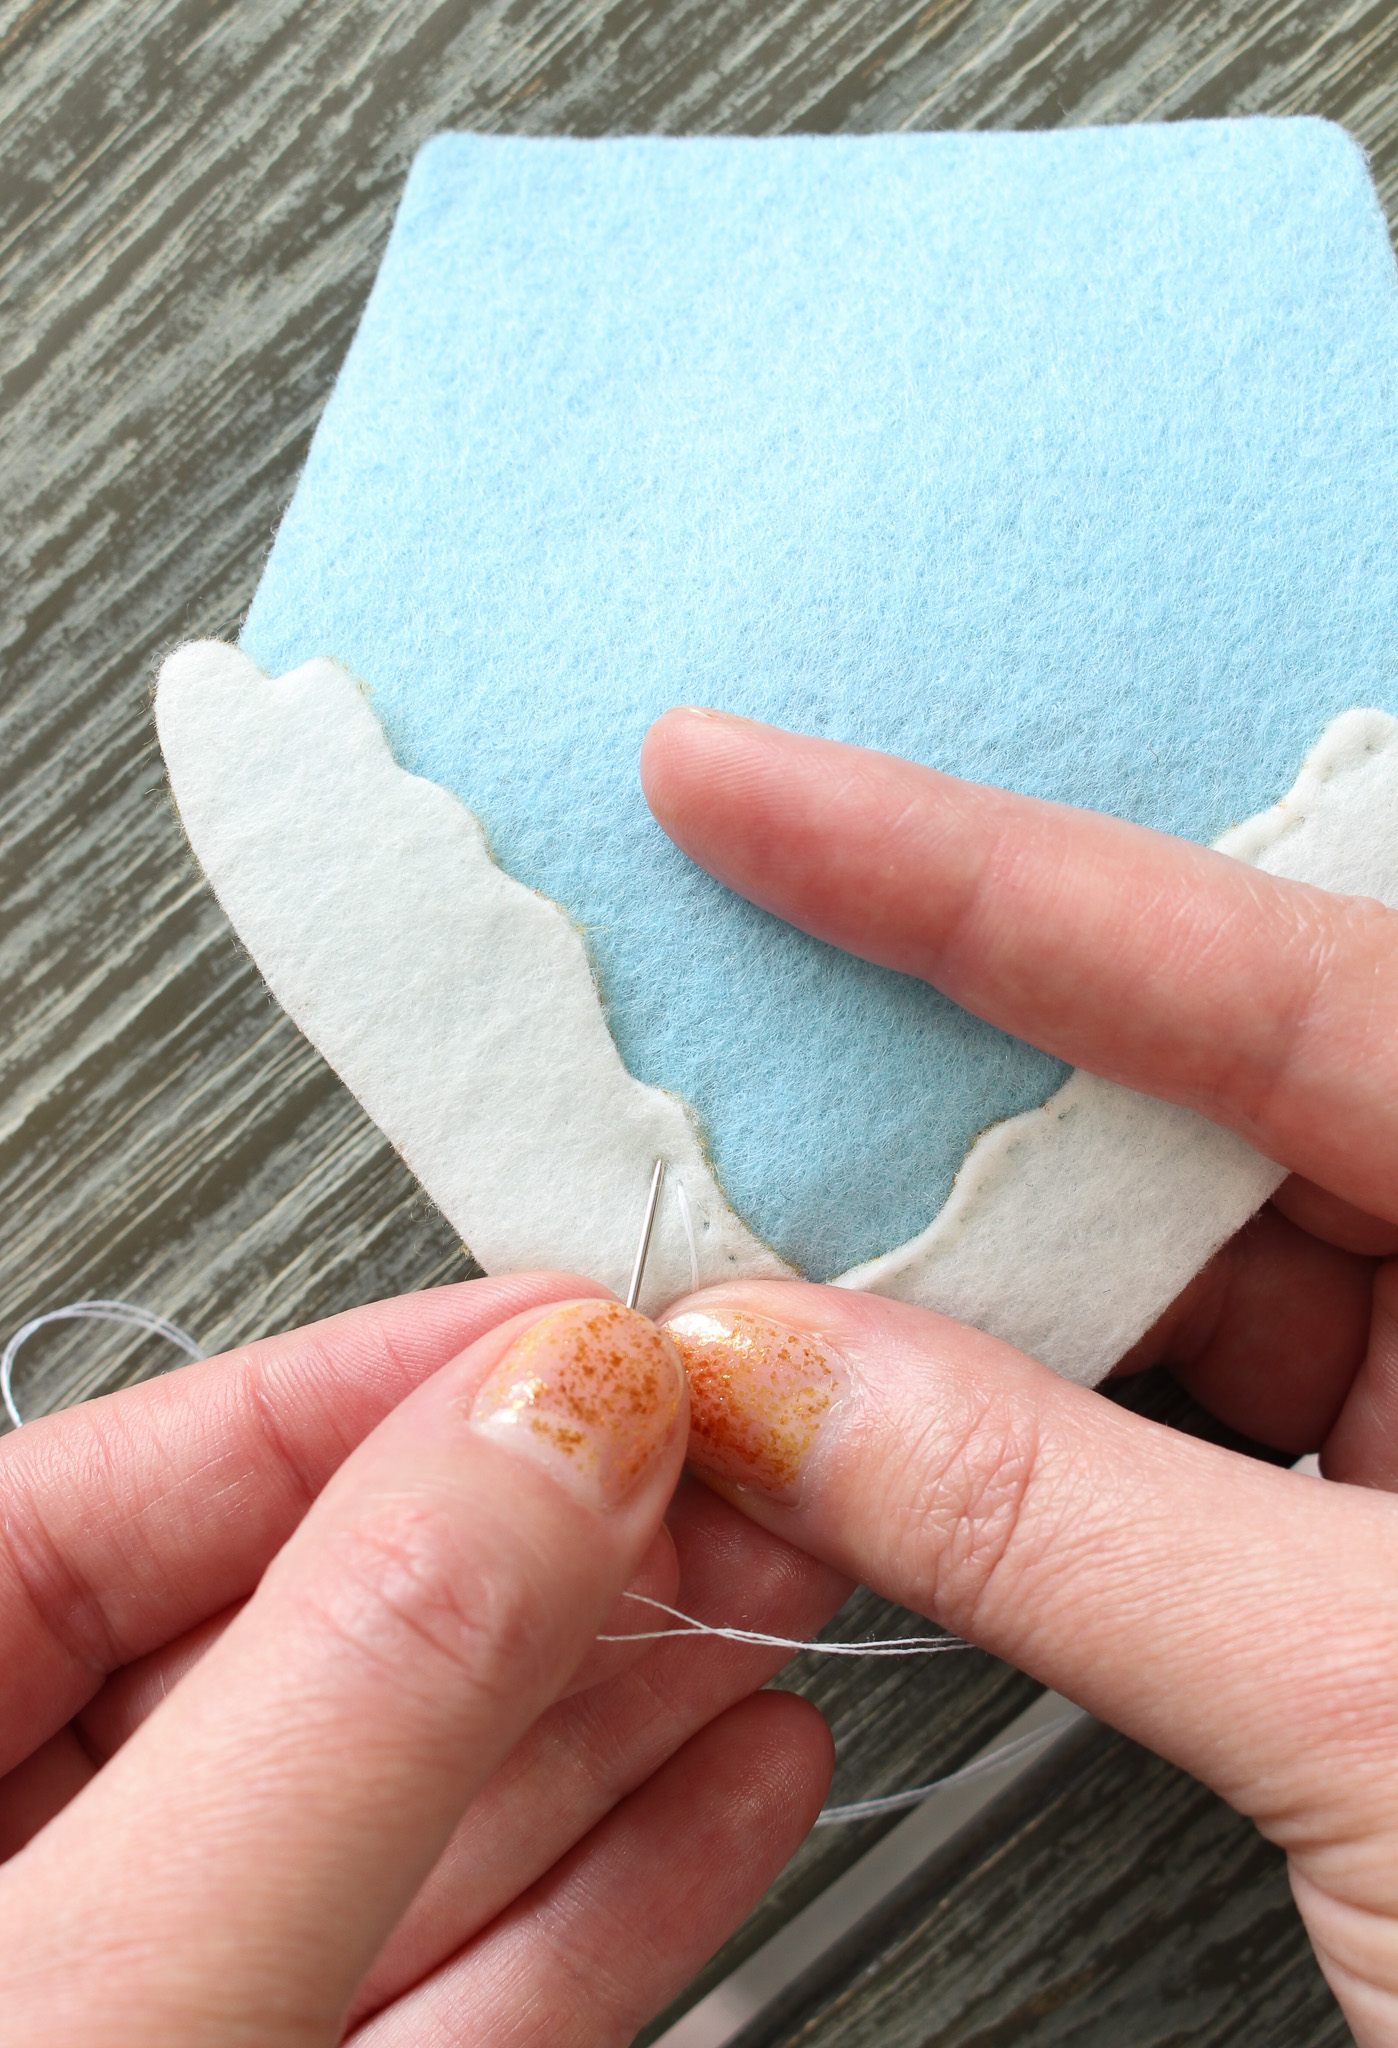
For the snow, you can see the little overhang I left in the photo below. I also did a little whip stitch along that edge, totally optional, just to keep everything tacked down while I fussing with the other stitching and beading.

I did what I guess you could call a running stitch for the snow, but everywhere else I did a little overcast stitch, simply because it added a cute little texture. You could do a running stitch here as well. If you really hate sewing, you could even use a fabric/all purpose crafting glue – just make sure the glue doesn’t get in the way of any beading you’d like to add.

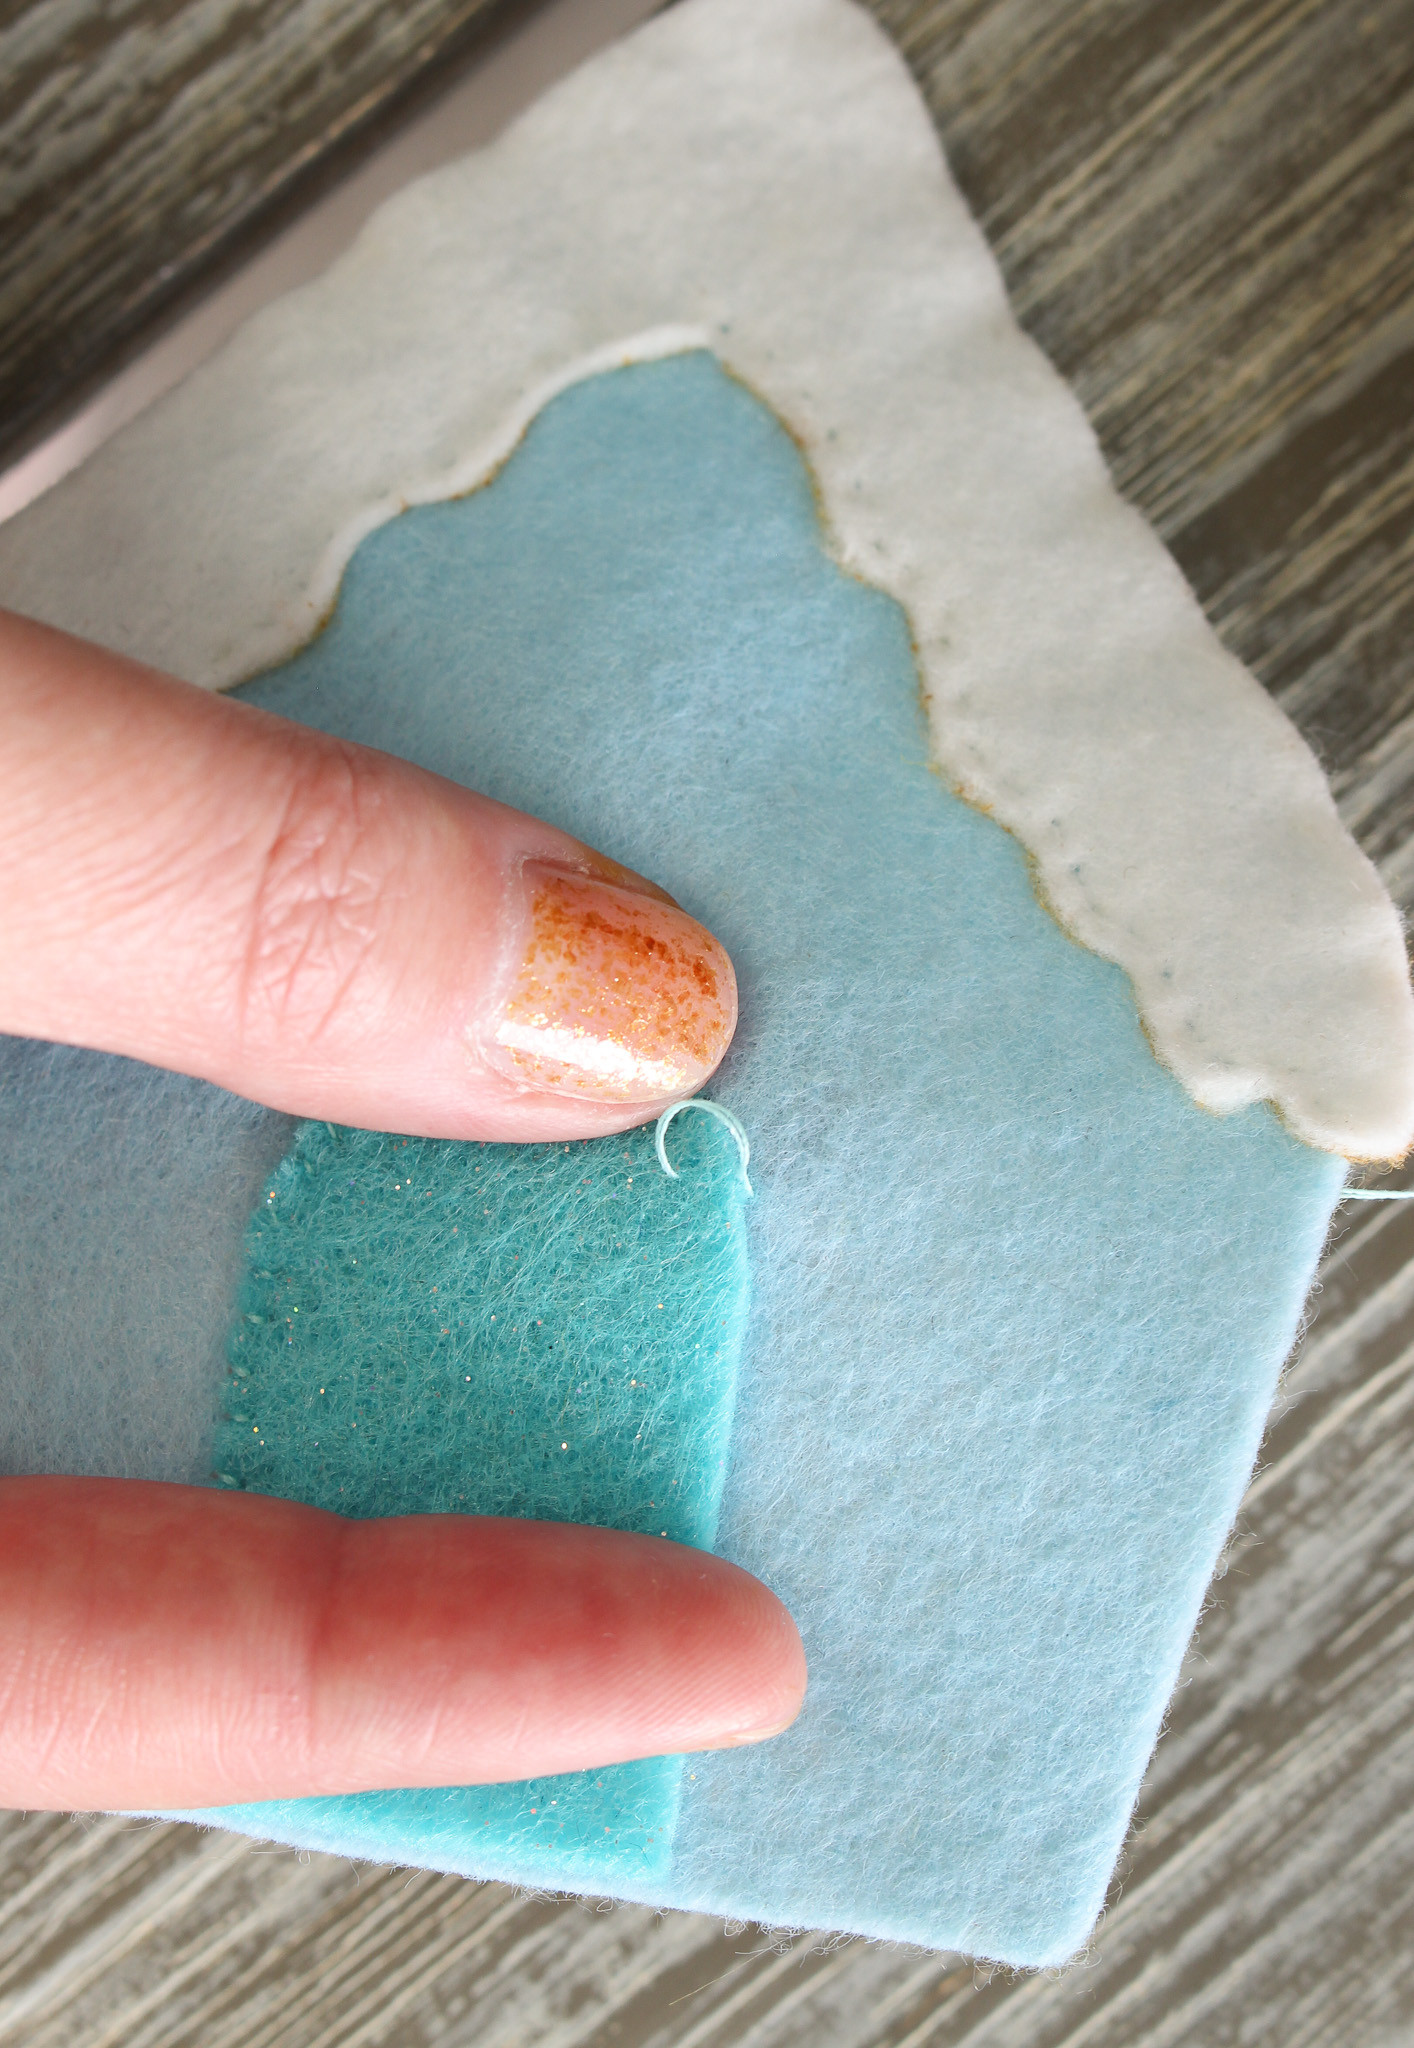
Once the details are stitched in place, you will have something that looks like this:

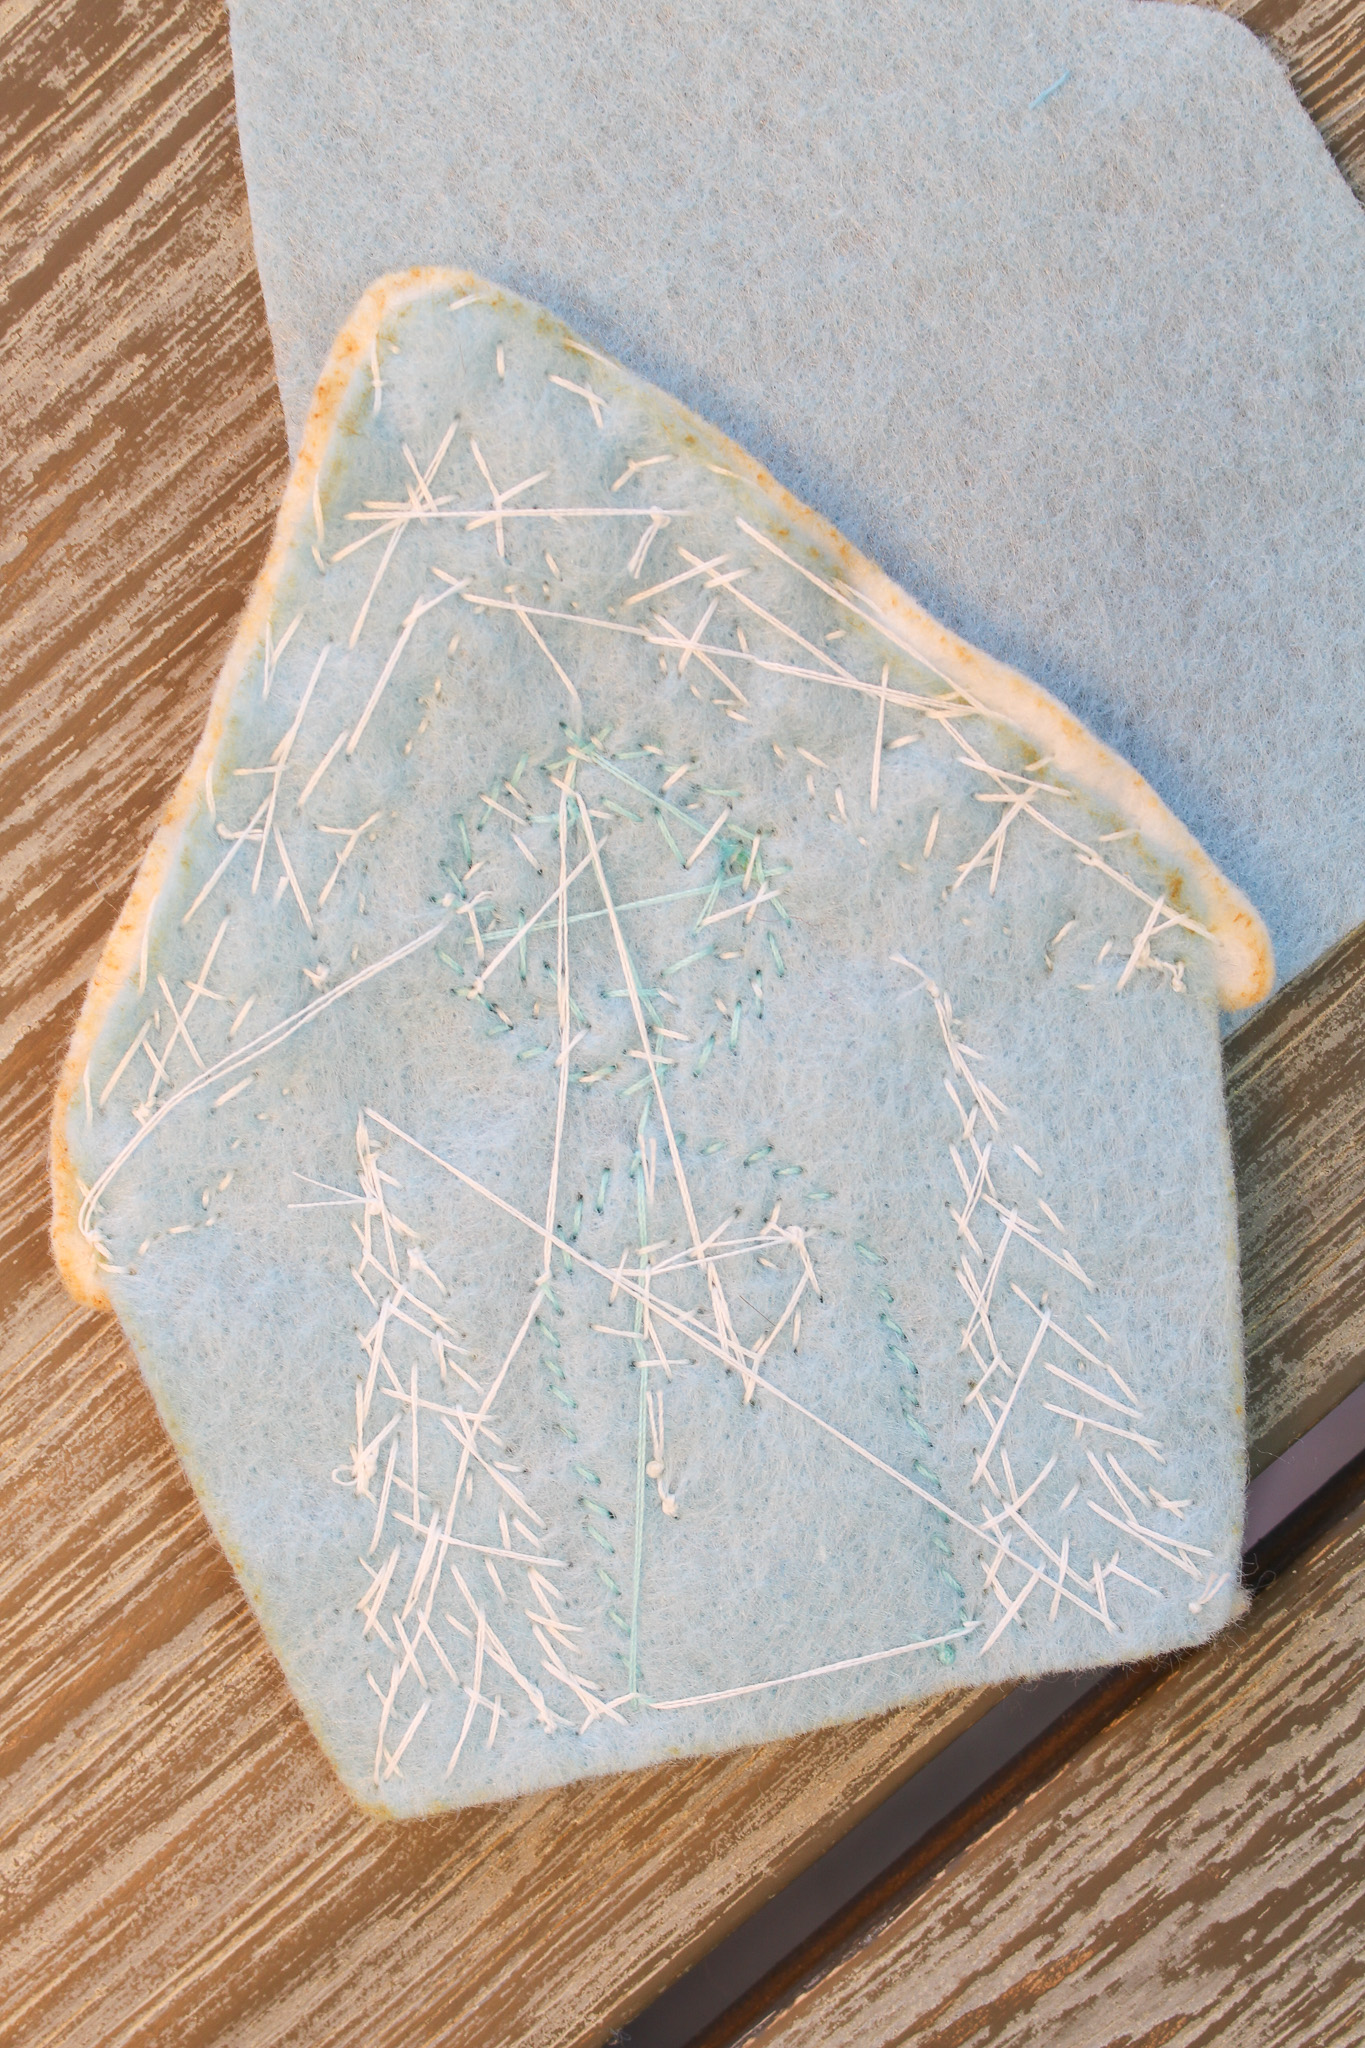
it’s okay if the back is messy because it will be hidden!
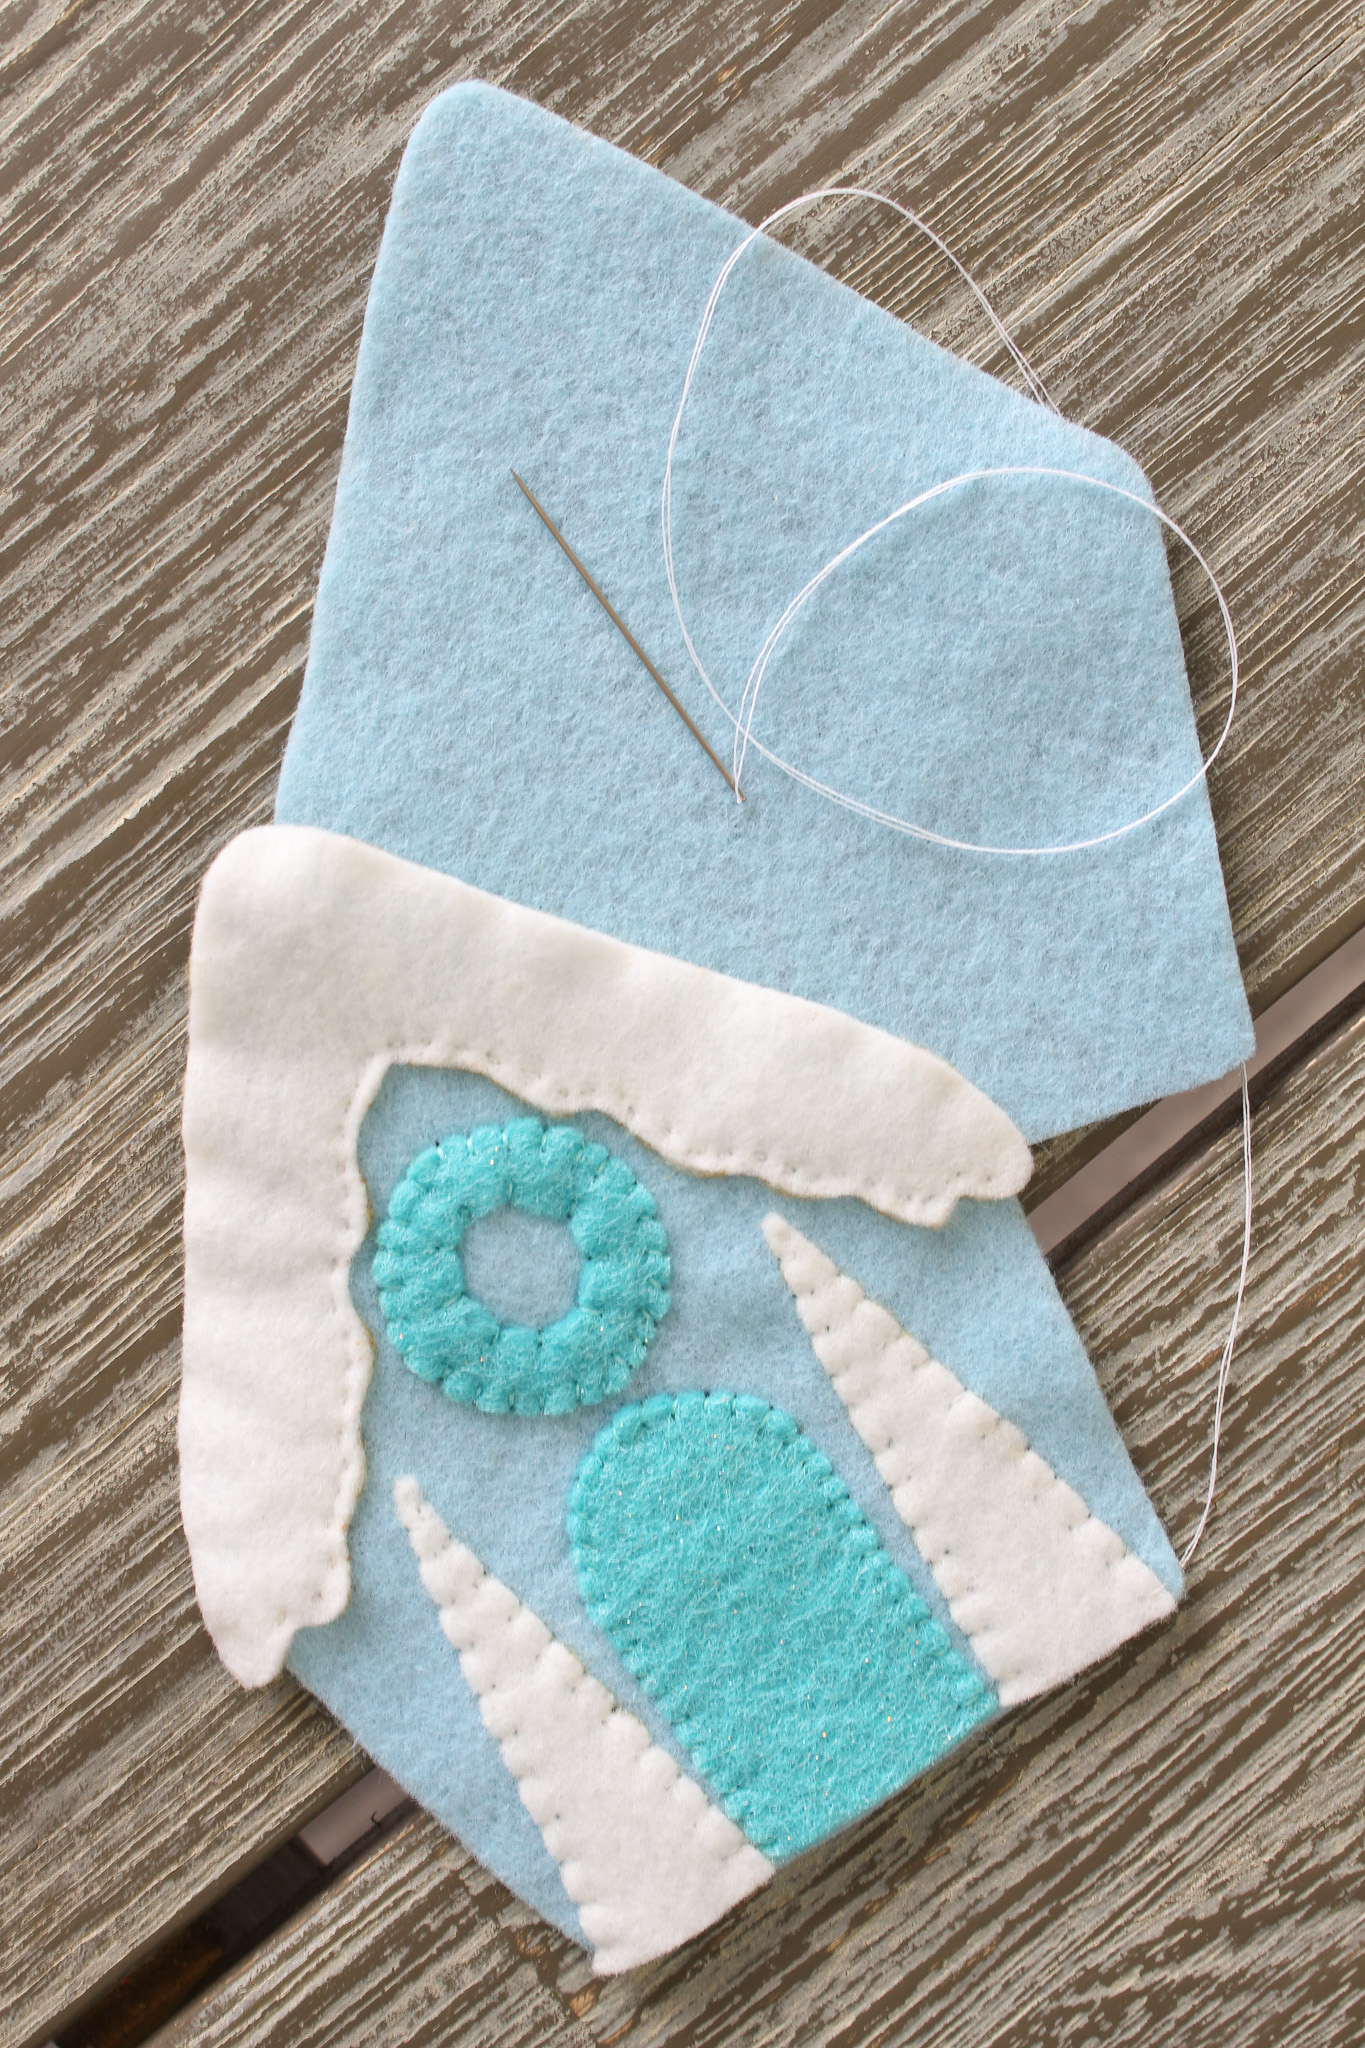
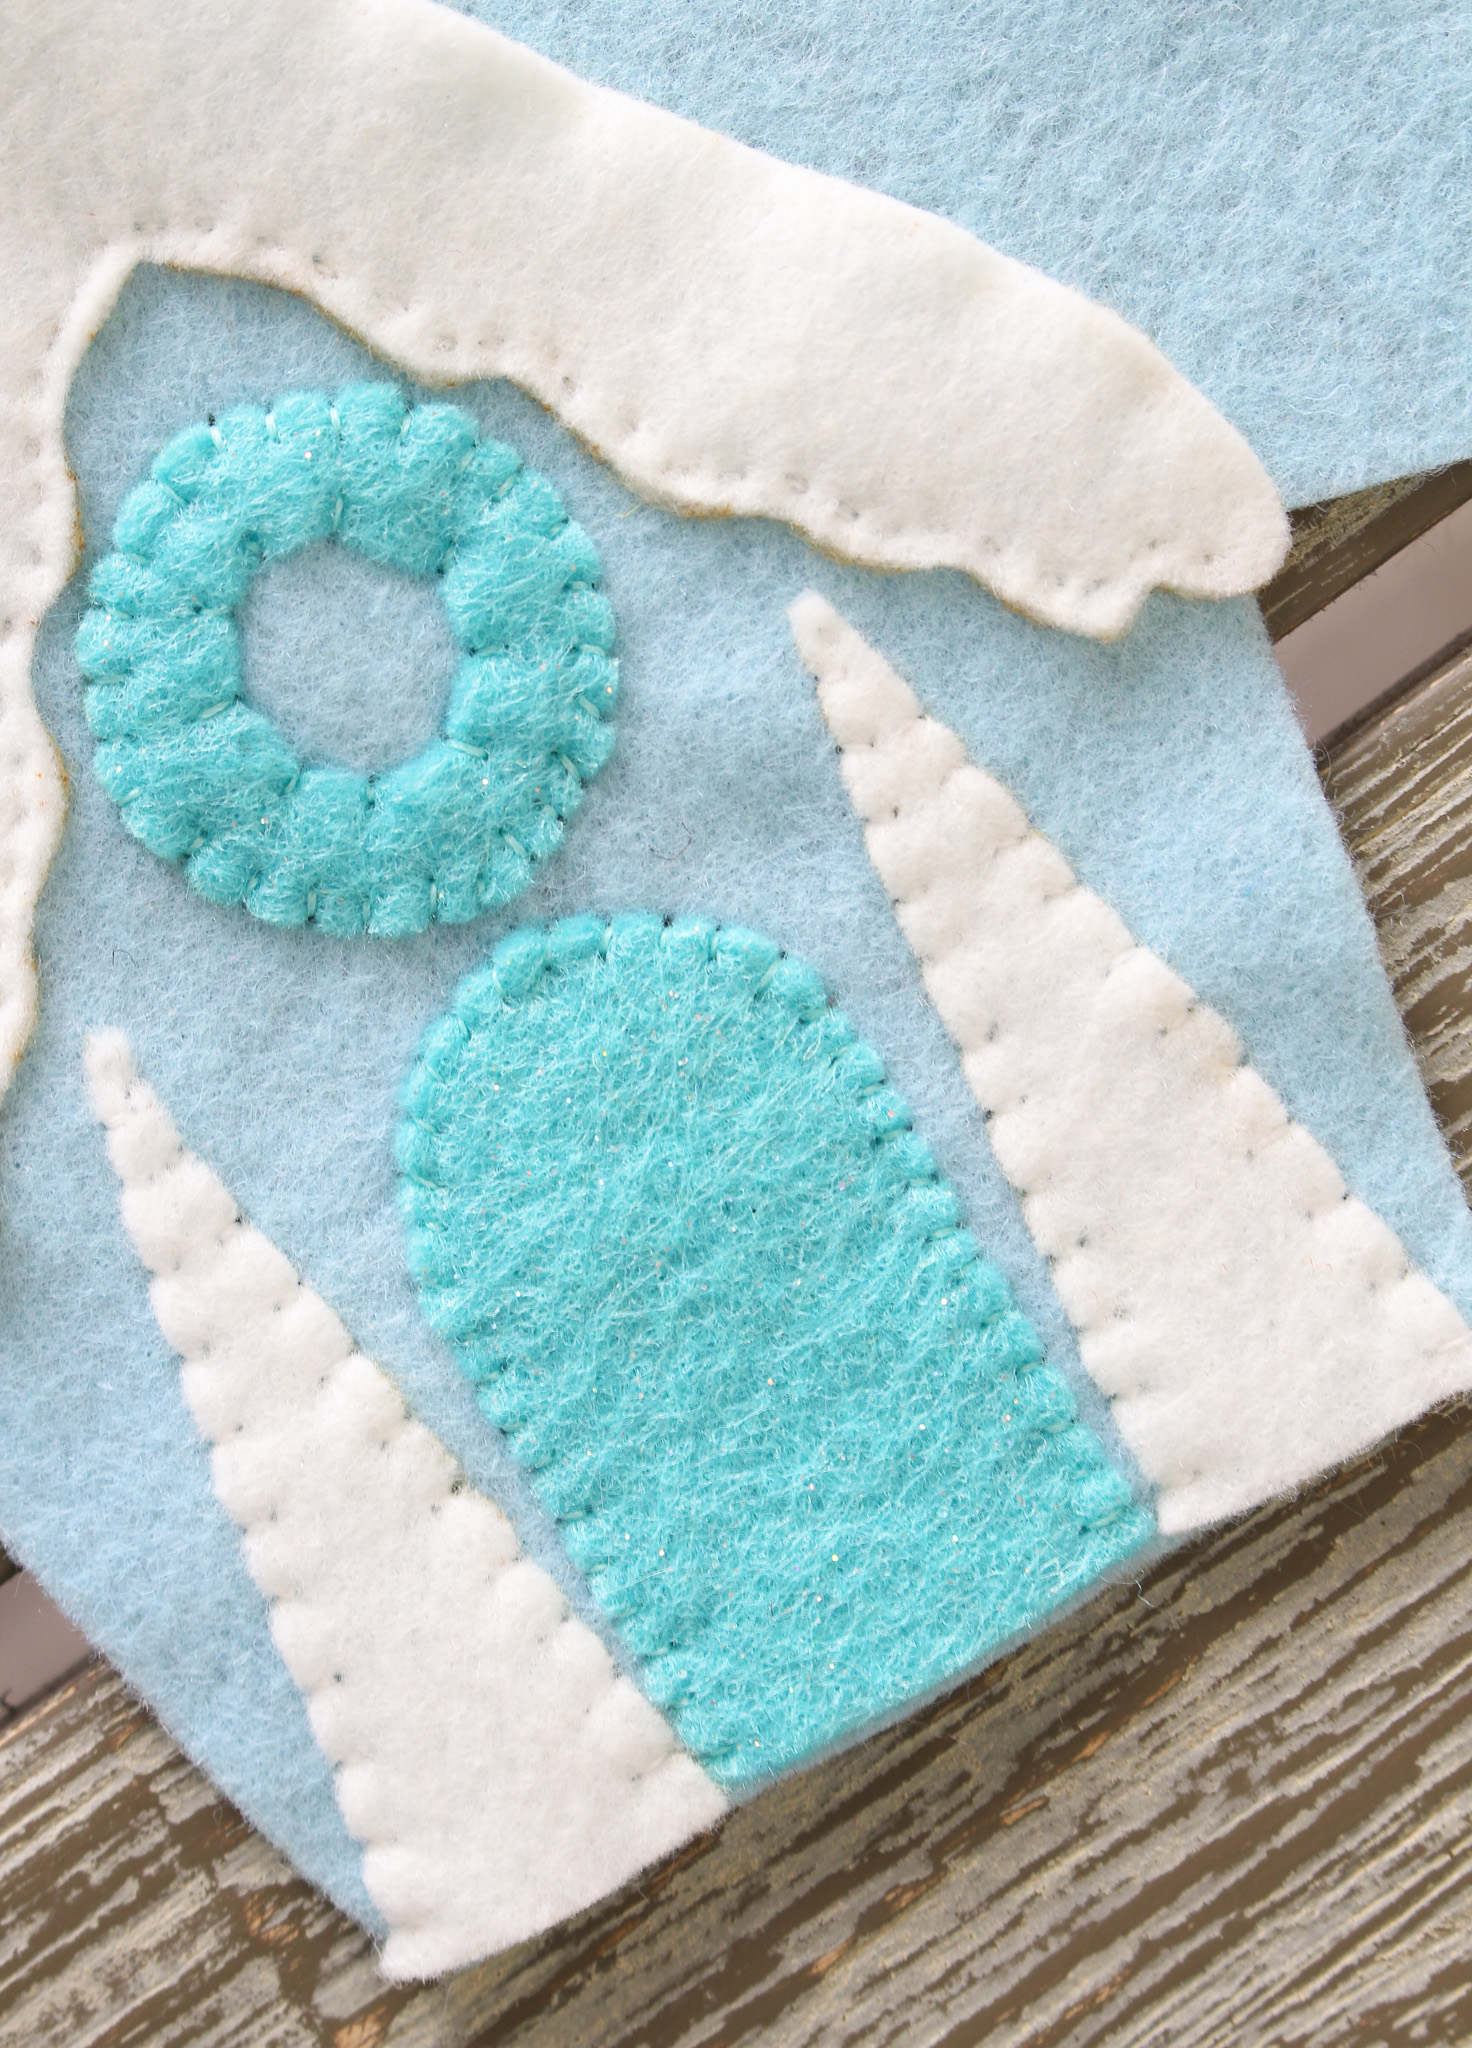
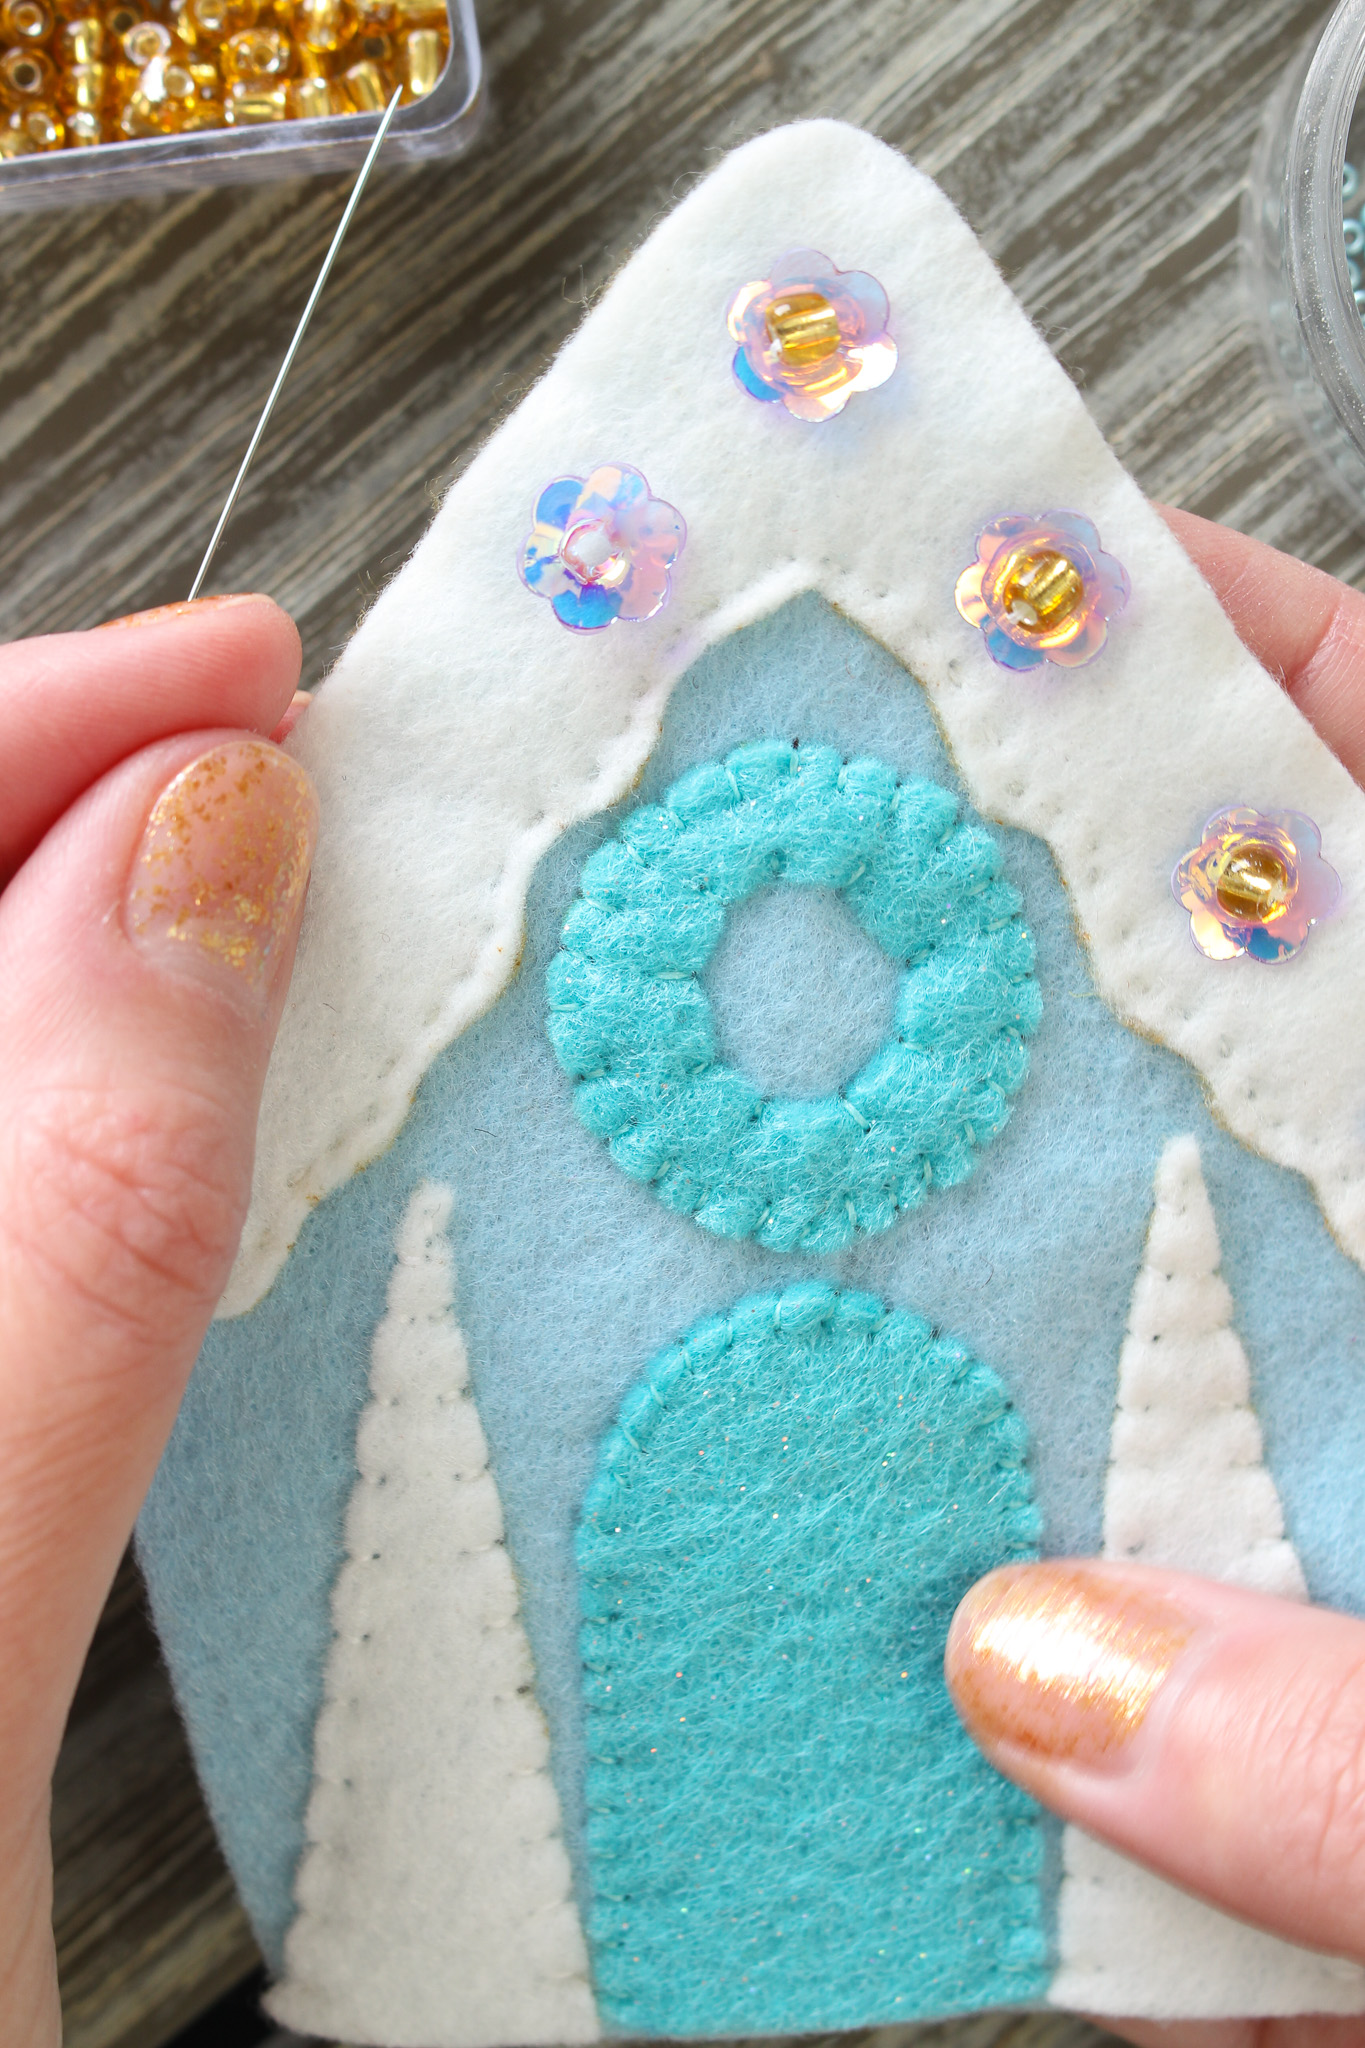
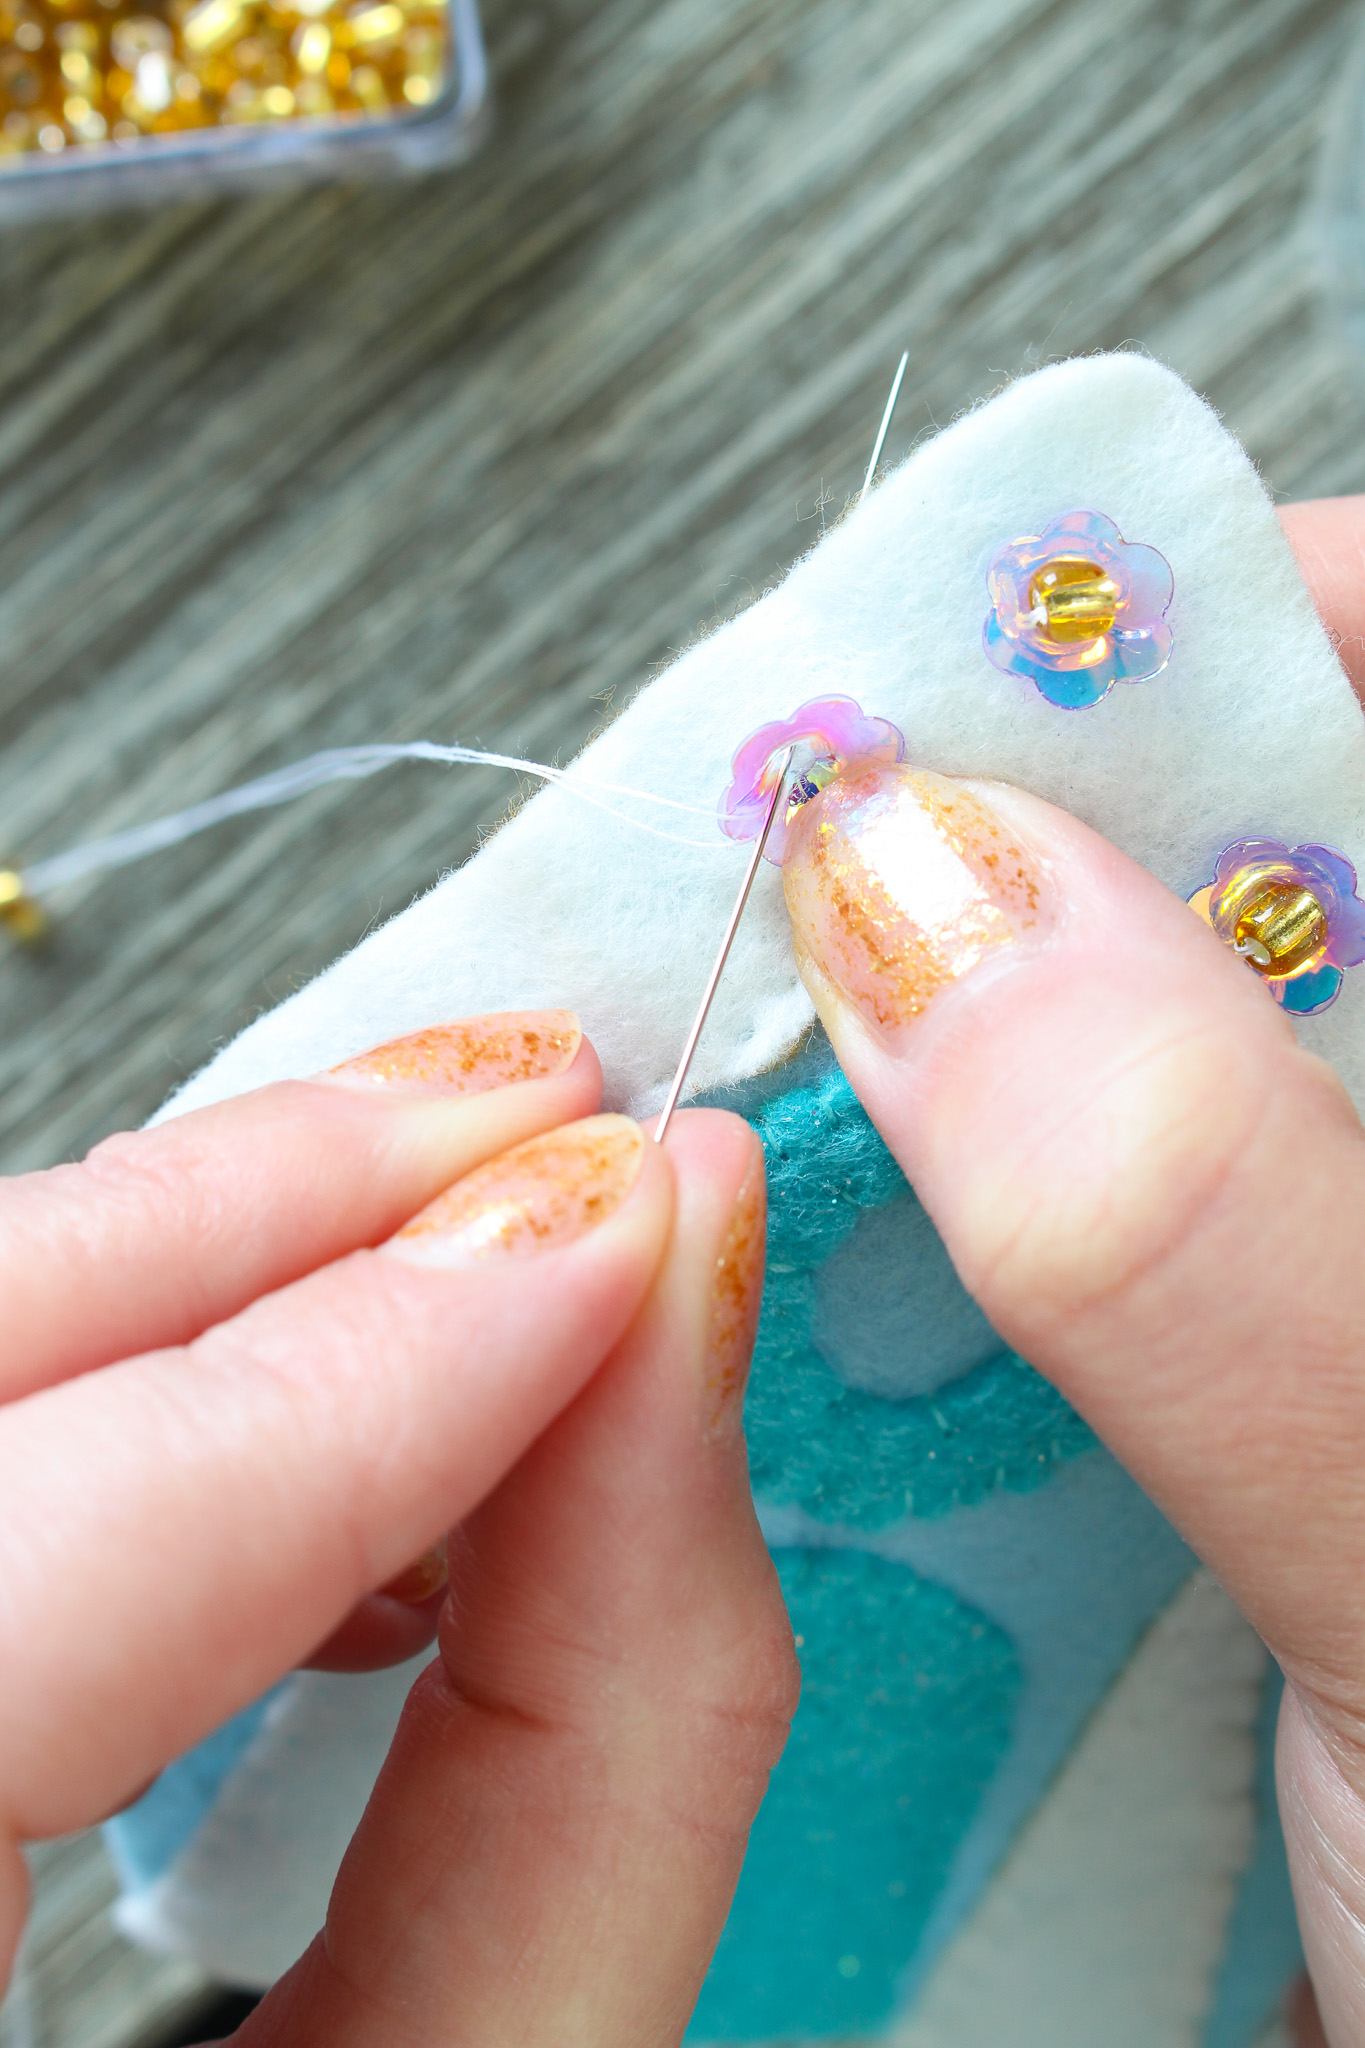
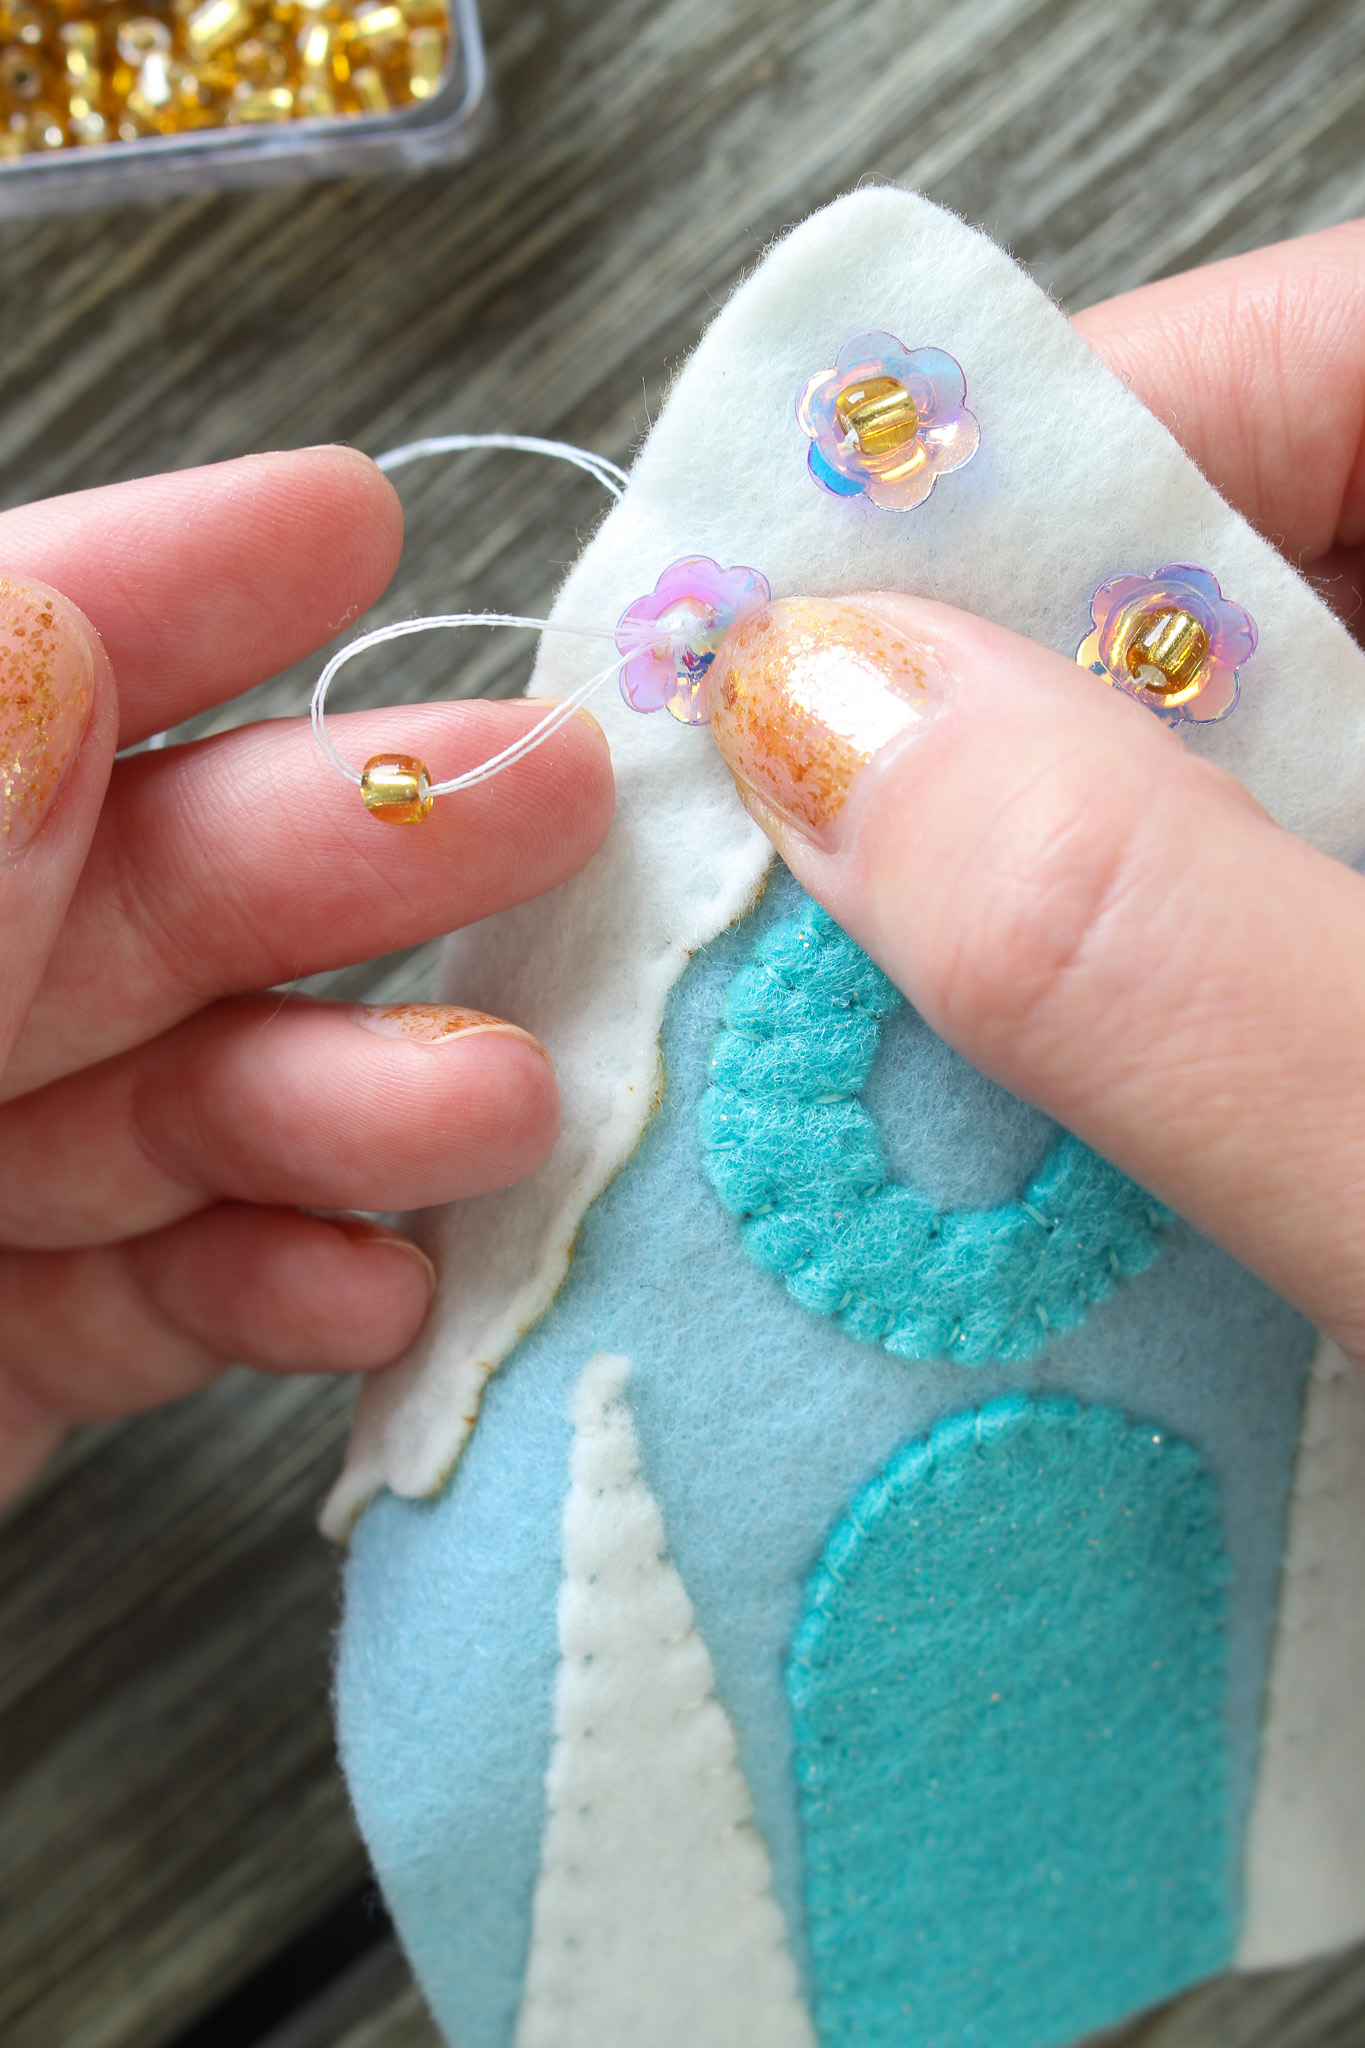
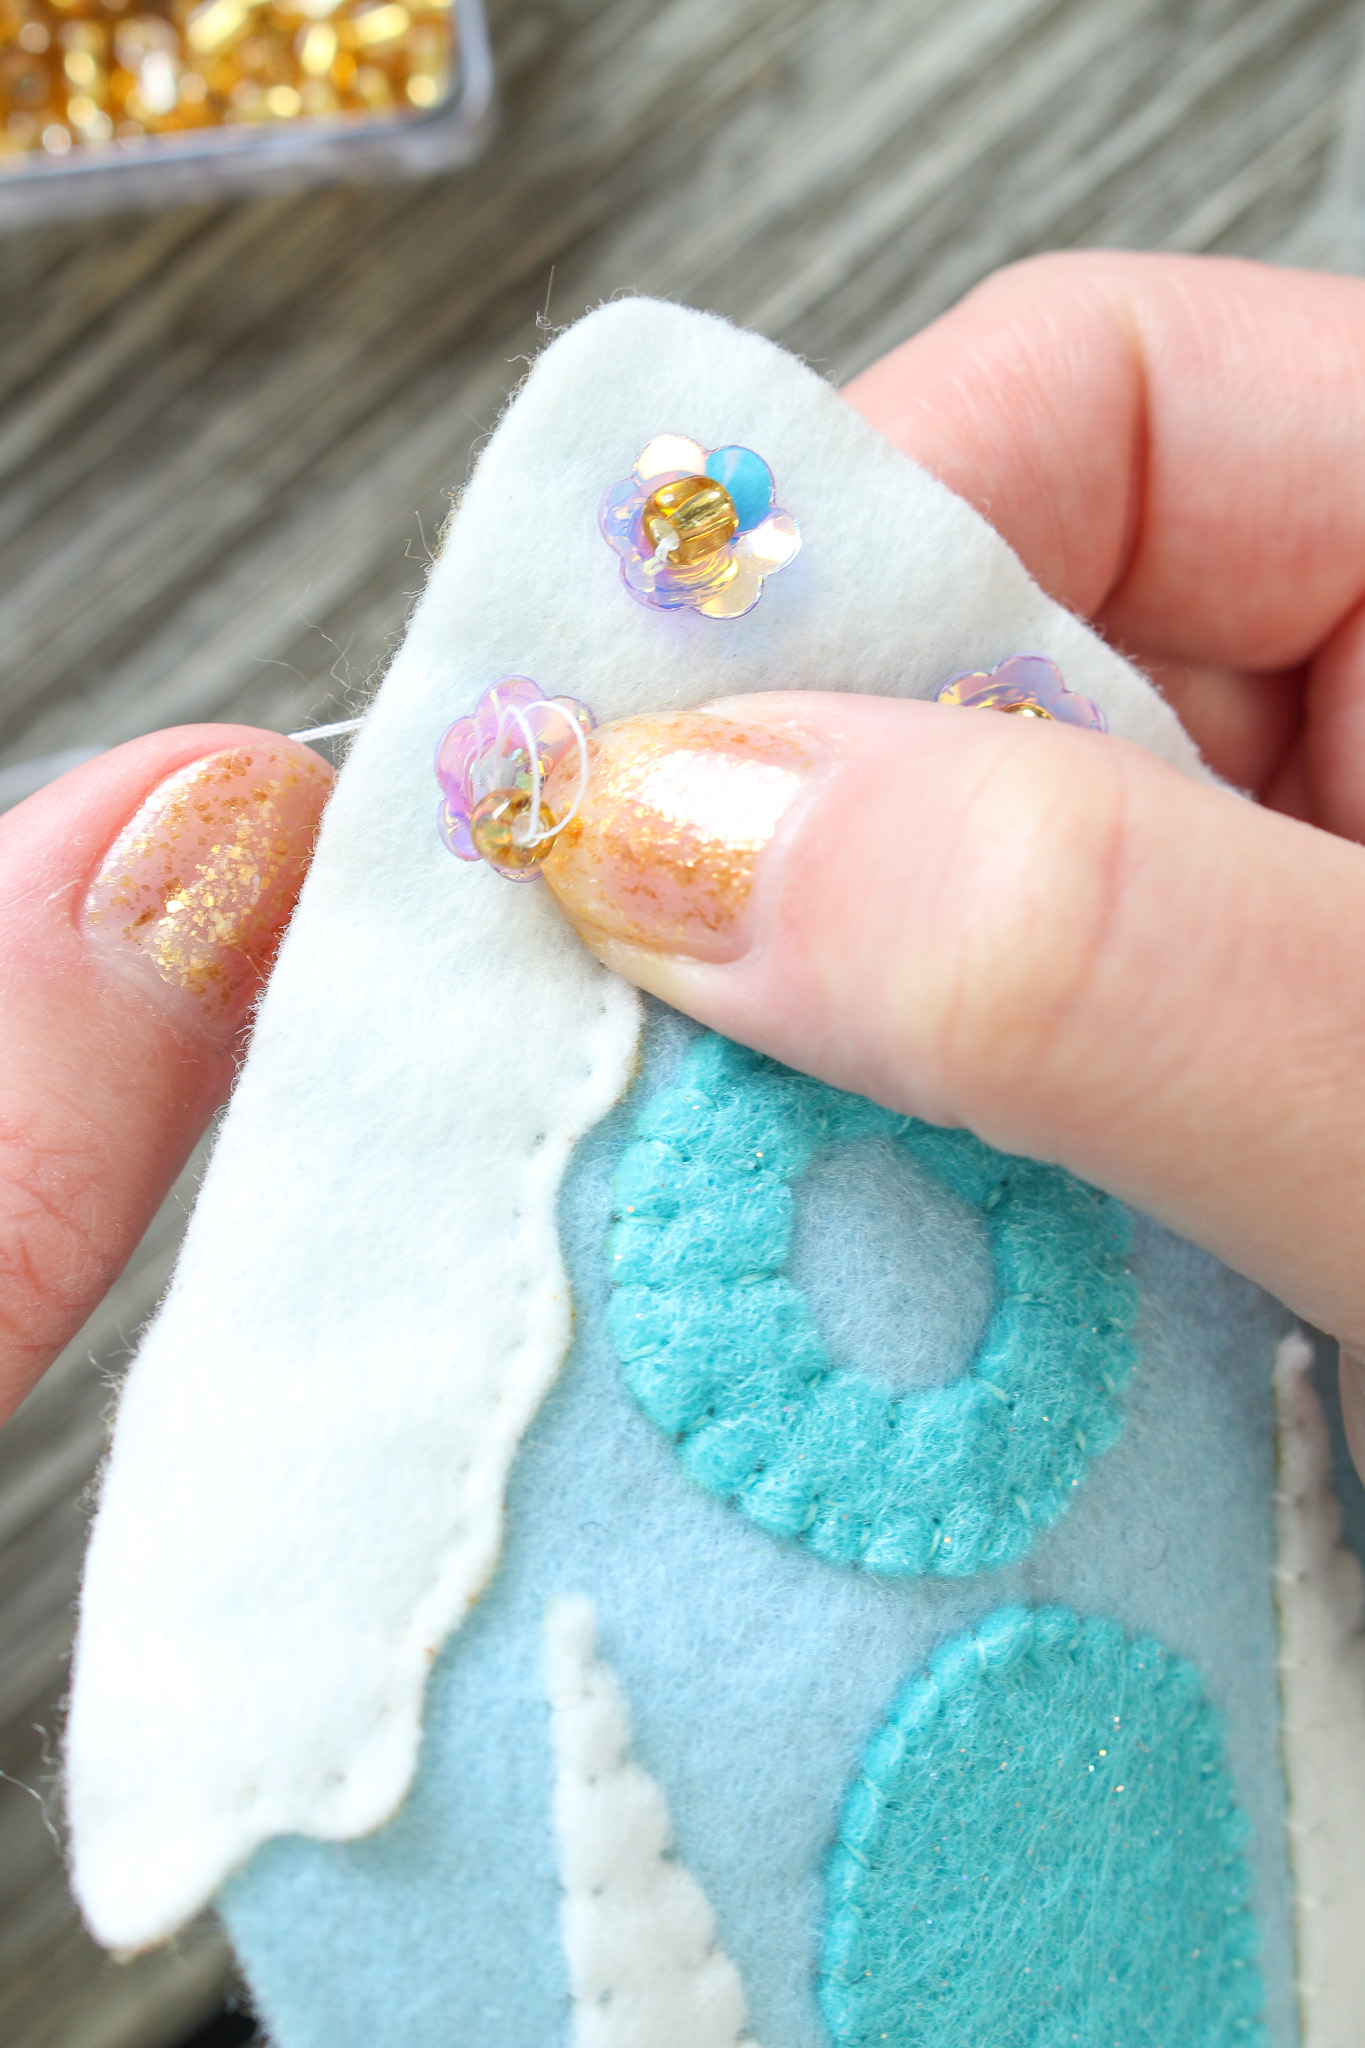
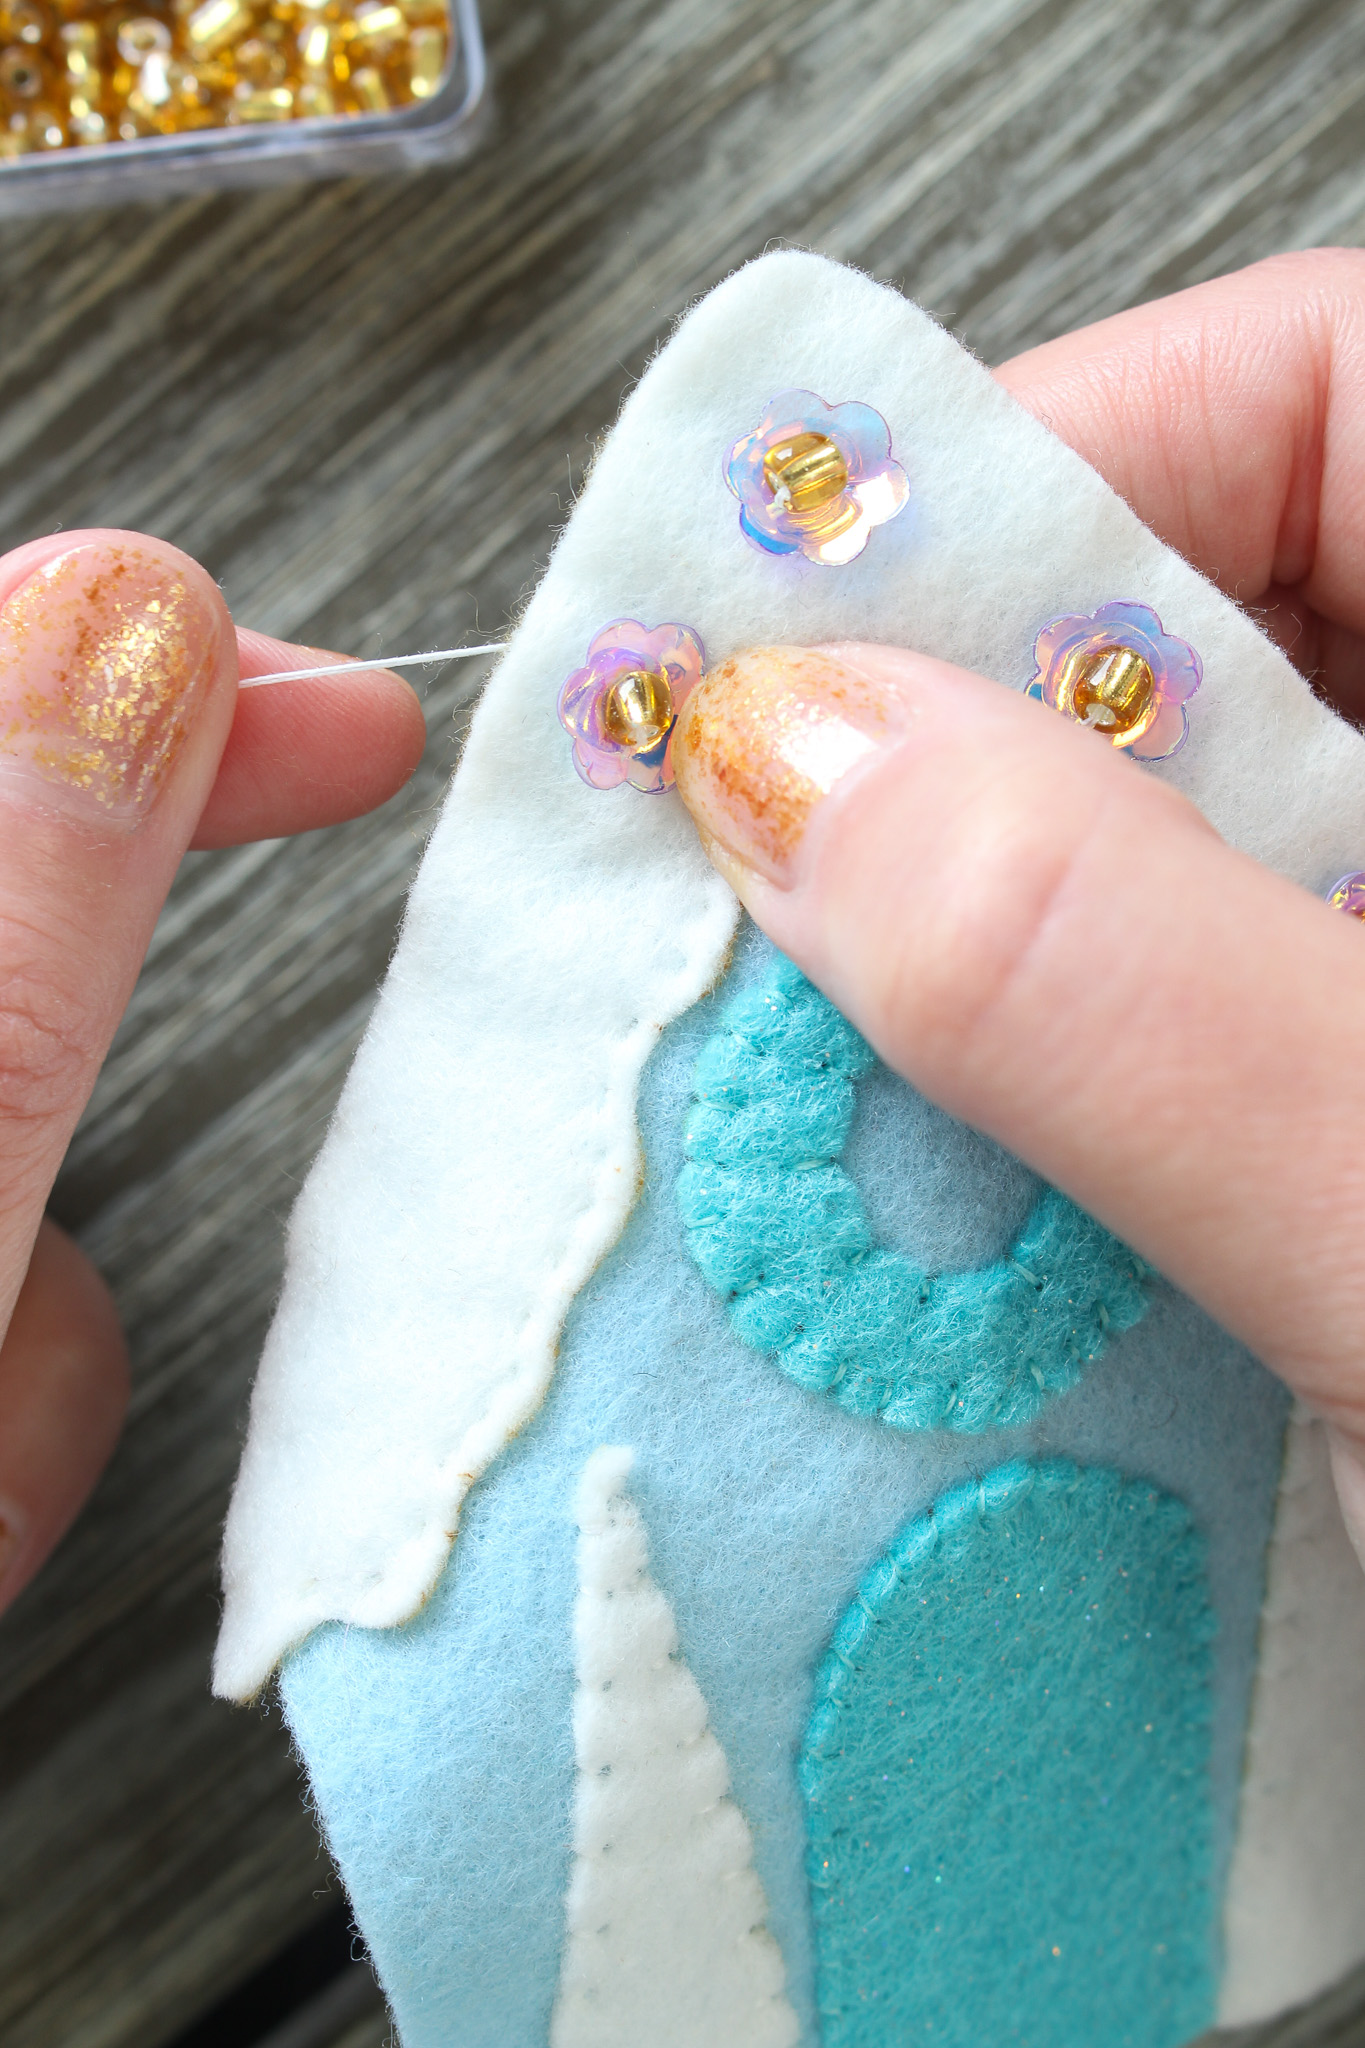
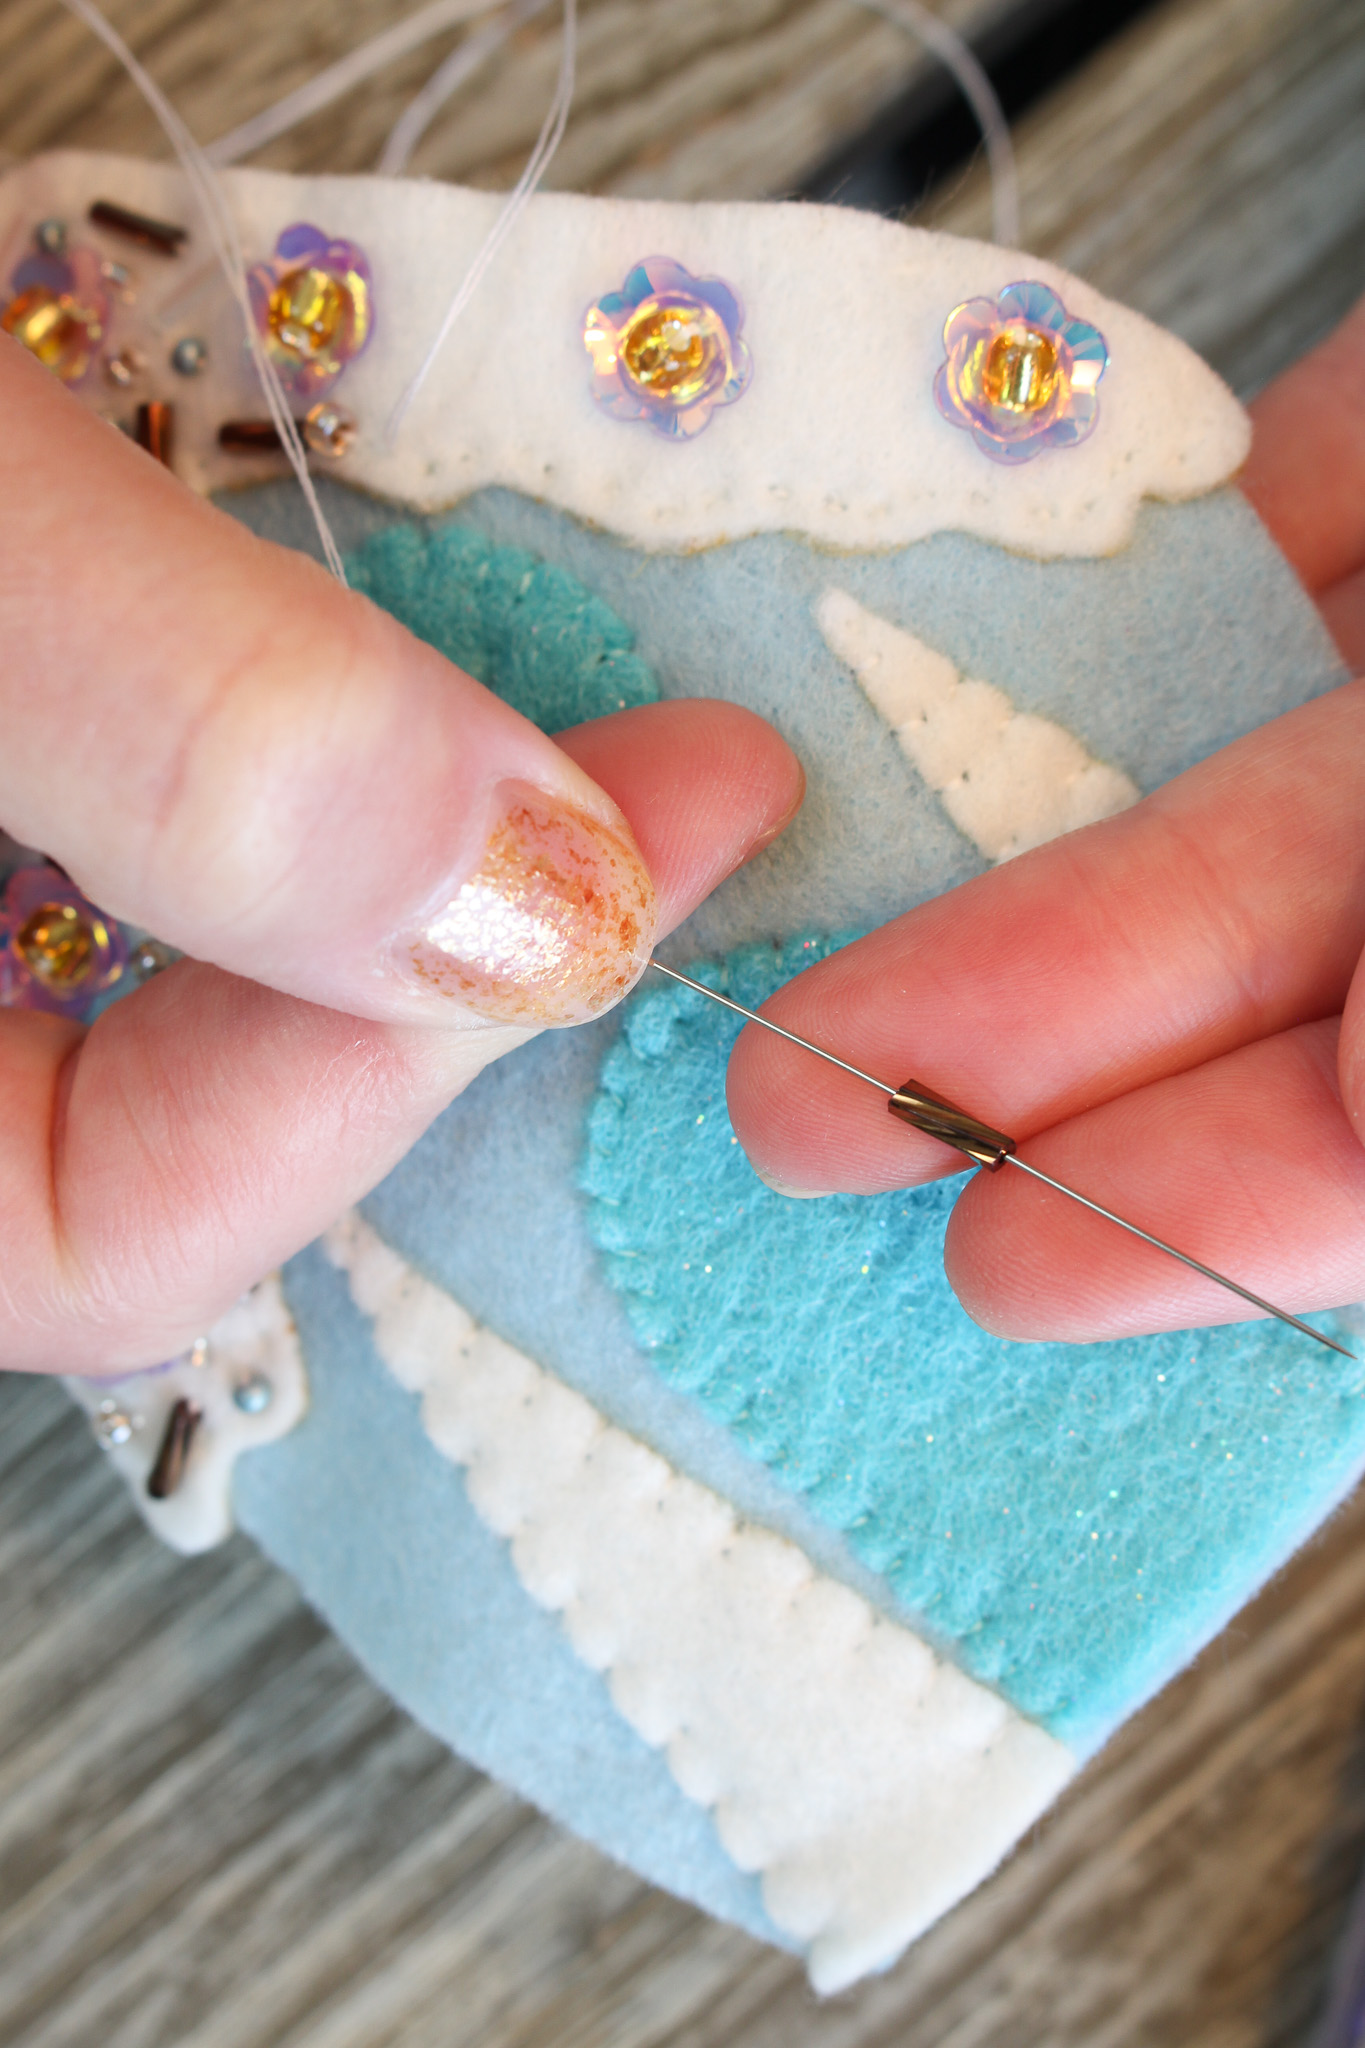
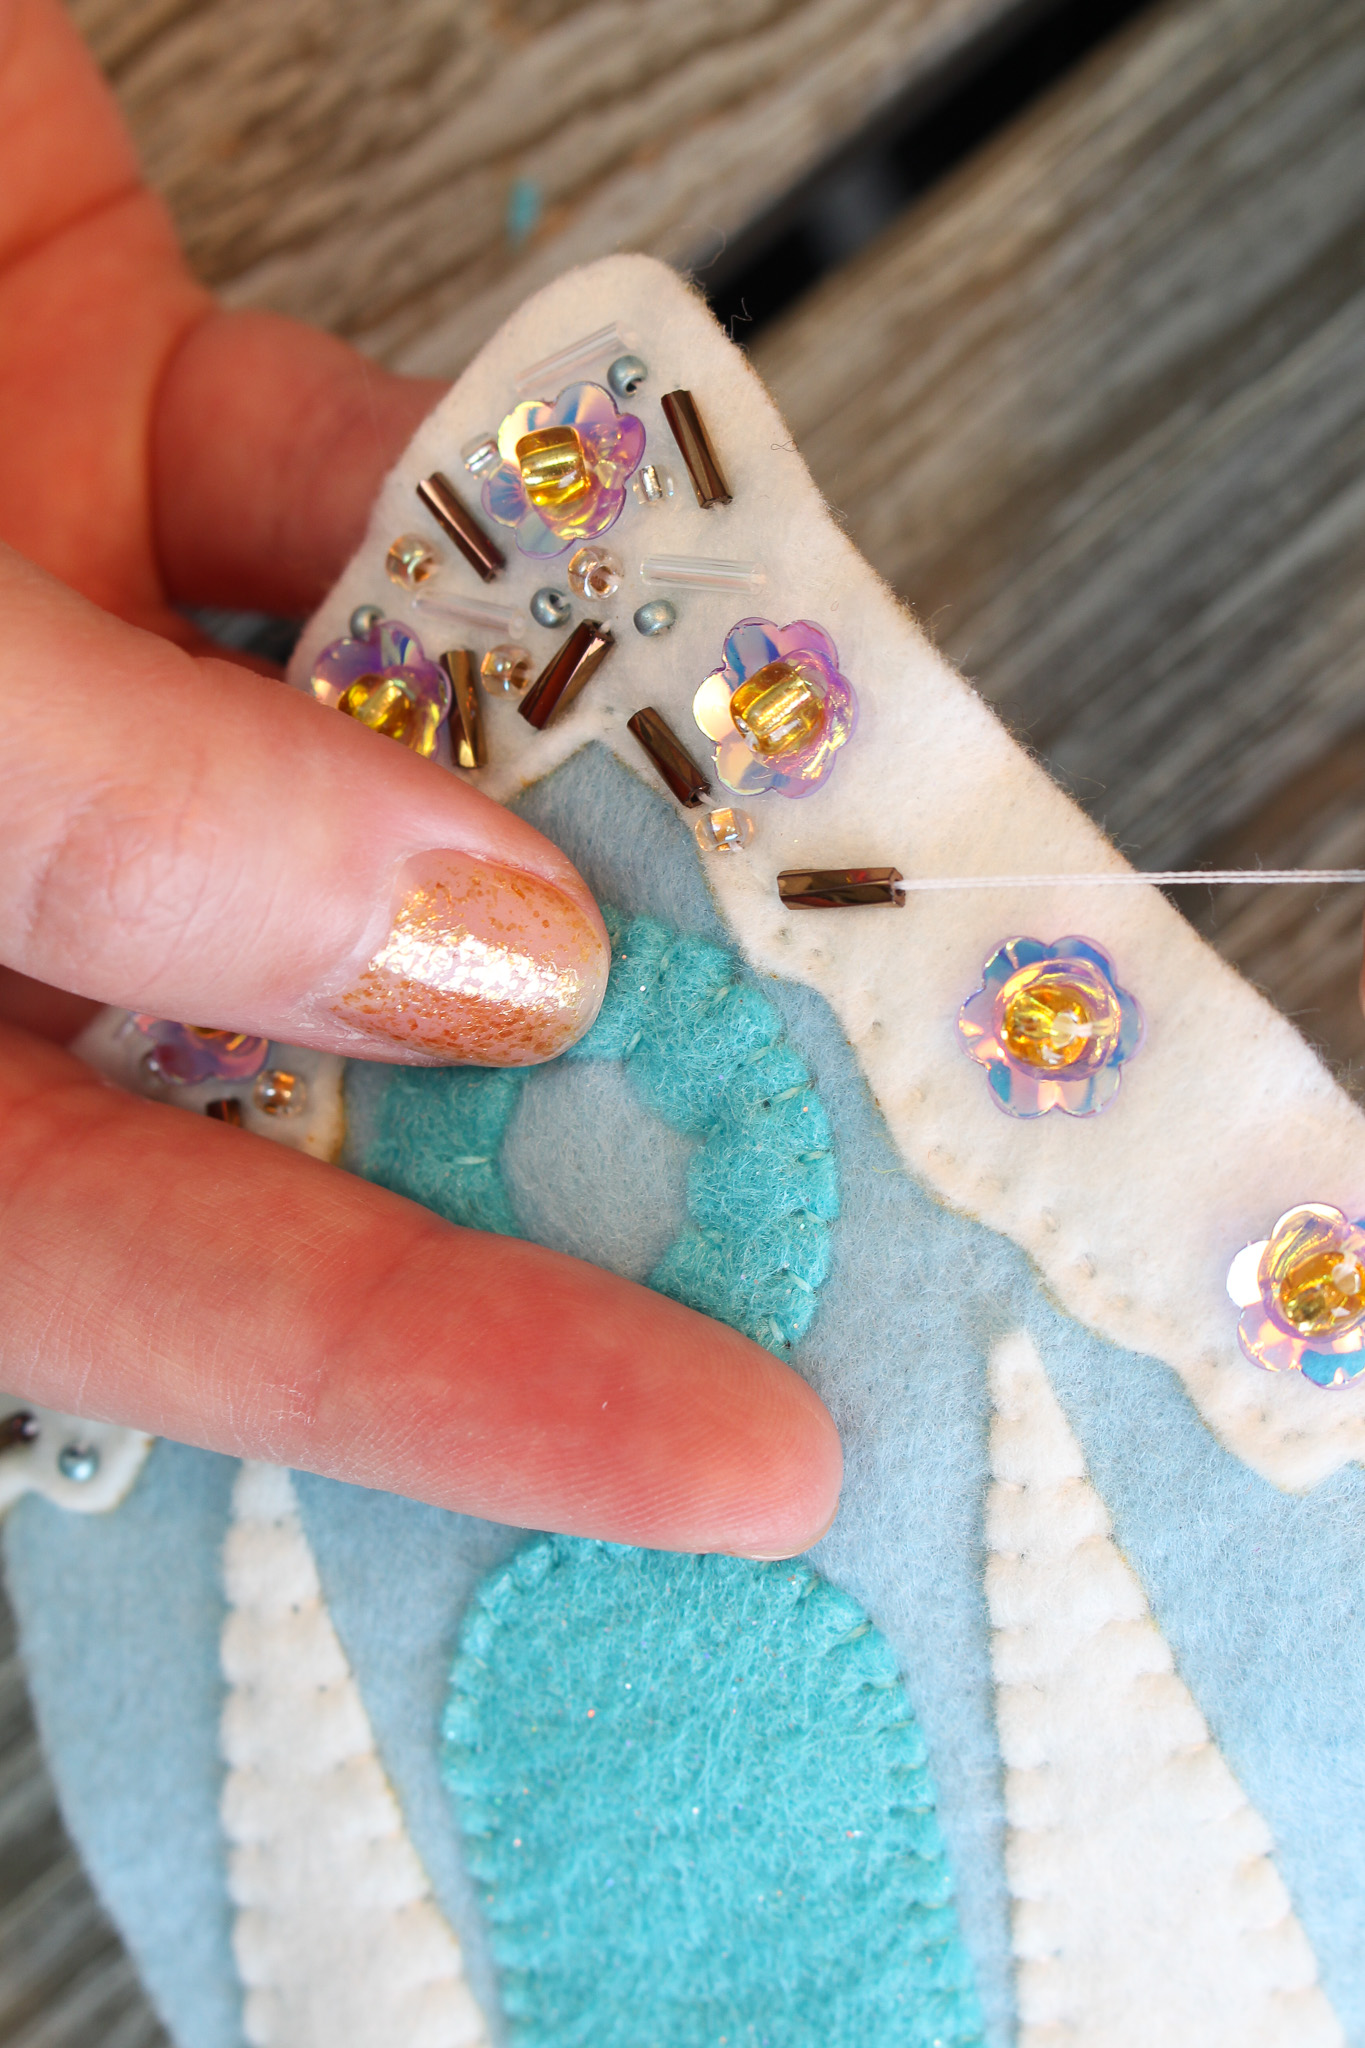
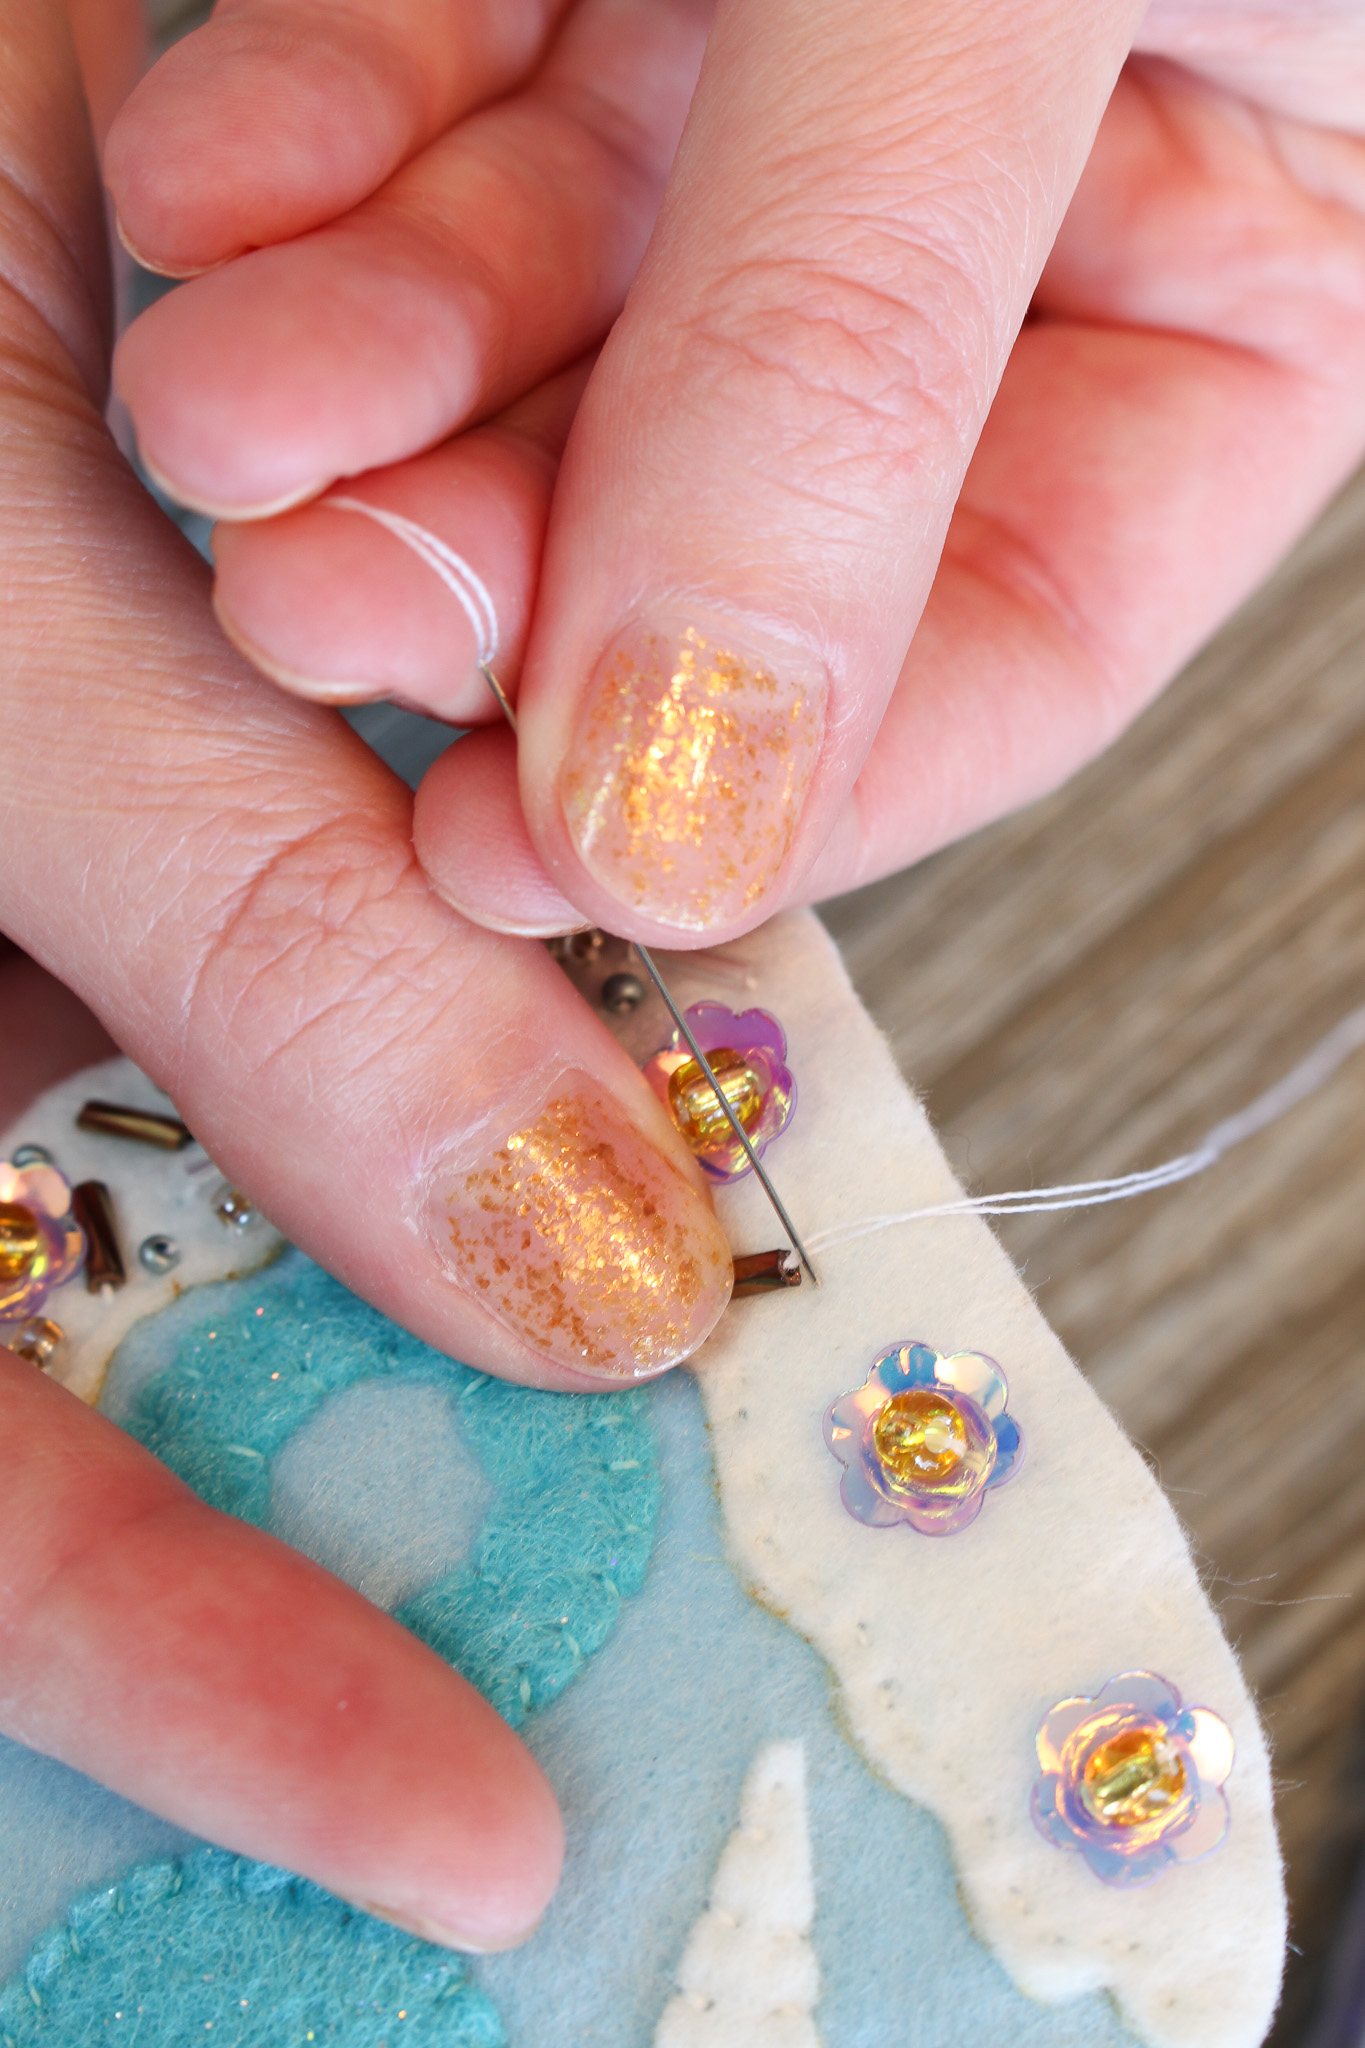
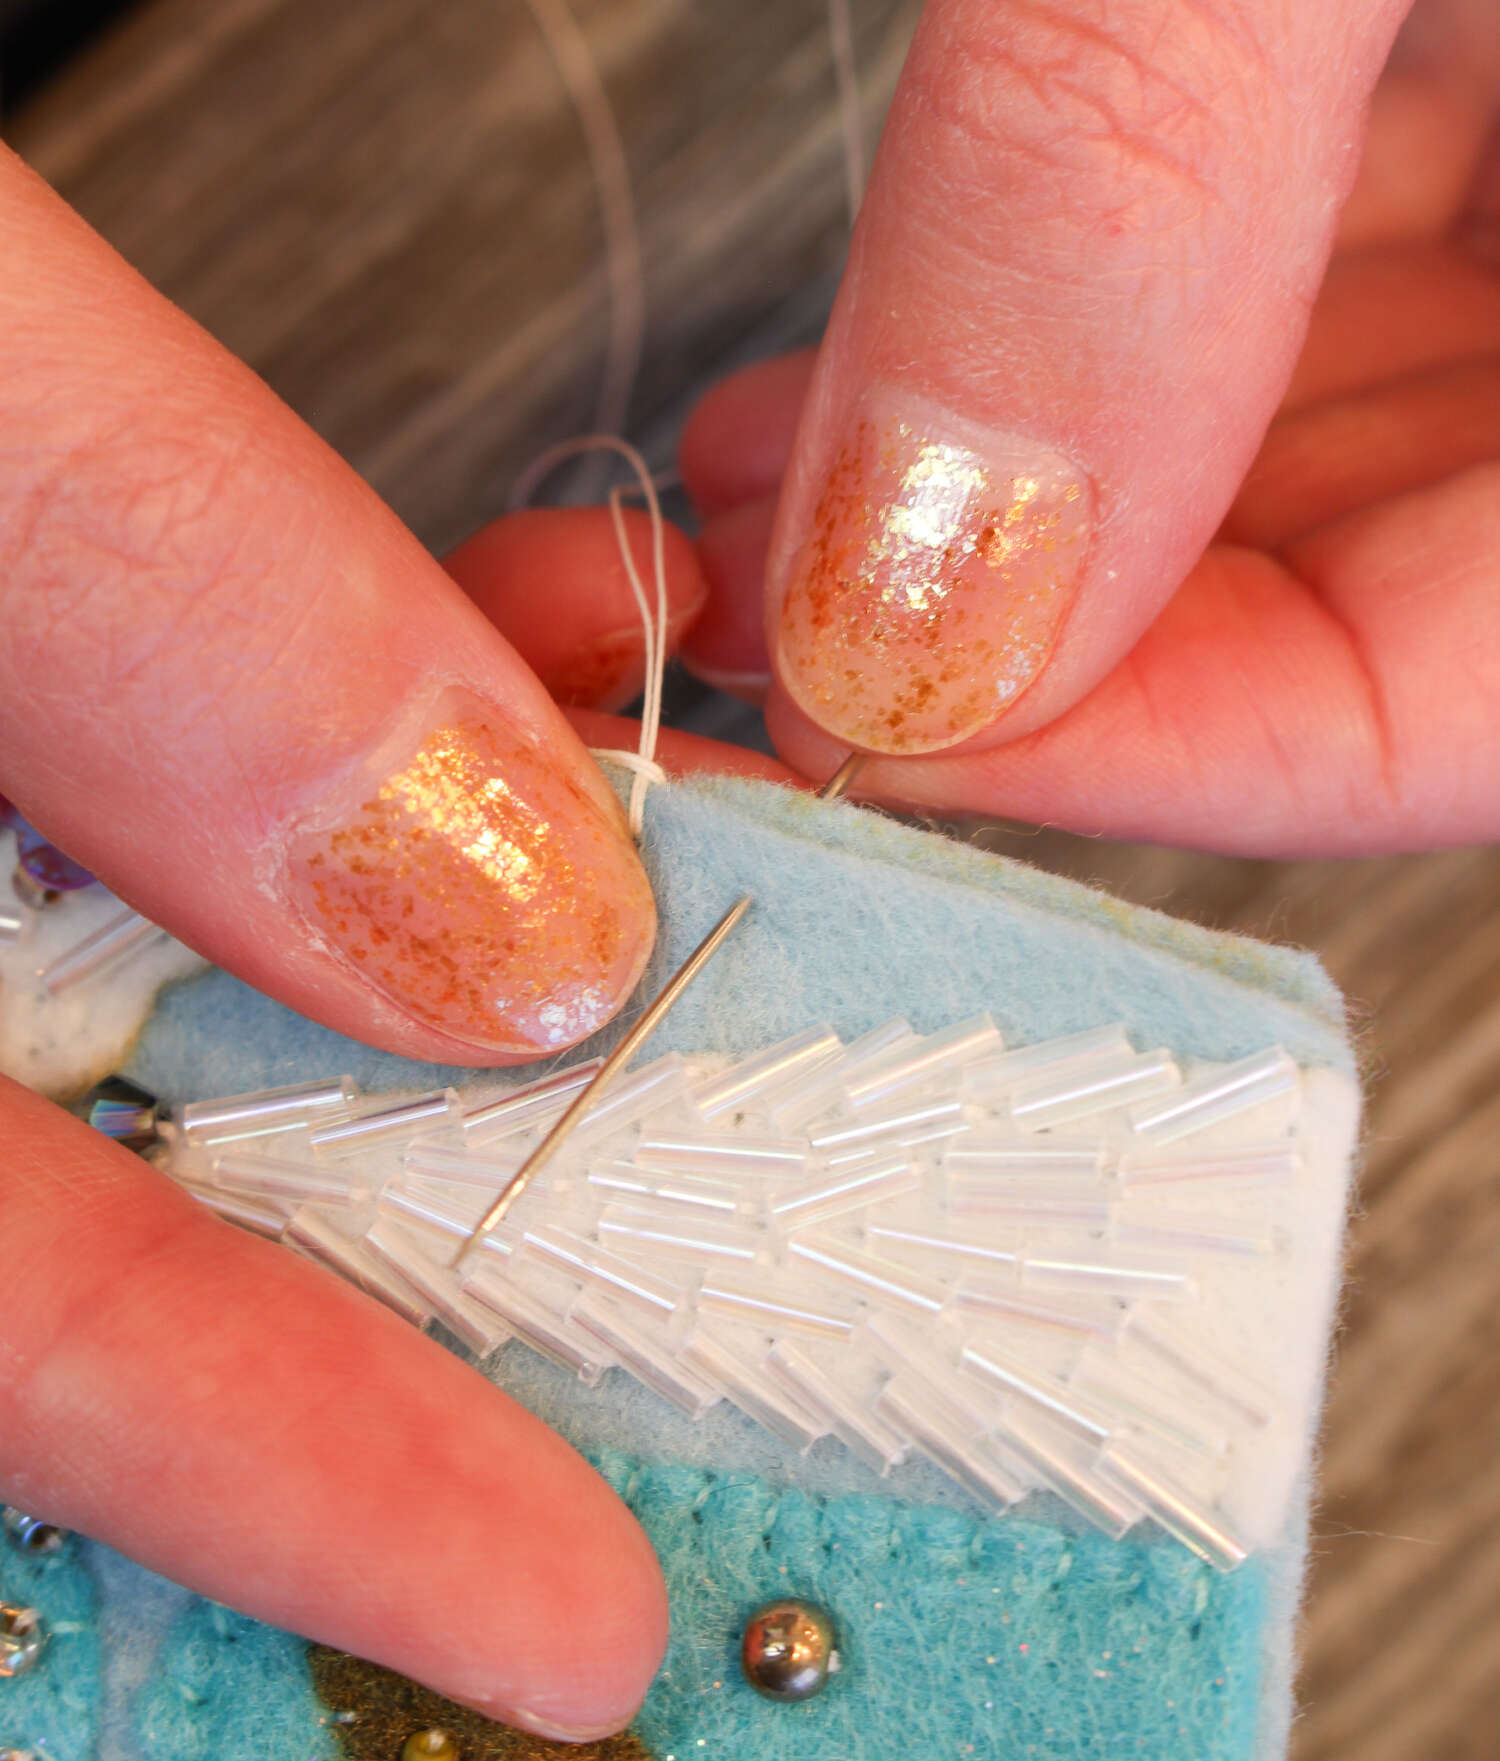
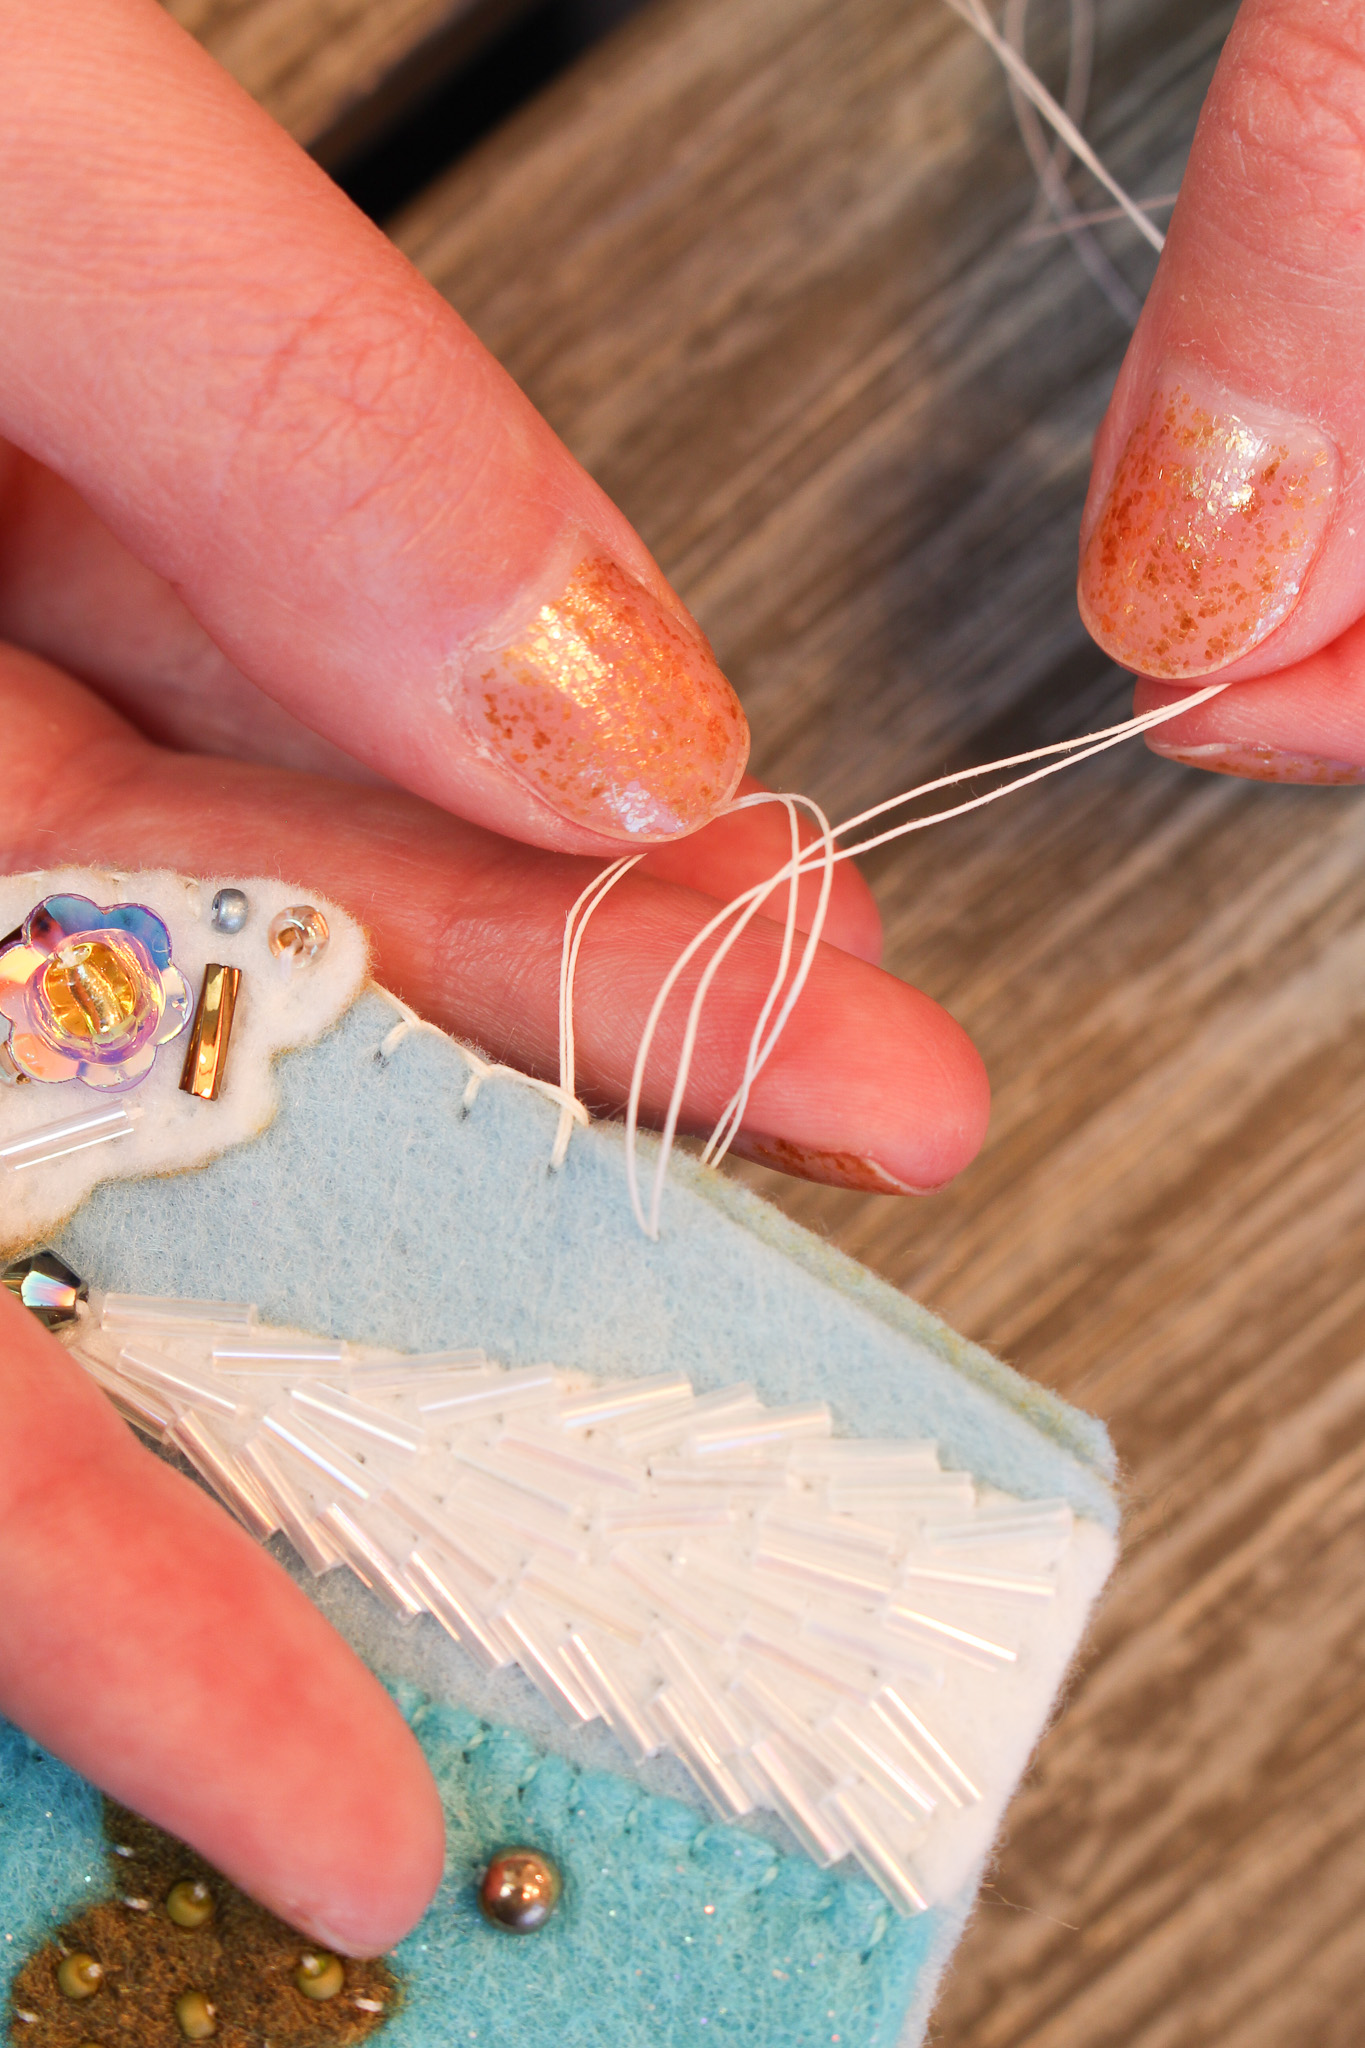
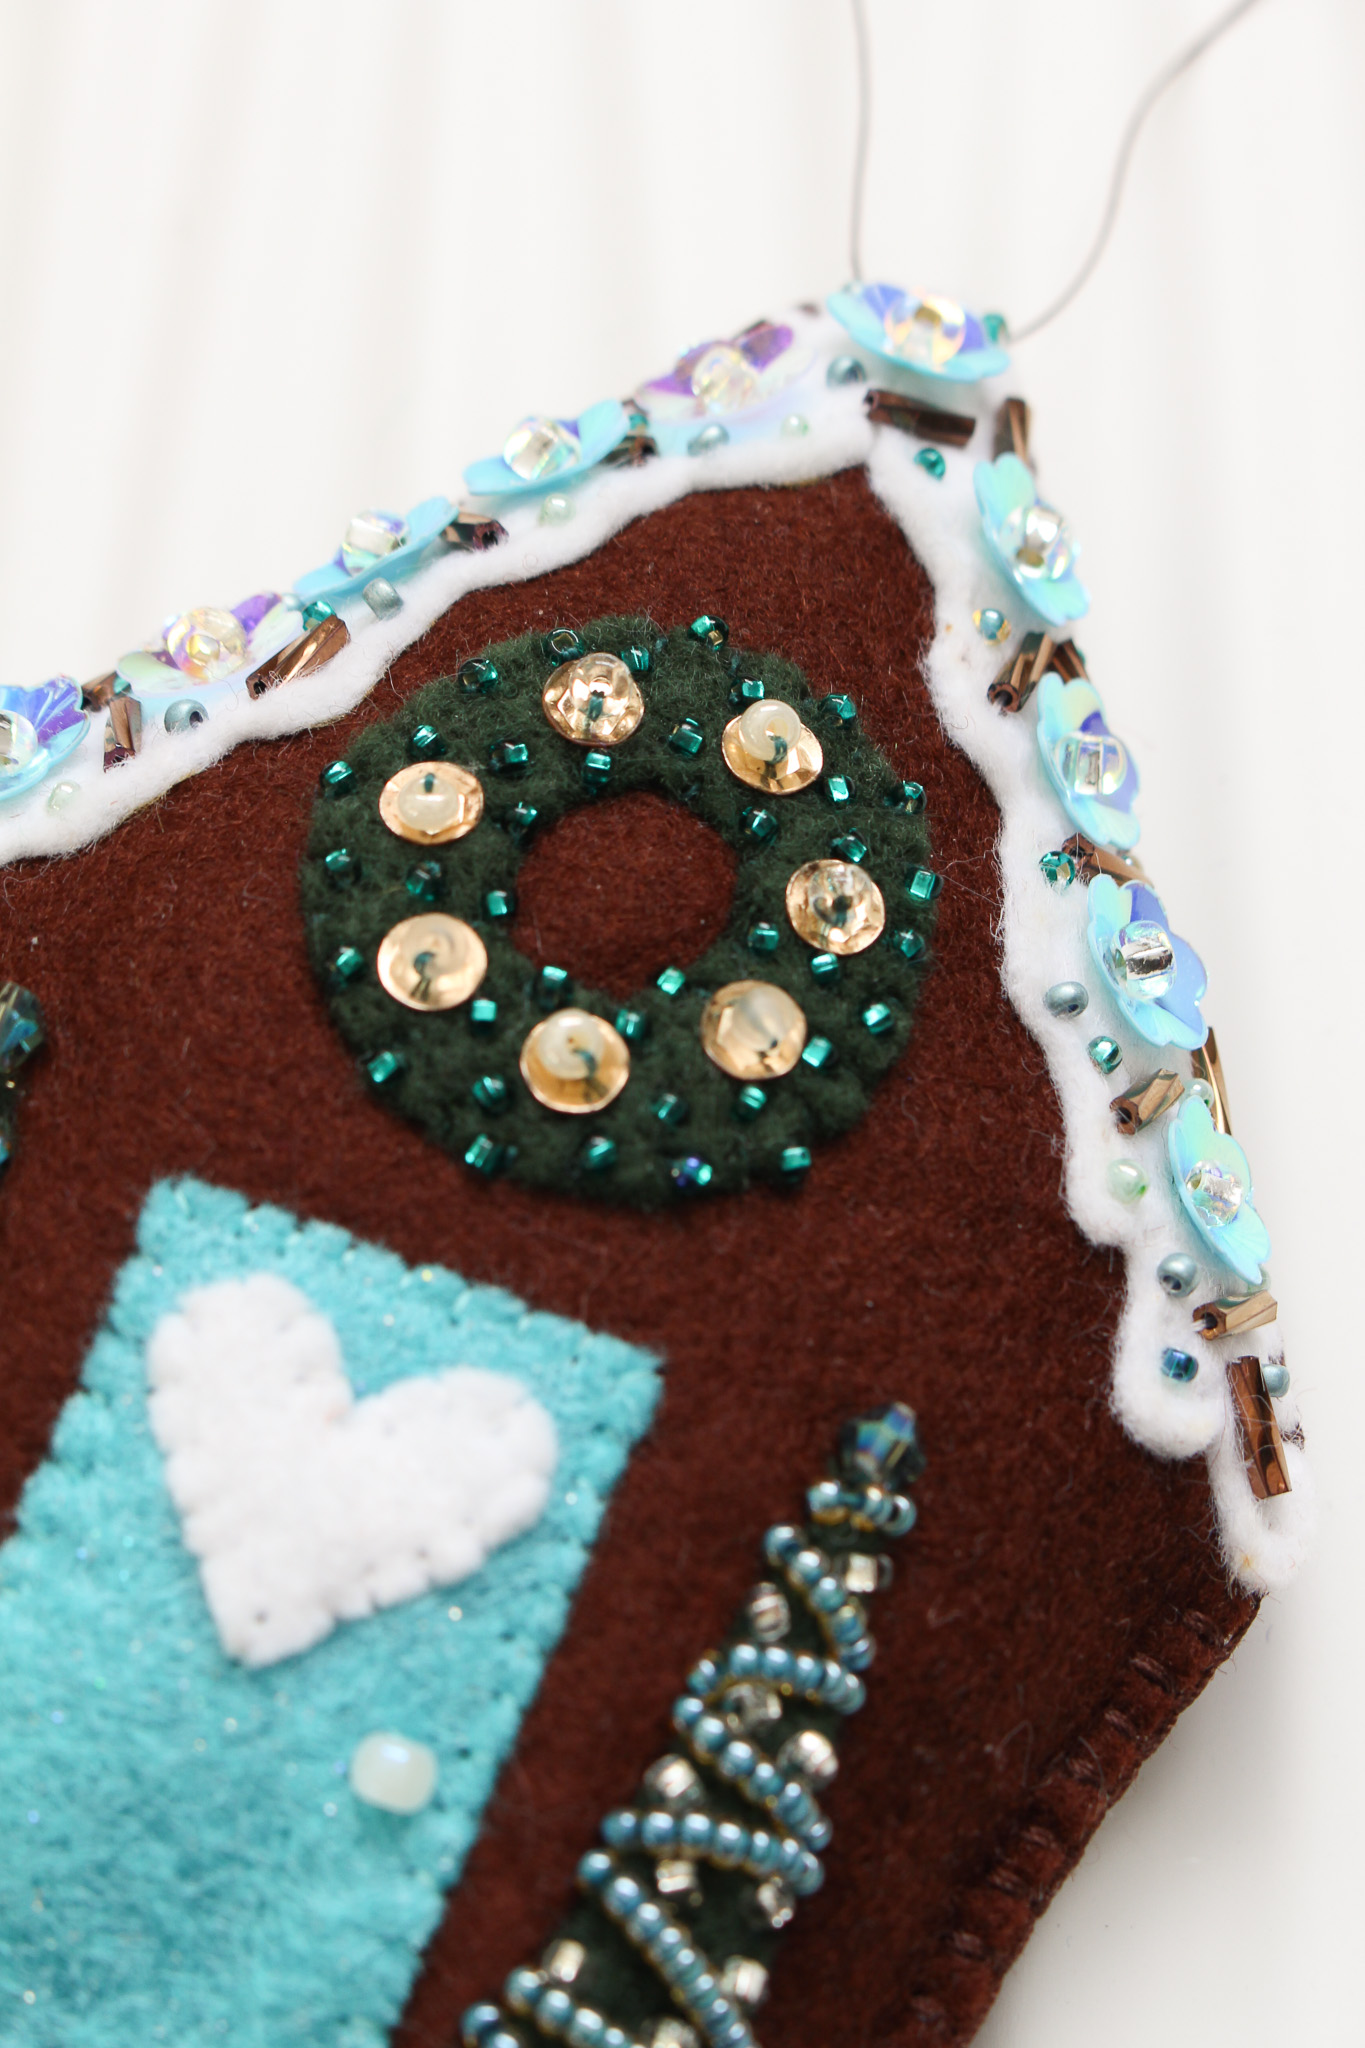
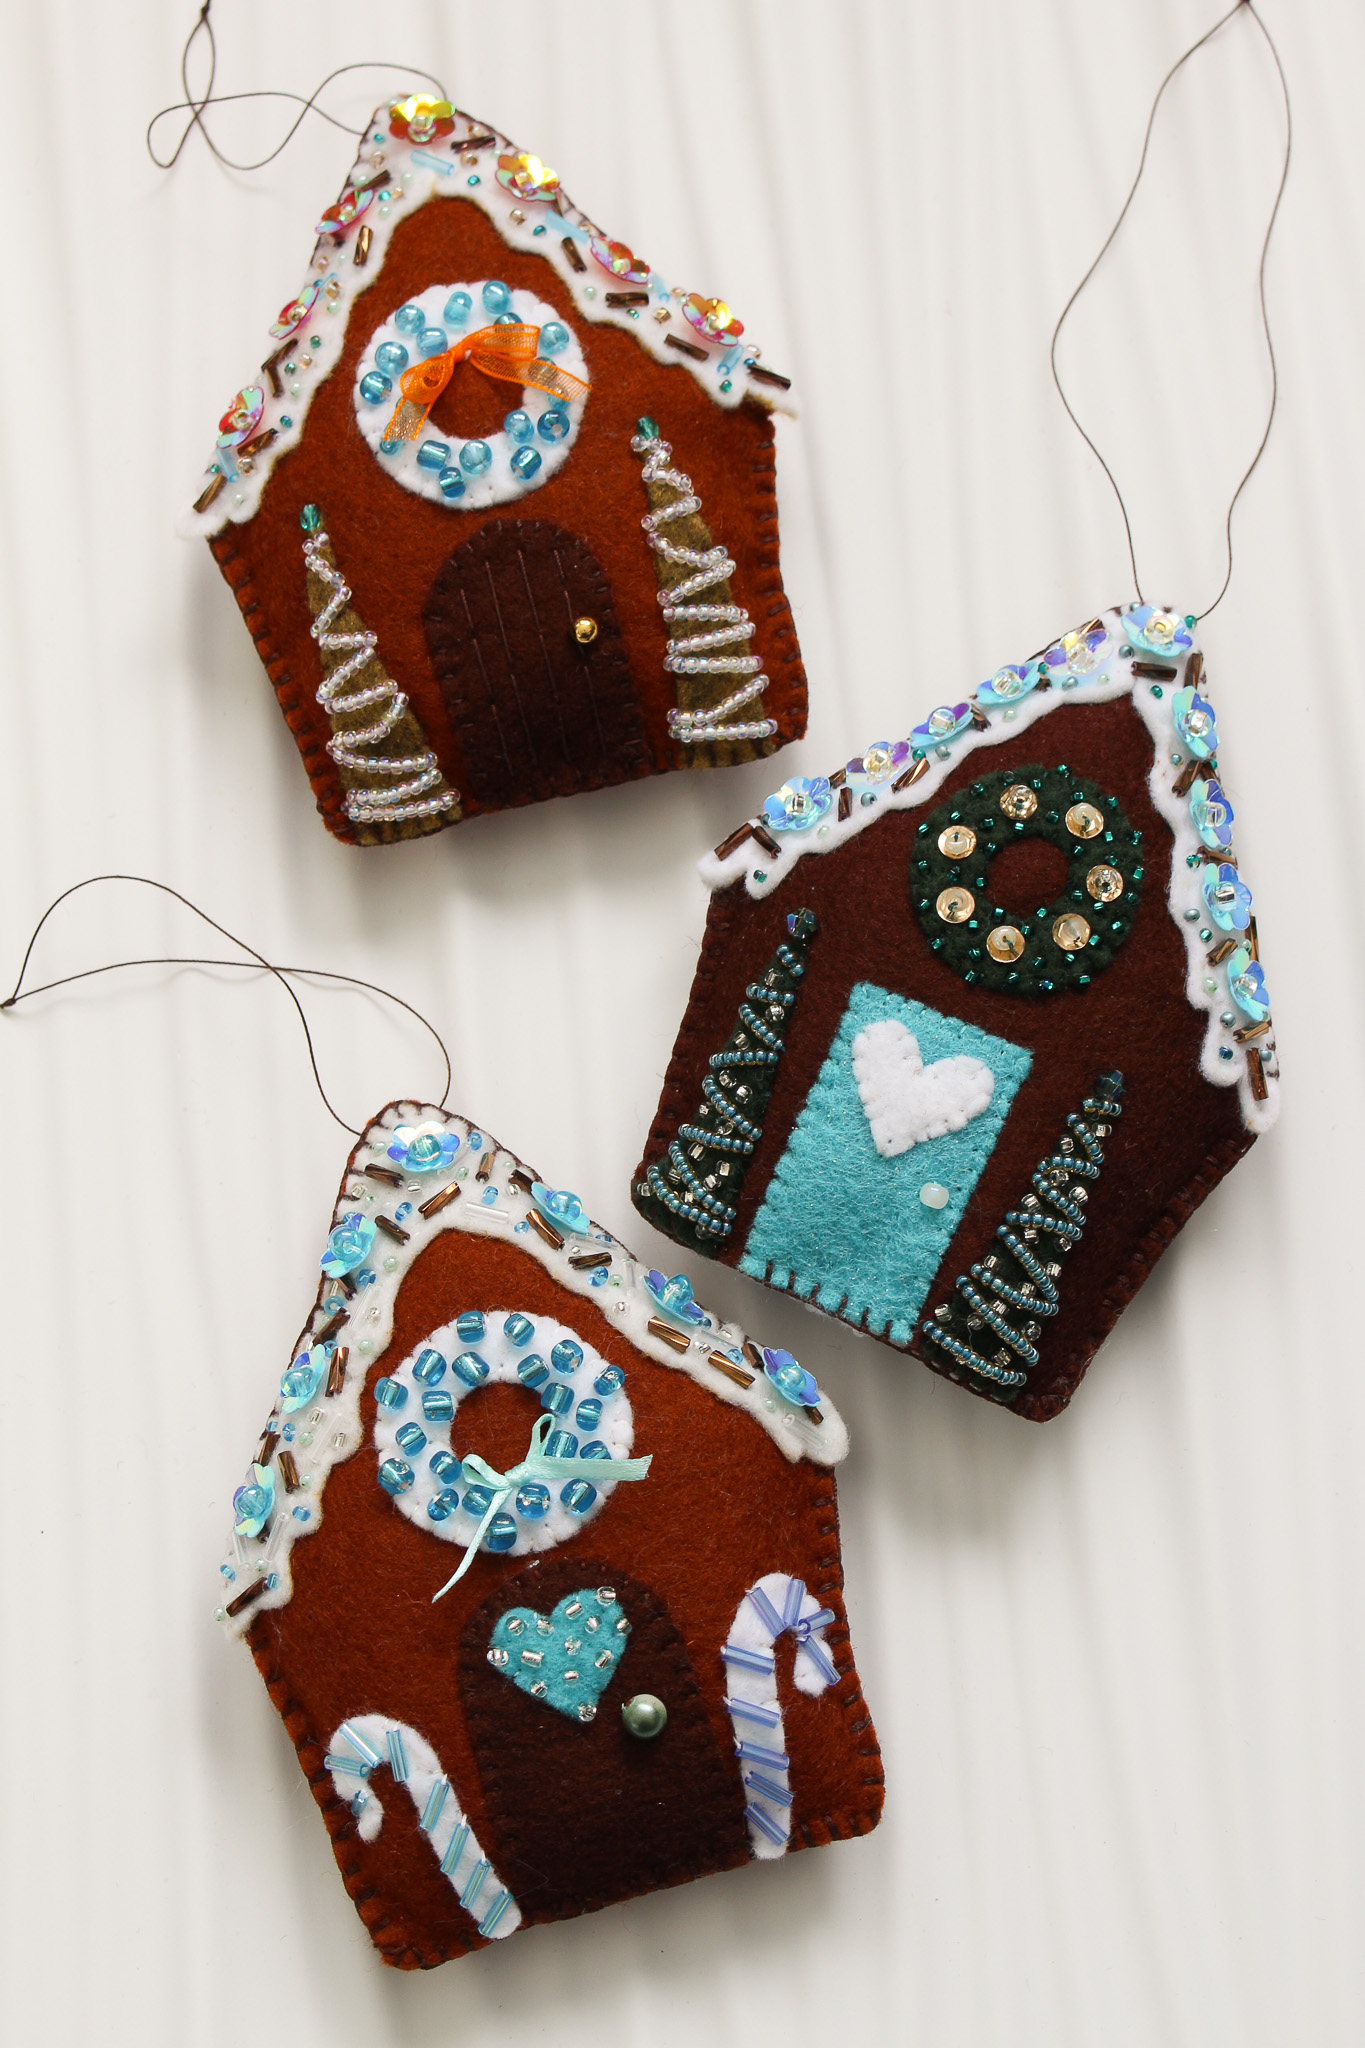
Step 4: Stitch on Sequins and Beads. With all of the felt details stitched on, it’s time to add beads! I bead as many places as I possibly can, but you can add as many or as few beads as you’d like. I start of the roofline snow, stitching on sequins (the center hole is marked on the template), bugle beads and seed beads. I used larger glass beads on the wreath (to look like “lights”).
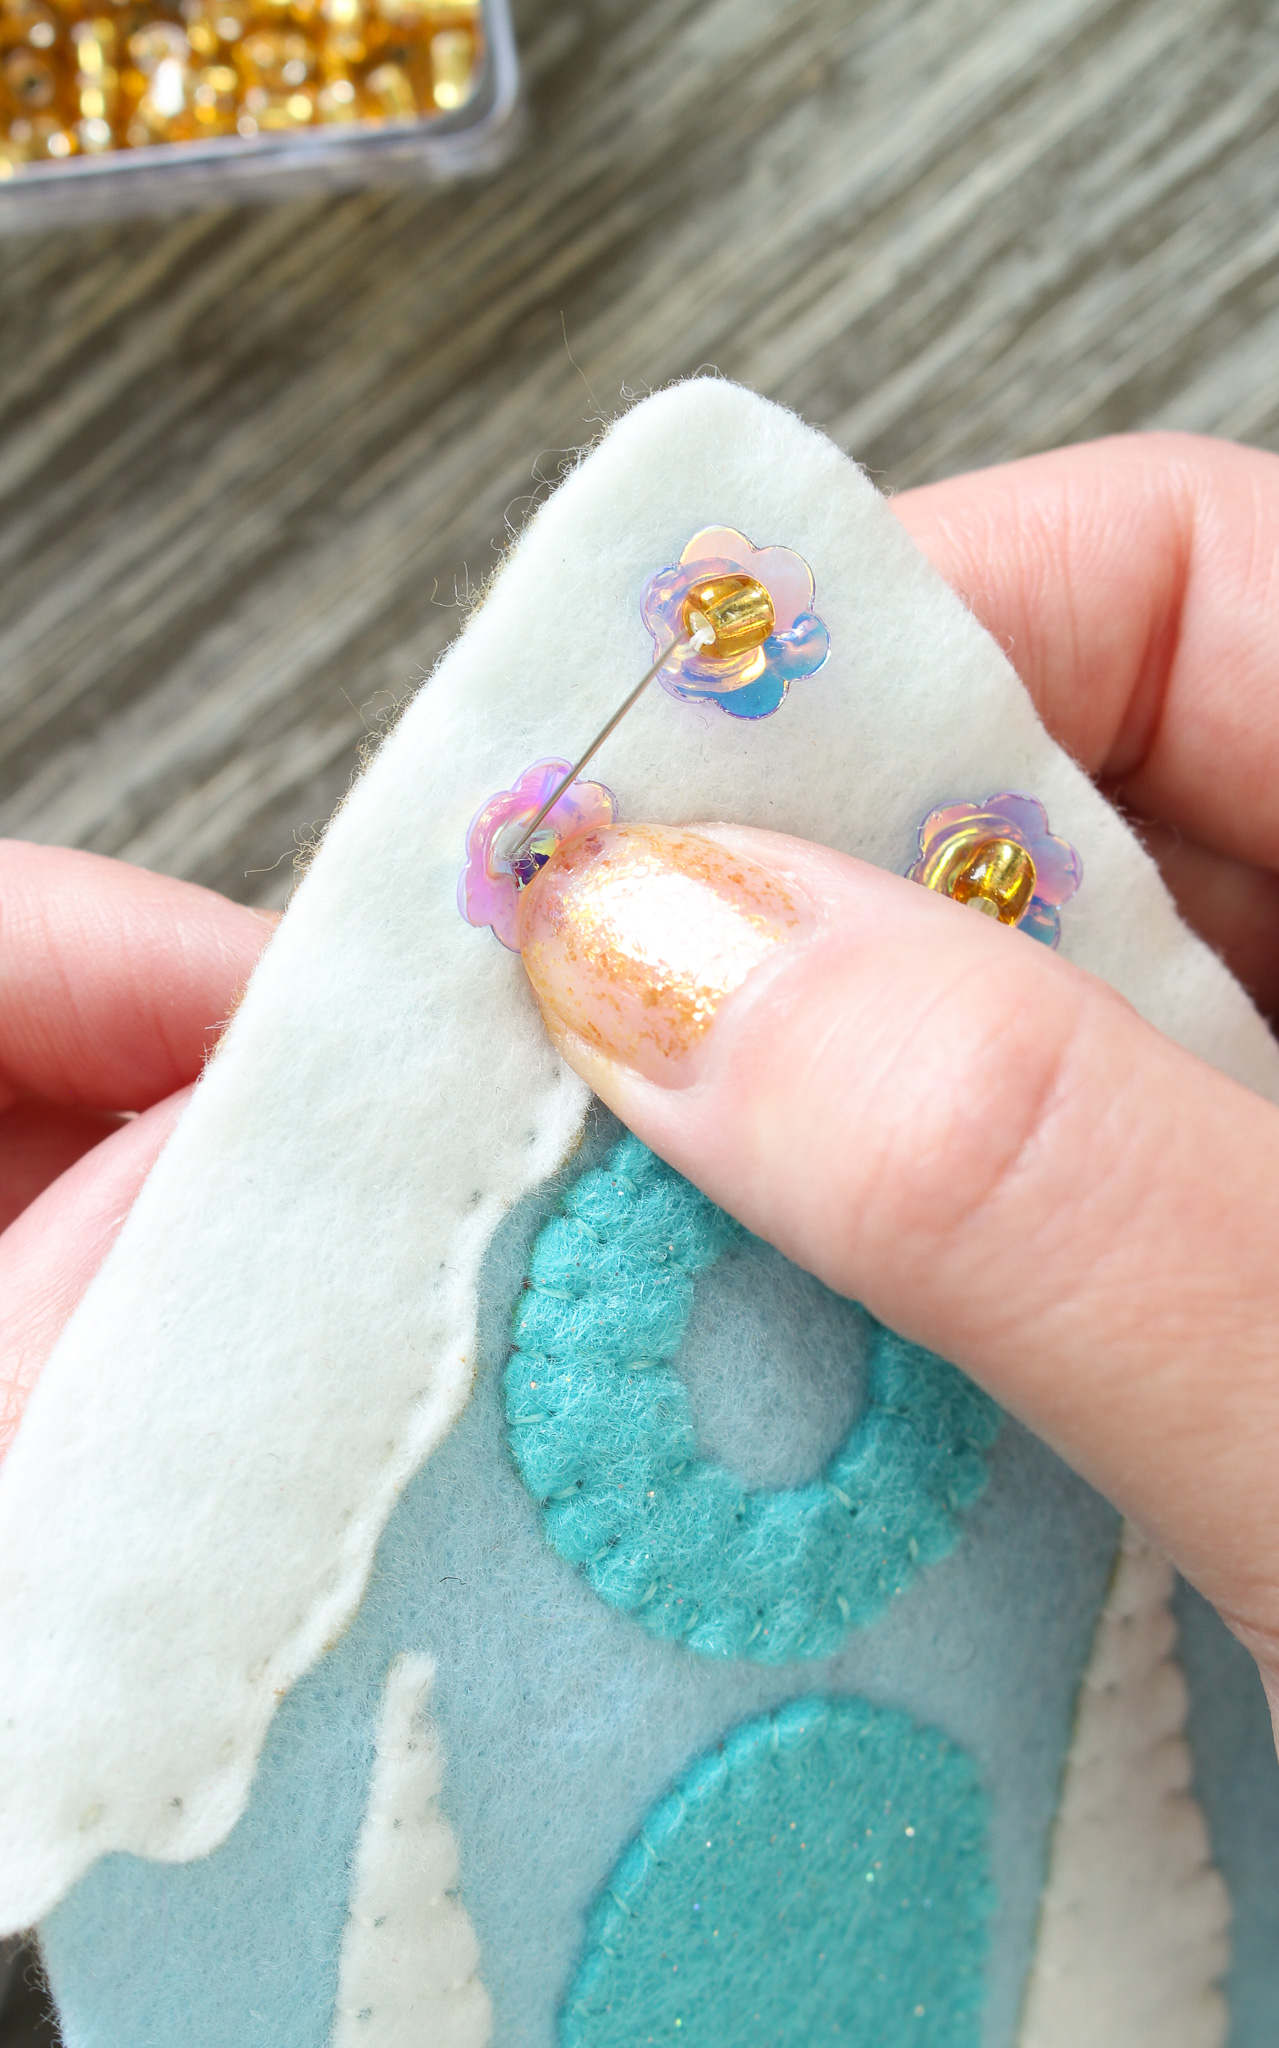
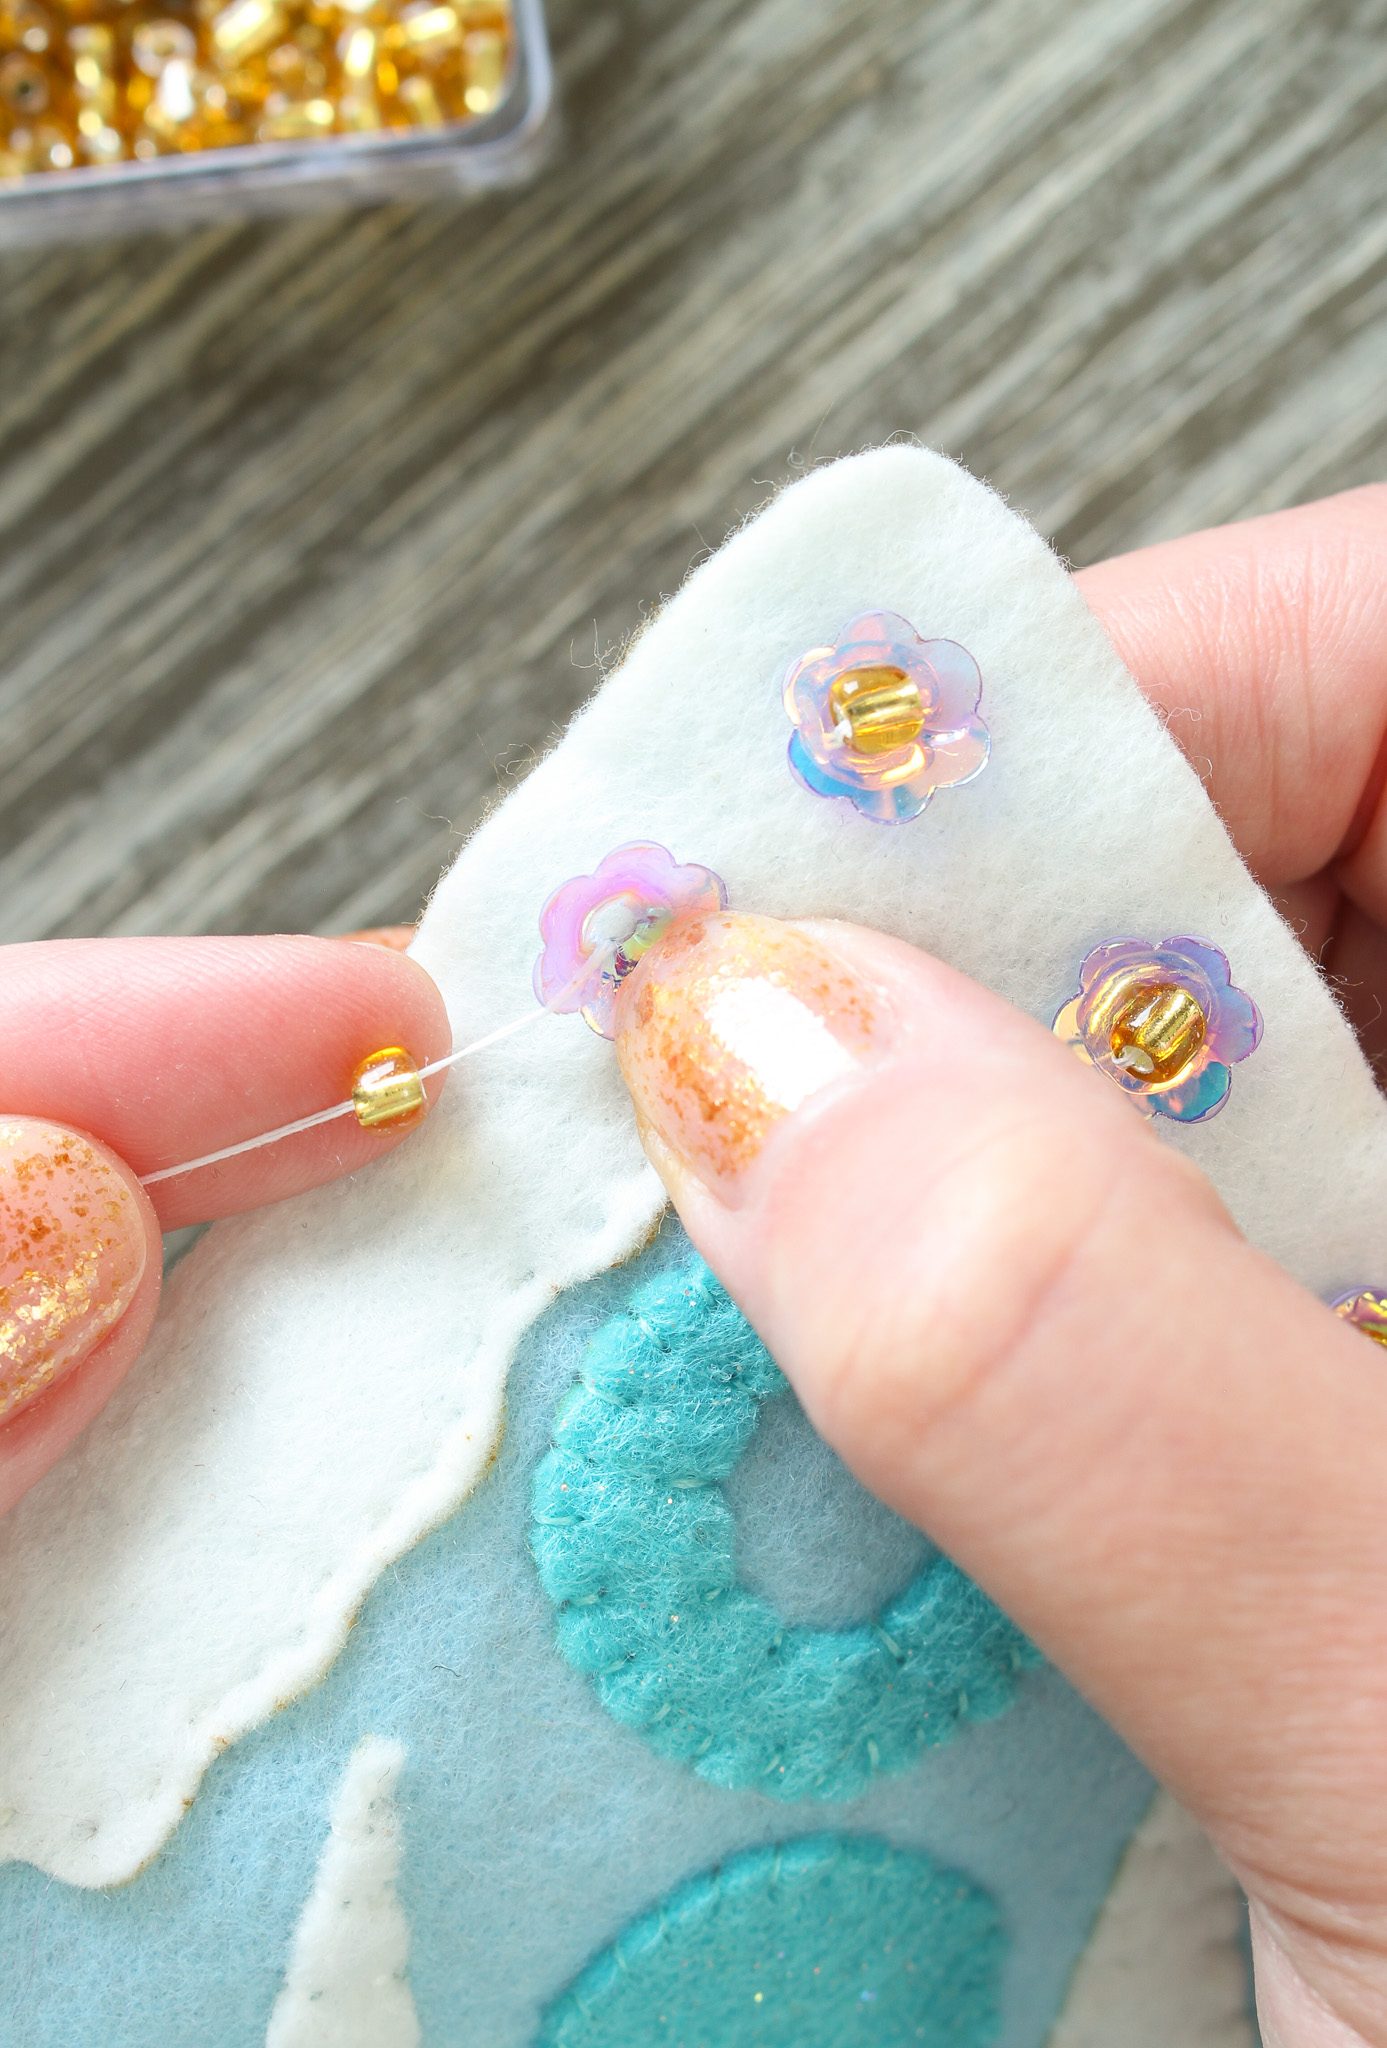
To stitch on the sequins, I hold the sequin in place where I’d like it to be secured and then bring the threaded needled up through the back, through the center of the sequin hole. Then I string on a bead, larger than the sequin hole, and push the needle back down through the felt just beside where I came up (still in the center of the sequin). The bead secures the sequin and adds a little extra sparkle! I repeat this for each sequin and then move onto the other beads, which I stitch on around the sequins.
To stitch on the bugle beads, I bring up the needle from the back of the felt, slide on the bugle bead and position it on the felt (pushing it right up against where the thread came through the felt). I hold it in place with one finger and then push the needle back down toward the back of the felt. I push the needle back down right at the end of the bugle bead. This way you don’t see any thread and the bead is held securely in place. I use a finer beading needle for this, as a sewing needle is usually too thick for bugle and seed beads.
Step 5: Check for Loose Stitches and Beads. Once you’re finished the beading, the back will look super messy but this will all be hidden inside the ornament. At this point, just check to make sure none of the stitching got tangled up back here or has gotten loose. This is your last chance to just check on the beading to make sure it’s nice and tight before sewing closed the ornament.
Step 6: Sew the Sides of the House Together. Sew the front and back together – but only the sides because you need to leave room to insert the batting. Make sure the permanent marker pattern outlines are both facing inside, just in case you didn’t trim away all of the marker, it will be hidden inside the ornament.
Starting at the bottom corner, working up the side toward the roof, stitch together the top and two sides of the ornament. I like to use a blanket stitch for this, but you can also do a running stitch or machine sew it, if you prefer. Basically sew along the side, up to the point, and back down the other side – but leave the ornament open at the bottom.
Step 7: Stuff with Batting and Sew Closed. Insert some batting – using the capped permanent marker from earlier to push the batting into the peak of the house if necessary, and then finish stitching closed the bottom of the ornament.
Here’s the finished DIY Felt Gingerbread House Ornament
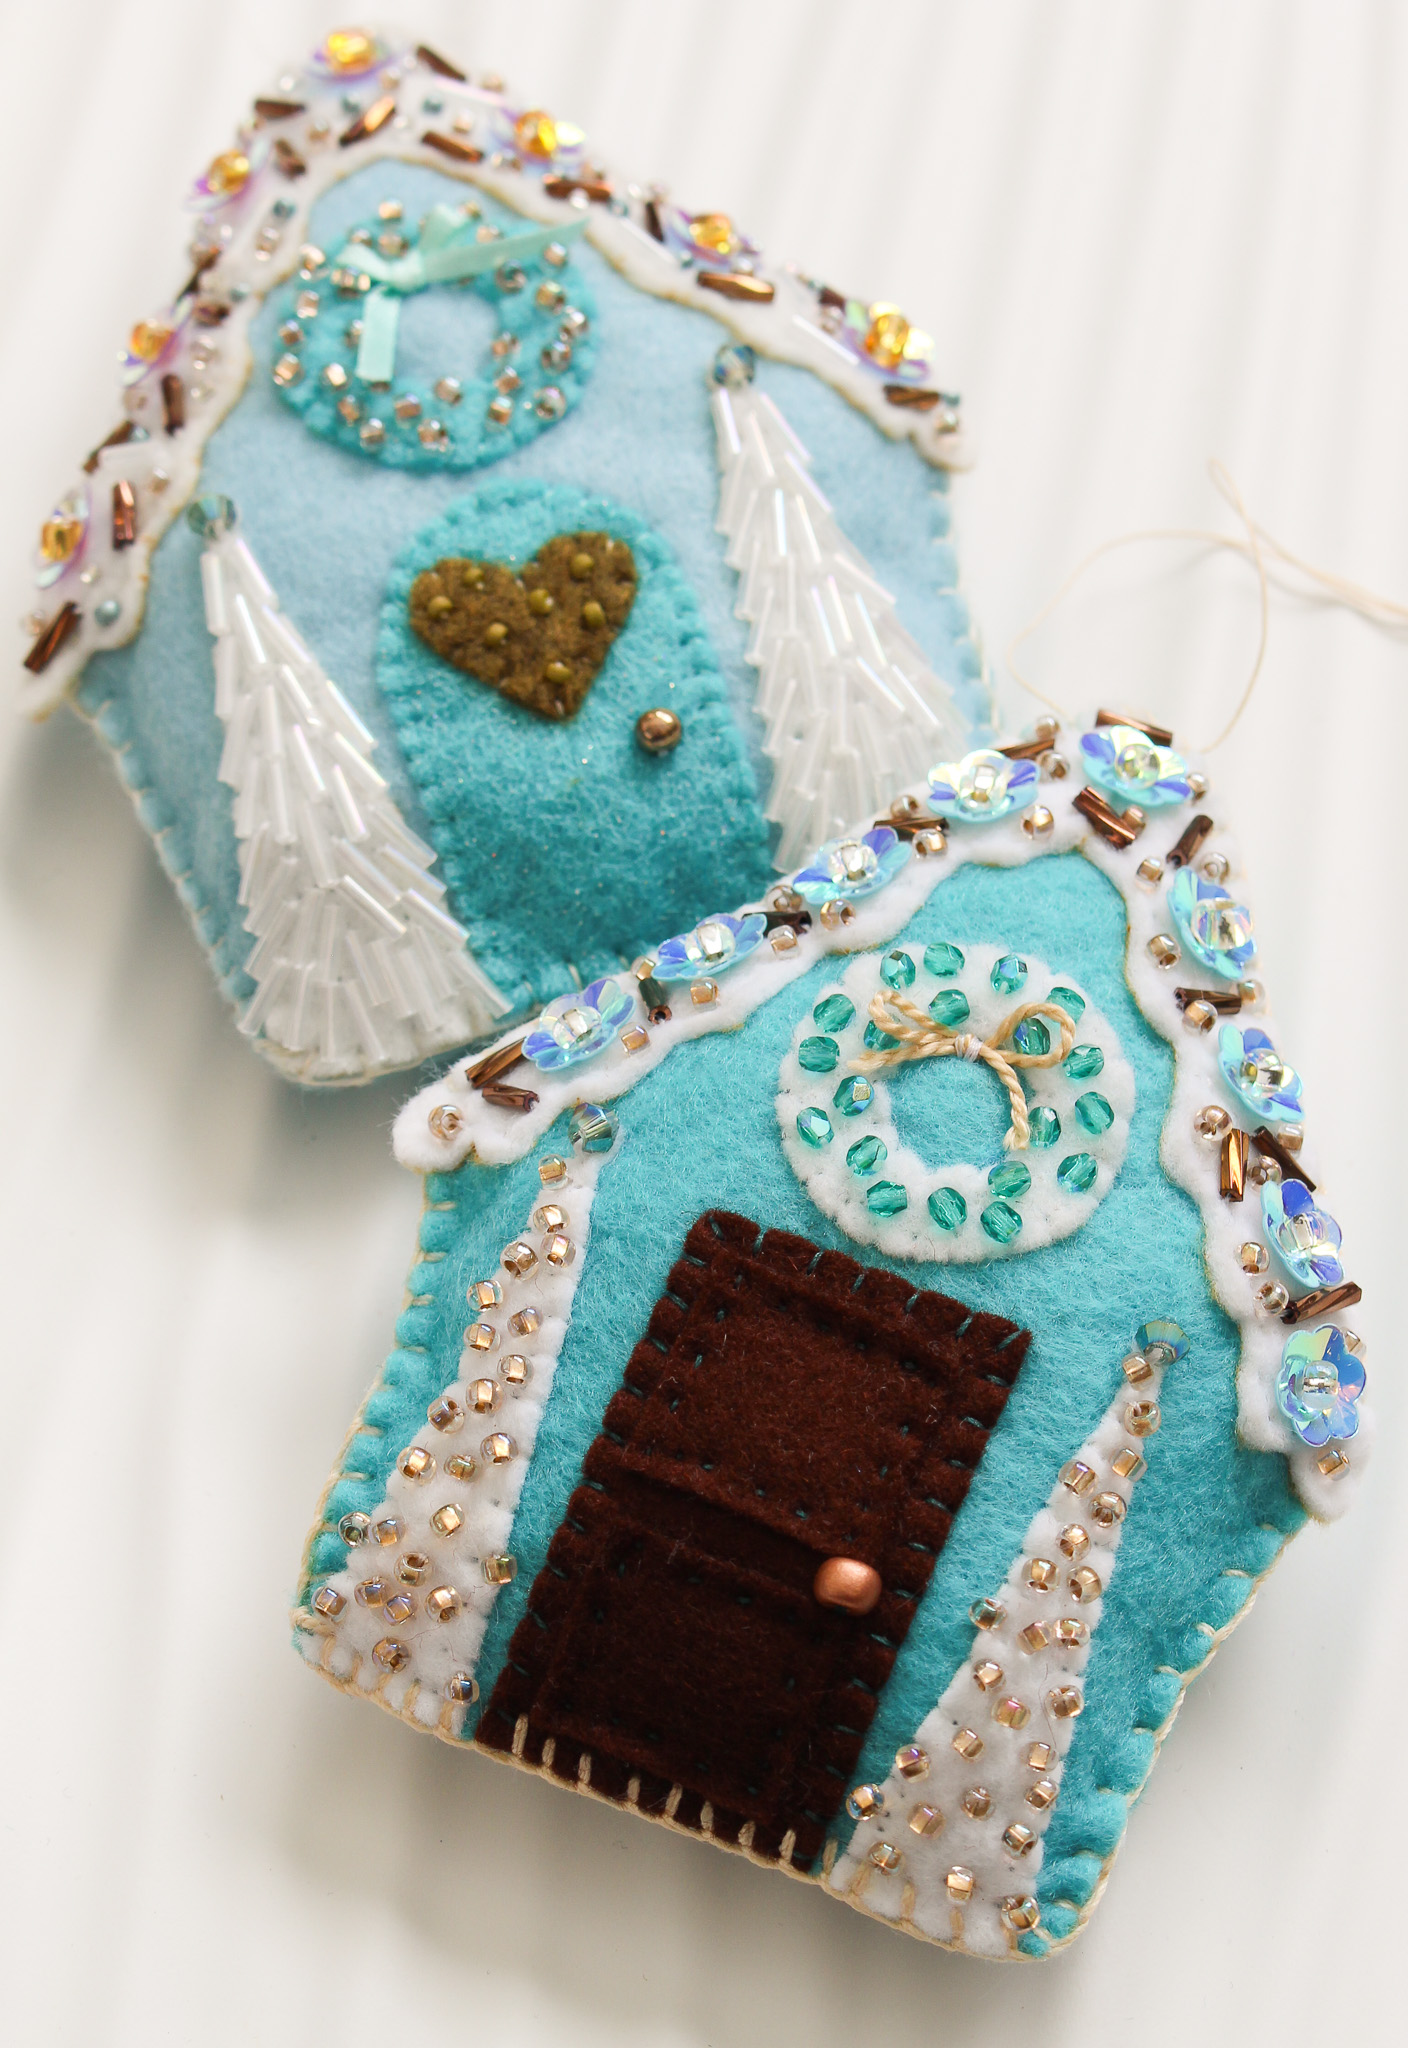
I am OBSESSED with the finished DIY felt gingerbread house tree ornament. The magic is definitely in the beading, which catches the light and also adds some textural interest. I even added tiny bows on the “wreaths” above the door, and a larger gold bead for a “door knob”. If you embroider, you could also embroider some of these detailed instead of, or alongside, the beadwork. Below you’ll find some other variations I made – all of the beads are stitched on with the exact method outlined above, just in different locations.
For you gingerbread purists, I made more gingerbread felt ornaments with different shades of brown felt for the house (I made the light aqua one because I thought it would be easier to see the steps when photographed for this tutorial). I also added some with candy cane details to one ornament in lieu of trees – feel free to add more authentically gingerbread felt appliques and beads (like these candy shaped beads and these polymer clay dessert shaped beads). I played around a lot, adding stitches/appliques to the “door” to make it look like chocolate or a wafer and added brown sparkly bugles because they look like chocolate chips.
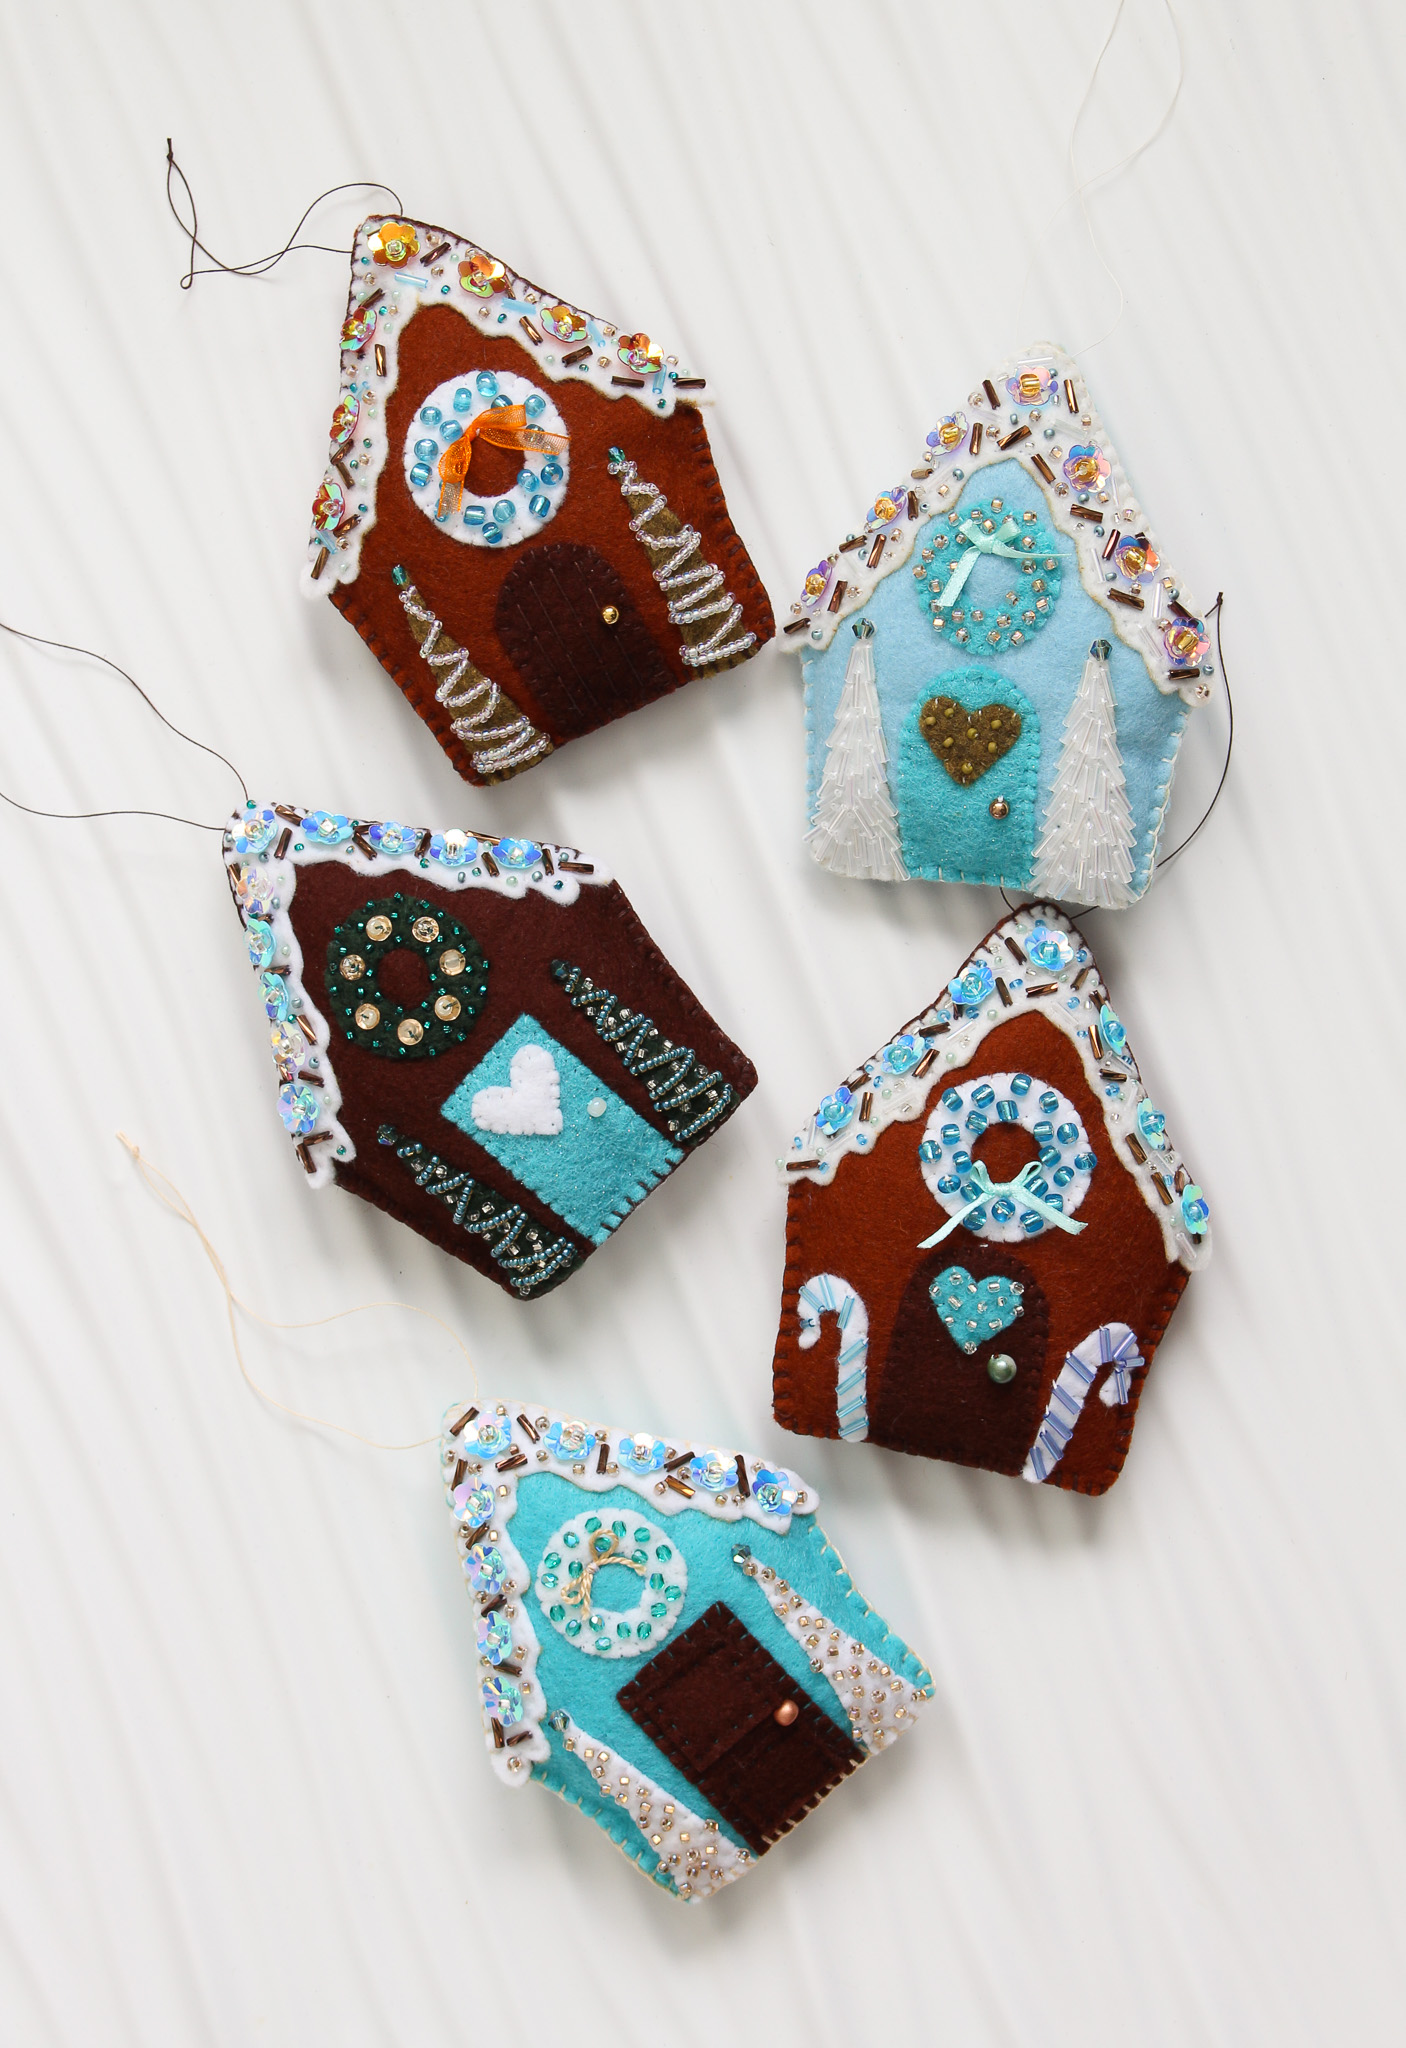
Here are the first two felt gingerbread house ornaments I made – with a lot less sparkle and windows instead of wreaths. They are still super cute and much easier to make, so if you’d like a faster project, these took a LOT less time, so try experimenting with a little less beading and then go from there!
I hope you enjoy making these gingerbread house ornaments! Happy crafting!


P.S. Don’t Forget to Pin for Later!

Thank you for the detailed photos, instructions and supply lists! I can’t wait to try this!
Author
I’m so happy to hear that! I would love to see you what you make 🙂 Happy Crafting!
Nowhere on the email is there a download for the gingerbread templates.
Author
Once you submit your email address, you are sent a confirmation email from me first (to make sure it’s the right email and that you did indeed sign up). In the email you received, click “confirm your subscription” and the template will pop up in a new window for you. The email also includes the link to the blog post, so you can find you way back to the tutorial again if you need it!
This is so adorable thank you for sharing this idea
I have absolutely everything to do this ornament. It is so sweet and adorable. thank you for much for sharing this.
viv
Author
I’m so happy to hear that! I would love to see what you make 🙂
Hi! Super cute, I bought all the supplies. However, receiving the template via your newsletter is simply not working. I have tried two different e-mails. I confirm the subscription but got no pop-up or anything with the pattern 🙁
Author
I think have figured it out: I looked at the back end, and it looks like you signed up through the general newsletter form – not the specific one for this pattern. No worries! I am going to email it to you right now so check your inbox in five minutes 🙂