The DIY thrifted ghost painting trend is too adorable and today I’m sharing my own version – although *technically* I found my painting at the landfill (*cough*lastyear*cough*). And while painting ghosts on a painting you find secondhand is a cute enough trend on its own, I also decided to take it a step further and make the entire painting a little more dark and scary. But this is still a totally easy DIY Halloween decor project – and a budget friendly way to create personalized DIY Halloween art! (Scroll to the bottom of the post if you’d prefer a video tutorial).
What is Thrifted Ghost Painting?
If you haven’t heard of this trend before, thrifted ghost painting is a DIY Halloween home decor project that consists of adding a ghost – or two or three – to an inexpensive painting (or print) found at a thrift store. If you’ve spent any time thrifting, you know the thrift stores are always packed with art, especially landscapes. Take home one of those abandoned little paintings and make it a little more eert for easy and affordable DIY Halloween wall art. I love this trend because the end result isn’t gross – it can actually be kind of elegant (see here for inspo)!

Materials for Making a Thrifted Ghost Painting:
- Thrifted or previously loved art – a print, painting, etc (preferably some kind of “scene” where you’d spot a ghost!)
- Black and white acrylic paints (orange is optional)
- Small paint brushes – or acrylic paint pens
- Tools to liberate the artwork from the frame, if required (pliers/screwdriver, depending on frame installation)
- Spray paint to update the frame (optional)
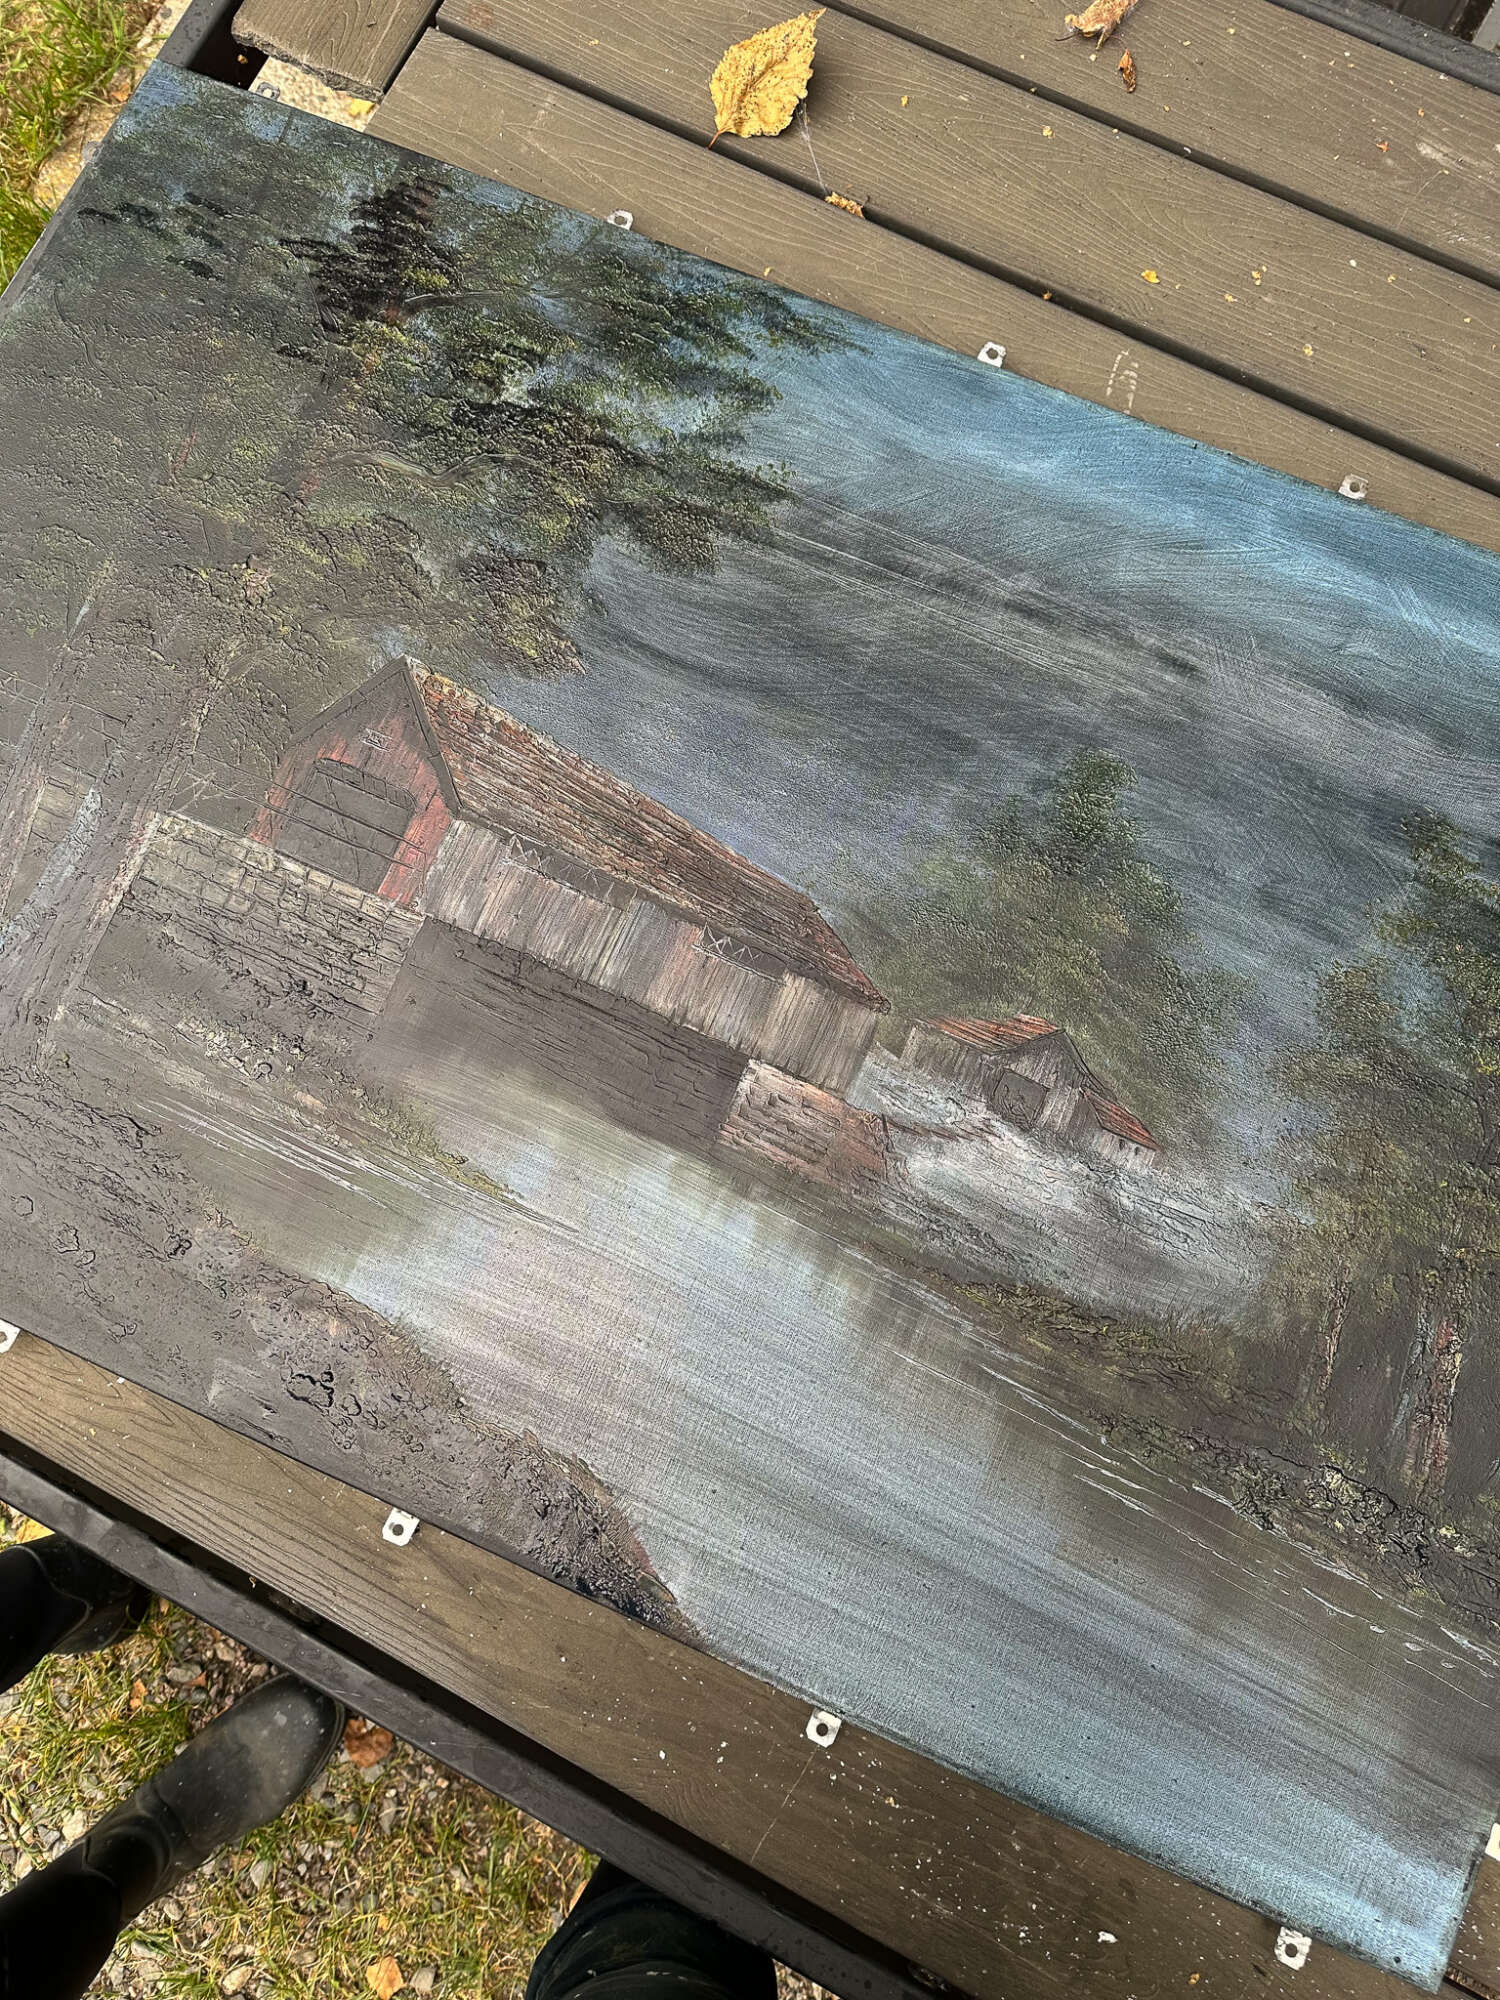
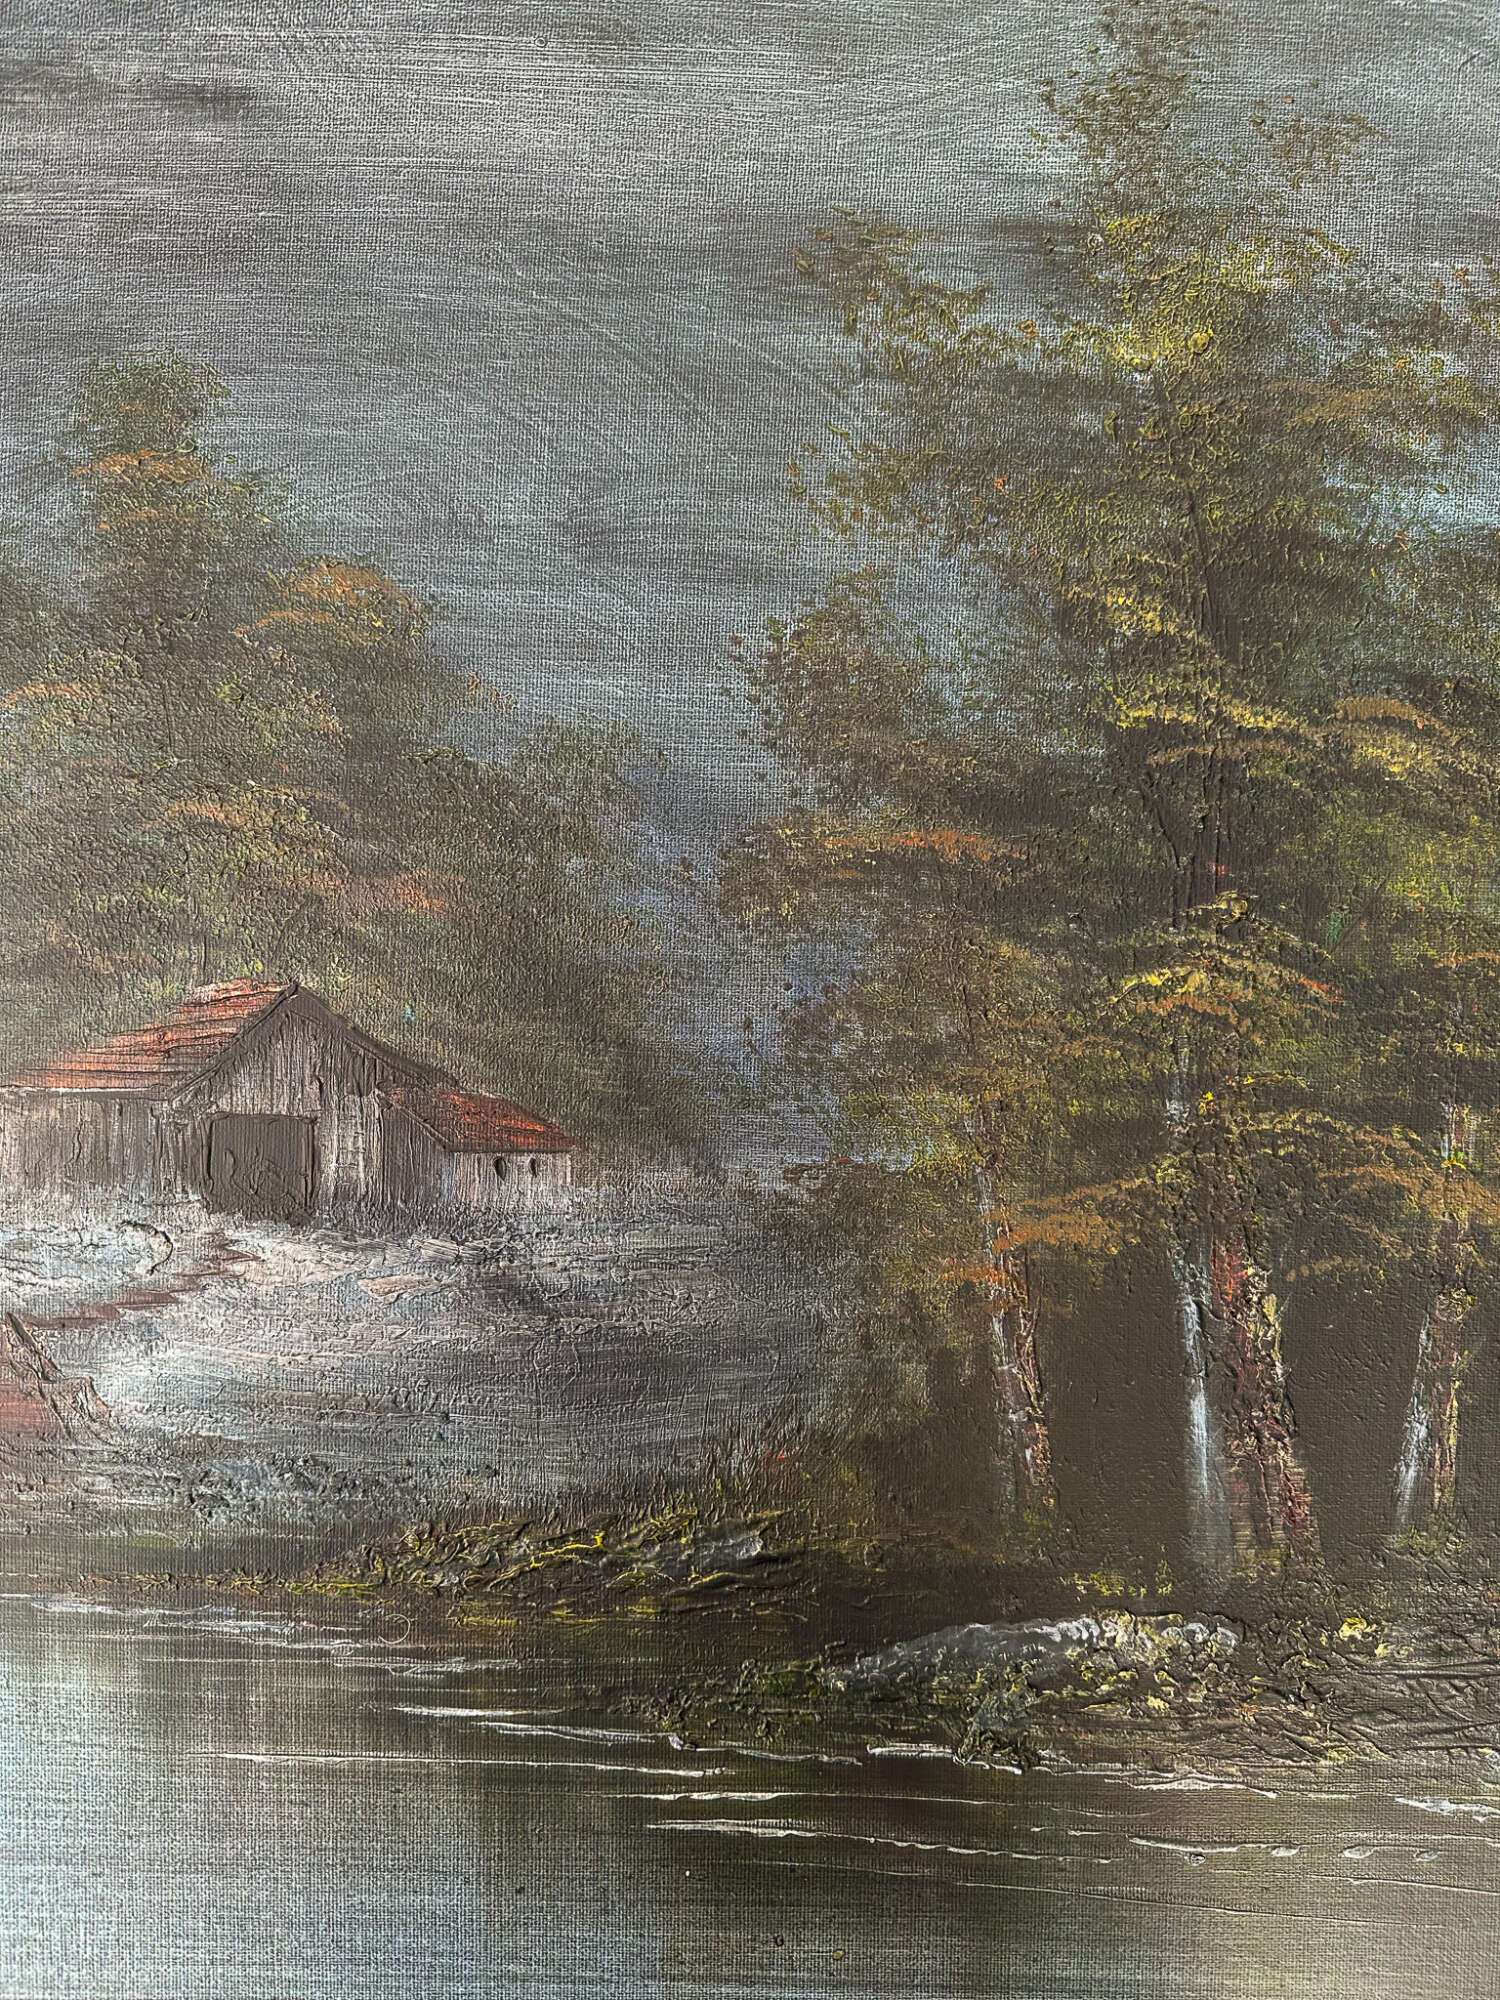
My DIY Ghost Painting BEFORE:

DIY Thrifted Ghost Painting Instructions:
- Thrift or find the perfect painting or print – look for interesting or already slightly spooky scenes.
- Remove the painting/print from it’s frame and/or glass.
- Add a wash of sheer black acrylic paint to tone down art that’s too vibrant or summery (optional).
- Paint in some darker, shadowy area (if there are none) where a ghost could be lurking (also optional).
- Stipple on some fall leaves in shades of orange and brown (optional).
- Using small artist’s brushes or acrylic paint pens, paint on a ghost, or ghosts, into the scene.
- Paint the frame (optional).
- Reassemble the frame and glass, if necessary.
My Exact Halloween Makeover for Secondhand Art Method:
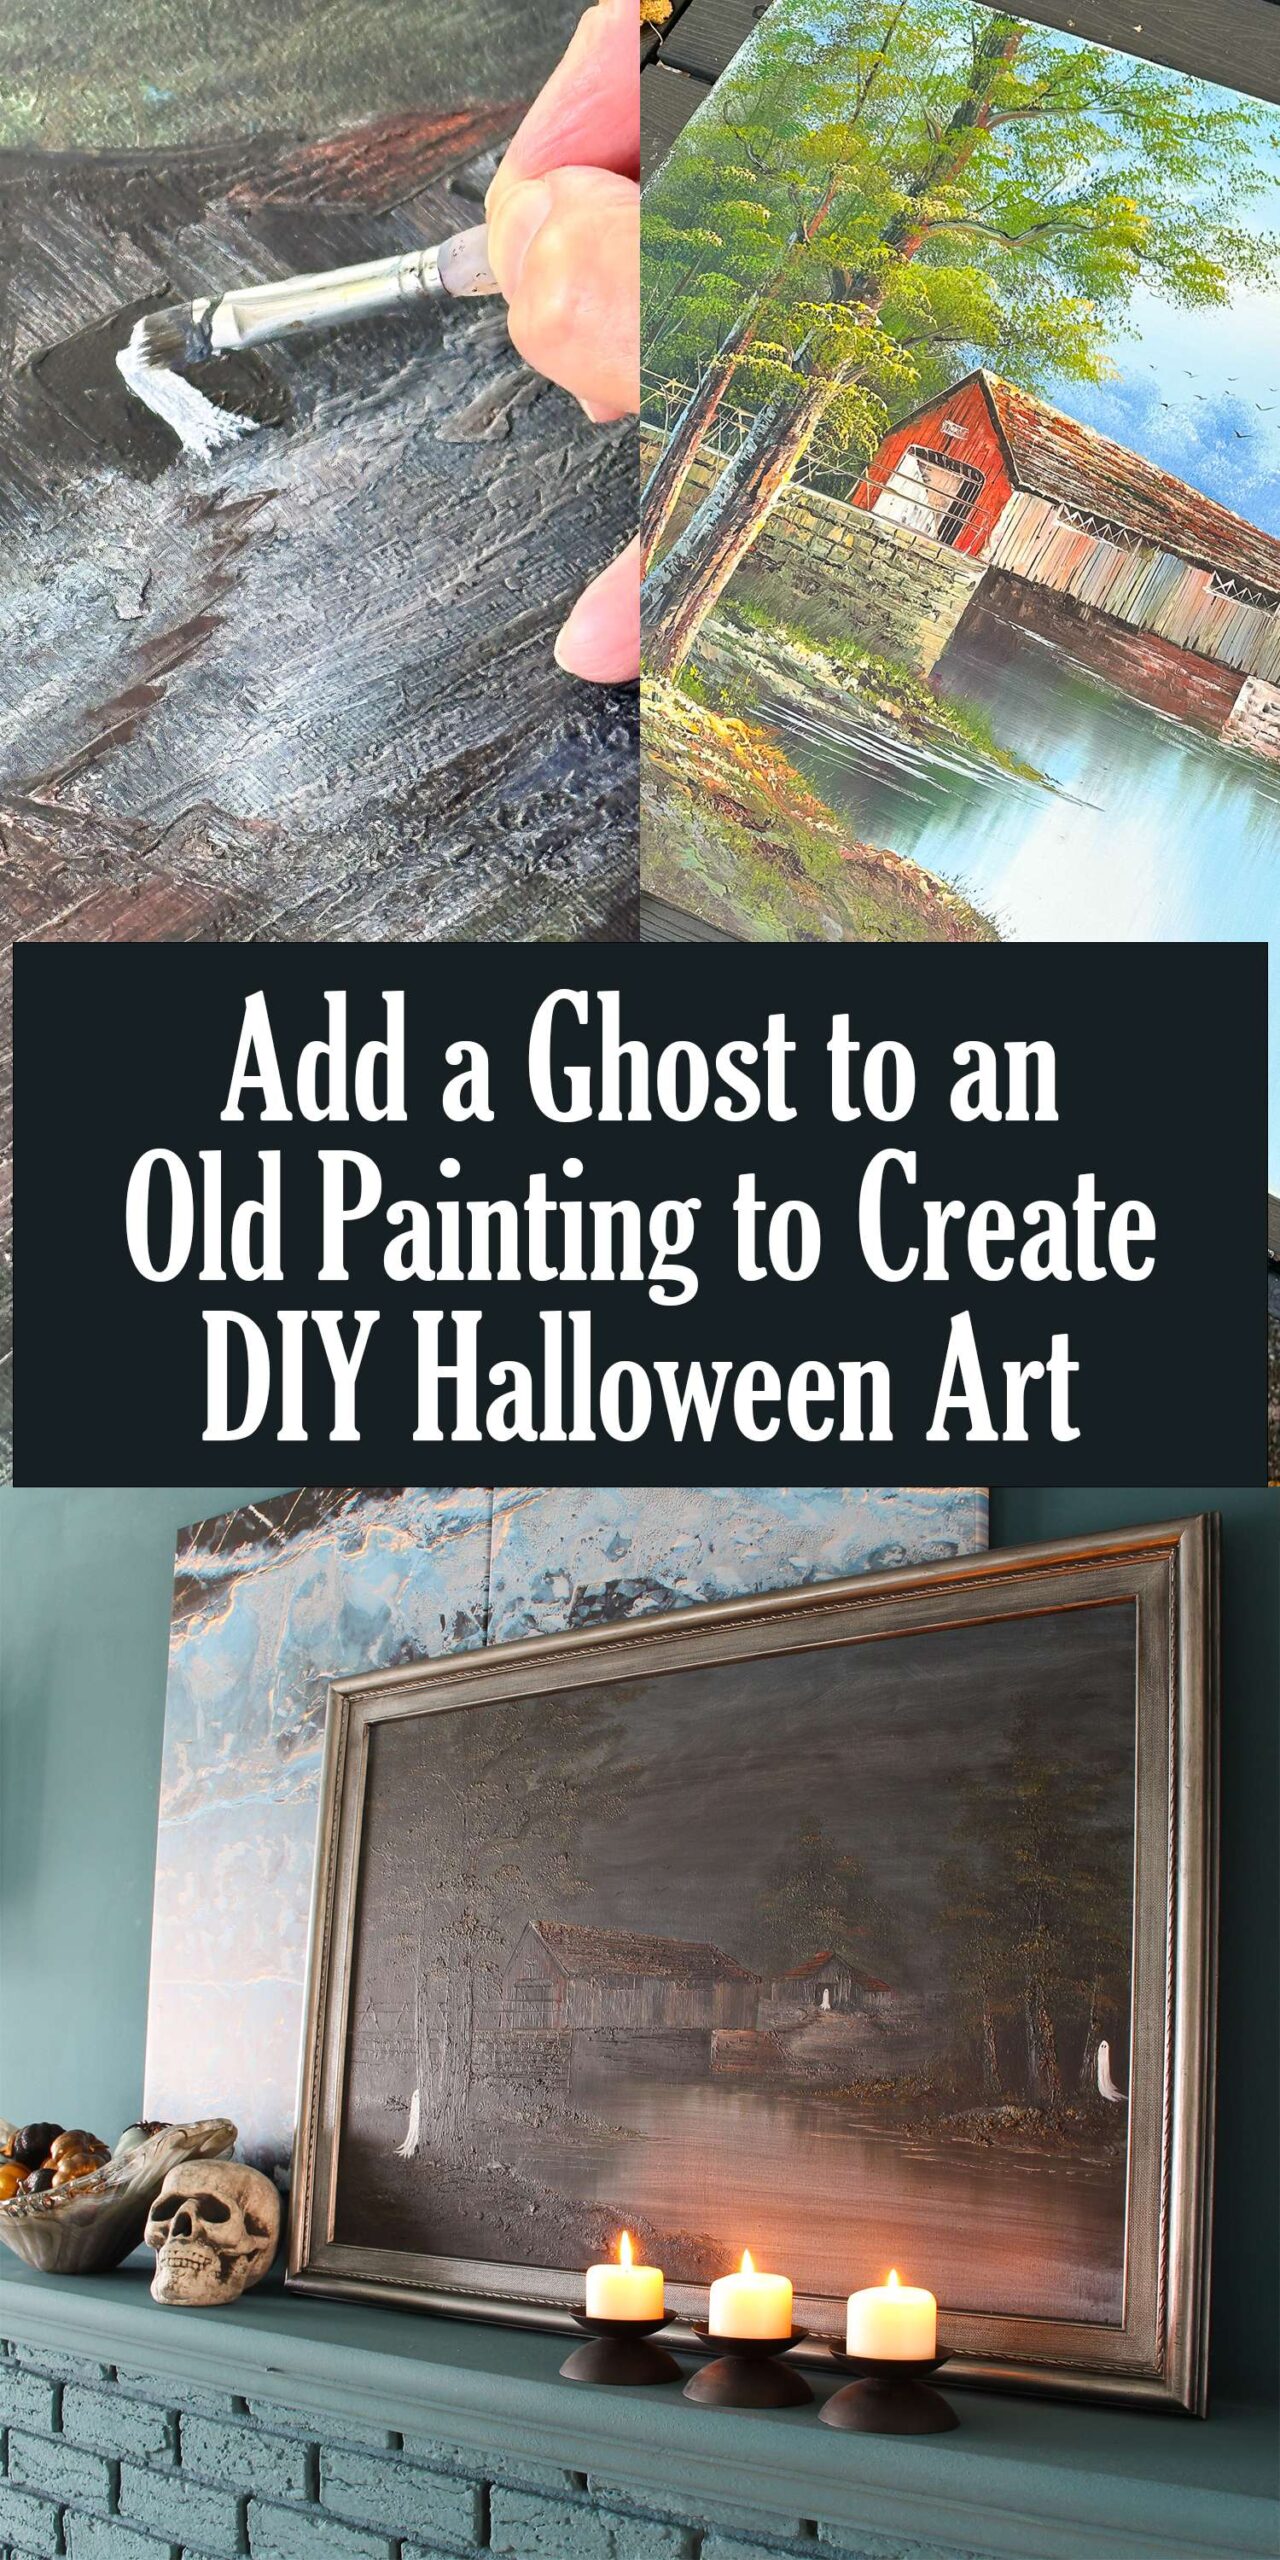
First, grab a painting friend, to help keep this a silly, fun craft project. My Mom and I worked on it together and at first she was SUPER serious. I had to keep reminding her: this painting came from the LANDFILL. The landfill has an excellent return policy. If this doesn’t turn out, we can bring it BACK, lol. She was worried we would “ruin” it – but acrylic paint is so forgiving and you can just keep painting over mistakes (as long as you apply the paint thin, and don’t add in new texture). My landscape was a bit too summery and bright for the Halloween season, so first I had to turn it into an autumnal night scene.

I separated the canvas from the frame (there were screws holding it together at the back). Then I brushed on a sheer coat of black acrylic paint with a large brush. As I did this, I mostly followed the existing brush strokes, but I did add some swirls to the sky. I started with a very sheer layer, let it dry, and then kept adding more.

Using a smaller brush, Mom and I painted some areas even darker, like around/behind the trees, on the wood siding, and under the covered bridge.
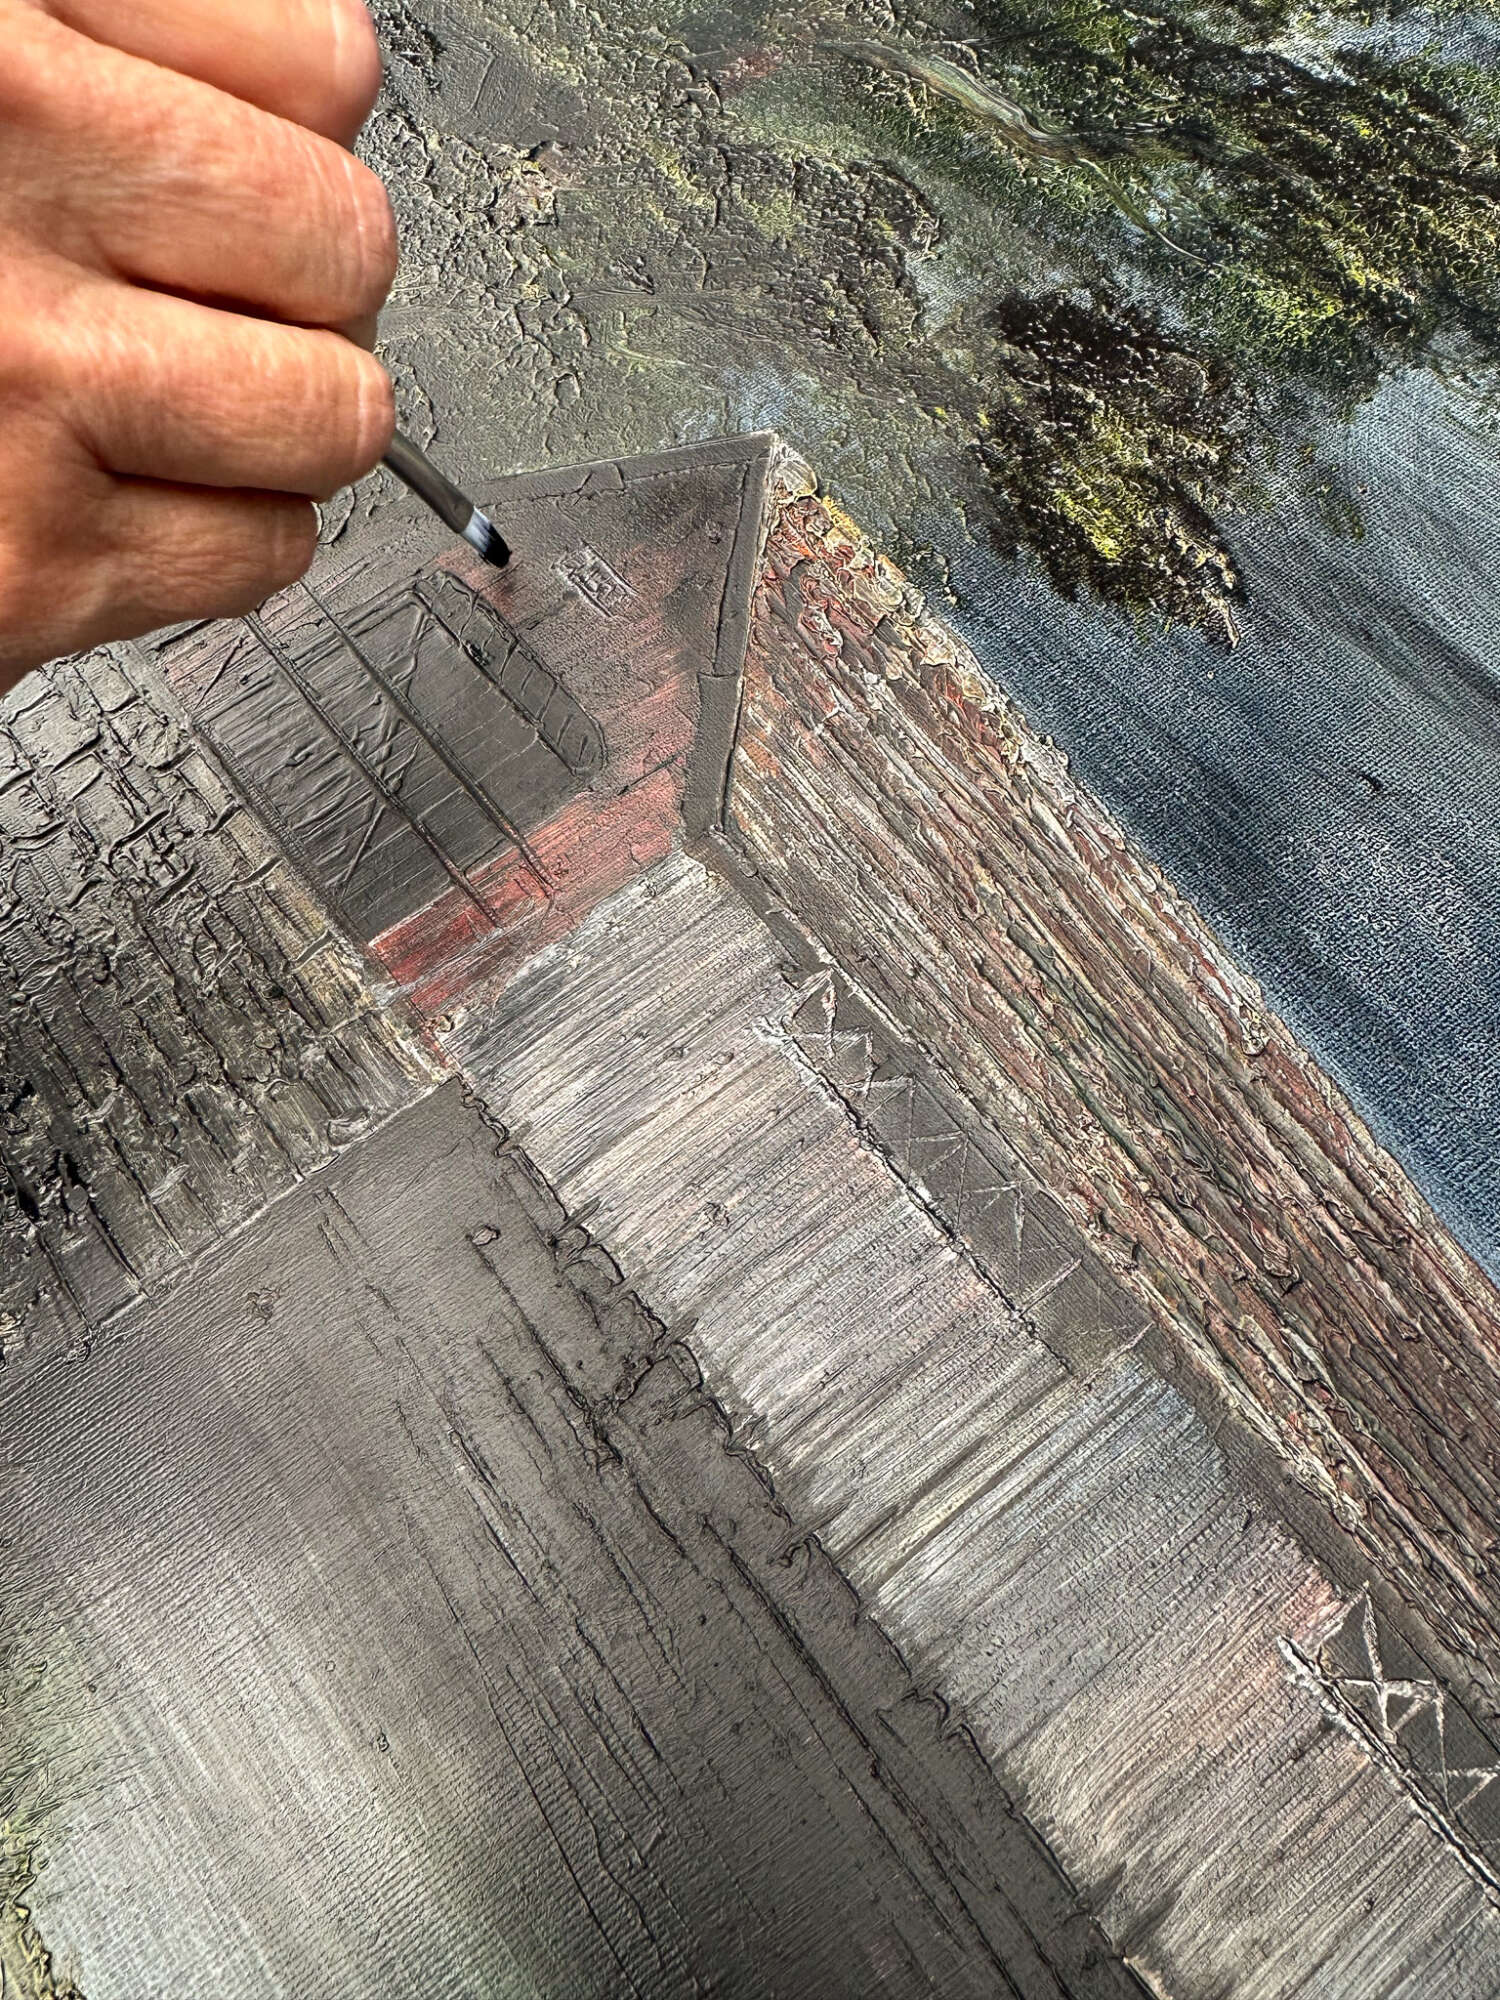

Then I just kept adding more darkness, following the original painter’s brushstrokes, until it was just the right amount of dark and scary – without losing too many of the original details. I was NOT a fan of the original painting, so obscuring it was key to my liking this project. If you love your landscape as-is, skip these steps or add black with a very light touch.
Then I went back in with a light grey to add some highlight where the moon might hit the shoreline and trees. Basically I just brought back in a little dimension.

Finally, I used a fan brush to stipple on some fall “leaves” – basically just warming up the existing leaves in the painting with autumnal colors. I stippled on some burnt orange and brown paint, but left some of the original green peeking through for more interest.

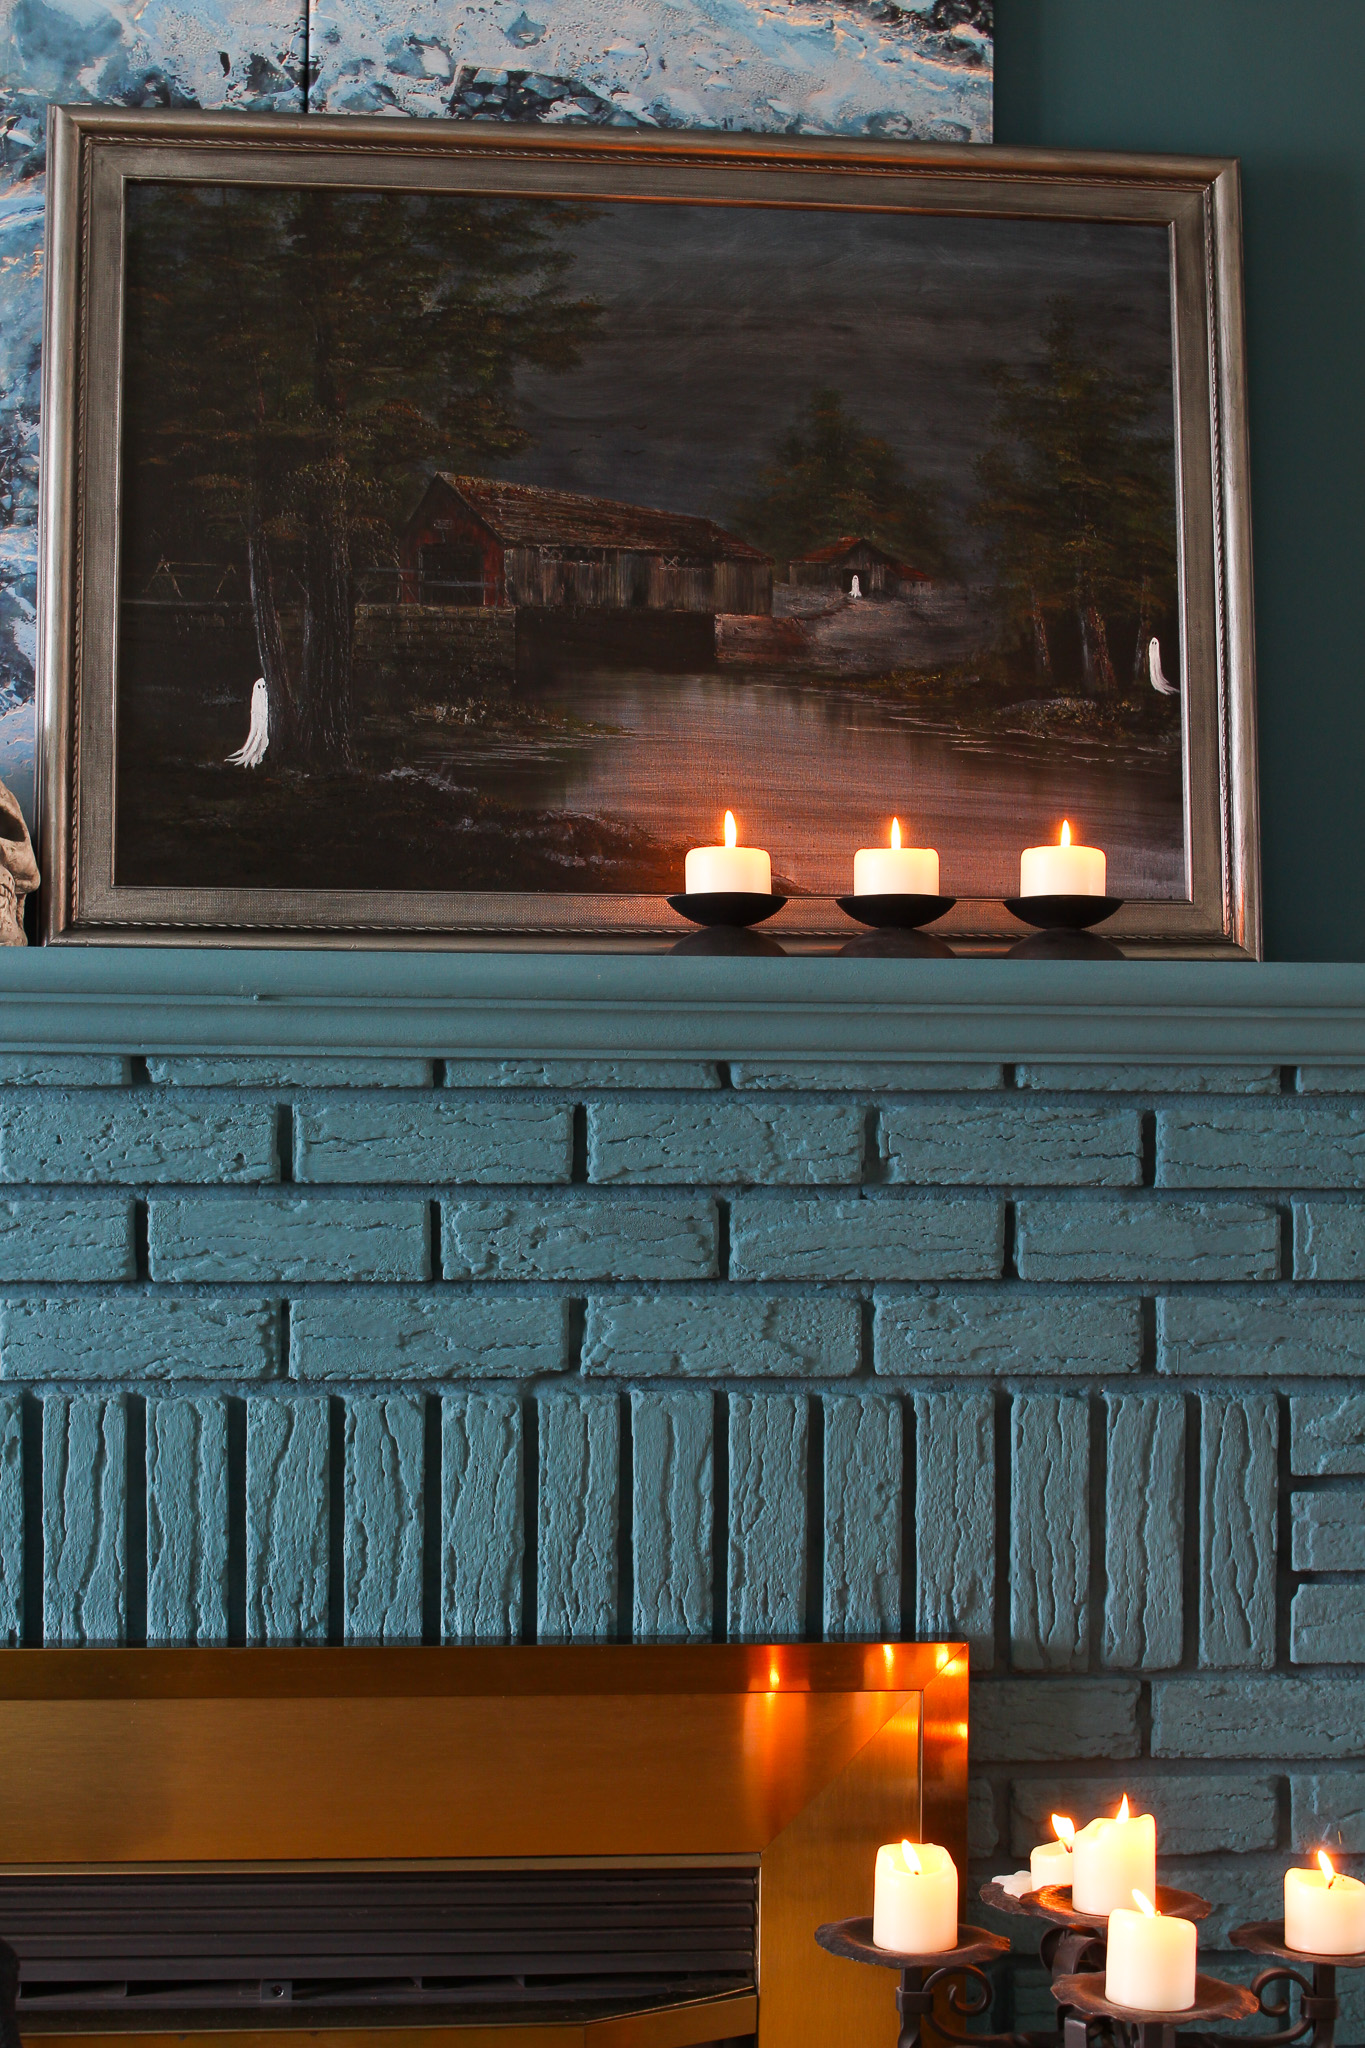
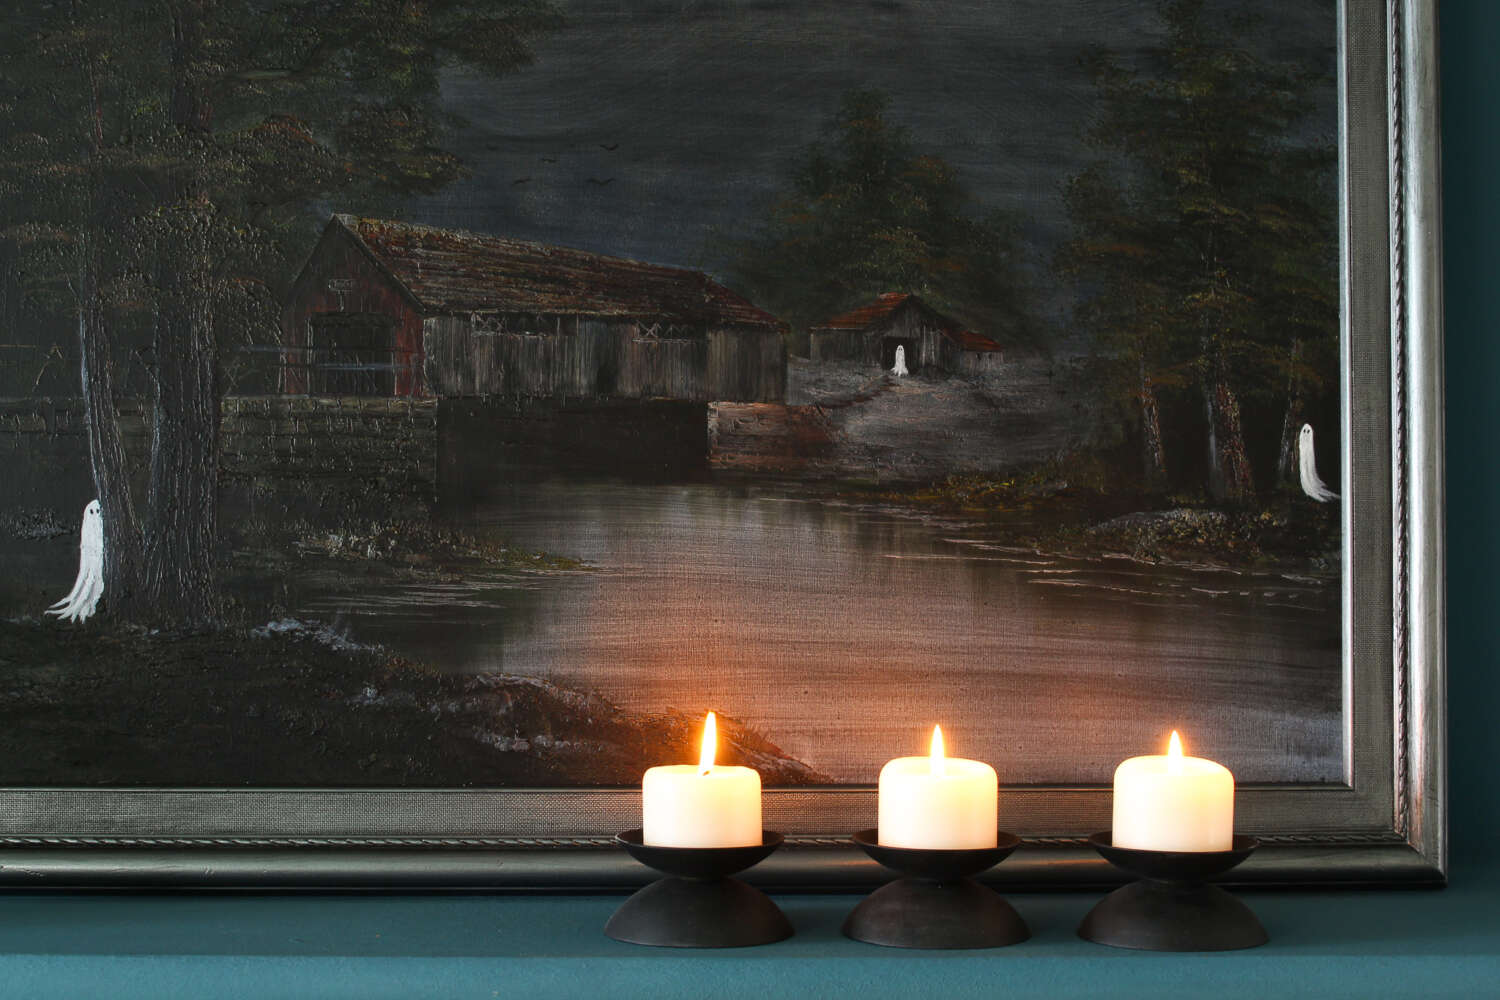
Lastly, we painted on three ghosts in shades of white, with a little gray painted into their wispy bottoms for dimension/depth. With a steady hand, I used a tiny brush to add a pair of black circle eyes to each. (Detailed tutorial for how to paint a ghost follows). While I waited for the paint to dry, I painted the frame to match the new vibes of the art. The end result is the CUTEST.

What Paint to Use for Ghost Painting?
Acrylic paints are the perfect paint to use for ghost painting because they can be inexpensive (check dollar stores!) and so forgiving. If you don’t like how something has turned out, let it dry and paint right over. If you don’t feel comfortable with a paint brush, or want more crisp lines, you can also try acrylic paint pens.
How Do You Paint Ghosts on Old Paintings?
To paint a small ghost, grab a small artist’s paint brush and dip it in some white acrylic paint. Using short, light brush strokes, paint on a basic rectangle, then add a curved shape at the top. The bottom doesn’t matter yet – just worry about creating a nice, non-phallic, shape to the top of the ghost:


Once the top is nicely rounded, use short, soft, vertically sweeping brush strokes to create a raggedy bottom, keeping the brush strokes light and the paint sheer. We had the bottoms of the ghost curve a bit, like a sheet was draped on a figure and the sheet swooping across the ground a bit.

Mix up a slightly darker color (a light grey) and then paint on a few vertical lines of shadow near the bottom of the ghost. Think about the shadows in a draped cloth. Once the paint dries, use a tiny paint brush or fine point permanent marker and add two dots for eyes. That’s it! If you’re nervous, try painting a ghost on a scrap of cardboard before tackling your thrifted ghost painting – but you’ll quickly see that it’s super easy!


How to Fake a Faux Aged Metal Frame
Creating a faux aged metal frame for the painting was almost an accident! The frame was originally wood, with some plastic inserts close to the painting, and I knew I wanted to spray paint it. Originally I was planning to spray paint it matte black but, in the interest of keeping this project free – and using what I have – I chose instead to use up a half empty can of silver spray paint.
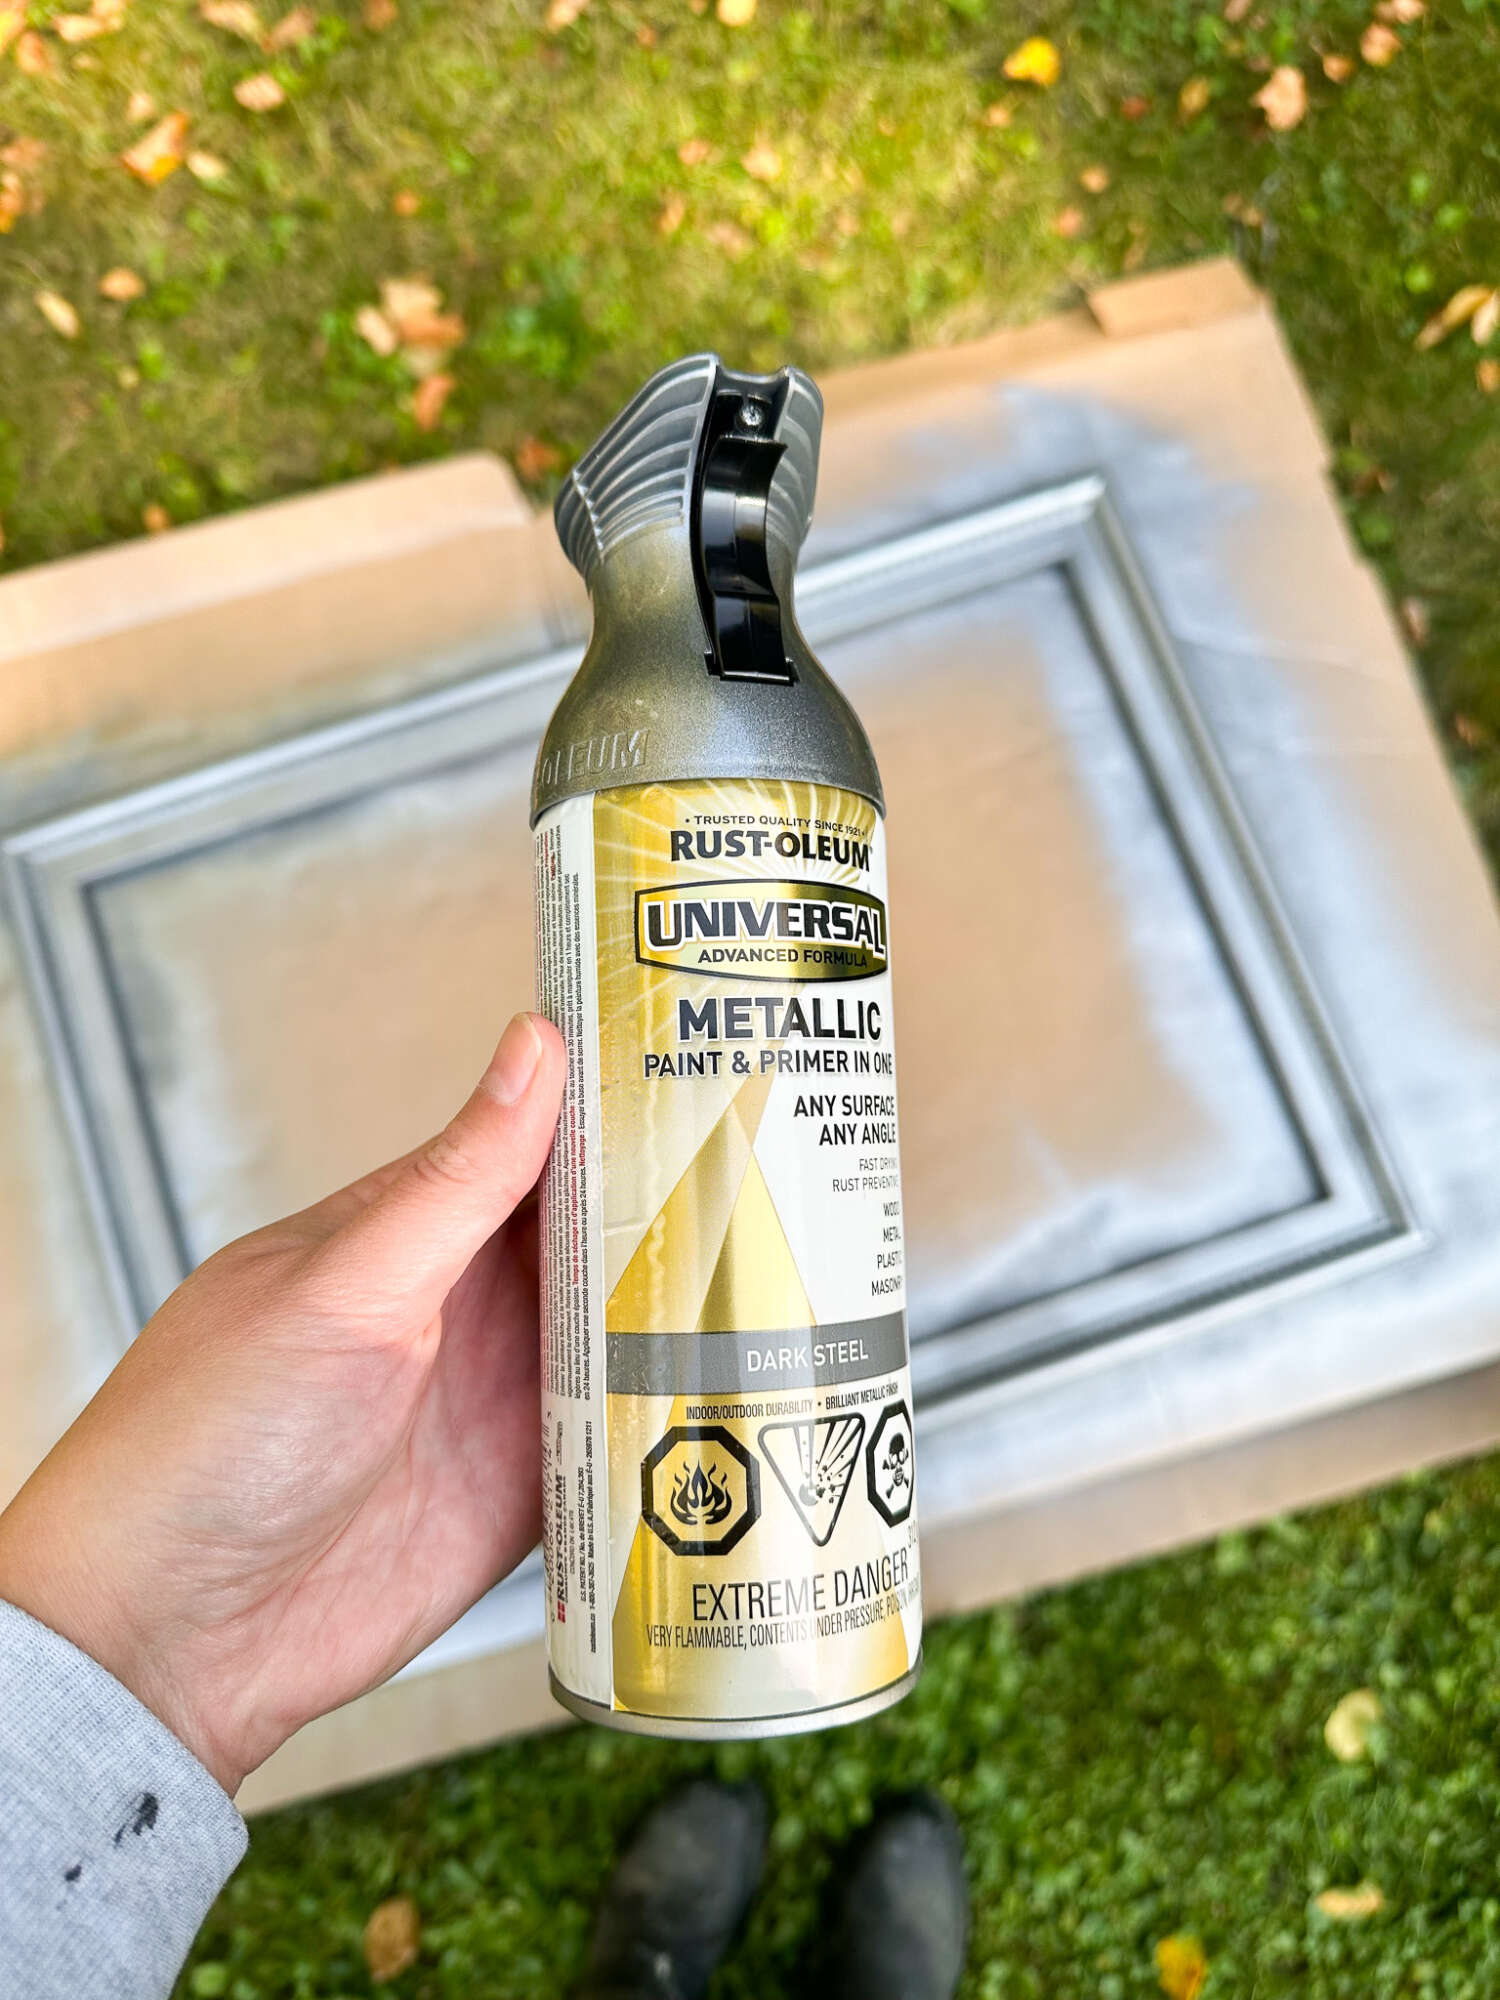
But the end result seemed too shiny and new, so I just roughly brushed on some black acrylic paint once the spray paint dried completely. I wiped off excess black paint with a paper towel, and the end result is this suitably moody faux aged metal finish, which I think is so perfect.
Alternatives to Painting a Small Ghost onto Thrifted Art
If you cannot, or do not want, to actually paint a ghost onto thrifted art, here are some alternative ideas for creating a thrifted ghost painting:
- Use a vinyl cutting machine, like the Cricut Joy, and cut out a small vinyl ghost to add to smooth thrifted art (it may not stick to a super texture painting but a print would be perfect).
- Add add a removable vinyl ghost to the glass of a painting/print, if you have a painting you want to make more spooky – but not permanently.
- Cut out small ghost shapes from sheer paper and affix onto any artwork with mod podge.
- If you’d prefer not to paint with brushes, try acrylic paint pens or oil paint pens.
- Add foam ghost stickers to art.
The possibilities are endless for creating your own DIY ghost Halloween art. But, if you can get your hands on an inexpensive and unwanted landscape, I think you’ll love making this thrift store ghost painting. It’s fun to paint on ghosts to old vintage art – just make sure you don’t accidentally paint onto something priceless…
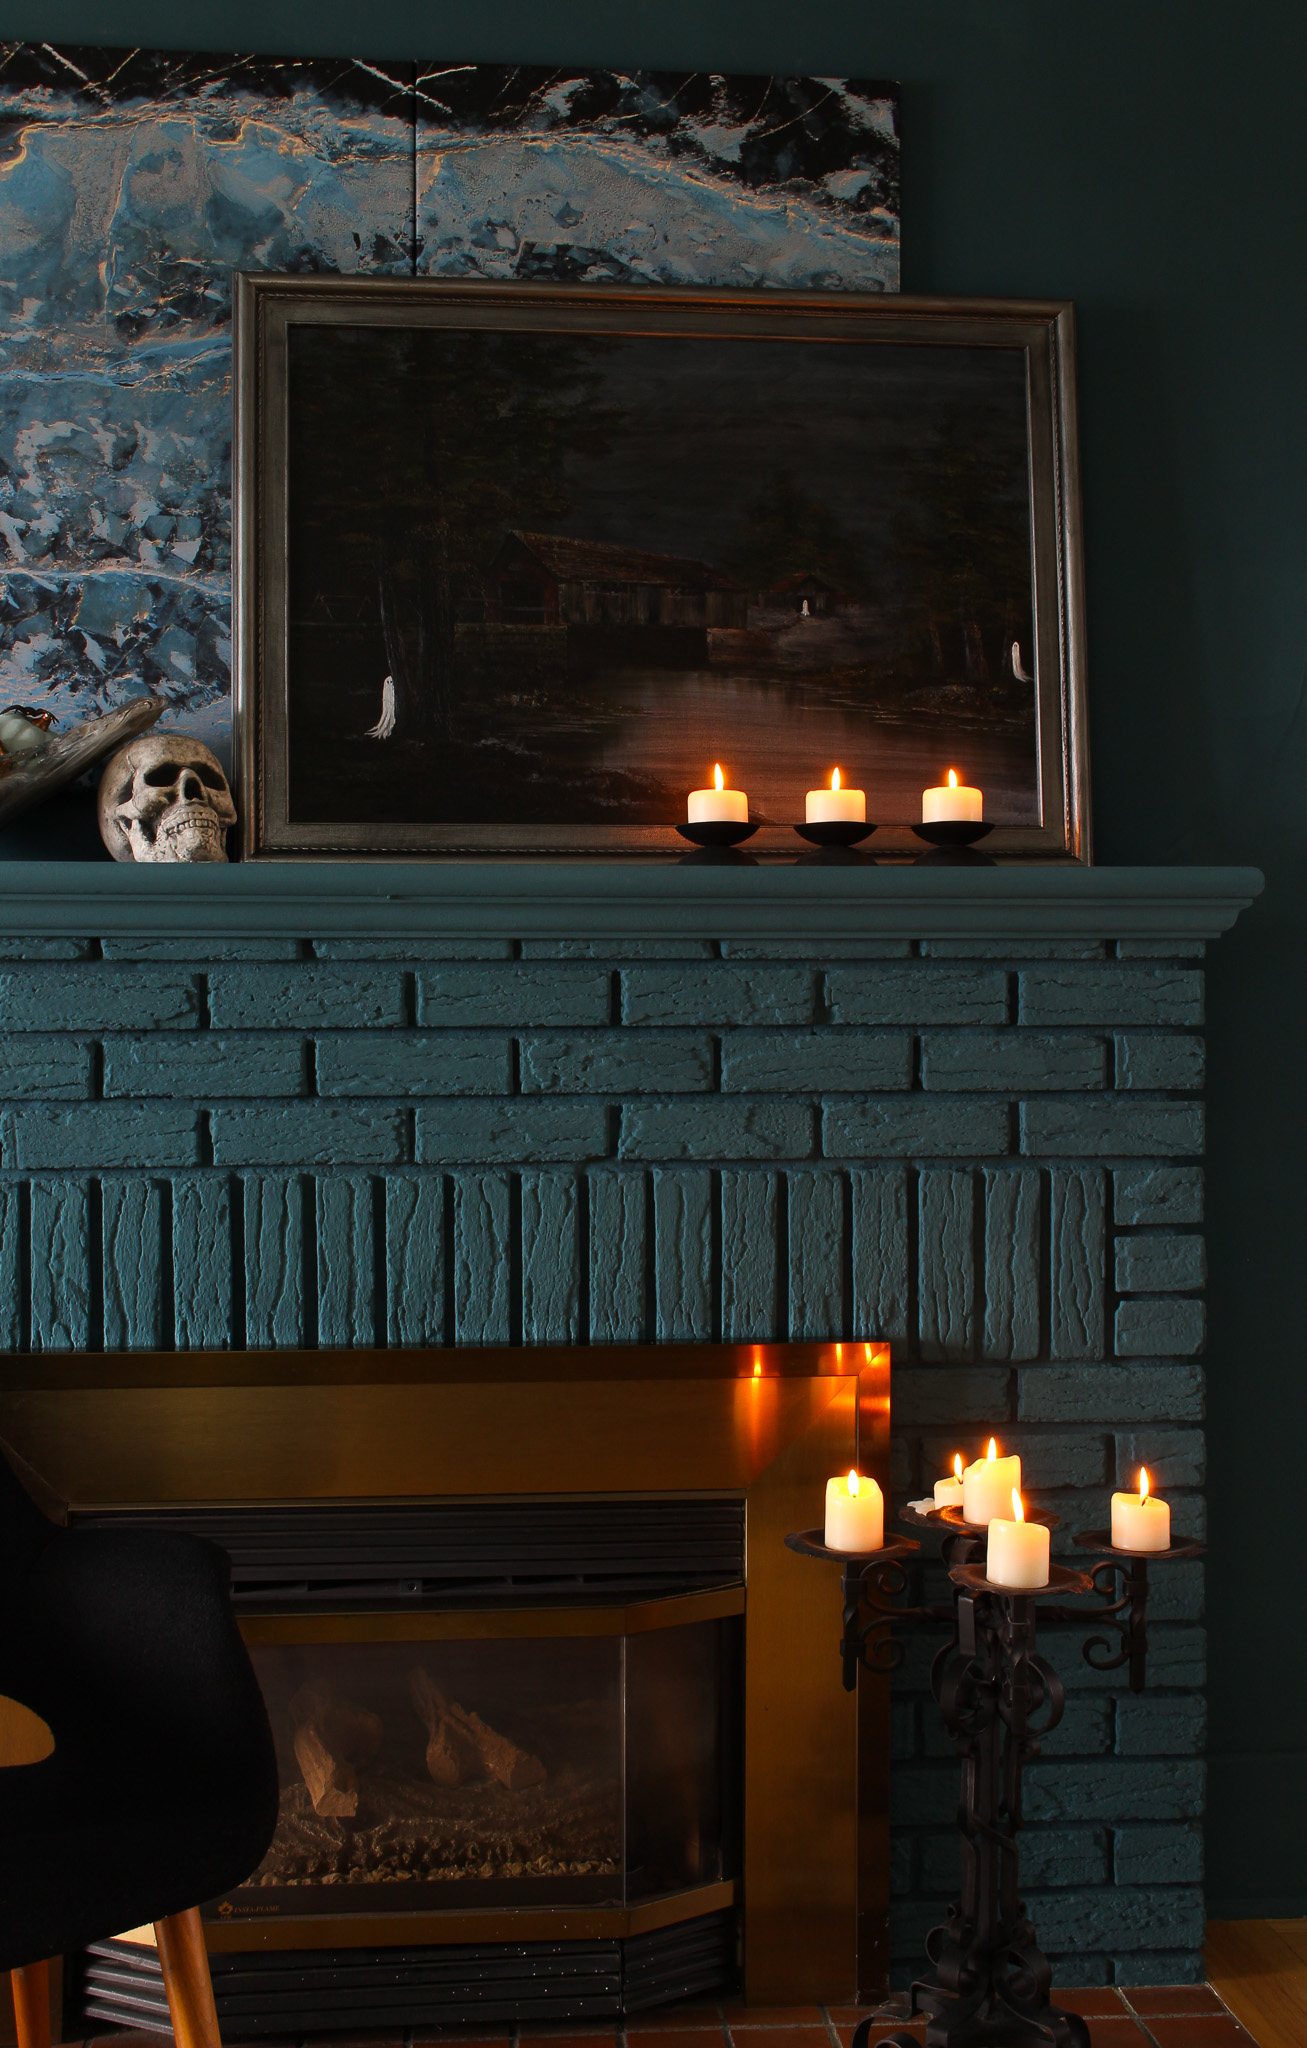
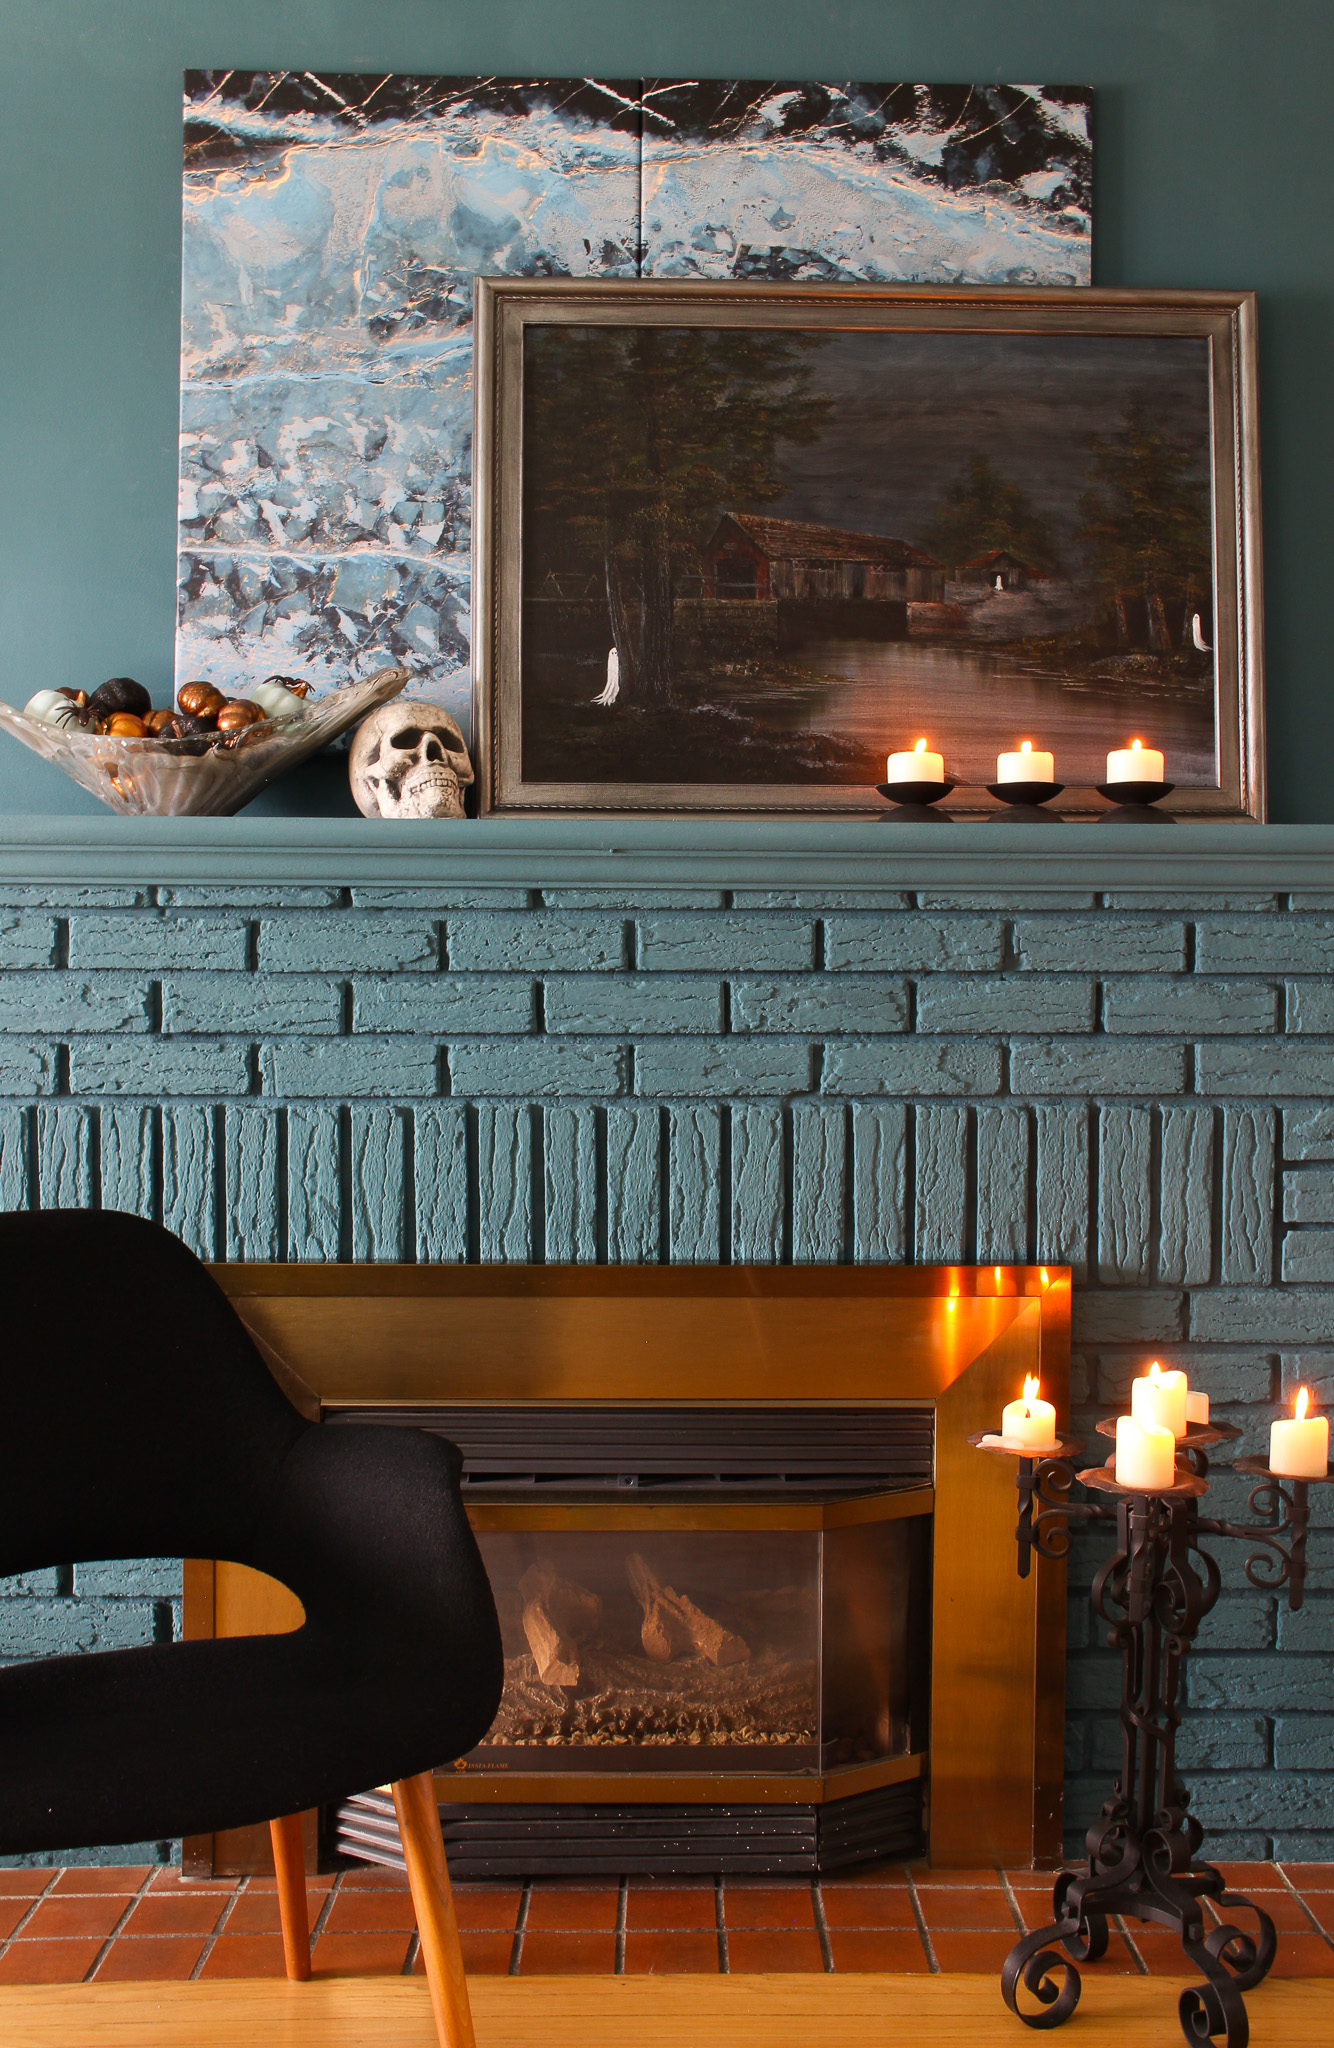
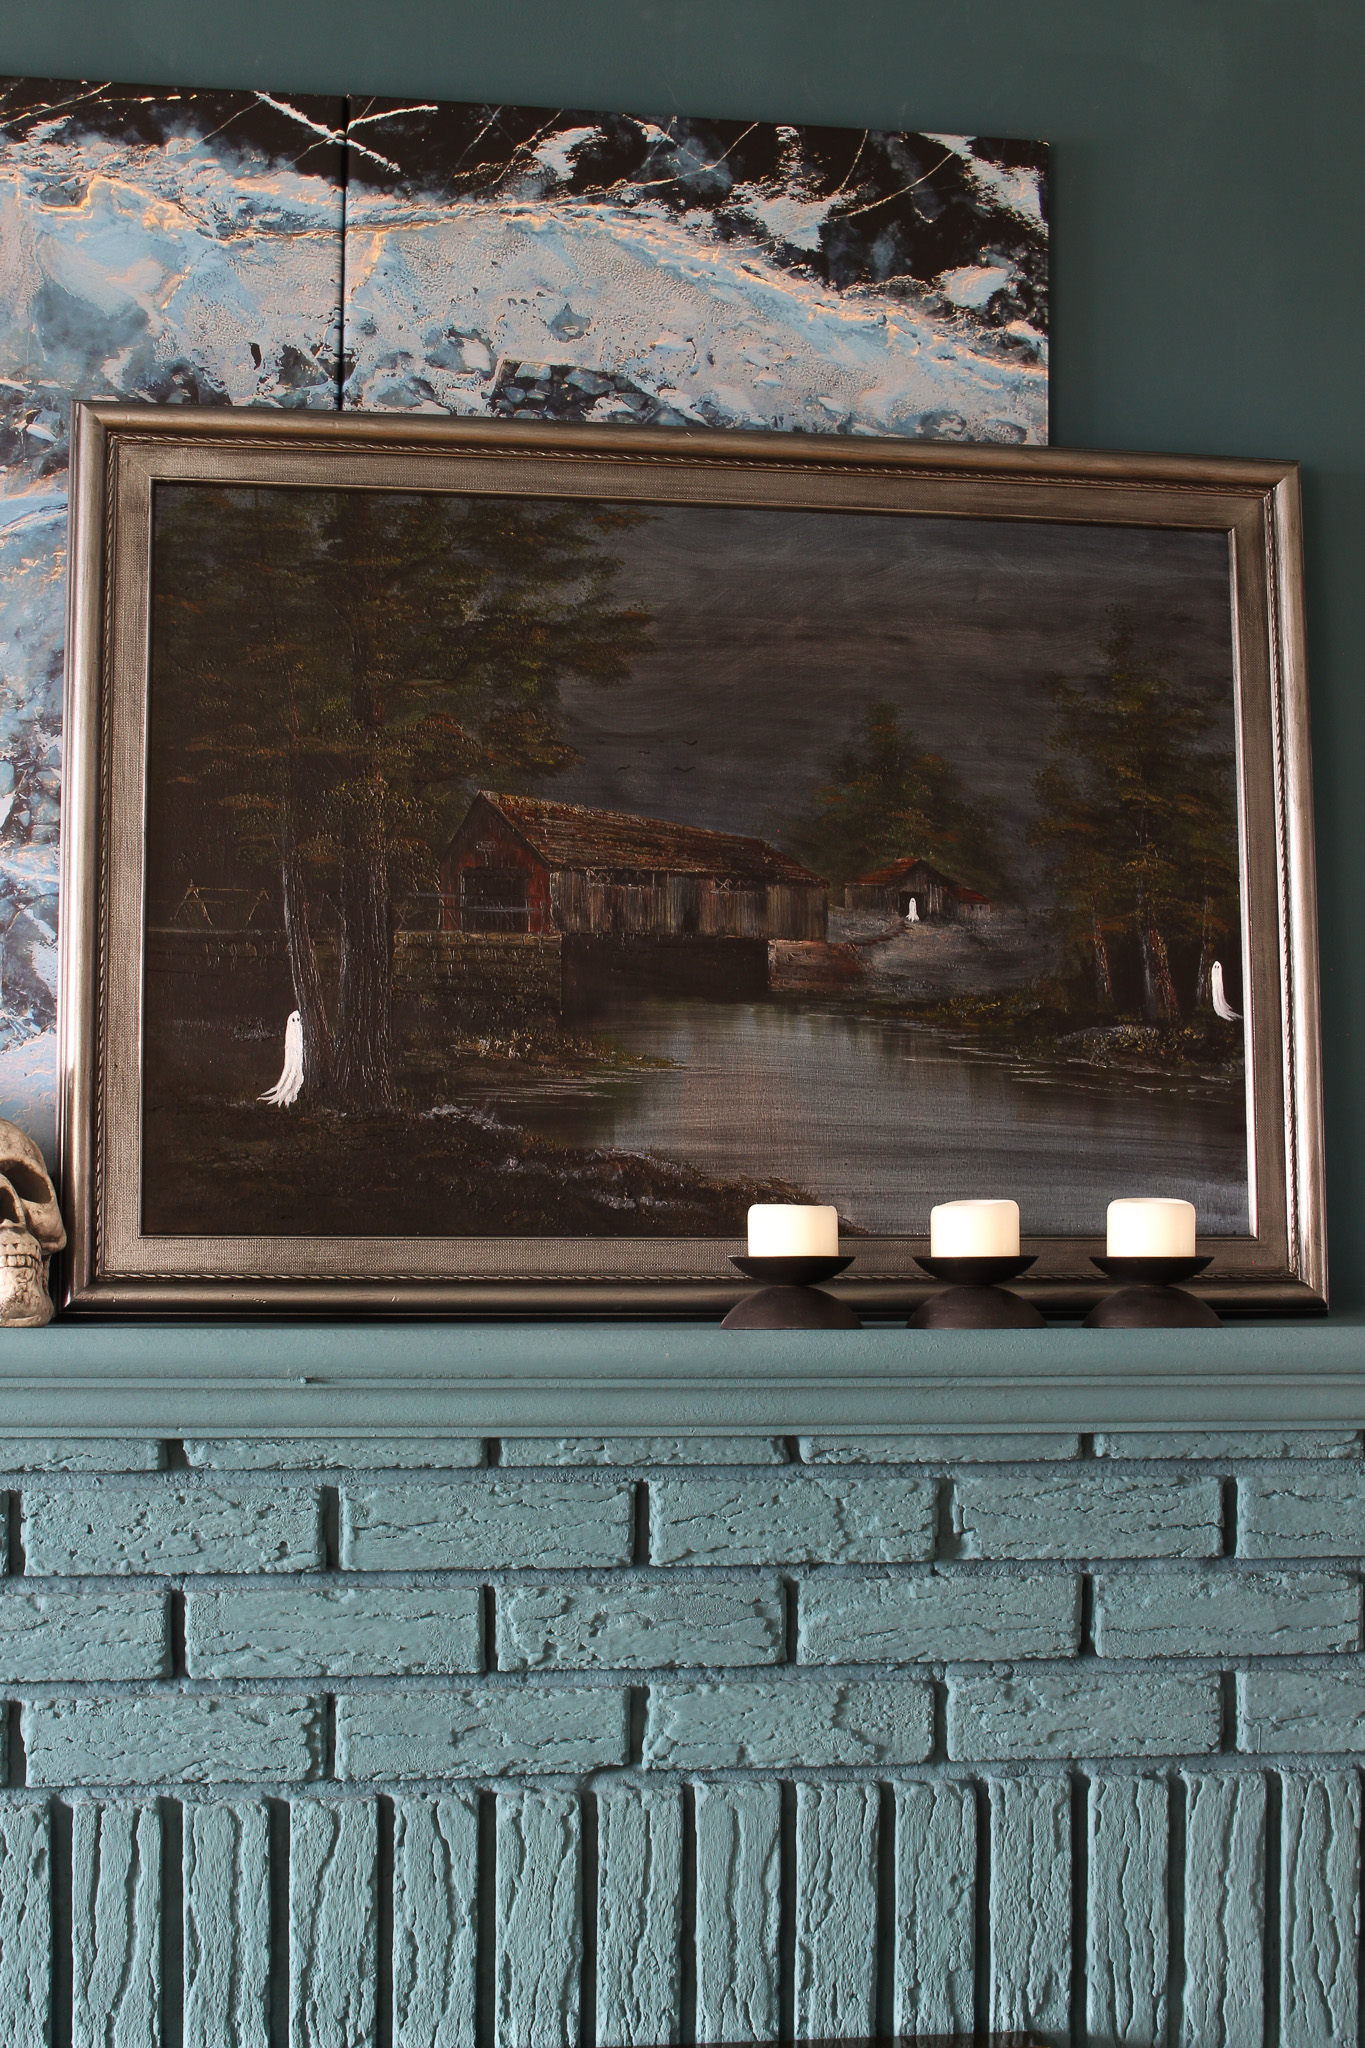
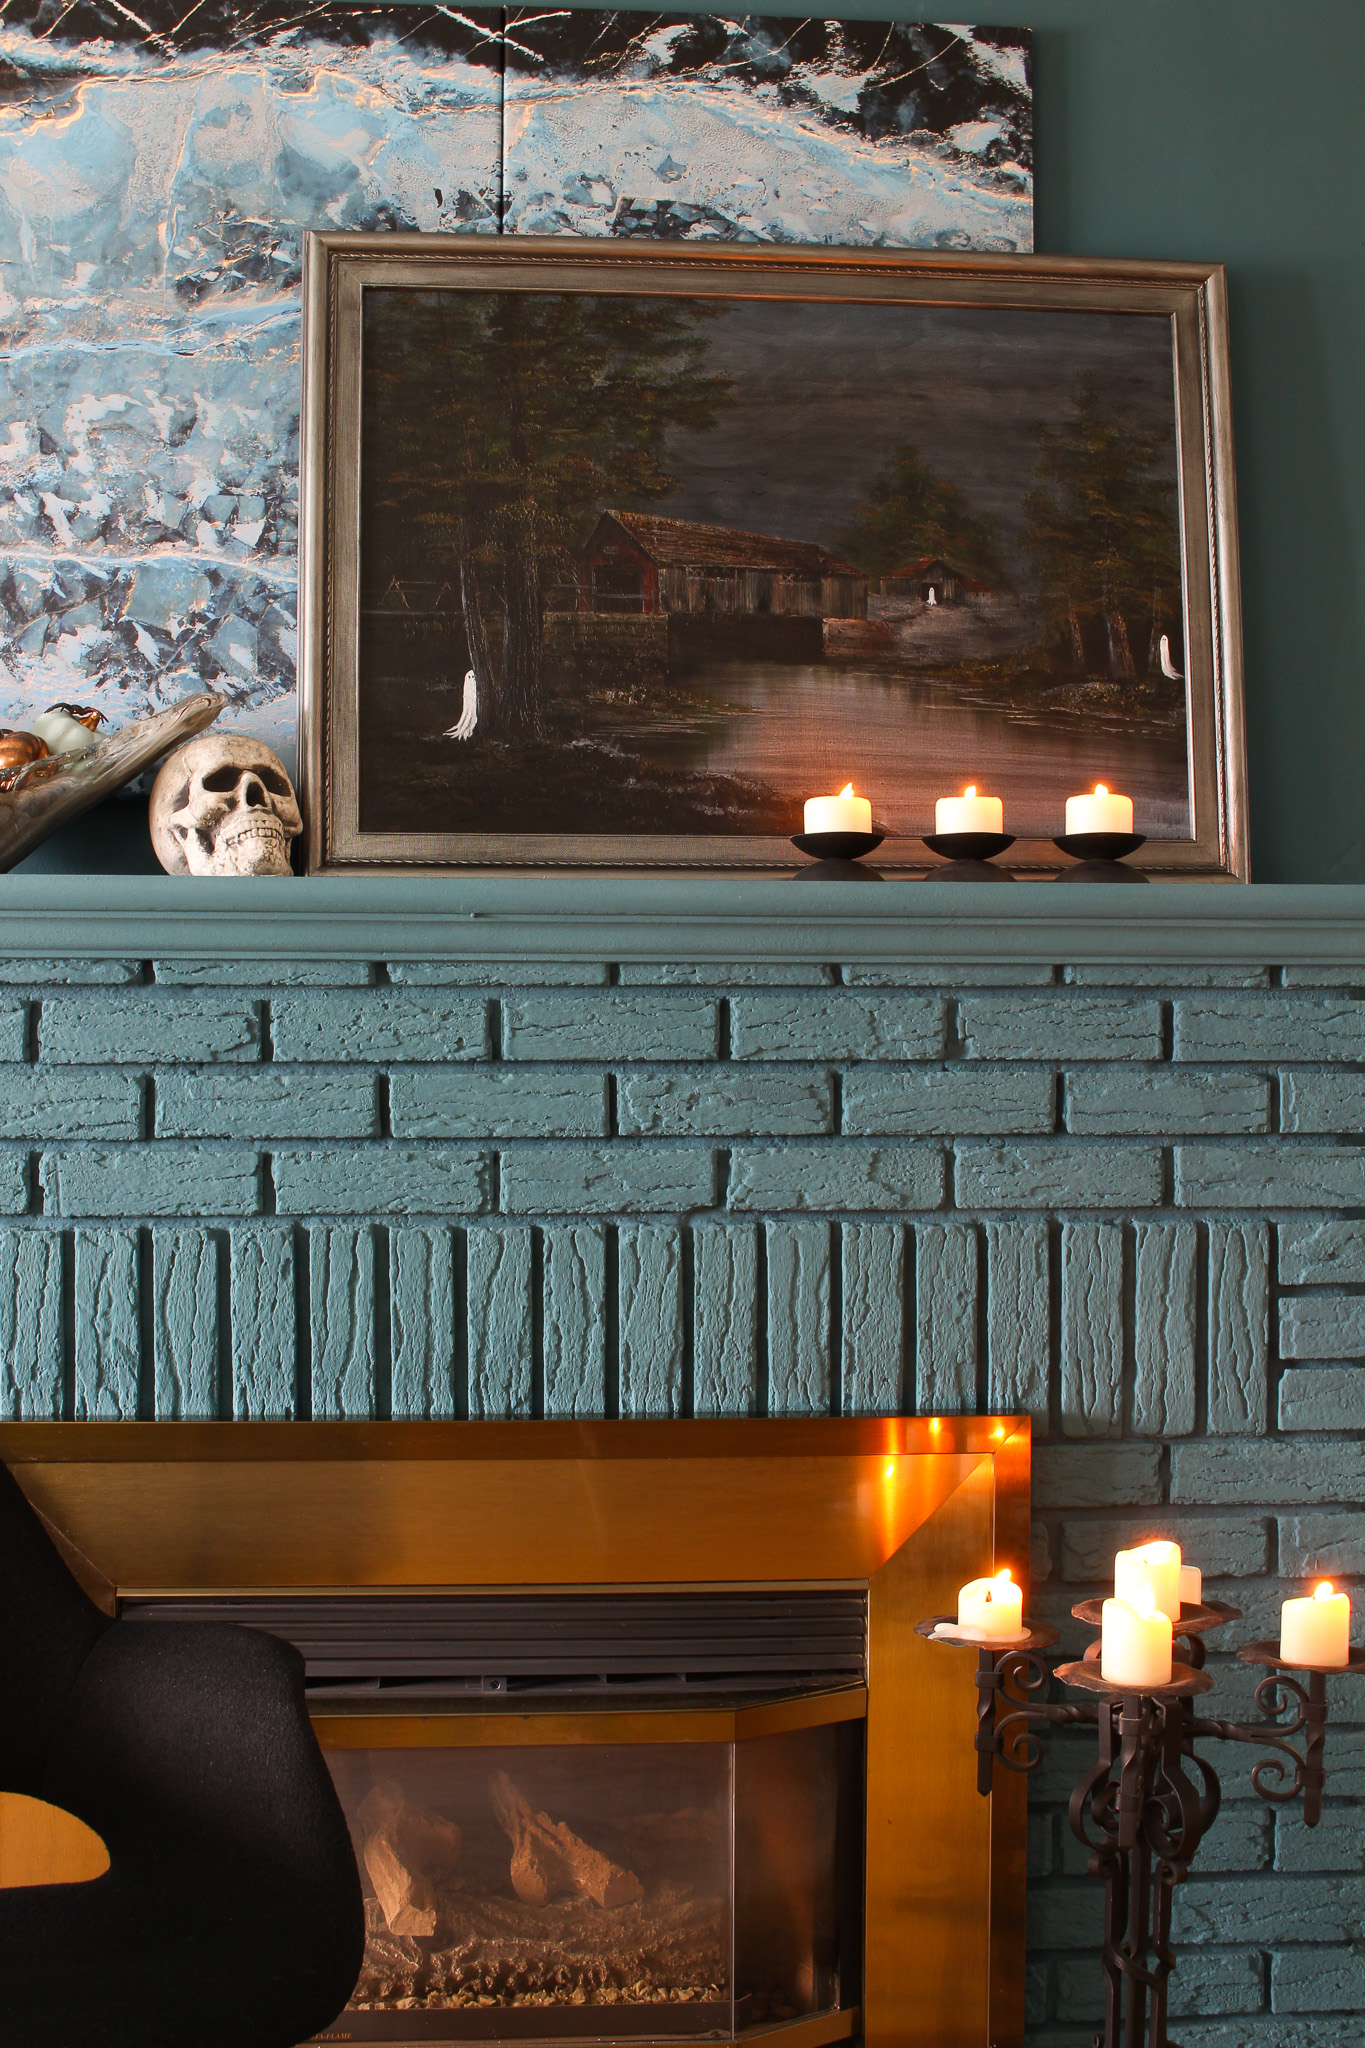
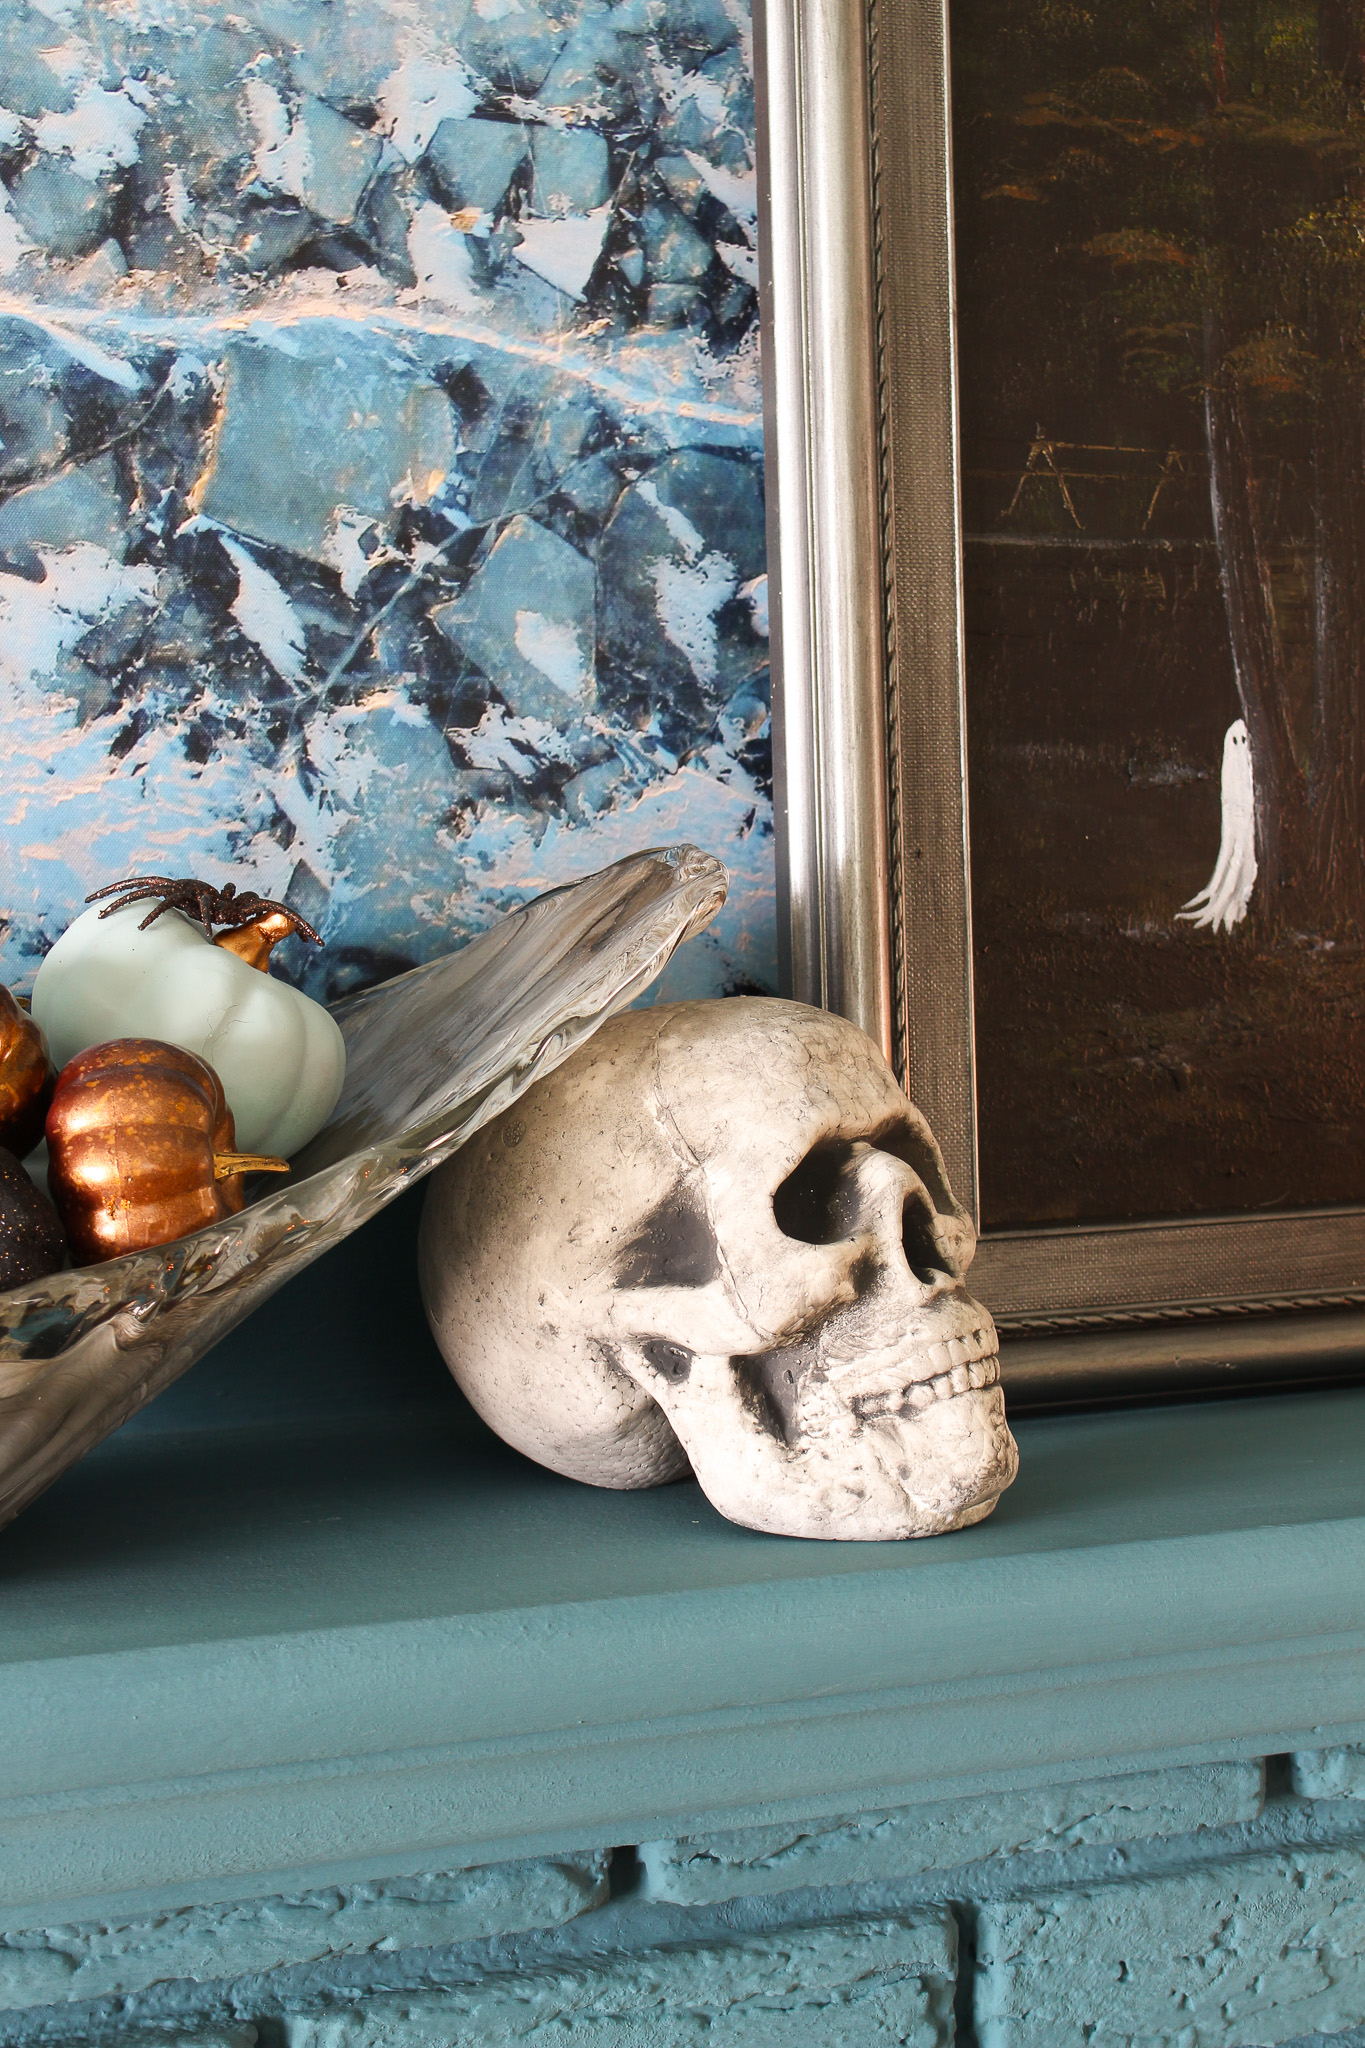
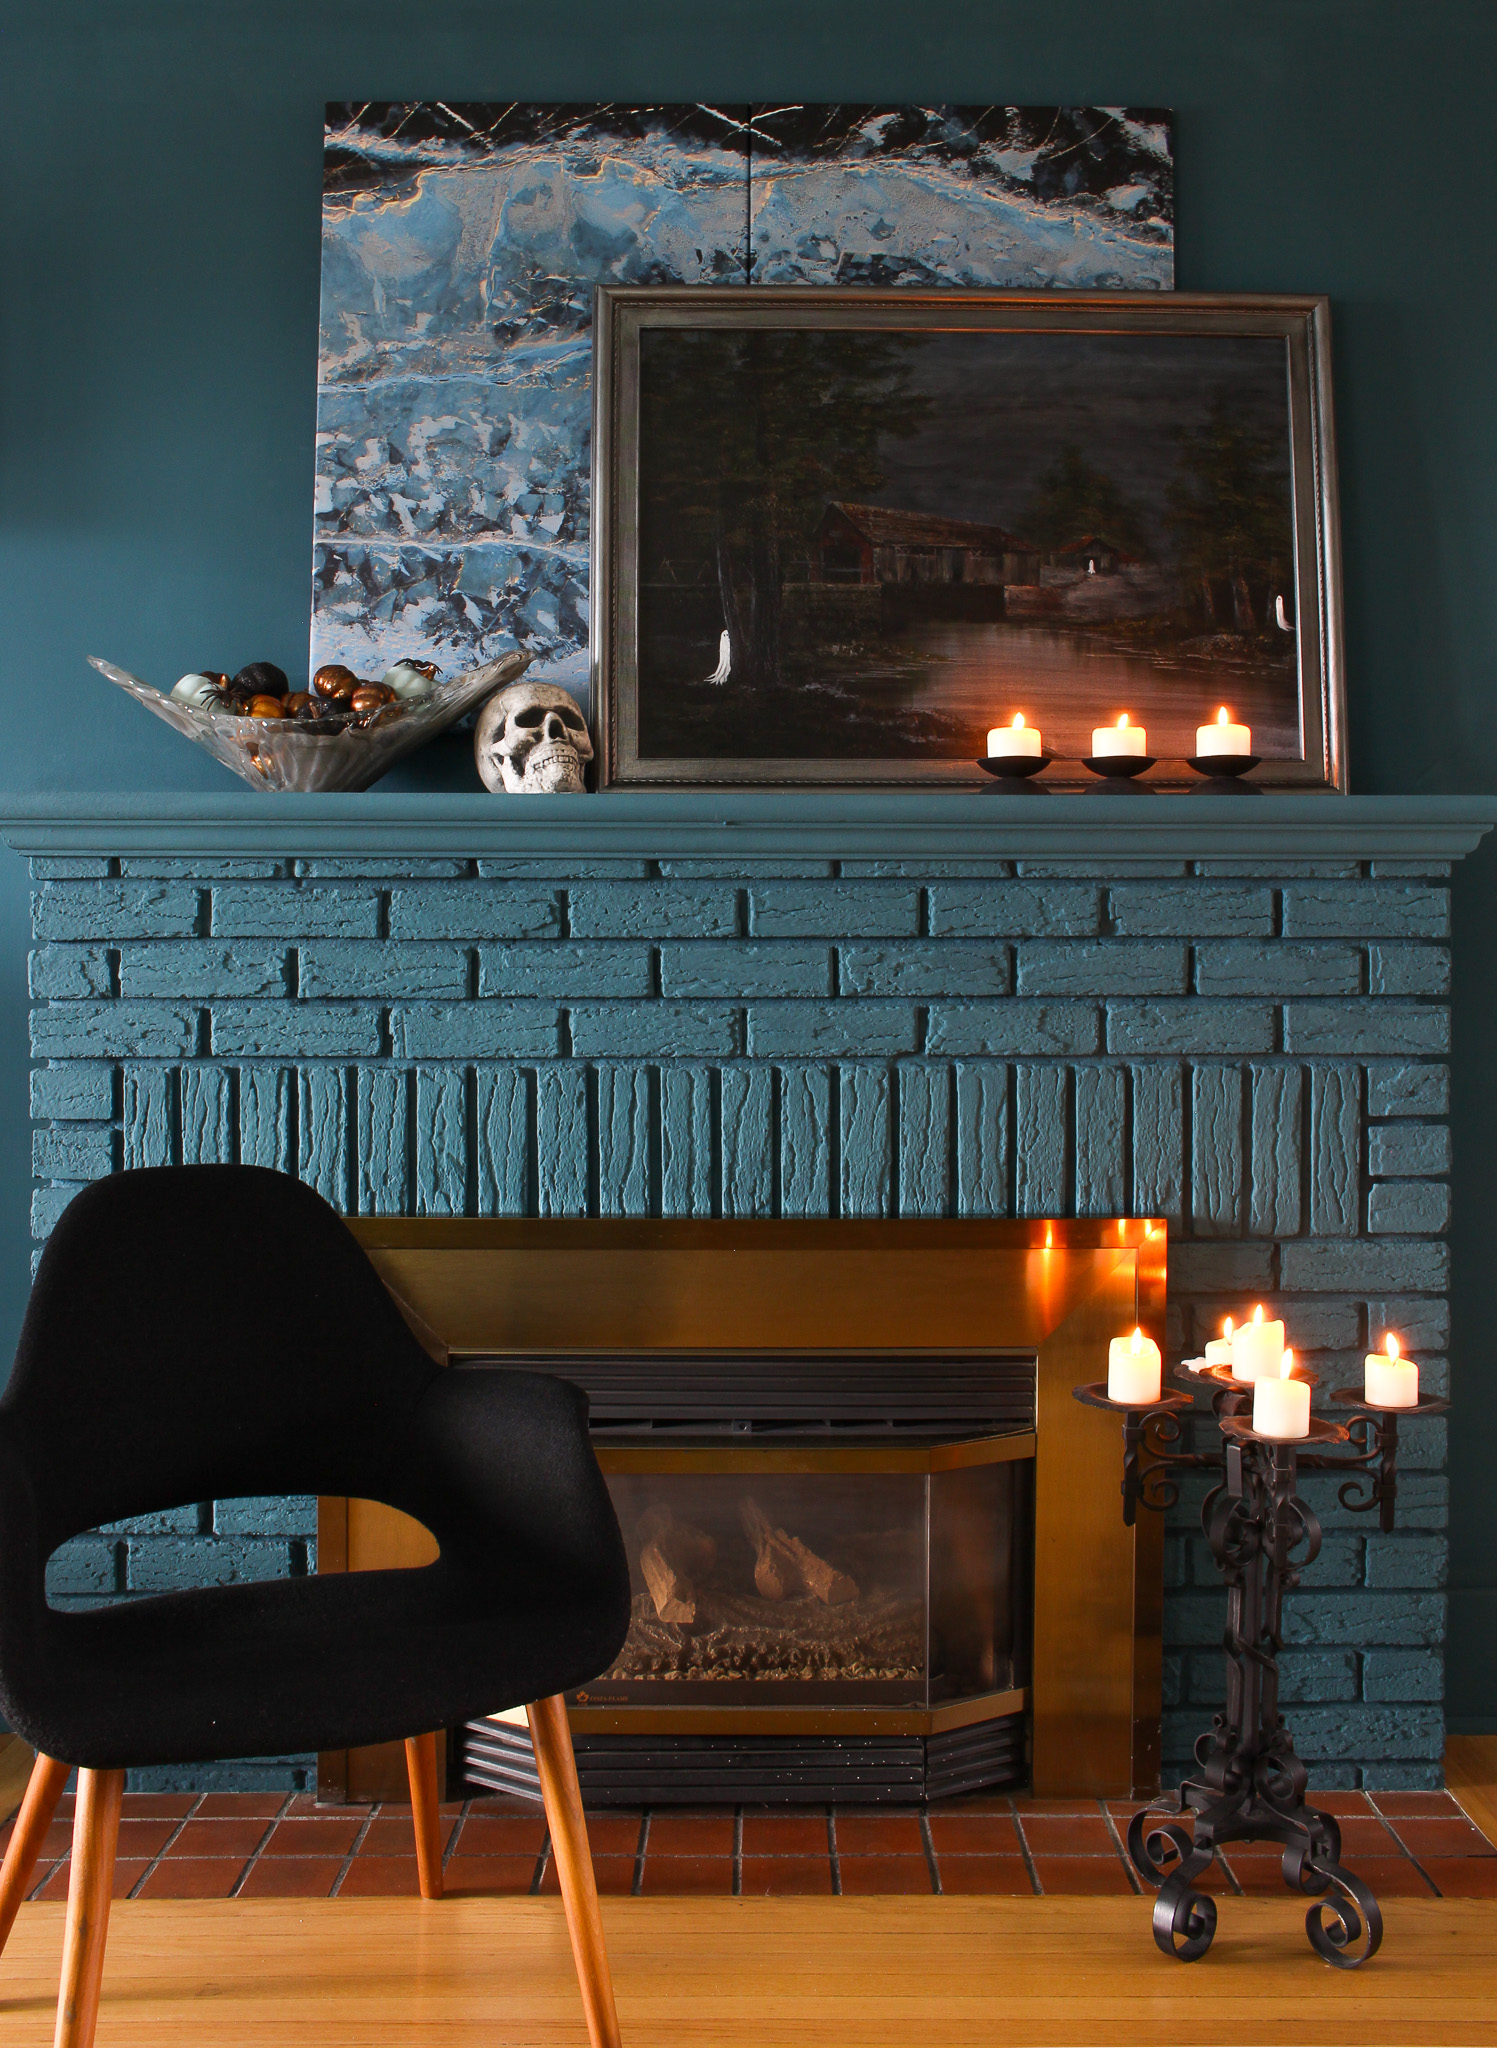
Styling a Moody Fall Mantel
Styling my DIY ghost painting on my Mom’s mantel worked so well! The cool tones of her blue painted fireplace played nicely with the newly moody landscape. I also found the grey Murano glass bowl at the landfill, and the shape/color were perfect for Halloween decorating! I filled it with dollar store pumpkins and spiders (along with some chalk painted pumpkins from a few years ago). The little black candle holders were a thrifted find and the elaborate candelabra was welded by my artist grandpa. Honestly, my Mom and I both struggle decorating with it because it’s a bit…gothic – but for Halloween it’s perfect!

Thrifted Ghost Painting Trend Video Tutorial:
If you’d like to see more of the process, you can check out my video tutorial on TikTok, Instagram, or YouTube:
P.S. Don’t Forget to Pin for Later!

I am shocked how much the dark wash elevated that plain painting. The moodiness is captivating. And I like how you placed the candles to reflect in the water. Hmmm, I think I need to review some of my artwork!
Author
Thank you! I was so happy the dark wash worked – I just kept my brush really wet but didn’t even need to water down the paint.
I am going to try this for Halloween this year! Thank you for sharing the idea.
Author
So glad you like this idea – you have lots of time to thrift the perfect piece 🙂