I teased you with the post about how we stained and varnished the wood surface and how Hubby welded the base so, without further ado, here are some photos of the completed DIY welded desk:

My DIY Desk Design Plan:
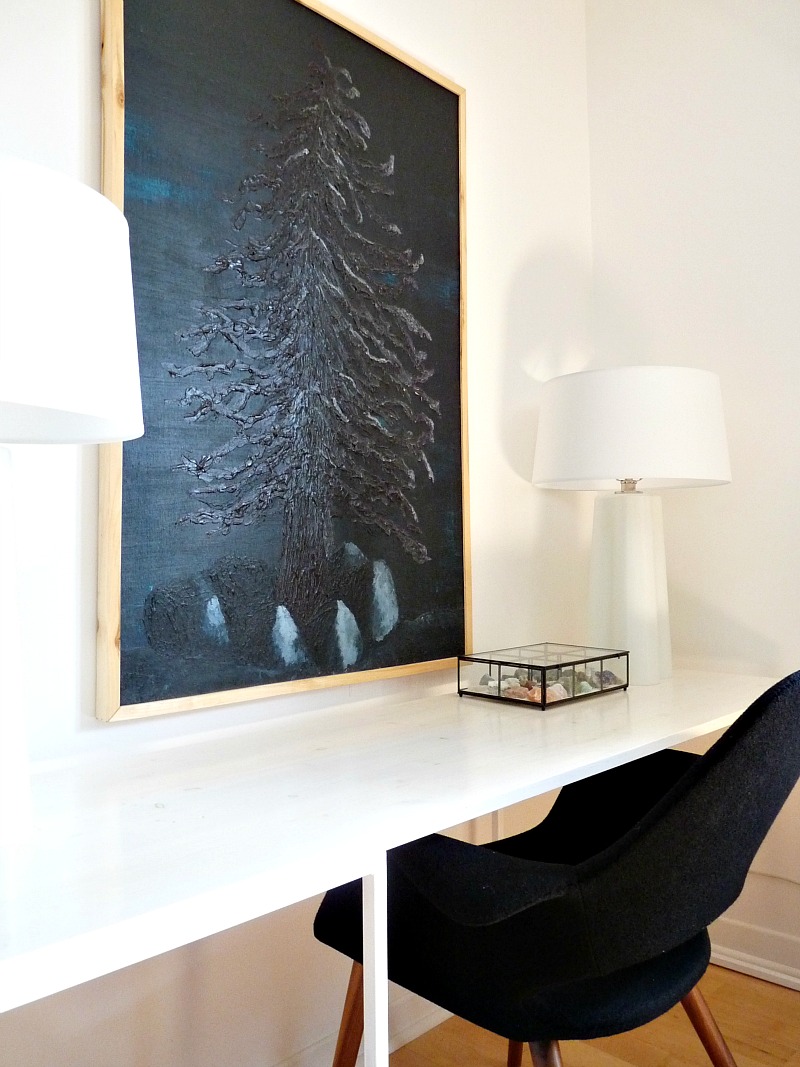
As you saw, we stained the pre-fab wood desk white but added a very glossy top coat and I just love how it gleams!

The pre-fab wood surface was a very knotty pine, so I toned that down with multiple coats of a water-based wood stain in the color “whitewash”:

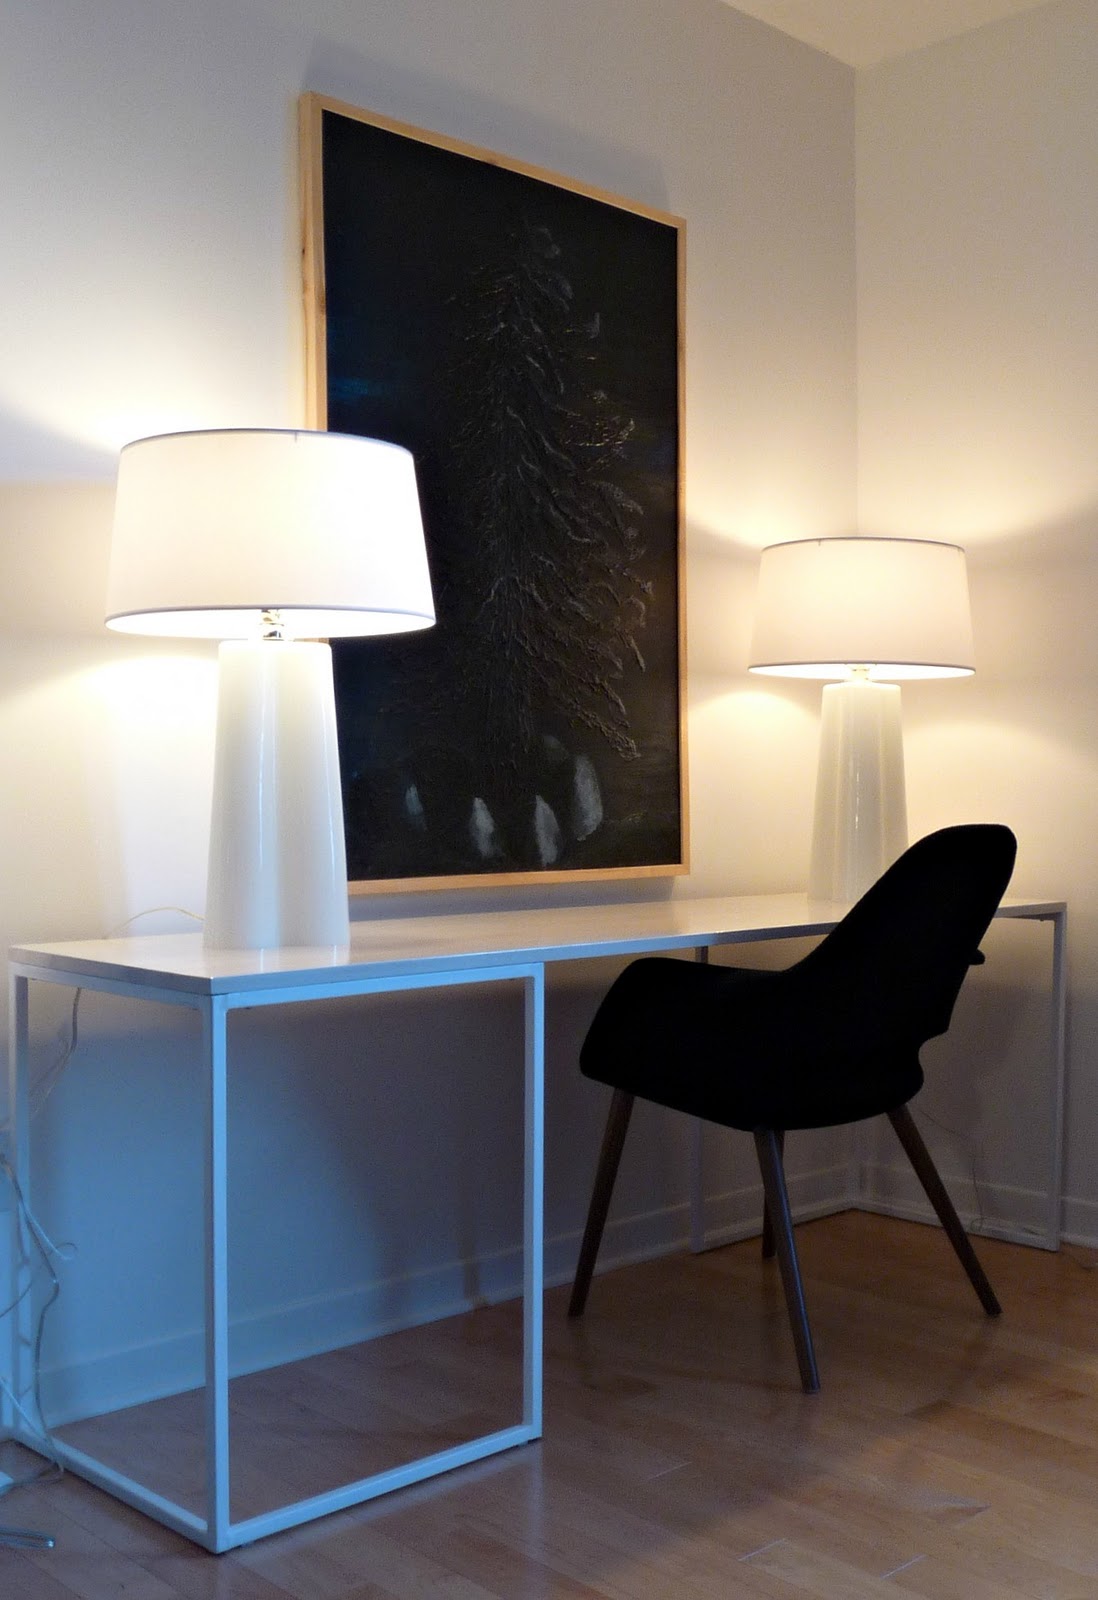
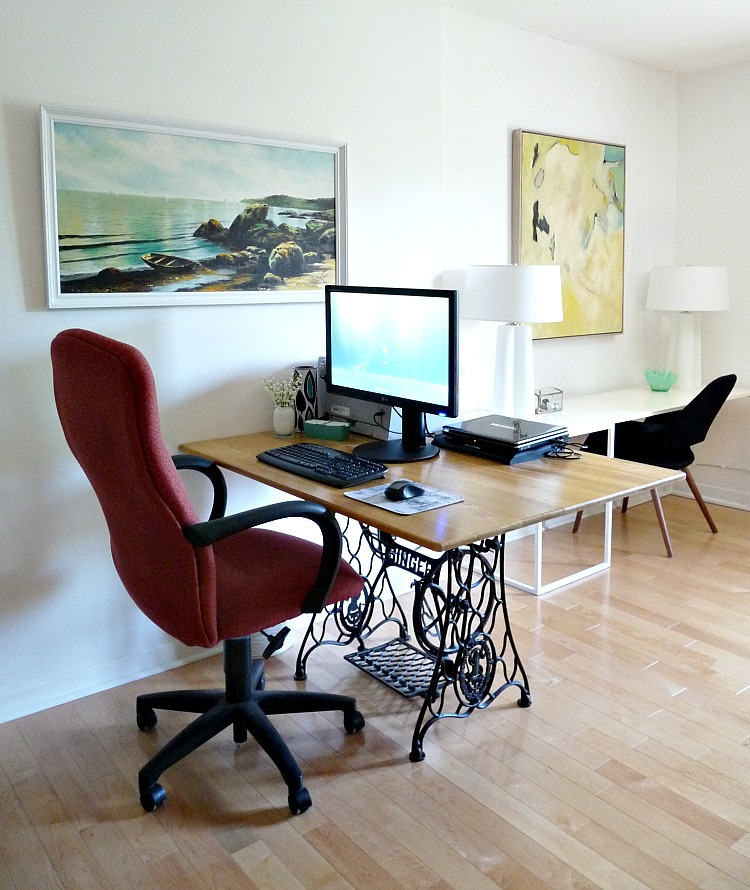
This DIY desk was meant to visually double as a simple DIY console table in my home office. I wanted to create a space for hubby to use his laptop or hang out while I’m working from home, but when he wasn’t using it I wanted it to sort of visually disappear in the space. This is what I look at from my desk, so I didn’t want to be really distracted! In my opinion, the interesting design of the white welded legs, the glossy off-white stained top, and the beautifully sculptural white glass lamps all add visual interest but in a very subtle way! The black chair and black painting add some drama and contrast, so the entire area isn’t completely monochromatic. If I turn the chair – which I chose because it’s super comfy but does NOT look like it belongs in an office – this will just looked like a beautifully designed little vignette in my office – not a second desk.

I love the welded table legs Hubby made for these desk – the design turned out so cool! After welding, you can prime + paint metal legs any color, but I loved the idea of a white so the desk had this airy look that kind of blended into our crisp white walls. But think of the drama matte black legs would create… Oh – and if you don’t want to try welding legs, I found a similar style to buy.


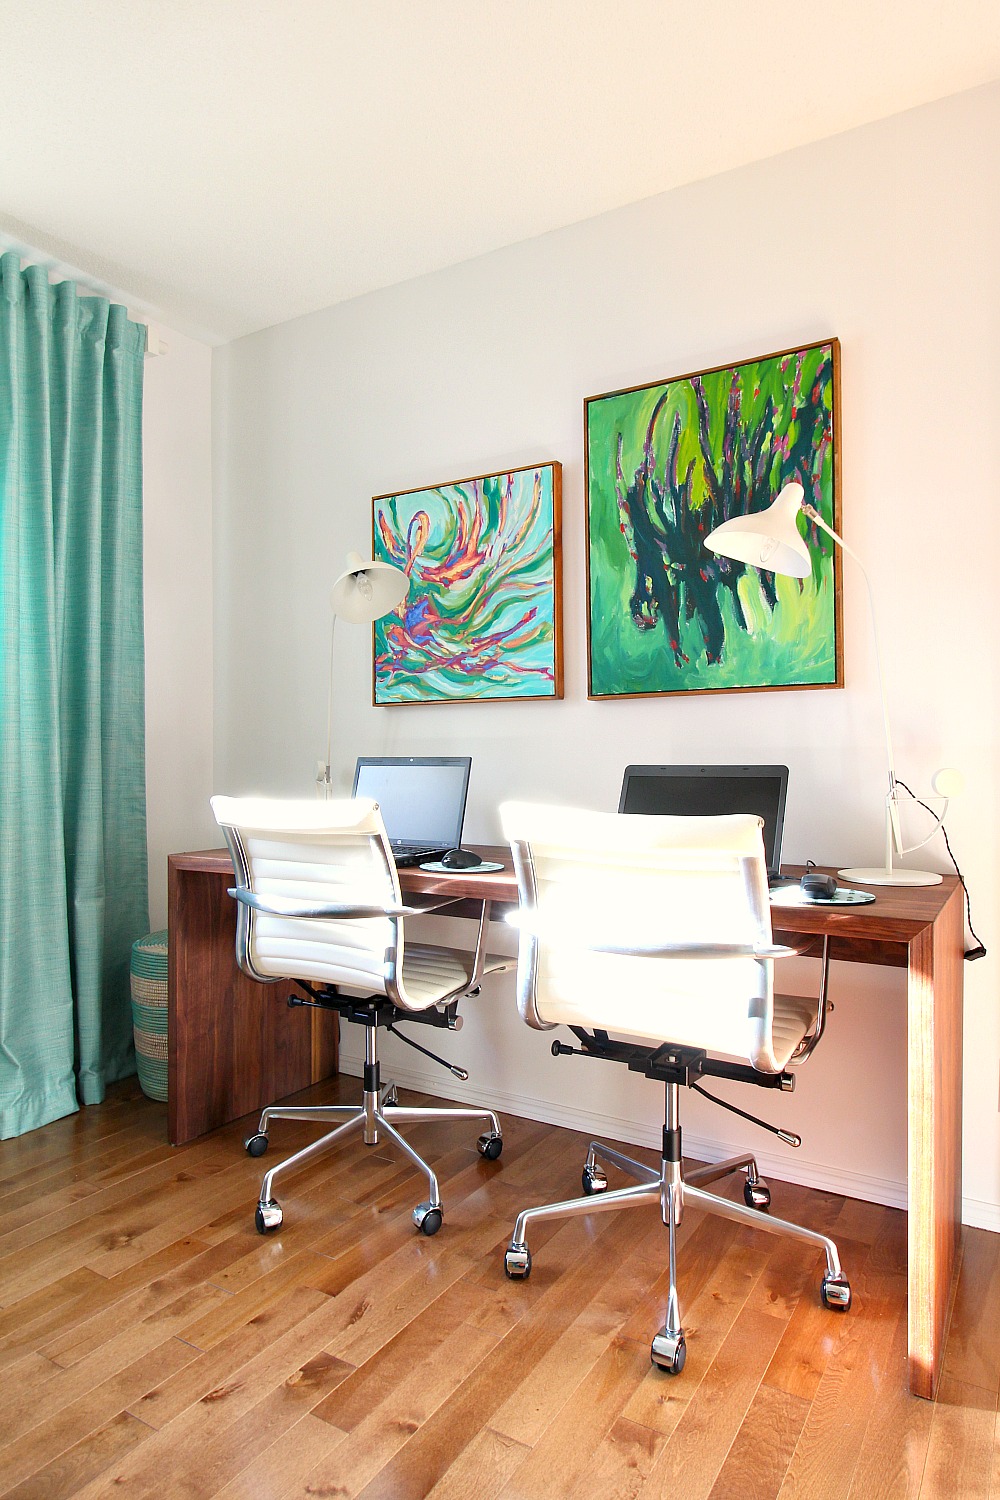
I haven’t had a chance yet to do any “styling,” or even hide the cords, but here’s a cozier view with the new lamps turned on:
 |
| These lamps have a dimmer, which is a nice touch. |
Decor Sources:
- Chair – purchased locally (here’s a similar one)
- Painting – I painted in high school (here’s a similar vibe print)*
- Lamps
Note About the Black Painting:
I painted this in high school, a loooong time ago. So it’s not my best work – but I still love it! Hubby (although he wasn’t my Hubby, yet) was handy back then too, and made my canvas stretchers and framed the finished pieces for a high school art class I was taking. I sold one painting from the series, gave away most, and painted over one – but I gave this to him as a gift to say, “hey, thanks. p.s. I love you”. He had it hanging in his bachelor apartment for years before we moved in together and got married.
 |
| The painting is DIY, too! |
Choosing Materials for a DIY Welded Desk:
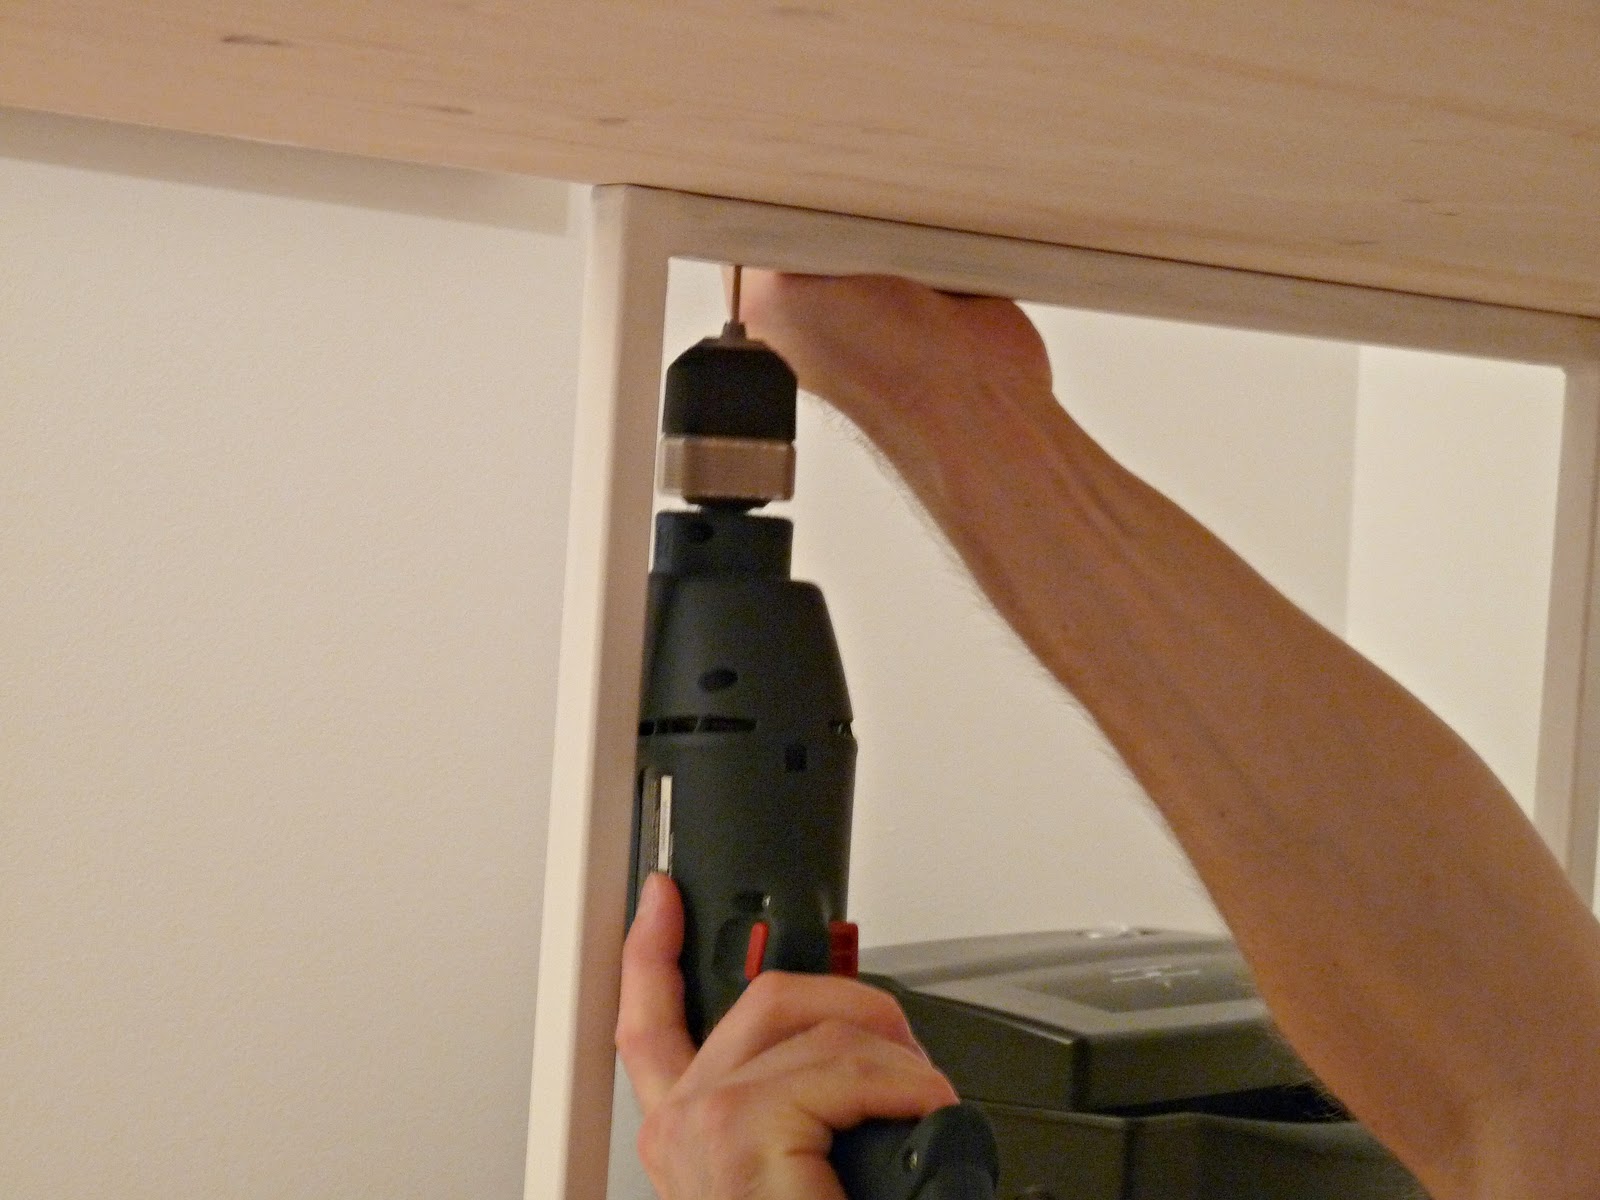
We chose square metal tubing the same size as the thickness of the surface because I think that looks good. If you try this yourself, you can use larger/smaller tubing and a different surface thickness – a solid walnut top would look so good (like maybe even the walnut ply countertop from IKEA… gears are turning with cool variations….) You could definitely customize this desk a million ways to make it “yours”.


Affixing the legs to the surface was really straightforward:
Now some shots of the glossiness that took me days to achieve:


Apologies for the wait, but I wanted to let the varnish thoroughly cure, especially because I doubled the “recommended” number of coats. I didn’t want any lamp-shaped indentations! But waiting was excruciating for me. I’d come home from work/school and just stare at the desk, willing it to cure more quickly.

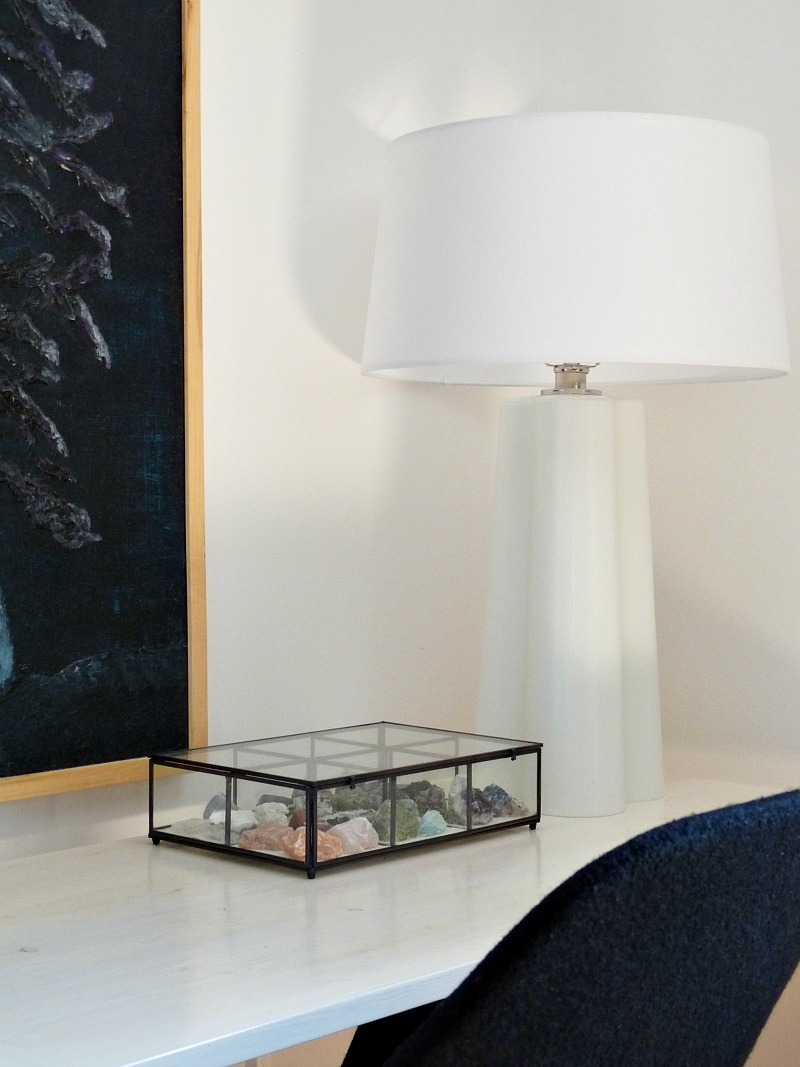
UPDATE: After thinking about how to style our new DIY welded desk, I decided to keep it simple. With the newly modified Ikea Expedit behind the desk, and the silhouette wall behind my desk (here’s a tour of my home office) – plus my own DIY desk (which is always filled with marking and papers and books), I didn’t want to add to the visual clutter, so I just added a little glass box with my childhood rock collection. This will leave ample space for Hubby to work or enjoy the space, and it won’t add to the mayhem in here:
But one question for you all:

Don’t Have a Welder???
I know this project won’t be especially affordable for people who don’t have the equipment already. I have the equipment because my grandpa was a welder and he bought me the tools so he could weld my headboard and so, eventually, I’d learn to weld (I’m working on that!) If you love the idea of this simple desk, but can’t reproduce it, chat with local high school students and college students in welding courses. A friend in high school welded her entire bedroom set (for credit!!) and I’m sure she would have welded something for someone else, for a fee less than paying a pro. Alternatively, you could make a similar style desk made entirely of wood!
Looking for More DIY Desk Ideas?
DIY Treadle Sewing Machine Base Desk:
DIY Solid Wood Waterfall Desk:

it looks amazing!!!!!!and you look so cute waiting….
WOW. It is amazing – congrats! I love the lamps and the chair too. They are such classic pieces you'll love them for ages, so it's worth the investment 🙂
Thanks, Cassie!Amelia, that's what I figured. I like to mix in some "posh" pieces because so much is DIY, bought second-hand or from a big box. It does feel good to have a few really good quality, stylish pieces. And the chair was more a comfort concern – it was, by far, THE most comfy chair we found in our city and we looked at less expensive ones first.
This is absolutely incredible! I'm so impressed!
I love love love it! Well done.As for the cords, have you seen what Benita at Chez Larson did with her desk space cables? It's genius. Here's a link to the post:http://chezlarsson.com/myblog/2011/10/hiding-the-desk-cables.html
You lamps are fabulous!
Oh.my.goodness. I love your desk! The amount of shine is amazing. I have a couple of rast hacks and I'm thinking they need some more coats of poly after seeing your desk top. I was going to ask how you deal with cords but then saw your question…. 🙂
Can I borrow your hubby for the day? My guy is useless at DIY! Your desk turned out fabulously! The beautiful lamps and chair (omg so in love with that chair) really make it all look so chic!
Hi Sarah,Luckily the cords on this lamp are clear. And one outlet is behind the curtain, so on the right side they are hidden. Lotte lamps have a retractable cord, why can't all lamps have that?!?
Hi Meghan,My Hubby is available for rent – we have to pay for the lamps and chair somehow. Lol.
Gorgeous! You two make quite the DIY team. I love how it all looks together…desk, lamps, chair, picture. Great job!
good jobbie!!!!!!!!!!!!!!
The desk is so pretty 🙂 You guys did such a great job
Thanks ladies!Dana, yes we do love to work together. His handy skills were actually very appealing to me when we met. I was already a fan of DIY as a teen, but had gaps in my skillset which Hubby filled nicely.
I'd say you complement each other in many ways! I could tell that the minute I met you. 🙂
Thanks Dana! That means a lot to me. I think it helps that we got together when I was 17 & he was 19 so we really "grew-up" together and grew in ways that fit one another. We celebrate our third wedding anniversary soon, and I have a funny post planned to celebrate.
Looks great! Worth the wait 🙂
Kirsti,I checked out the link, from Benita at Chez Larson. What a clever solution! I'll have to see if I can make her tips work for me.
I like how you put together your ideas in this blog.http://paquetevistasbien.blogspot.com
Totally love this. Think I might have to make my own version whenever it's time to get a new desk 🙂
it looks great!!! 🙂
That looks amazing. Love the painting, lamps, desk, chair, everything. Gorgeous.
so clean and chic. i love it. amazing post, love. thanks for sharing. if you get a sec I'd love to hear what you think of my latest post. xowww.fashboulevard.blogspot.com
From my perspective the waiting was worth it! The final product looks amazing!My BF is an electrical engineer… his life is wires! Have you ever heard of a "random wire box"? I'll be honest, it comes in handy once in a while… anyways, the BF bought a staple gun and tucked his insane amount of wires onto the baseboards and made our TV and speakers look like they are wireless! Believe me, the staple gun will save your life!Emiliewww.liveeatsmile.blogspot.com
Love, love, love it. Way to go you 2!!
Good tip, Emilie. I'll see if we can do that . . .
Love your desk! Amazing project and EXCELLENT result!
Looks fantastic! Love how simple and modern it is! Great job! Wish Shayne knew how to weld…
I have been toying with the idea of starting an etsy shop (largley because it has been suggested by many readers) and one thing we could stock are these welded legs. Handy folks who have all the skills but welding could then DIY a top (or go prefab, like we did) and prime and paint the legs to suit. We could even take custom orders. But this is just something we're thinking about. I'll post updates if we end up taking the plunge!
That is some high-class high-gloss! Brava!!
Love the desk! And that painting looks great with it.
Holy Smokes – fabulous! And those lamps – LOVE!
Thanks everyone! I did have plans to swap out the painting because I thought the proportions would be wrong, but Hubby wanted a much lower desk than I originally planned, so it worked! And I like the history of the painting. We're not a really romantic couple, but we are sentimental about some things.
Turned out nice, I know waiting was hard, but well worth it.
loved your desk…cant get enough of your DIYs :)…you rock tanya
tanya – this desk is amazing – it looks stunning – and being a girl with a penchant for black – i LOVE the painting too!
It turned out so absolutely fabulous! It's looking so mad men-esque…and that is a complement to the highest degree if you ask me (c: I love how clean the lines are…I have no clue what you are going to do with those cords, though, so I am no help…but it looks fantastic, be proud!
I certainly have to agree with everyone else, the desk is fantastic. But I have to admit my heart belongs to your painting. How did you get that amazing texture?
Deborah,Thanks for your kind words! I'm glad you like my painting :)For some of the paintings in that series I used a thick gesso (came in a tub). For this painting I think I just used acrylic paint. The cheaper, school-issued brand I used had a thicker consistency than more expensive brands I had used.
This is SO amazing I saw your comment and had to come and see this! i would love to feature it, if you are interested please let me know! I will get you all the details!Cassity
What a beautiful desk. The shine and simplicity is breathtaking. Thanks so much for your kind comment on my console table that was featured on Remodelaholic.
I love your last sentence – “Or, you could make a similar style desk made entirely of wood!” , it’s like saying that if you can’t weld, then don’t do it! Anyway, it’s really hard to weld at first. You have to practice for quite some time until you get used to it.
Welding is SO tricky! I was also thinking that some readers might not have access to the equipment but might like the style of the desk. Someone who already is set up for making wood cuts, etc., could make a similar style using their own expertise.
Could you run the electrical cords through the hollow tubing of the desk?
That's a great idea! I'd have to check to make sure the plugs would fit through the tubing. I'm selling this desk but I'll be sure to recommend your idea to the gal who is buying it. If I had thought of that when we bought the supplies, I could have picked out larger tubing that could accommodate the plugs.
This is wonderful! It's simple and minimal but it's really appealing. We especially like the glossy table, which you've waited a lot for. Anyways, great job!
So simple yet elegant, I'm inspired! How is that table top holding up? Have you had any problem with warping, given that the top is made out of spruce/pine/fir? Keep up the good work!
We used it for three years and have since sold it. But while we used it, it held up perfectly. No warping or problems. I think the boards were laminated together well (smiles and frowns, etc). Great question!
Thank you Tanya! Love your blog by the way!
I'm so happy to hear that, thank you 🙂
I love this project. I love how you sitting in deep thought, great idea! You are so lucky to have had a grandpa who taught you how to welder things . You listen, watched, and learned well, because you did an excellent job here. Thank you so much for this post. Your desk is fabulous.
I have to give the welding credit to my Hubby who is so good! I'm slowly slowly learning, haha.