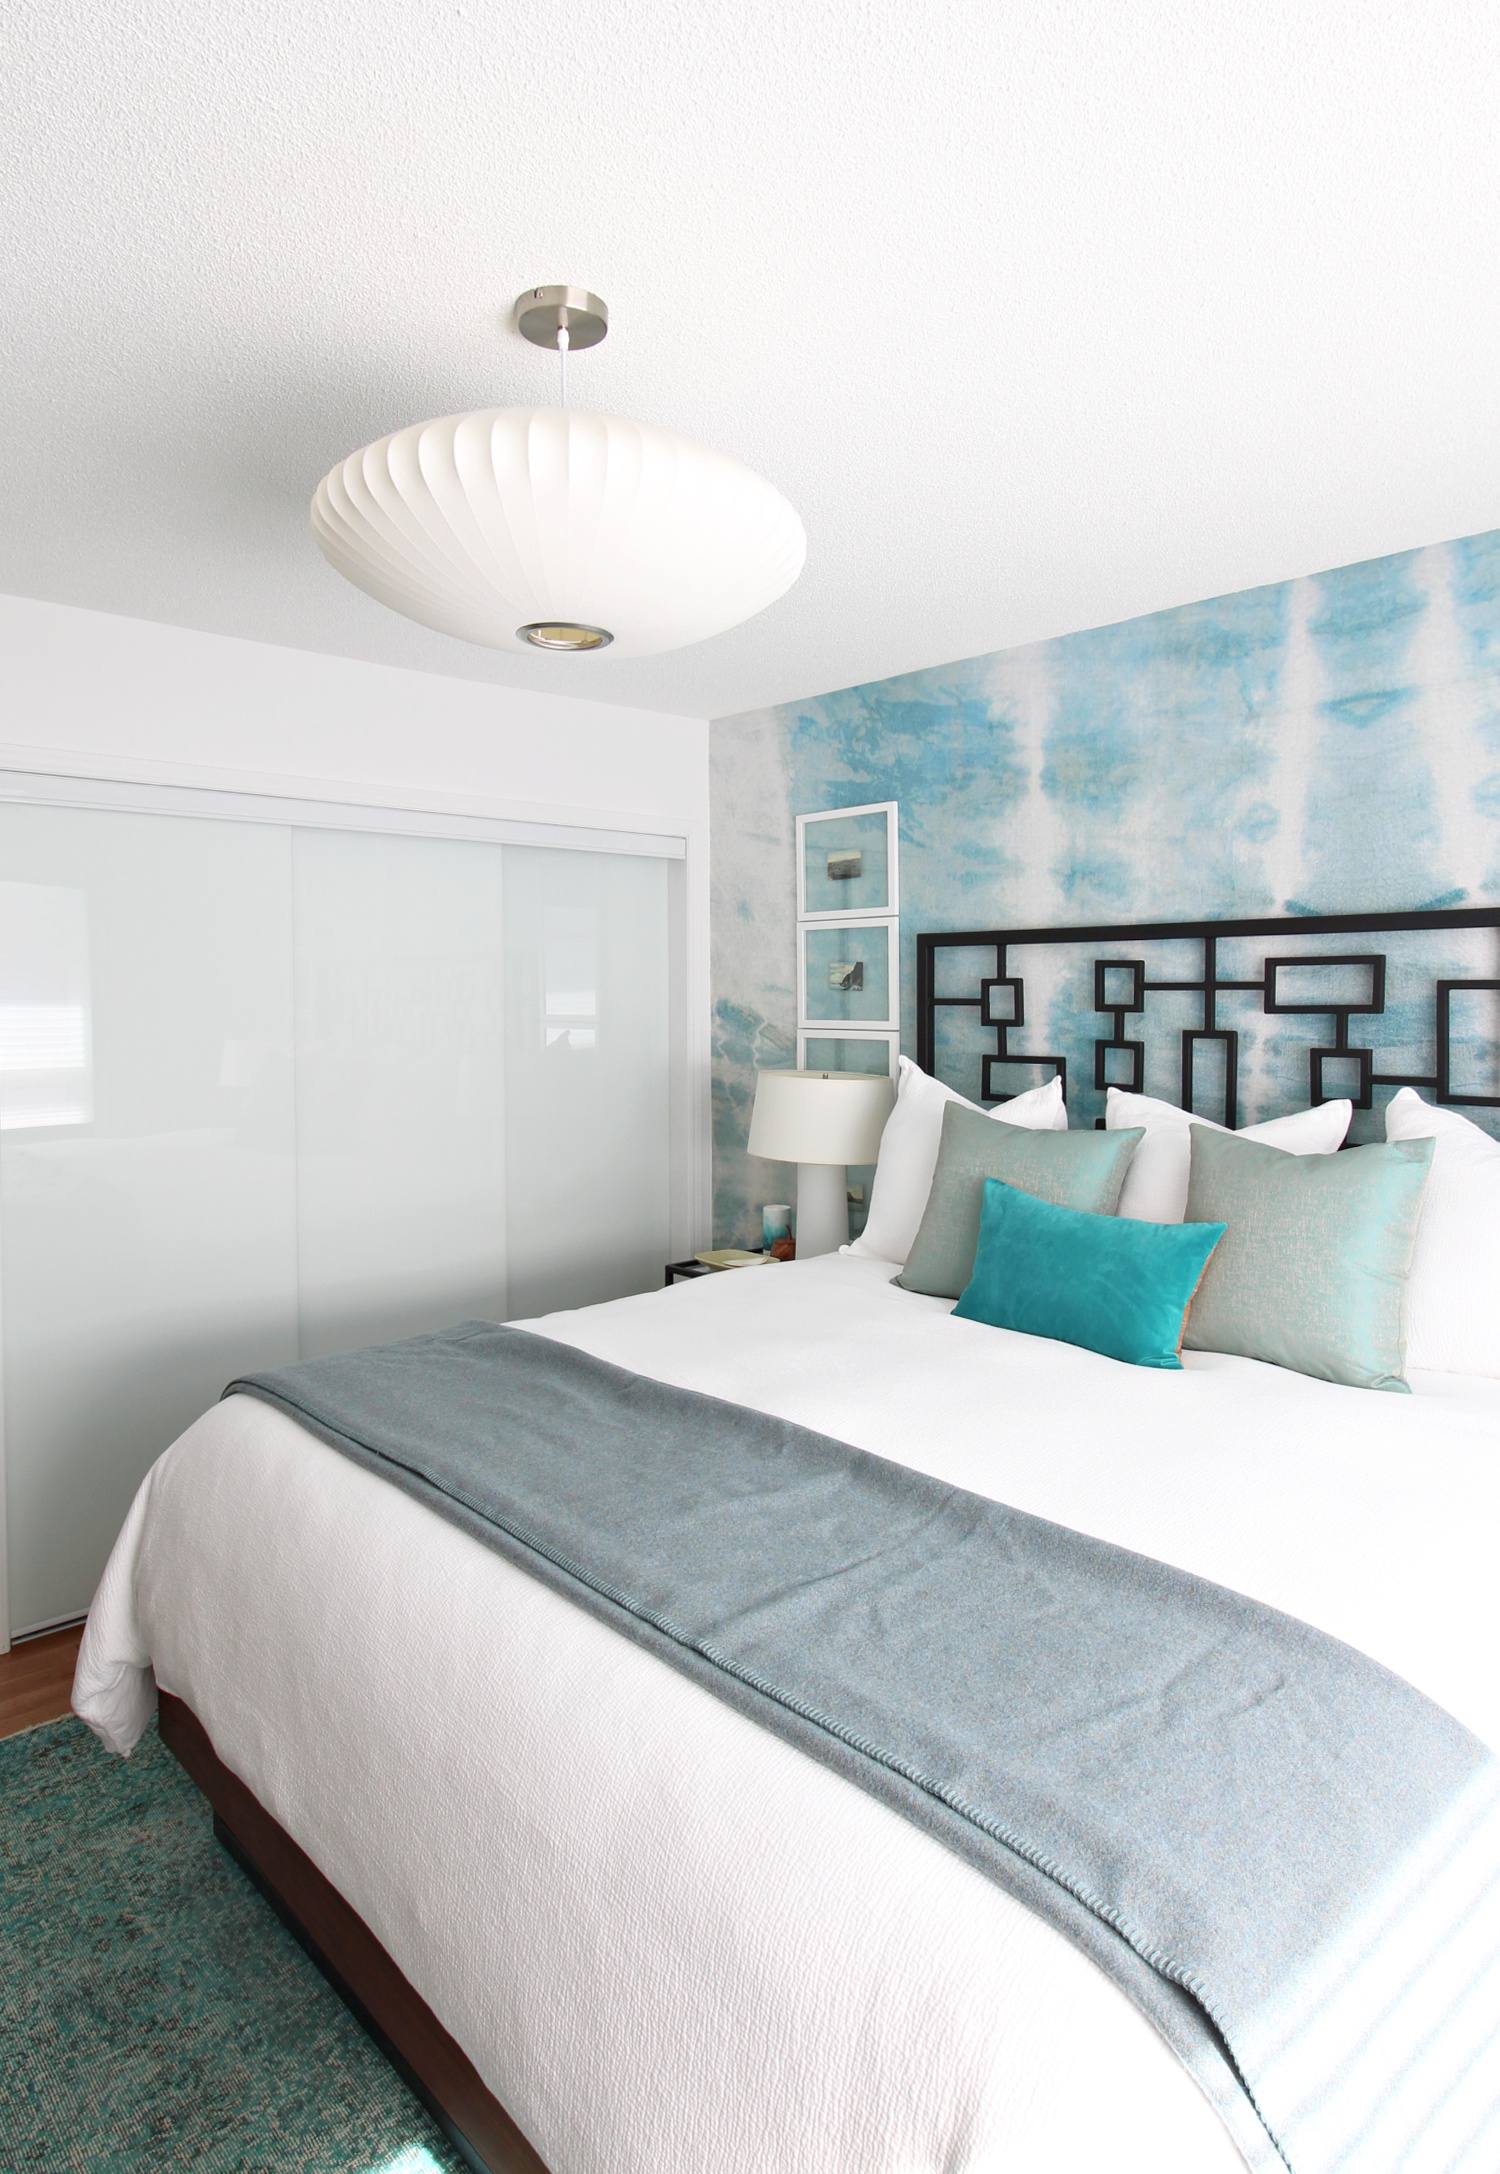
Our bedroom is a lot more colorful now, thanks to the addition of a new beachy tie dye mural from Limitless Walls. Doesn’t it look like a huge piece of art?

I have previously experimented with pre-pasted wallpaper in my powder room and non-pasted wallpaper in my Mom’s dining room, so I was very curious to try something even easier and reached out to Limitless Walls after spotting this gorgeous tie dye mural and realizing it was available in peel & stick! Specifically, I chose Peel & Stick Premium Canvas, which feels very thick and substantial. The mural arrived in three large panels and was so straightforward to install. It can even be peeled off walls at a later date and stuck back onto the backing to be used again, making it a fun choice for renters or homeowners who want to easily restore a house to neutral before selling/moving.

How to Hang a Limitless Walls Mural:
Once I chose my design (you know how much I love ice dyed/tie dyed fabric!) and provided my wall measurements (I added a couple of inches to my submitted measurements just in case – although I didn’t need to because they automatically add an inch if the mural will cover the whole wall, but I missed that fact when I ordered). Limitless Walls printed the design in the size/scale required to cover my wall fully. The panels arrived numbered with directions on which end is the top – which made installation so easy. It also came with a detailed instruction sheet. I found it easier to have a larger surface (the bed) to get organized.

We removed outlet covers and prepped the walls, as per the instructions (it should be cleaned with a warm, damp towel – and not freshly painted – so the adhesive can stick well). We started working left to right and, because of my experience with wallpapering, decided to draw a plumb line first. Lining up wallpaper or a mural with a wall’s edge can often lead to problems because most rooms are not square. So if the wall is not straight, the design can veer or slant and possibly leave a strip of exposed wall or just look weird.

Once we had the plumb line figured out, we installed the first panel, leaving a bit of overhang on the left side (and also the top/bottom), making sure to line up the right hand edge with the plumb line.

The next two panels could then be lined up with the design, and that process went a lot faster.

It was easier to install this tie dye mural with an extra set of hands, simply because the panels were fairly large and heavy. We’d start by positioning the panel, with the backing still on, to see where it would need to go. Then we peeled a strip of the backing off at the top, matched it up again to be sure, smoothed it to secure it to the wall, and then worked our way down, peeling the backing off and then smoothing the panel with the smoothing tool (which was provided – a wallpaper smoothing tool works also).


The overlap between panels is two inches, which we opted to leave (you can, after install, peel it back and cut it so it sits flush but that was too scary for me lol). After all three panels were installed, we used a sharp utility knife to trim the excess and around the outlets.


Here’s a good look at this beautiful design, without our bed hiding most of it:

Here’s The Installed Tie Dye Mural:
This mural looks like a photograph of shibori or tie dyed fabric, so there’s a lot of texture, depth, and visual interest. But… you may spot something in the design. Do you see it?


Oops – I saw a FACE:
Once we had the mural installed, I noticed a bit of a face but it really became prominent because our headboard height was just perfect for enhancing the “smile” of the face. But the folks at Limitless Walls were so amazing and edited and re-printed the second and third panels for me. This is why the tie dye mural looks a bit different during install compared to some of my “after” photos. The silver lining is that I could experience firsthand how easy it is to remove these panels.


Changing Out the Panels:
Once removed, these mural panels leave zero residue behind and can be smoothly removed and placed back onto the backing and used again! The only tricky part is making sure it doesn’t stick to itself, because then the glue seemed to weaken. It is fairly stiff material, so it doesn’t fold on itself easily. But again, having a second set of hands makes these easier. And having a large floor space to put the mural, glue side up, to then re-apply the backing helps too.

Here’s the Tie Dye Mural Now:
The second and third panels are a smidge lighter and so the first seam is a touch more noticeable (the second seam totally blends in), but I love the updated design.

The face was cute and happy, but very distracting haha. I also switched up my bedding and added a striped linen duvet cover – to play up the beachy vibes – and then my Mom and I sewed those new sand colored and pale blue linen pillows. Here’s a better look at how the mural looks now:


What do you think of the new beachy mural from Limitless Walls? I should mention that it’s much softer in real life – it’s been a struggle to photograph this room, the sunlight has been so odd. But it’s softer and more muted (and less blue, more teal) in real life – more like the rug.


Huge thanks to Limitless Walls for providing the mural – and generously re-designing and re-printing it for me. They offer so many gorgeous designs to choose from, along with different materials/application types – plus the ability to create a custom size mural.
P.S. Don’t Forget to Pin for Later!


That’s so amazing that the company did that for you. So…what did you do with the panels that you removed? Back wall of closet? Your mom’s place?
Author
I put them back on the backing and am noodling on a project – but I love your ideas! Closet would be so perfect!