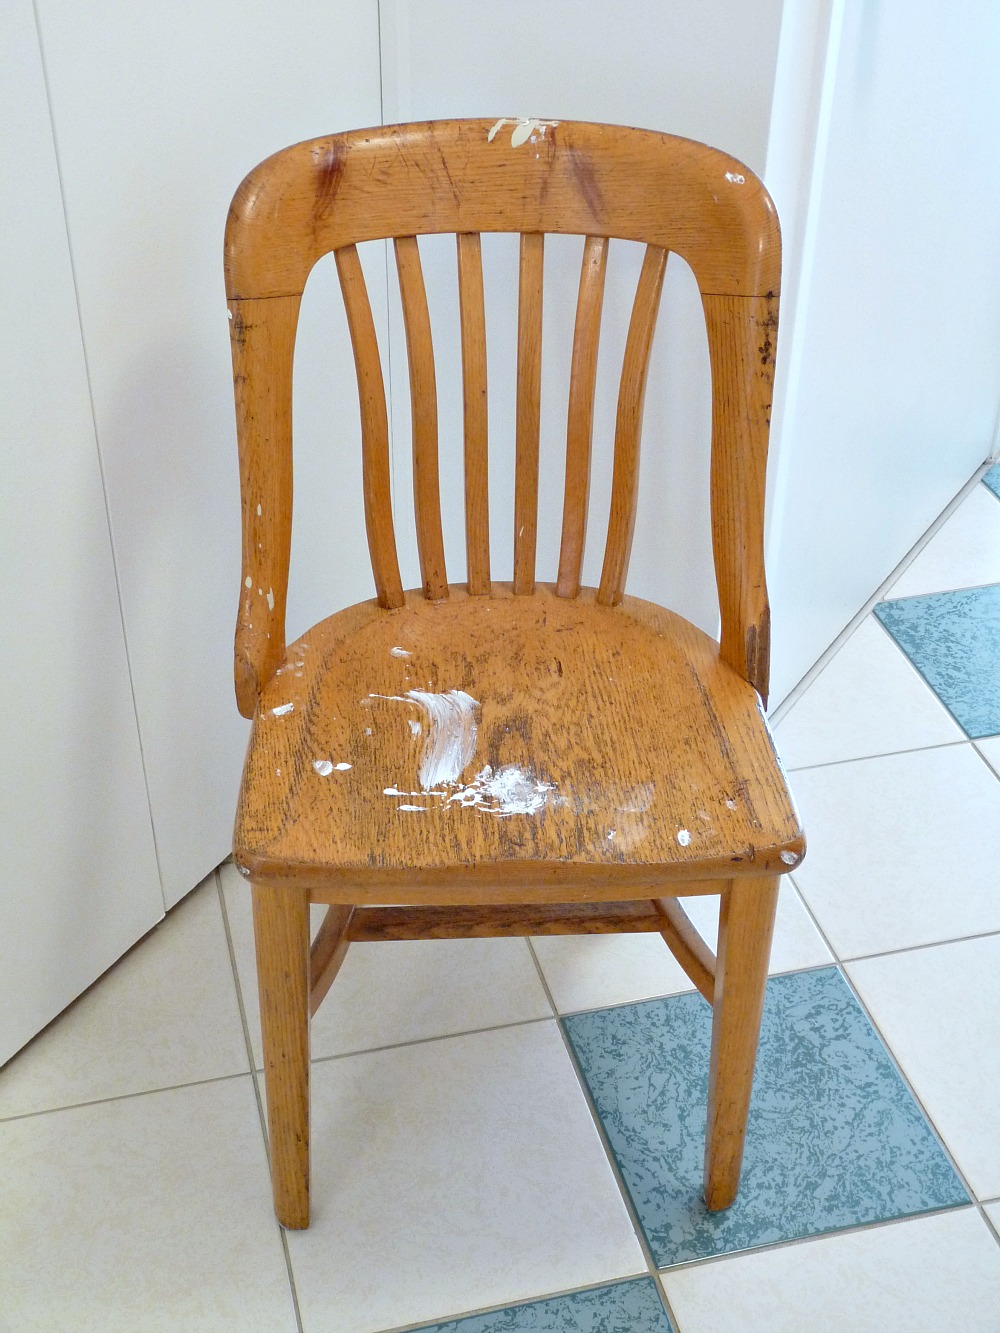
This painted turquoise chair makeover was a bit of a DIY saga! I have wanted a piece of bold turquoise furniture, and an old wood chair I thrifted was chosen for a painted wood project. Despite a few missing hunks, it’s a good solid chair that is surprisingly comfy (I think because of its curvy back and grooved seat). But I got paint on it, by accident. And I ruined the lovely patina, built up over 60 years. So I figured, why not have some fun and paint it turquoise?
Painted Turquoise Chair Makeover Version 1:
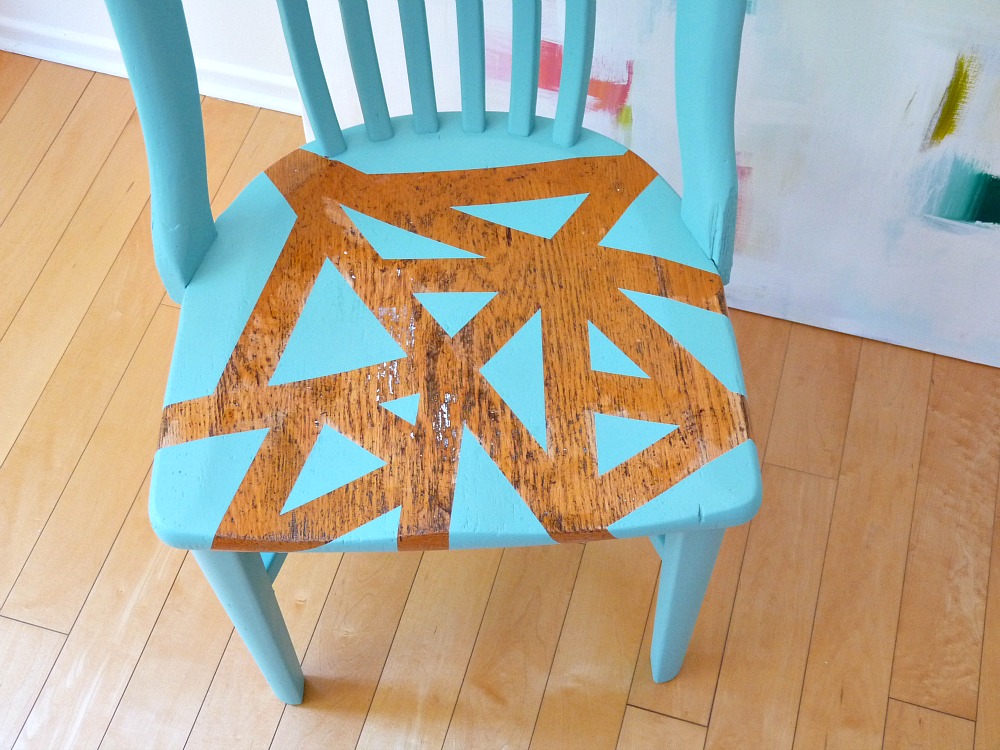
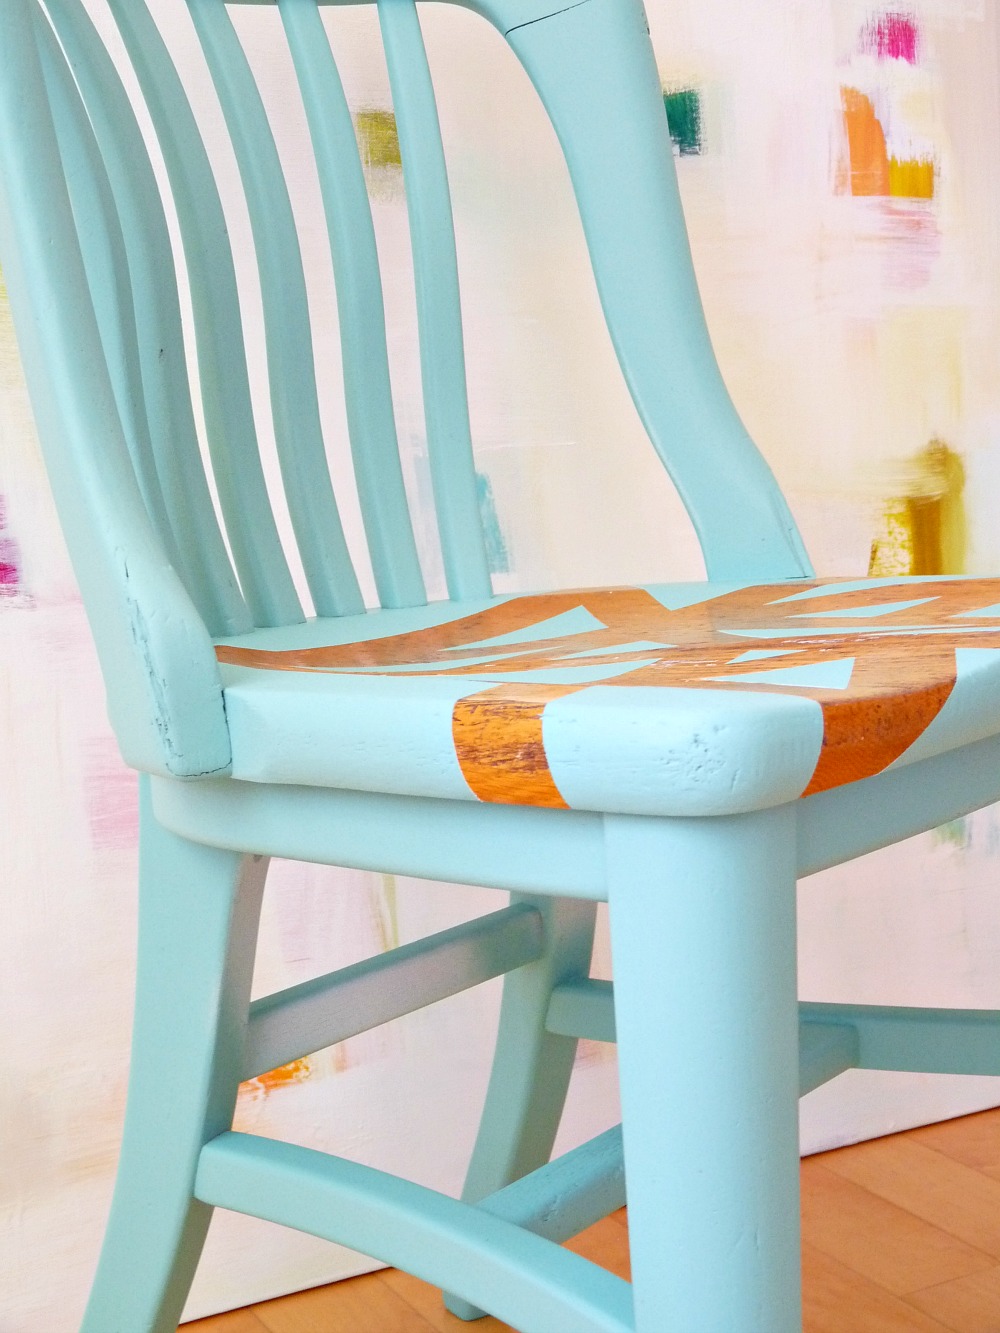
But then, for some reason, I decided to take a bit of a DIY detour… I gave the whole wooden chair a light hand sand, then used a belt sander to remove the paint from the seat. I did a rough job so it didn’t make one section look brand new while the rest kept its 60 year old patina. I also left a bit of the paint that had soaked into the grain. Then I applied strips of painter’s tape in a controlled-chaos random pattern. I wrapped the tape right under the seat, too.

To avoid any unsightly paint bleeding, I pressed down the edges of the tape with the handle of a pair of scissors, to make sure it was fully stuck everywhere.

Tip for Painting Chairs:
Like I did with the last chair makeover, I hammered in small nails to the legs so the chair would “float” and not get glued to the cardboard with paint. I applied a couple of thin coats of primer. I used Rust-oleum Painter’s Touch primer in white and loved it! It has great coverage and went on smoothly and evenly. I used the whole can, but I was pretty obsessive about painting the underside and getting into all of the little grooves.

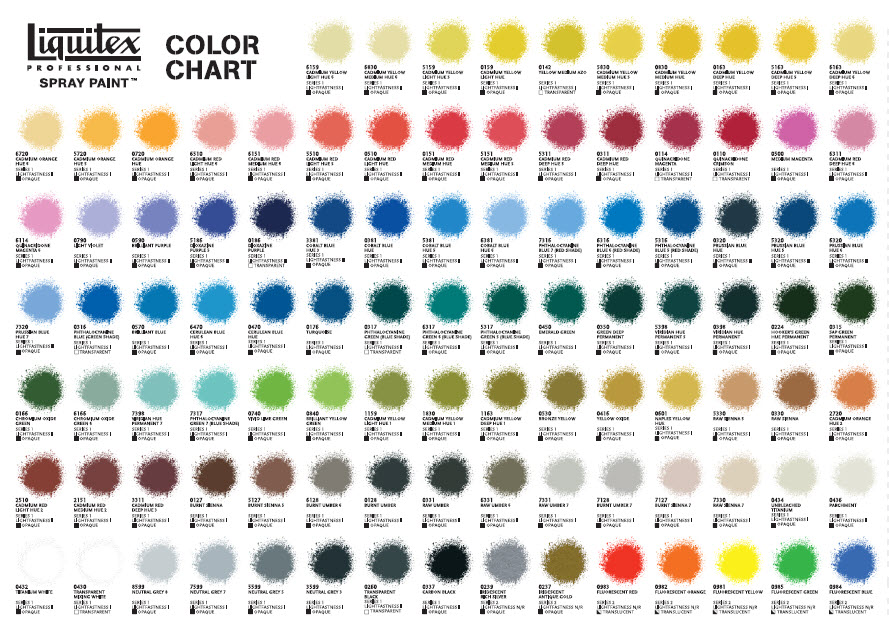
Then I started spraying. I splurged on the paint: Liquitex Professional Spray Paint Viridian Hue Permanent 7. It’s the fancy-pants stuff normally behind a locked cage at Michael’s. I sprayed the underside first, then flipped it over onto the nails and kept spraying.

I carefully removed the tape while the paint was still tacky, so no scoring was required and no paint was peeled off during the process. I did such a good job on this, which is such a shame, lol…

Technically, this painted chair turned out well. But I just didn’t love it…


To save you some scrolling, here’s is the painted turquoise chair makeover before and after:

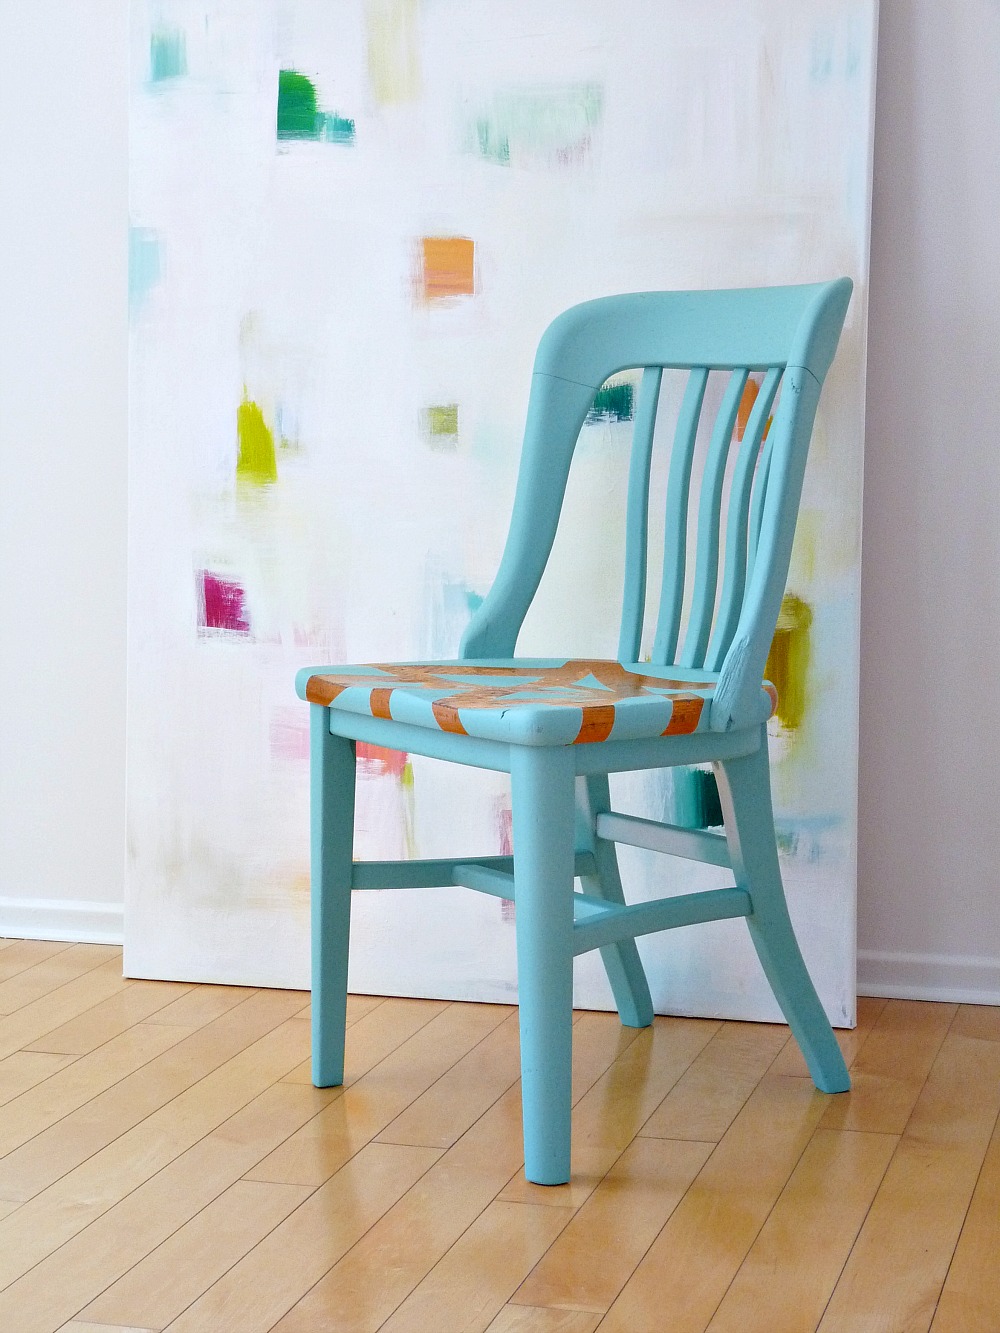
Painted Turquoise Chair Makeover Version 2:
Are you thinking, “kinda cute, but . . . . “? Me too.
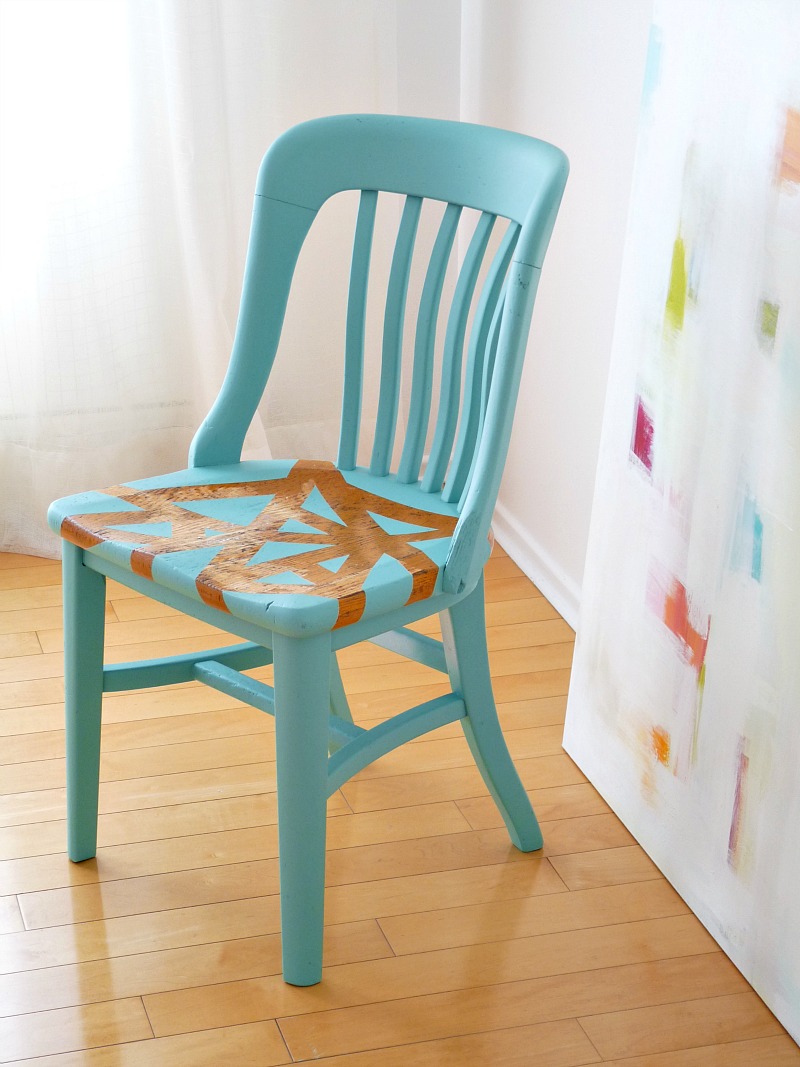
I loved the strips of exposed wood at first, but I think it was too busy and didn’t complement the shape of the chair? So I sanded the edges of the stripes until I couldn’t feel them (and then primed and sprayed) but that was too lazy of me. After re-painting, I can still see the pattern ever so slightly. I should have sanded right down to the wood. But here’s the chair, looking simple but good. The paint still shows the wood grain’s texture and the little dints and dings look sweet, like there’s a story hiding under the cheery, modern hue. I love it now. For a bit of variety, I snapped this set of after photos outside (any excuse to be in the sunshine):

For some reason, I really love dints and dings covered in a creamy coat of paint. Old mixed with new.


Our neighborhood cat, who will sit on the exterior ledge of our dining room window, staring at us eating dinner and meowing at us loudly, approves of the new chair makeover. And his opinion counts! We think the cat might really be a human in cat clothes. He stands on his hind legs and stares at us, as if trying to tell us something. Or maybe I watched too much Sabrina the Teenage Witch.

Turquoise Painted Chair Makeover Versions 1-2:

Using Liquitex Professional Spray Paint on Furniture:
I usually use spray paint from the home improvement store for furniture but I wanted to try this Liquitex Professional Spray Paint. I chose Viridian Hue Permanent 7. Although I really liked the velvety matte finish, it was a tad trickier to use than my usual hardware store brands. So let me share some tips!
 |
| Photo Via |
I was drawn to the Liquitex Professional spray paint because of the beautiful and unique colors. I think for modern spray painted home decor projects, there is a lot of potential here!
1. Hold the can upright the entire time!
I’m so used to newfangled spray cans that let me spray this way and that (sometimes accidentally toward my face, but that’s another story), that I sprayed this fancy stuff with wild abandon and it totally gummed up the nozzle. It’s designed more for art applications (although it’s supposedly weather-proof and really durable), so keep the can upright at all times! Flip the chair over to get the underside instead of crouching and awkwardly spraying up:
2. Multiple, Thin Coats – Not Thick Layers
I was so excited about the perfect shade of turquoise I chose, that I sprayed and sprayed and sprayed and sprayed. And guess what happened? Drips. Big drips. Worse that other brands/types of spray paint. So definitely apply thin, thin coats – thinner than other brands. Yes, the typical advice is to spray paint thin coats but with this paint it’s a more serious warning!

3. Drips Sand Away Easily
The makers of this creamy gorgeous paint must know we’ll go crazy for it because drips were fixed super easily. A light sand removed them (like the big one pictured above) and another (thin!!) coat covered them perfectly (see below). I find other brands of spray paint more difficult to sand down if drips happen.

4. Prime first!!
I am lazy and don’t always prime. But to get the promised intensity and richness of colour (it has artist’s grade pigments), a white base is a must. So use a white primer, let is cure completely, then apply this paint. (I used Rust-oleum Painter’s Touch primer in white).
5. Clean the nozzle.
This nozzle is finicky. There are few instructions on the can, but the main one is to hold the can upside down and spray for a few seconds to clean the nozzle. It’s the only time it will let you hold it upside down. Don’t skip this step!
 |
| Liquitex Professional Spray Paint Viridian Hue Permanent 7 |
6. It Smells Nice
Although Hubby disagrees, I think it smells nice. It also does not have the same risks of skin or eye irritation but still avoid getting this stuff on you.
Overall Impressions Using Liquitex Professional Spray Paint on Furniture:
This paint went on really nicely. It has a great depth and richness that spray paint doesn’t always have. A creaminess, if that makes any sense. The finish is unusual: more buttery, matte, velvety. The selection of colors is inspiring – I would definitely use Liquitex Professional spray paint on furniture again. It also held up SUPER well, so no worries about chipping, etc. I am using this in my little art studio in the basement, so it definitely sees quite a bit of wear and tear!


I love it! I thought it looked cool with the zig-zags, but I like it better now too! Sometimes the 2nd or even 3rd times is the charm!
Sometimes the idea is good, but not right for the piece. I might zig zig something else, something with cleaner lines and maybe less contrast.
I'm glad you chose the route that you did and covered up the random strips showing through- just my opinion but I think it looks much better this way!! That cat is adorable too…cats have so much more personality than people think they do!! I'm sure he misses you! 🙂
Awww, thanks! I'm happy you like it. I was worried I'd get a dozen comments on team zig zag and then I'd doubt my decision, lol.I have never had cats because of allergies, but this little guy is teaching me that behind their stoicism, they do have wildly different personalities!
What a beautiful cat – reminds me of our Leo (who also stands on his hind legs, yesterday to yowl at a Comcast rep canvassing the neighborhood – who thought a cat could be a watchdog?). Love the chair – the color is amazing, and the lines of the back and legs are fantastic. I'm glad to hear about your experience with the Liquitex too – I recently painted a kitchen island an electric blue color, and I just hate brush strokes so much, I'm considering sanding it down and doing it again with spray paint…
Awwww, Leo must be hilarious!! The shape of the chair is cool, I'm glad to no longer detract from that. An electric blue island?!? I have to see this. Spray paint, for all the paint it wastes, is awesome for a smooth finish.
Love the end result!
Thanks Jenna!
What's fascinating is the way the paint treatment has totally changed the character of the chair. Before, your eye was drawn to the seat. Now, it's the elegant shape of the whole chair that predominates. Either way, great little chair. It's always worth experimenting.
Yes, I did detract from the shape with my crazy pattern! I think this suites it better and I'm happy that I experimented a little, because now I know!
Whew! So much better. Way to get it done!
Ha, thanks! We've both had makeunders, huh? Your table looks good back to brass too.
Aw! What a cute kitty, im sure it misses you! LOL- Sabrina and the teenage witch…..that was my favorite show way back! I liked the chair with the exposed wood but i think having the chair in a solid color looks perfect! You used the same spray paint correct? You mentioned that it was trickier to work with, is it b/c of the texture of the paint? Is it fast drying?
I used the same spray paint and just sprayed the seat (after I primed the wood areas). It isn't fast drying but it isn't meant for furniture, so the can is more finicky. I promise a full run-down next week. It's more expensive but pretty much NO directions on the can! Hopefully I can help 🙂
Interesting……I'm really surprised theres no directions on the can! Yes, please let us know how you worked with this type of spray paint 🙂 Thanks Tanya!
I much prefer the make-under! But sometimes you never know until you try. And paint is an easy change, so keep up the adventurous spirit!-Revi
So true! Although I do regret my laziness – I wish I had sanded down the seat completely. But it's only noticeable if I really look for them reminder of the pattern.
Oh I have to say I liked your take on the first try but it looks so good solid.I think you did good!Now as for that cat, I think he is trying to tell ya something.Our cat meows like crazy and gives love bites but he is just wanting affection or food.I am sure he misses your face greeting him thru the window. :)Amy
Thanks, Amy. I think the first try just needed a different space to work. I'm glad you like both!Hmmm, so bites are for affection? Good to know. I was a bit affronted, lol. Little bitey cat.
Changing the color according to our need is a tough job though but after seeing the finished products it looks that its easy.Good job Tanya looking for video version of it how you have changed it looks.