I’ve actually wanted to create one of these DIY felted bead necklaces since 2002! I fear that perhaps the trendiness has evaporated and now this felted bead is “out”? So out it’s back in again? Ehhhh, who cares, a crafting dream has been realized. I don’t normally blog about human accessories, but this post provides essential backstory to this DIY billy button project.
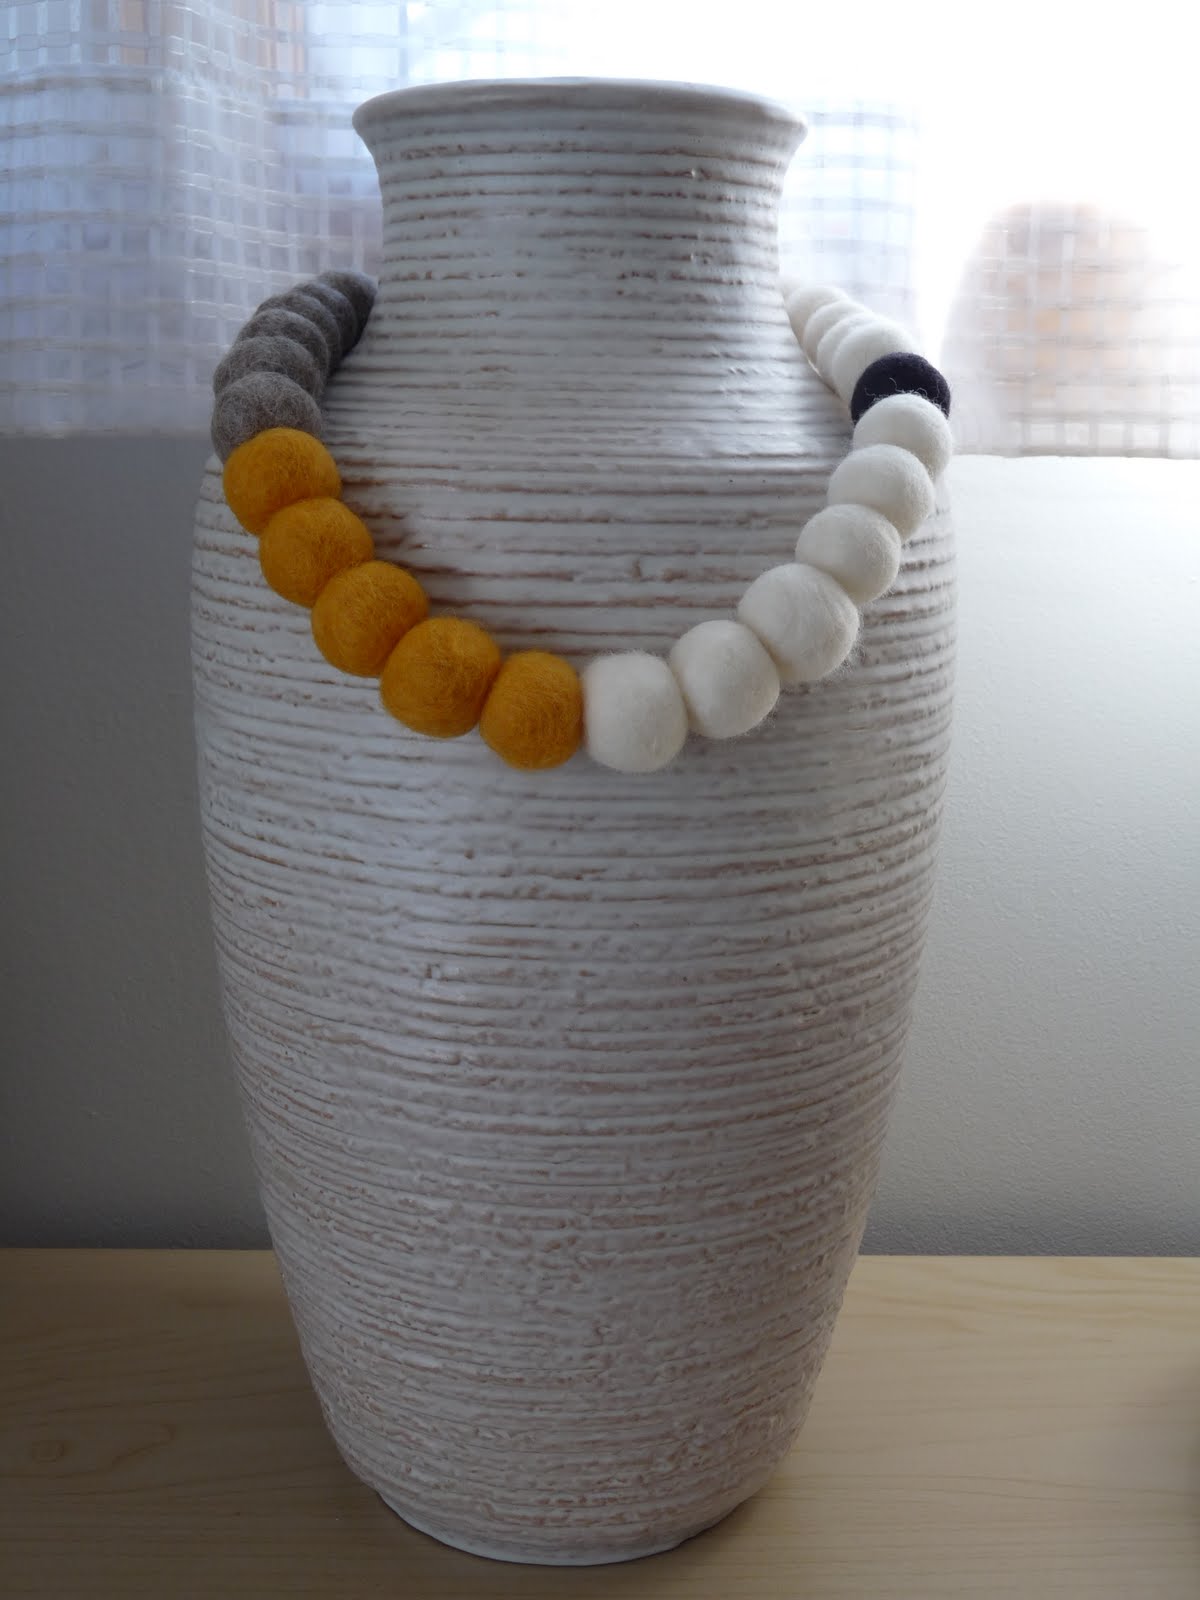

Here it is worn by me, so you can see the scale:

To be honest, I’m not yet 100% sure I love it. But making felt balls is FUN and there are lots of crafts you can make with them!
How to Make Felt Balls:
Supplies:
- Wool Roving
- One Bowl of Hot Water (as hot as you can stand)
- One Bowl of Cold Water (as cold as you can bear)
- Dish Soap or Liquid Hand Soap
HOW MUCH WOOL DO I NEED?
I started with this much wool and used almost all of it for each ball. I know this is vague! I just normally grab a mittful and go. One concrete tip I can provide: your finished ball will be about half the size once felted.

How to Make Felted Wool Balls:
- Tear off a piece of your wool roving, like you would tear off a piece of cotton candy.
- Place a small drop of soap in your dry hands.
- Rub a tiny bit onto the piece of wool roving.
- Roughly shape the wool into a ball before dipping it gently in the hot water.
- Very gently roll the wool roving between your palms.
- Dunk the roughly shaped ball into the cold water and keep rolling.
- Dunk the ball into the hot again, then the cold, rolling between dunks.
- As your ball becomes firmer, you can apply more pressure.
- Your DIY felt ball is finished when it is firm to the touch and feels dense.
- Leave the felted wool balls to dry, for 24 to 48 hours.
Detailed Felt Wool Ball Tutorial:
The whole process for one ball should only take a couple minutes. First, tear off a piece of your wool roving, like you would tear off a piece of cotton candy. You want ragged ends. Remember that your wool ball will shrink a bit during the felting process. Try starting with the same approximate amount of wool I use in the photo below to create a ball the same size as mine.

Next, place a small drop of soap (I have used both hand soap and dish soap successfully) in your dry hands and also rub a tiny bit onto the piece of wool roving.

Then, roughly shape the wool into a ball before dipping it gently in the hot water – you want it a tad wet, not completely drenched.

Very, very gently roll the wool roving between your palms – like you would a clay ball. At this stage, don’t squish the wool any harder than you would a baby chick. Then dunk the roughly shaped ball into the cold water (this time you can soak it) and keep rolling. Then dunk the ball into the hot again, then the cold, rolling between dunks. The change in temperature helps “shock” the wool fibres and is part of the felting process. Plus, you want to rinse out the soap.

As your ball becomes firmer (and thus smaller), you can apply more pressure. Your ball is finished when it is firmer to the touch and feels dense. You can see in the next photo how much smaller my wool ball has become.


Leave the felted wool balls to dry, for 24 to 48 hours. The dry felted wool ball should have a slight bounce to it when dropped on a counter top. I recommend making a few as a “test” before diving into mass production.
DIY Felted Ball Troubleshooting: How to Fix Cracks
To fix a crack during the felting process, grab a thin layer of wool roving and place it over the crack.

Keep wrapping additional wool onto your ball until the crack is covered. Then, add a touch more soap, roll the ball and keep dunking into the super hot and super cold water. Basically just keep going with the felting process outlined above.

Stringing Felt Balls:
Once my beads were dry, I laid out the beads as I worked to get a sense of the pattern I wanted and to make sure I had the right number of each color. Then I simply strung them with some heavy duty beading thread and the sharpest needle I could find. You can fuss with a clasp (here’s a tutorial for how to string a necklace and add a clasp), or just tie a knot and slip it over your head.


An unwelcome felted bead hazard: prune hands that lasted two days.
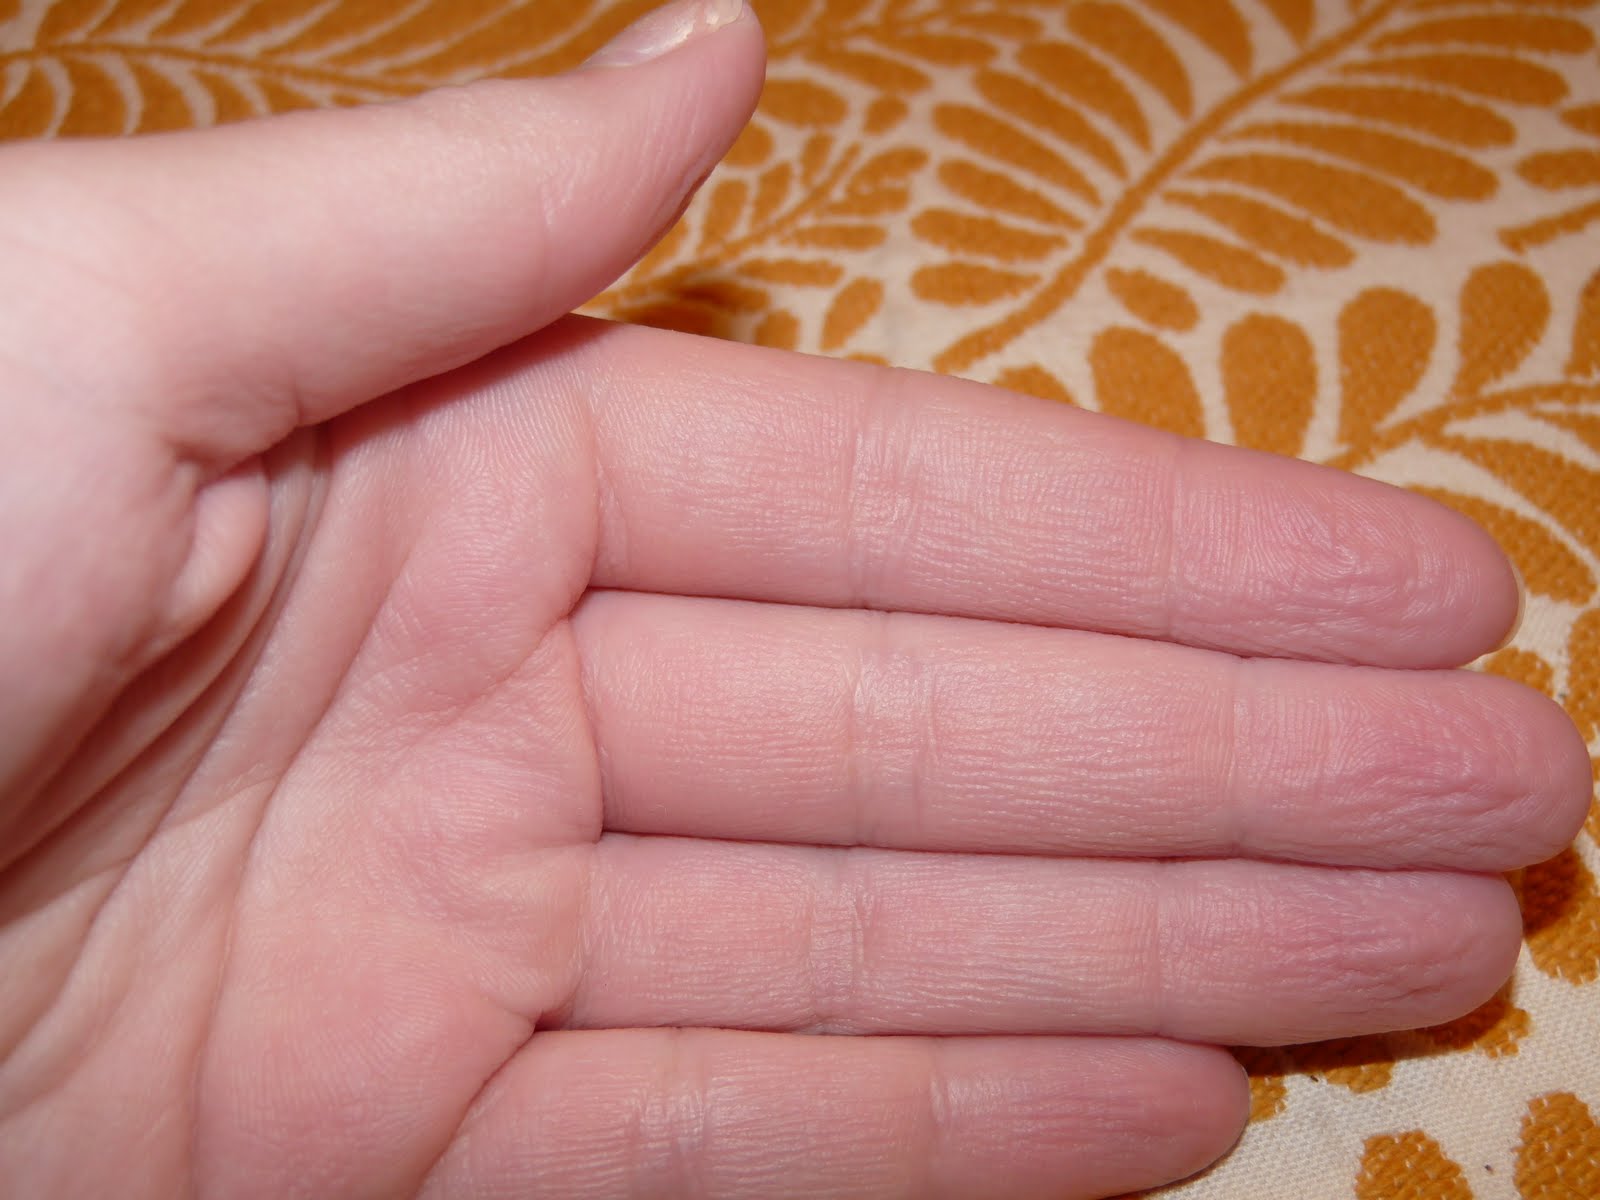 |
| Felting wool = prune hands |

I am strangely intrigued by this.
Aw, c'mon. We could wear something like that from about January 15th through February 2nd…in a cold year! Seriously, felting is a process I knew nothing about till recently when I read in another blog about felting old blankets. It completely fascinates me for some reason, even though wool makes me itch like crazy. I loved seeing how the necklace was made. You're right that Sara's video is simple, but her instructions are incredibly detailed. Oh, if all DIY videos were so good!
this looks really nice. i tried felting once – made a little rug. your necklace is a lot more sophisticated!best wishes,edie
ahhh! that is so cute! and i always wondered what it meant to "felt" something, but have been far too lazy to actually look it up. you know that scene in "napoleon dynamite" when uncle rico is trying to sell tupperware to a woman with the promise of a ship in a bottle?"i want that." ie, this necklace.
I think this necklace is amazing! I love the combination and arrangement of colors. I have always wanted to do felting…it's on the list…the very long list! What if it were shorter and looked more like a twist on a 50's retro pearl necklace? I really think it's fabulous!
Great tutorial! I have had felt pillows on the brain for a week or two. Thinking about doing sheets of felt and grommets to come up with something. You've inspired me. I'll have to give it a go! M.
Wow – thanks for the positive feedback!! I wasn't 100% in love with the finished product. But maybe my wrinkly hands had much to do with that. But now I'm thinkin' maybe it is a-okay. Can't wait to see what felt-y goodness you gals cook up!
Wow! I'd like to shake that pruney hand for making such a rad necklace. "Human accessories". That made me laugh for some reason!
Sad day. You might know blogger was down and as a result I lost a bundle of comments. Like almost every comment from this post (except Stephanie's – yay!) Just wanted everyone to know I didn't delete those lovely comments. Keep 'em coming cuz they keep me goin'!!
I love your necklace and glad you found the tutorial useful.Normally I wouldn't run the tap the whole time, just a little here an there. It all got a bit complicated when I was trying to video… it took me about 5-6 takes before I got it right!Sara xx
Happy day. Mystery of mysteries – some comments re-appeared. Oh blogger. Always keepin' us on our toes.
What an adorable necklace! Love all your stuff! Thanks for reading my blog too 🙂 enjoy yours a ton!!!
I just used your tutorial for the Felted Wool Billy Buttons and am feeling much more confident in my felting abilities after working on that. I'd like to attempt a project like this necklace sometime in the future. I was wondering what you used to string the felted balls together? Can you share some instructions or tips on that process? Thanks so much!
Hi CD. I am glad you asked. I will whip up a mini-tutorial on threading beads for necklaces and post within the next week. There are a few different, equally do-able, methods.
Alrighty – I have a brand new post all about stringing beads to help anyone aspiring to make this necklace. Check it out here:http://dans-le-townhouse.blogspot.com/2011/07/how-to-string-beads-plus-diy-bracelet.htmlAnd please, please, please send me a photo of your finished product – I would love to see!
Thanks for the tutorial! The necklace looks awesome! and for those who can't wear the wool, wear it under a collar and it would still look great!
Great idea!!