Today I’m sharing my new colorful DIY abstracts – and showing you how to make your own art!

First Tip: Don’t Be Afraid to Just Put Paint to Canvas!
I painted three abstracts for our bedroom that felt a bit ho-hum after I added brighter touches to the room, like the bright pink Marimekko blanket. Many lovely readers asked how I made the paintings but I really just sort of leapt into it and didn’t document my progress. However, I decided to work into a couple of the paintings and I did photograph that, which will give you a good sense of how I made this DIY abstract art. But I’ll say this: embrace the creative process! Grab paints, a canvas, and just do it. With thin layer of abstract paint, you absolutely cannot make a “mistake” because it’s so easy to paint over – see?

Second Tip: Work in Thin Layers
To make a simple abstract like this, the key is in layering colors. I find that if I just paint in one layer, my paintings look flat. Instead, I try to build up layers of colors, letting some depth and vibrancy peek through softer colors. I will go back and work into a canvas, again and again, until I am content with how it looks. For these paintings, to keep them still somewhat ethereal and soft, I layered bright colors, then painted over a bit with white (and cream), then a bit more color, this time more muted.

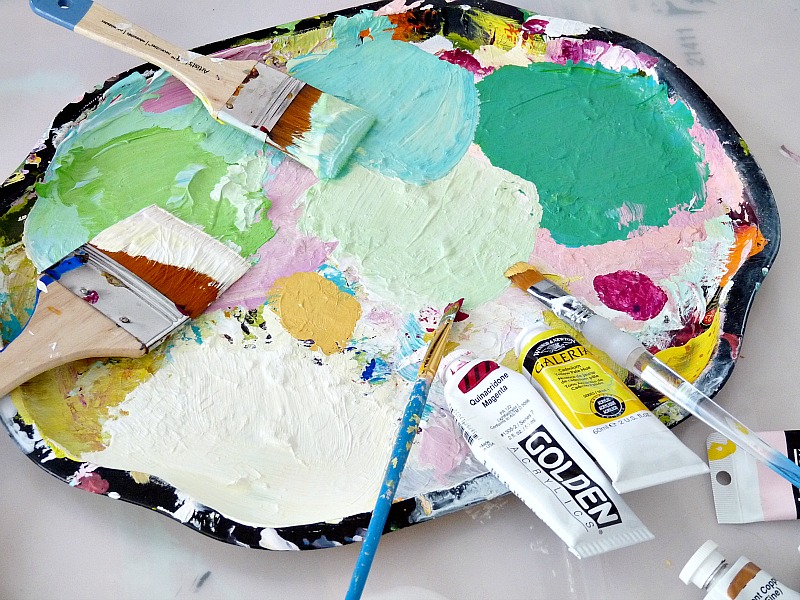
DIY Abstract Supplies:
I like to use acrylic paints because they dry quickly, can be easily layered, and also they clean up with soap and water. For larger canvases like this, I like a big fat paintbrush but a few different sizes helps. If you’re on a budget, you can mix your own paint colors. Just buy red/blue/yellow/white and you can make any colors you want! If that’s too intimidating, you can just choose pre-mixed acrylic colors individually or a kit if you really can’t decide. Even with a kit of buying specific colors, if you are feeling brave, you can mix those together to make new colors. Although I’m usually pretty thrifty when it comes to craft supplies, I use artist’s acrylic (not craft paint) because the colors are more saturated and the quality is better. You can purchase a cheap palette for mixing or grab an old plastic lid or other flat, smooth surface. You can even mix right on the canvas, if you’d prefer.
- Acrylic Paint (this set is nice quality)
- Large Primed Canvases
- Paint Palette
- Paint Brushes (these are nice, I’d get these but also check the dollar store!)
This type of art is open ended – you can do whatever you want, however you want – just to get some paint on the canvas.
How to Make Your Own Art:
- Starting with a blank (white/primed) canvas, paint on random, colorful squares
- Use messy, vertical and horizontal brush strokes
- Work around the canvas, layering on colorful, messy squares
- Once dry to the touch, go back to the starting point
- Paint over some of the color with white or creamy off-white colors – even pastels
- Once dry to the touch, repeat and add in a bit of color (I went for softer colors this time)
- Add a few swaths of muted or pastel colors so there’s not too much white

Third Tip: Move Your Canvas to a New Space and Re-Evaluate
I worked and I fiddled. I did the old step back, paintbrush between my teeth and my head cocked to one side, with a really pompous expression. The kind that requires a black beret. I also covered myself in paint in the process. I continued fussing until I liked the finish product. The same process unfolded with another of the three paintings. The trick is to apply the paint thinly, with a large, very dry brush. This way the paint won’t drip and will dry quickly so the paint can be layered easily. But in your pondering process, bring your art into the space you’re making it for (if you’re making it for a space). In the basement, I liked my paintings – in the room, in the sunlight, they looked washed out. But that’s okay because it was easy to add more intensity, as you saw.

Here’s A Closer Look at My Layering “Process”:
You can see with these details how much I’ve layered. For my last layers, when I knew I was happy with my painting, I did apply the paint a bit thicker and added some texture and brush strokes. If you add texture too early, it can be difficult to cover up. So keep the layers sheer and thin and FLAT. At the end, you can apply paint more heavily and focus on adding more dimension through texture.

Here is the “before” and “after” of all three paintings together:

I like the brighter, more colorful paintings better. They suit the room better.
 |
| The middle canvas remained untouched |

Here’s the Wall Opposite the DIY Paintings:
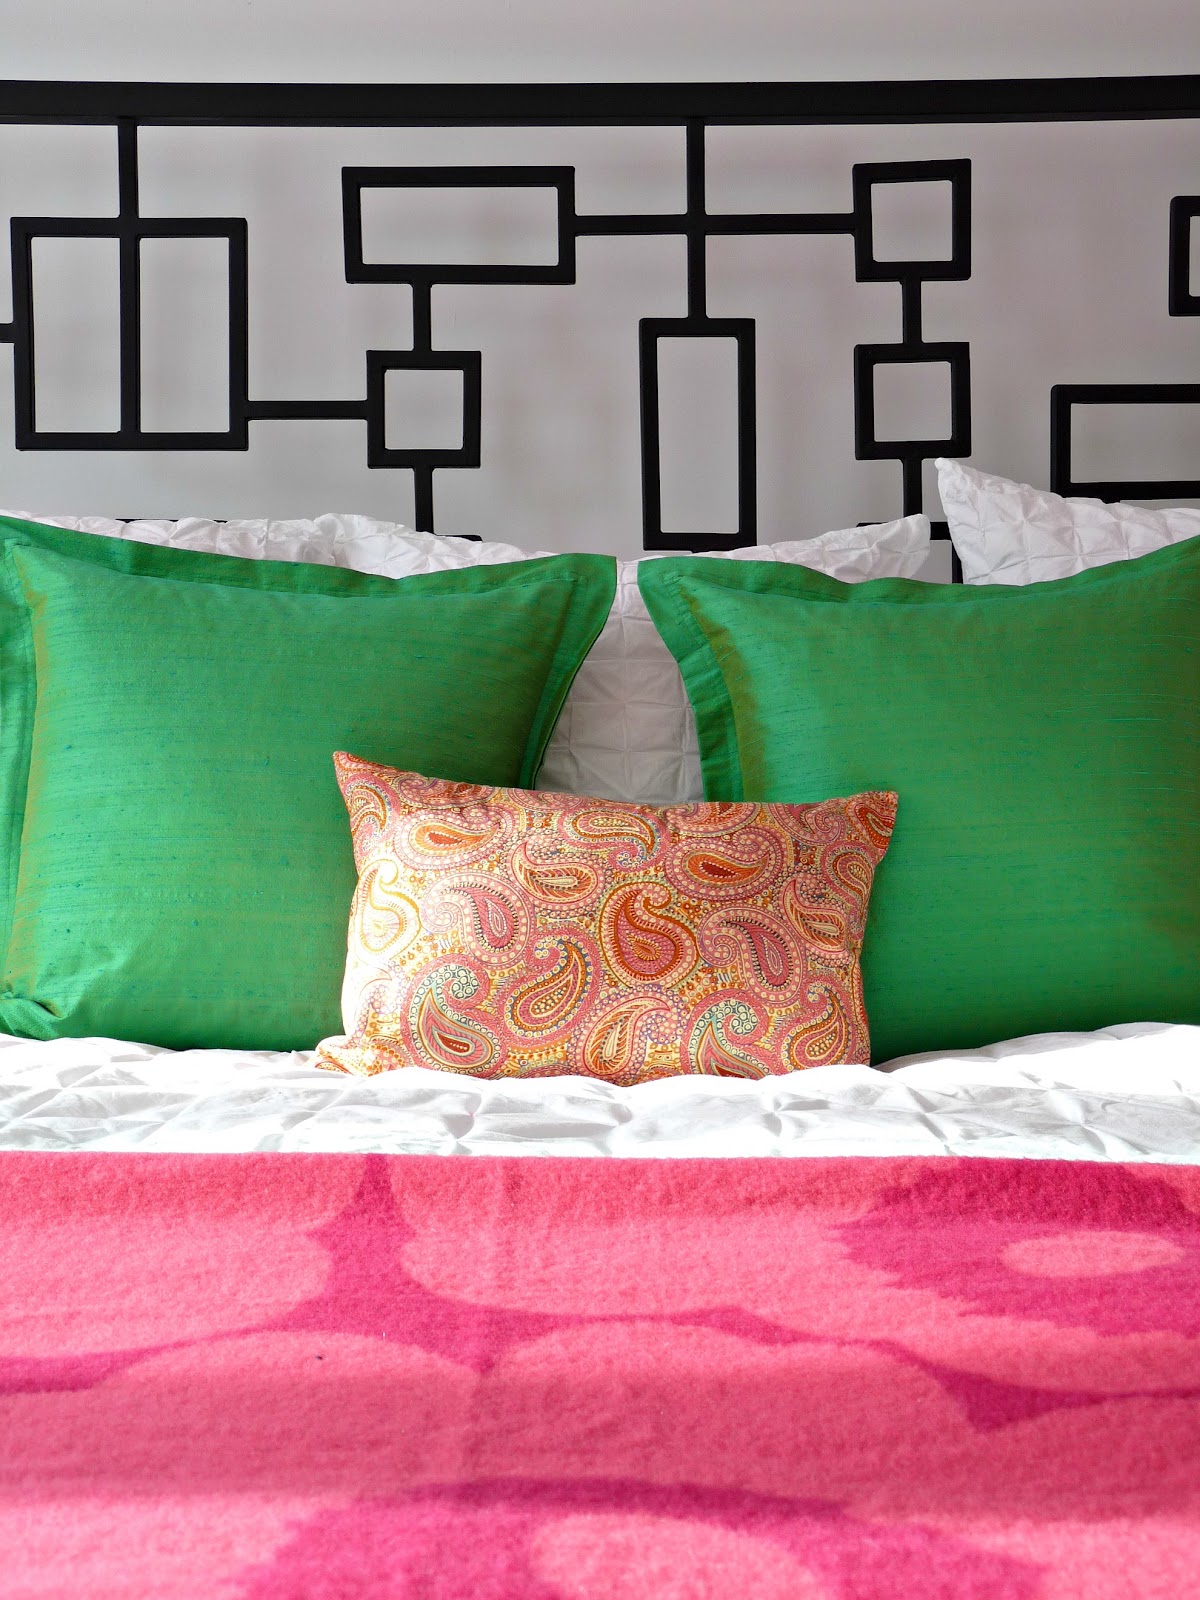

The paintings are a cheery scene to wake up to each morning, as I begrudgingly haul my butt outta my warm, toasty bed and face the cold, snowy world. I hope you enjoyed seeing how I made my colourful DIY abstracts – and that you picked up some tips/ideas for how to make your own art

The view from my bed!
How to Frame Canvas Art:
If you want to skip the frame, you can either paint the edges of the painting a solid color or carry the artwork around to the sides. Either way is a nice way to finish canvas art without framing. If you’d like to frame your canvas art, here are two ideas: DIY Floating Frame for Canvas Art or a simpler DIY Frame for Canvas Art.

More DIY Art Inspiration:
If you’re looking for more DIY art inspiration – especially more DIY abstract ideas, check out these other paintings I have made! These are all also done with acrylic, but if you’d like to get into other kinds of art mediums, check out my other handmade art my DIY Project Gallery.
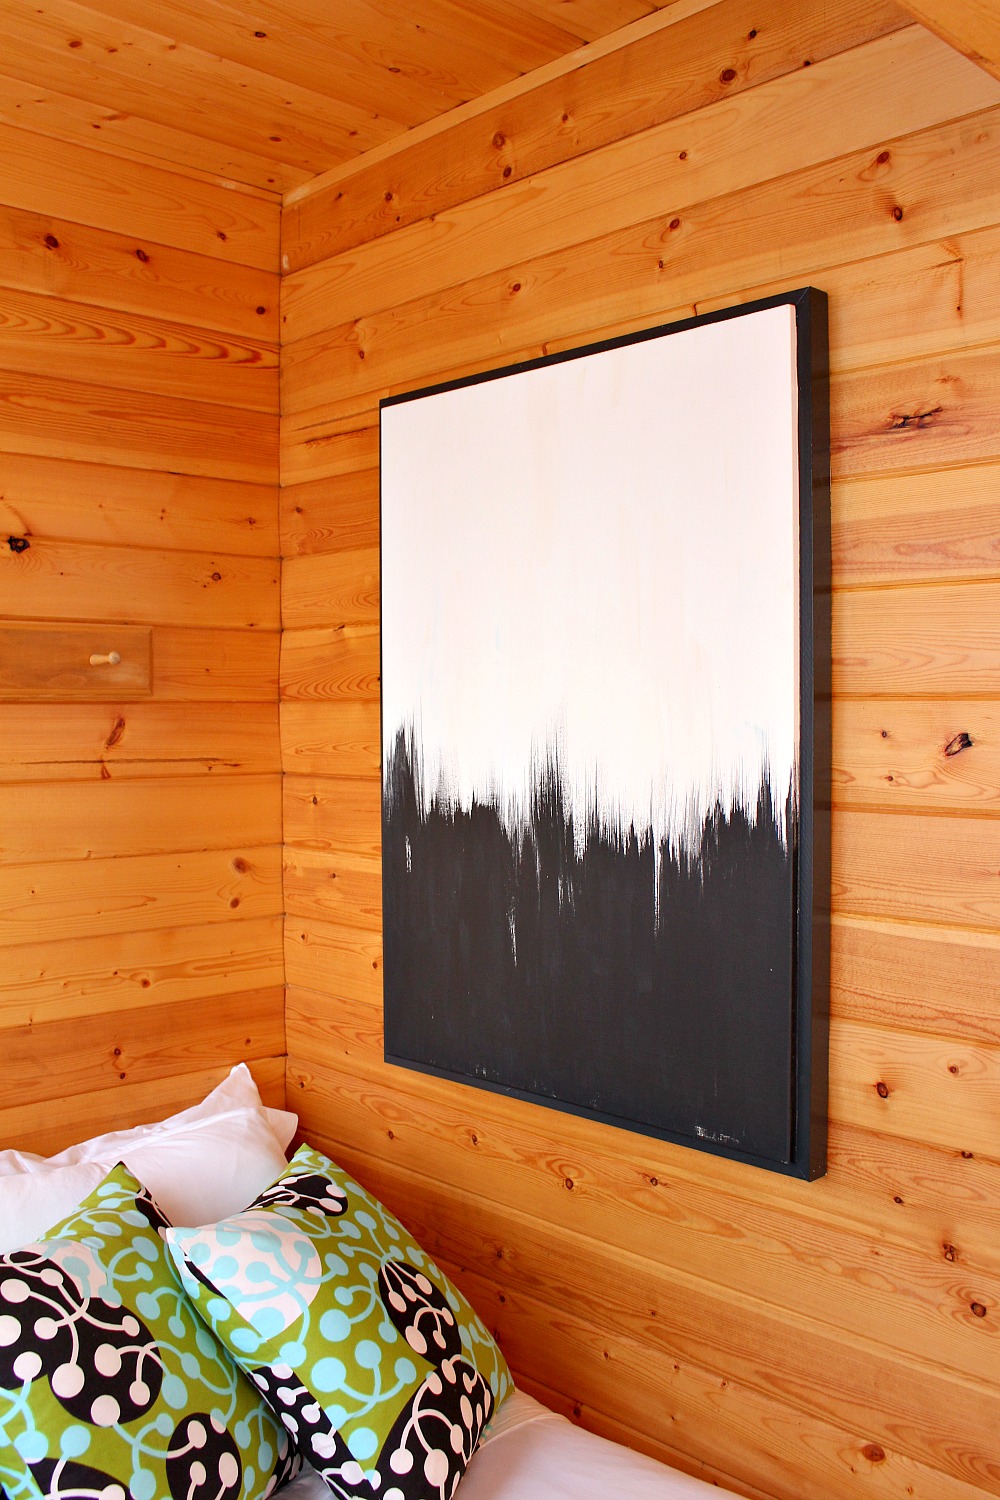
DIY Black & White Abstract:
DIY Drippy Abstract:
This one has lots of step-by-step photos!

DIY Coastal Abstract:

DIY Text Painting:


they look great! nice work 🙂
Thanks Gemma! I'm a lot more happy with them now.
you really are an amazing artist! these look so good – both the before and after versions!
Awww, thanks, but I promise I'm not a good artist. Anyone can do what I do. The only difference is I have no fear! I smoosh paint around until I like it, and then sometimes revisit something months later and re-smoosh some paint. I also keep a pinterest board and real-life-not-online folder of paintings/patterns/colours I love for a steady stream of inspiration. But thanks for the vote of confidence.
lovely 🙂
looks great! Love the little hits of pink in there. lovely!
They look great and love the pink throw. So cheery and happy!
Thanks Beatrice! It's funny how two little changes made the room all of a sudden seem so much more colourful.
These are really, really lovely. I like this kind of art, and so it resonates with me… and I do like the brighter cheerier versions better, but didn't mind the 'befores' either! What a nice way to wake up 🙂 The first two photos following the 'Details' and the 'Before & After' section, I totally LOVE with the sunlight streaming in. Great capture!!!
I love how these bring out colours that are on your bed! Great look Tanya!! I'm going to share your post on my Facebook page! https://www.facebook.com/flutterflutter
Thanks for the shout-out. I don't have a facebook page, but I will take a peak at yours 😉
These are really beautiful. i love the new bolder colors 🙂
Wow! These are really beautiful! Love the colours you chose.
Beautiful Tanya! Such a talented lady:)
Love the pops of pink you added…but what I really covet is your easel. I need a large one like that!
Thanks, Dana! Handy Hubby made that easel for me years and years ago. I didn't want to get paint on it, so for years I used it for display only! I started using it a couple of years ago. We looked at some ones in the art department at Lakehead University (in our hometown) and he made some drawings and designed it himself. Yep, that's when I knew he was handy enough to marry 🙂
Those look awesome! I know it wont turn out as great as yours, but I think I'd like to try one of these…
Tanya, your paintings really inspire me! I hope to try my hand at abstract art soon. 🙂
Hi TanyaI never comment on blogs, but I just wanted to say two things:1. These paintings are awesome. 2. I love your blog. I also live in Ottawa, in a townhouse, and it's good to live vicariously through someone who lives like I live, but has much more energy and skill than I do.MaggiePS. Ok, one more thing. If you ever wanted to do a post sharing your fav spots to shop around Ottawa, I would love it.
Hi Maggie, well I'm so flattered you commented on my blog! It is so lovely to hear from a fellow Ottawa-er and townhouse dweller. Thanks so much for your kind words. It really means a lot to me when people leave such nice comments. I'm glad you're keen on a post about Ottawa shops because I'm partnering with Gemma, from thesweetestdigs.com, a fellow Ottawa blogger, for a few posts about where we thrift and where we shop in town. It won't be for a few weeks, but I hope you will enjoy it.
I'll look forward to it, thanks!
These paintings are amazing! So fresh and cheery. (I thought the before was great too!) I'm feeling inspired to pull out the paints again, it has been so long. 🙂
I love it, super fun!
Your paintings are beautiful! I'm pinning this one too 🙂
Very pretty!!! It totally makes me want to paint…
Earth tones are nice, but a some bright happy colors always put you in a good mood for the day 😉
My sisters and I will try to make a painting like this tonight to celebrate being together for the Chinese New Year. Such an inspiring blog.
Hello Tanya, I love how your wall turned out after your revamp – just gorgeous! I have this linked to my bloggers triptych roundup post too today, for inspiration!
Thanks Heather! I'm excited to take a look. Thanks for the link 🙂
Hi Tanya, All your art projects are awesome! They have turned out so well! I may just have to pick up a canvas and try something out myself!
Late to the party here, but I love these! Wondering how thick (or thin) you make your acrylics? Do you water them down at all or use them right out of the tube? You've inspired me to take a stab at something like this!
I usually use them right out of the tube! I do keep a jar of water nearby for rinsing my brush, which I pat dry with a paper towel, but that rinsing does leave some water on my brush so my acrylics do get watered down a bit as I work. I promise you'll have a ton of fun!!